How to Analyze Trending YouTube Videos with n8n, Apify, OpenAI, and Google Sheets

Burning hours on YouTube topic research is a creator tax nobody should pay. This n8n template turns a keyword into a stream of high-performing video ideas, thumbnail notes, and AI-written outlines inside Google Sheets – without opening a single YouTube tab.

In this tutorial you’ll import a ready-made workflow that combines n8n Apify OpenAI GPT-4.1 GPT-4o-mini Vision Google Sheets to automate the exact research loop most YouTubers run by hand every week.

What the workflow does

The template exposes a simple n8n form that accepts a keyword or topic. From there, everything is automatic:

  1. Scrape trending videos with Apify’s YouTube search actor – last 60 days, mid-length, newest first, capped at 100 results per run.
  2. Filter outliers: keep only videos with more than 1,000 views and more views than the channel has subscribers. This surfaces videos the algorithm is actively amplifying.
  3. Deduplicate against your sheet so you never re-process the same video twice.
  4. Analyze the thumbnail with GPT-4o-mini Vision – layout, subjects, color palette, mood – in one natural-language paragraph.
  5. Fetch the transcript via a second Apify actor.
  6. Generate an SEO-tuned title plus a 3-5 word thumbnail overlay with GPT-4.1-mini (JSON mode).
  7. Write an original outline with GPT-4.1 that borrows the structure of the winning video but takes a fresh angle – no copy-paste.
  8. Update the Google Sheet with the enriched row: new title, thumbnail text, thumbnail description, transcript, and outline.
Tip: Every node is renamed for clarity and has a sticky note next to it. The workflow is a single-screen flow once you import it – no hunting for connections.

Why this beats manual YouTube research

A manual research session typically takes 60-90 minutes for ten candidate topics: searching, skimming, noting view counts, checking sub counts, screenshotting thumbnails, drafting titles. This workflow runs the same loop in roughly 3-5 minutes per keyword and stores everything in a sortable sheet you can revisit for months.

The outlier filter is the secret sauce. A video with 200k views on a channel that has 30k subscribers is statistically winning right now. Those are the ideas you want to study – not the evergreen giants sitting on top of the search results.

Prerequisites

  • An n8n instance – self-hosted (Docker, VPS, Render) or n8n Cloud. Version 1.70+.
  • Apify account with API token. Free tier is enough for testing.
  • OpenAI API key with access to gpt-4o-mini, gpt-4.1-mini, and gpt-4.1.
  • Google Workspace account and a spreadsheet you control.

You’ll find the exact step-by-step to obtain every credential in the Credentials Guide PDF included with the download, and a full import walkthrough in the Setup Guide PDF. Grab the template here.

Step 1 – Prepare the Google Sheet

Create a new Google Sheet, rename the first tab to Step 1, and paste this header row across the top:

id | title | url | fromYTUrl | thumbnailUrl | channelName | channelUrl | duration | likes | numberOfSubscribers | viewCount | videoTranscript | thumbnailDescription | thumbnailText | newTitle | newOutline

Order doesn’t matter – n8n maps columns by name – but every field above must exist or the workflow will error out on write.

Step 2 – Import the n8n workflow

  1. Open n8n and hit + New > Import from File.
  2. Select analyze-trending-youtube-videos-apify-openai-sheets-n8n.json from the ZIP.
  3. n8n will open the canvas. You’ll see 12 nodes: a form trigger, two Apify HTTP calls, an IF filter, a Google Sheets dedupe + append, three OpenAI nodes, a merge, an update row, and a sticky note with setup instructions.

Step 3 – Paste your Apify token

Click Scrape Trending Videos (Apify), then Fetch Transcript (Apify). Each has an Authorization header set to Bearer YOUR_APIFY_TOKEN. Replace the placeholder with your real token from console.apify.com/account/integrations.

Which Apify actors? The template uses streamers/youtube-scraper for search and pintostudio/youtube-transcript-scraper for captions. Both have public IDs baked in – you do not need to fork them.

Step 4 – Attach OpenAI credentials

Open Analyze Thumbnail, YouTube Title Generator, and Generate Original Outline. For each, pick or create an OpenAI credential with your API key. The models are pre-selected:

  • Analyze Thumbnail: gpt-4o-mini in image mode (~$0.00015 per thumbnail).
  • YouTube Title Generator: gpt-4.1-mini in JSON mode.
  • Generate Original Outline: gpt-4.1 for deeper structure – swap to gpt-4.1-mini if you want to save 60% on that node.

Budget roughly $0.01-$0.02 per video analyzed at default settings.

Step 5 – Connect Google Sheets

Click each of the three Google Sheets nodes (Find Duplicate Entries, Step 1 Results, Update Rows) and:

  1. Attach your Google Sheets OAuth2 credential.
  2. Open the Document dropdown and pick the sheet you prepared in Step 1.
  3. Open the Sheet dropdown and choose the Step 1 tab.

Step 6 – Activate and run

Toggle the workflow active in the top-right corner. n8n exposes a public form at the URL shown on the On form submission node. Open it, type a keyword like “ai automation” or “home workout for seniors”, and submit.

Within a couple of minutes your sheet fills up with filtered videos, AI-optimized titles, and fresh outlines ready for scripting. Sort by viewCount / numberOfSubscribers in a helper column to see the strongest outliers first.

How the filter works under the hood

The Filter High-Potential Videos node enforces two conditions with an AND combinator:

viewCount > 1000
viewCount > numberOfSubscribers

The first condition removes noise – brand-new uploads with a handful of views. The second is the outlier signal: a video whose views already beat the uploader’s subscriber count is almost certainly being pushed by YouTube’s recommendation engine. That’s the exact moment to study the thumbnail, hook, and structure.

Customization ideas

  • Daily cron: replace the form trigger with a Schedule node that runs a rotating list of keywords every morning.
  • Slack digest: add a Slack node after Update Rows to post the top five new outliers to #content channel.
  • Notion sync: mirror the sheet into a Notion database so writers can claim outlines from their side.
  • Shorts mode: swap lengthFilter to "under4" in the scrape node to hunt trending Shorts instead of long-form.
  • Voice cloning prep: pipe the generated outline into ElevenLabs for a rough voiceover of the hook.

Troubleshooting

“Unauthorized” from Apify: the Bearer token is missing or has a trailing space. Paste it again without the word Bearer duplicated.

Google Sheets node errors on missing column: double-check the header row spelling. Column names are case-sensitive.

OpenAI returns a non-JSON outline: the Generate Original Outline node is in text mode on purpose (outlines are prose). If you want structured JSON, toggle JSON Output on and update the system prompt.

Transcript is empty: the Apify transcript actor occasionally fails on age-restricted or auto-generated-caption-disabled videos. The workflow continues gracefully – the row simply has a blank videoTranscript and a weaker outline.

Skip the rebuild – get the finished template

Download the ready-to-import JSON plus the Setup and Credentials guides. Save an afternoon of wiring.

Get the YouTube Trends n8n Template

Final thoughts

YouTube research used to be a research skill. Now it’s a workflow you run on a coffee break. Hook this into your weekly content planning, let it pre-fill your sheet with validated topics, and spend your actual creative energy on the hook and delivery – the parts AI still can’t do for you.

How to Auto-Categorize Blog Posts with GPT-4, GitHub, and Google Sheets in n8n

If you run a blog with dozens — or hundreds — of markdown posts sitting in a GitHub repo, keeping categories and tags consistent is a pain. You either do it by hand (tedious) or you skip it (bad for SEO). This n8n workflow reads every post in your repo, ignores the ones you already analyzed, feeds the rest to GPT-4, and drops the suggested categories and tags into a Google Sheet for your review. It works for Astro, Next.js, Hugo, Jekyll — any static site that stores posts as markdown with frontmatter.

By the end of this guide you will have a form-triggered workflow that processes only new posts on each run, uses a two-sheet diff to avoid re-work, and returns a structured JSON response (old categories, new categories, old tags, new tags) for clean before/after comparison.

What this workflow does

The workflow has one job: look at the posts in your GitHub repo, figure out which ones haven’t been categorized yet, and ask GPT-4 to suggest categories and tags based on the content of each post. The proposals land in a Google Sheet so you can review and apply them later — the workflow never pushes commits to your repo, which keeps it safe to run.

  • Trigger: a simple n8n form so you can fire it on demand
  • Source: the content/ folder of your GitHub repo (configurable)
  • Deduplication: posts already logged in Google Sheets are skipped
  • AI engine: GPT-4.1-mini with a structured JSON output parser
  • Sink: Google Sheets with columns FileName, Categories, Proposed Categories, Tags, Proposed Tags

Architecture at a glance

The workflow runs in three phases. First, it pulls two lists in parallel: the full file list from GitHub and the list of previously analyzed filenames from Google Sheets. Second, a Code node computes the difference — posts in GitHub that are not yet in the sheet. Third, it loops through the difference, fetches each file’s content, passes it to the AI agent, and appends the AI’s structured response back to Google Sheets.

Nodes in the workflow

Node Purpose
On form submission Manual trigger with a “Start process” form
Get row(s) in sheet Reads the list of already-categorized filenames
List posts/articles/pages Lists every file in the GitHub content folder
Aggregate (×2) Collapses both path lists into arrays
Merge Brings the two arrays into a single item
Check new repo files for AI processing Code node computing the diff
Switch Routes to “Finish” if empty, otherwise to the loop
Get post/article file Fetches the markdown source for each new file
Loop Over Posts/Pages Batches one post at a time to the AI
AI Agent + OpenAI Chat Model Analyzes content, proposes categories and tags
Structured Output Parser Forces clean JSON output
Append rows with posts / article analysis Saves proposals to Google Sheets

Step 1 — Prepare your Google Sheet

Create a new Google Sheet with exactly five columns in row 1, in this order: FileName, Categories, Proposed Categories, Tags, Proposed Tags. The workflow reads FileName to decide what to skip, and writes to all five on each run. Grab the Sheet ID from the URL — it’s the long token between /d/ and /edit.

Tip: If you want to skip the setup and import a working template immediately, the pre-built n8n JSON + step-by-step setup PDF is available for $14.99 on EasyWorkflows.

Step 2 — Import the workflow into n8n

Open your n8n instance, click the “+” menu, and choose Import from File (or paste JSON). After import you’ll see the full workflow with sticky notes already in place. Nothing is active yet — the trigger is a form, so there are no webhooks firing in the background.

Step 3 — Connect credentials

You need three credentials. Click each highlighted node and create a fresh credential — do not share credentials across nodes that don’t need to share them.

  1. GitHub — a personal access token with repo read scope. Used by List posts/articles/pages and Get post/article file.
  2. OpenAI — a standard API key. Used by the OpenAI Chat Model node.
  3. Google Sheets OAuth2 — run through n8n’s OAuth flow. Used by both Get row(s) in sheet and Append rows with posts / article analysis.

Full step-by-step instructions for getting each token — including screenshots of the GitHub scope page and the Google Cloud OAuth consent screen — are in the Credentials Guide PDF included with the product.

Step 4 — Configure the three placeholders

After import, open these three nodes and replace the placeholder values with your own:

List posts/articles/pages
  owner      = YOUR_GITHUB_USERNAME
  repository = YOUR_REPO_NAME
  filePath   = src/content/blog/  (adjust to your folder)

Get post/article file
  owner      = YOUR_GITHUB_USERNAME
  repository = YOUR_REPO_NAME

Get row(s) in sheet  +  Append rows with posts / article analysis
  documentId = YOUR_GOOGLE_SHEET_ID

That’s all the config. The workflow does not hardcode category names or tag taxonomies — the AI agent reads whatever categories already exist in your posts and proposes additions that match your style.

Step 5 — Tune the AI system prompt (optional)

The AI Agent node ships with a default system message that tells GPT-4 to read frontmatter, infer categories and tags from content, and return a structured JSON object. If you already have a strict controlled vocabulary (e.g. “categories must be drawn from this list of 12”), add that list to the system message. GPT-4.1-mini handles vocabulary constraints well — the output parser will still enforce valid JSON either way.

The structured output schema is:

{
  "old_categories": ["business"],
  "categories":     ["business", "history-of-computing"],
  "old_tags":       ["DigitalGirls", "WomenInIT"],
  "tags":           ["DigitalGirls", "WomenInIT", "GraceHopper", "Debugging"]
}

Step 6 — Run it

Click Execute Workflow, open the form URL, submit it, and watch the executions panel. On the first run the sheet is empty so the diff returns every file in your repo. On every run after that, only new posts since the last successful run are processed — the sheet acts as the state store.

If you want this to run nightly, swap the On form submission trigger for a Schedule trigger. Everything downstream stays the same.

Why this approach beats the alternatives

  • Vs. cron job + script: no server to maintain, no cron log to babysit, and the AI step is visual.
  • Vs. a GitHub Action: Actions bill per-minute and don’t give you a diffable proposal review step — this workflow writes to a sheet so you can vet the AI’s suggestions before applying them.
  • Vs. doing it by hand: obvious.

Common issues

The loop finishes immediately with zero items

The diff node returned an empty list, which means every file in your repo is already logged in the sheet. Delete the test rows from the sheet and re-run.

GPT-4 returns categories outside my taxonomy

Add your controlled vocabulary to the system message on the AI Agent node. Example: “Categories must be one of: business, tutorial, news, opinion. Do not invent new categories.”

Rate limit errors on the GitHub node

A personal access token gets 5,000 req/hour — plenty for most repos. If you’re hitting the limit, enable Continue on Fail on Get post/article file and add a small Wait node inside the loop.

Skip the setup — get the ready-to-import template

n8n JSON + Setup Guide PDF + Credentials Guide PDF. Import, connect, done.

Get the Template – $14.99

What to do next

Once the proposals are in Google Sheets, you have two good options. Option one: review manually and copy the winning categories and tags back into your markdown frontmatter. Option two: extend this workflow with a second step that opens a pull request on your repo with the frontmatter updates applied automatically. The second is a ~6-node addition using the GitHub node’s create file and create PR operations — a clean follow-up if you want zero-touch automation.

Either way, you now have a GPT-4-powered categorization pipeline that costs pennies per post and keeps your content taxonomy clean as your blog grows.

How to Build an AI Email Autoresponder with IMAP and n8n

Answering emails takes time — often the same questions arrive over and over. With n8n and a little AI, you can automate 80% of your inbox replies without writing a single line of production code. This tutorial walks you through building a production-ready AI Email Autoresponder that reads your inbox via IMAP, uses GPT-4o-mini to draft contextual replies, sends them automatically when the AI is confident enough, and routes everything else to a Slack channel for a human touch.

By the end you’ll have a workflow that runs silently every five minutes, handles routine enquiries 24/7, and never accidentally fires off a half-baked reply on a sensitive email.

💡 Skip the build? Grab the ready-made n8n workflow template — includes the JSON, Setup Guide PDF, and Credentials Guide PDF — and be live in under 10 minutes.

What You’ll Build

The workflow runs on a five-minute schedule. It fetches every unread message from your IMAP inbox, strips it down to the fields that matter (sender, subject, body), and sends that context to OpenAI’s Chat Completions API. GPT-4o-mini returns a JSON object with two fields: a reply string and a confidence score from 0 to 1. If confidence is 0.75 or higher the reply goes out automatically via SMTP. Below that threshold the draft is posted to a Slack channel so a human can review and decide.

Here’s the full node map:

# Node Purpose
1 Schedule Trigger Fire every 5 minutes
2 Read Unread Emails (IMAP) Fetch unread messages from INBOX, mark as read
3 Extract Email Fields (Set) Normalize sender, subject, body into clean variables
4 Generate AI Reply (HTTP Request) Call OpenAI Chat Completions, get reply + confidence JSON
5 Parse AI Response (Code) Parse the JSON, attach original email fields, derive autoReply boolean
6 High Confidence? (IF) Branch: confidence ≥ 0.75 → auto-send, else → human review
7 Send Auto-Reply (SMTP) Send the drafted reply to the original sender
8 Flag for Human Review (Slack) Post the AI draft + original details to a Slack channel

Prerequisites

  • n8n instance (self-hosted or n8n Cloud)
  • An email account accessible via IMAP (Gmail, Outlook, Zoho, custom domain — any IMAP server works)
  • OpenAI API key (platform.openai.com)
  • SMTP access for the same or a separate sending address
  • Slack workspace with a #email-review channel (optional but recommended)

Step 1 — Set Up Your IMAP Credential

In n8n, go to Credentials → New → IMAP and enter your mail server details. For Gmail you’ll need to enable App Passwords (two-step verification must be on). For most corporate mailboxes you’ll use the same host/port as your Outlook or Thunderbird config.

Common IMAP hosts:

  • Gmail: imap.gmail.com, port 993, SSL
  • Outlook / Hotmail: outlook.office365.com, port 993, SSL
  • Custom domain (cPanel): mail.yourdomain.com, port 993, SSL
⚠️ Gmail users: Standard password login is blocked. Generate an App Password at Google Account → Security → 2-Step Verification → App Passwords and use that instead of your regular password.

Step 2 — Set Up Your OpenAI Credential

Go to Credentials → New → HTTP Header Auth. Set the header name to Authorization and the value to Bearer YOUR_API_KEY. This is used by the Generate AI Reply HTTP Request node to authenticate with OpenAI’s API.

Step 3 — Configure the Schedule Trigger

The first node fires the workflow on a fixed interval. The default is every 5 minutes — fine for most inboxes. If you have high email volume, drop it to every 2 minutes. For low-volume mailboxes a 15-minute interval reduces API costs significantly.

Rule: Every 5 minutes

Step 4 — Read Unread Emails (IMAP Node)

The Read Unread Emails node connects to your IMAP credential and fetches all unread messages from the INBOX folder. Key settings:

  • Mailbox: INBOX — or a specific sub-folder if you route certain emails there
  • Post-process action: Mark as read — prevents the same email from being processed twice
  • Mark seen: true — sets the \Seen IMAP flag immediately on fetch

If there are no unread emails n8n returns zero items and the rest of the workflow is skipped — no wasted API calls.

Step 5 — Extract Email Fields (Set Node)

Raw IMAP output is nested. This Set node pulls out exactly what the AI needs:

senderEmail  = {{ $json.from?.value?.[0]?.address ?? '' }}
senderName   = {{ $json.from?.value?.[0]?.name || $json.from?.value?.[0]?.address }}
subject      = {{ $json.subject ?? '(no subject)' }}
emailBody    = {{ ($json.text ?? $json.html ?? '').slice(0, 3000) }}
messageId    = {{ $json.messageId ?? '' }}
receivedAt   = {{ $json.date ?? '' }}

The .slice(0, 3000) cap on the body is important — it limits token usage and prevents oversized prompts from very long emails (newsletters, threads).

Step 6 — Generate AI Reply (HTTP Request → OpenAI)

This is the core AI step. The node sends a POST request to https://api.openai.com/v1/chat/completions with a carefully crafted system prompt that tells the AI to always return a JSON object with reply and confidence fields.

The system prompt key line:

"confidence": a number from 0 to 1 — 
  1.0 = simple clear question
  0.75 = moderate complexity
  0.5 = unclear intent
  0.25 = complaint or sensitive topic  
  0.0 = legal / urgent / needs escalation

Using response_format: { type: "json_object" } forces OpenAI to return valid JSON every time — no hallucinated text before the JSON, no parse failures.

Model recommendation: gpt-4o-mini hits the sweet spot of quality vs. cost for email replies. A full gpt-4o run costs ~10× more per email with marginal quality improvement for routine queries.

Step 7 — Parse AI Response (Code Node)

The Code node handles the raw API response and merges the AI output back with the original email fields:

const raw = item.json?.choices?.[0]?.message?.content ?? '{}';
const parsed = JSON.parse(raw);

return {
  senderEmail:  emailFields.json.senderEmail,
  senderName:   emailFields.json.senderName,
  subject:      emailFields.json.subject,
  aiReply:      parsed.reply ?? '',
  confidence:   parseFloat(parsed.confidence) || 0,
  autoReply:    (parseFloat(parsed.confidence) || 0) >= 0.75
};

The try/catch fallback sets a generic “we’ll follow up” message if the AI ever returns malformed JSON — useful safety net.

Step 8 — Branch on Confidence (IF Node)

The IF node routes items to two branches:

  • True (≥ 0.75):Send Auto-Reply
  • False (< 0.75):Flag for Human Review

Tune the threshold to your comfort level. Start at 0.9 when going live, lower it gradually as you verify reply quality over a week.

Step 9 — Send Auto-Reply (Email Send / SMTP)

On the high-confidence branch the reply is sent immediately. Update the fromEmail field with your sending address and make sure your SMTP credential is configured correctly.

The reply template wraps the AI text in a polite context:

Hi {{ $json.senderName }},

{{ $json.aiReply }}

Best regards,
Support Team

---
This is an automated response. For complex enquiries please 
reply to this email and a team member will follow up.

Step 10 — Flag for Human Review (Slack)

Low-confidence emails post a formatted Slack message to #email-review containing the sender, subject, AI confidence score, and the AI’s draft reply. This means a human always sees a ready-made draft — they can copy, tweak, and send in seconds rather than starting from scratch.

💡 No Slack? Replace this node with an email to yourself using the Email Send node, or a Telegram message using the Telegram node.

Testing the Workflow

Before activating:

  1. Send a test email to your monitored inbox from another address
  2. In n8n, click Test Workflow on the Schedule Trigger (or use Execute Workflow)
  3. Watch each node’s output to confirm the email is fetched, the AI response parses correctly, and the IF branch routes as expected
  4. Check that the auto-reply arrives in your test inbox
  5. Once satisfied, click Activate to go live
⚠️ Important: Test with a dedicated test inbox, not your primary customer-facing address. You don’t want to auto-reply to real customers during testing.

Cost Estimate

At GPT-4o-mini pricing (~$0.15 per 1M input tokens, $0.60 per 1M output tokens), processing 100 emails/day (avg. 500 tokens each) costs roughly $0.04/day — about $1.20/month. Even at 1,000 emails/day that’s only $12/month — far cheaper than any email support tool subscription.

Customization Ideas

  • Multi-language support: Add a language detection step and include the detected language in the AI prompt so replies match the sender’s language
  • CRM integration: After sending the reply, log the interaction to HubSpot, Airtable, or Google Sheets using an additional node
  • Blacklist filter: Add an IF node before the AI step to skip no-reply addresses, mailing lists, and newsletter senders
  • Category routing: Ask the AI to also categorize the email (support, sales, billing, spam) and route to different Slack channels or team members
  • Business hours: Wrap the auto-send branch in a time-range check so auto-replies only go out during business hours — more natural for customers

Get the Ready-Made Template

Skip the build — download the complete workflow JSON, Setup Guide PDF, and Credentials Guide PDF.

Download for $14.99 →

Conclusion

This nine-node workflow gives you a fully autonomous email autoresponder that works with any IMAP-accessible mailbox — not just Gmail. The confidence-score routing means you stay in control: the AI handles the easy stuff automatically, and anything nuanced lands in Slack for a human call. Swap GPT-4o-mini for a cheaper model to cut costs, or bump to GPT-4o for higher-stakes industries. Either way you’re looking at less than $2/month to handle hundreds of emails per day.

How to Build a Real Estate Submarket Trend Analyzer with n8n and GPT-4

Most real estate investors miss the best deals not because they lack capital — it’s because they can’t process market signals fast enough. By the time MLS data, public records, demographic shifts, and macroeconomic indicators are manually compiled into a report, the window has already closed. This n8n workflow solves that: every morning at 6 AM, it pulls all four data sources simultaneously, feeds them to a GPT-4o AI agent, scores each submarket on a 0–100 investment scale, and fires off alerts to your acquisition team via Gmail and Slack — automatically, without anyone lifting a finger.

Prefer to skip the setup? Grab the ready-made template → and be running in under 10 minutes.

What You’ll Build

  1. A scheduled n8n workflow that runs every morning at 6:00 AM and fetches live data from your MLS API, public property records database, a demographic data provider, and a macroeconomic indicator source — all four in parallel.
  2. An AI agent powered by GPT-4o that ingests all the aggregated data, calculates investment scores for each submarket, identifies the top opportunity, and predicts value growth over the next 12 months.
  3. An automated alert system that sends a rich HTML email to your acquisition team and posts a formatted Slack message to your investor channel whenever a submarket scores above your defined threshold (default: 75 out of 100).
  4. A fully configurable setup where you define the target market (e.g., “Austin, TX”), the investment threshold, and the recipients — no code changes needed.

How It Works — The Big Picture

The workflow is a single linear pipeline with one parallel fan-out. It starts on a daily schedule, fans out to four simultaneous HTTP requests, merges the results, runs them through a GPT-4o AI agent equipped with a financial calculator and a market research tool, checks the top score against your threshold, and routes high-quality opportunities to both Gmail and Slack.

┌────────────────────────────────────────────────────────────────────────────┐
│  AI REAL ESTATE SUBMARKET TREND ANALYZER                                   │
│                                                                            │
│  [Schedule: 6 AM] ──► [Config Node]                                        │
│                              │                                             │
│          ┌───────────────────┼───────────────┬───────────────┐             │
│          ▼                   ▼               ▼               ▼             │
│   [Fetch MLS]   [Fetch Public Records] [Fetch Demo-] [Fetch Macro-]        │
│                                         graphics]    economics]            │
│          └───────────────────┴───────────────┴───────────────┘             │
│                              │                                             │
│                  [Aggregate All Market Data]                               │
│                              │                                             │
│   [GPT-4o LLM] ──►  [Investment Opportunity Analyzer Agent]               │
│   [Calculator] ──►          │ ◄── [Structured Output Parser]              │
│   [Mkt Tool]   ──►          │                                             │
│                              ▼                                             │
│                 [Check Score ≥ Threshold (75)]                             │
│                         ▼ YES                                              │
│              ┌──────────┴──────────┐                                       │
│              ▼                     ▼                                       │
│    [Email Acquisition Team]  [Notify on Slack]                             │
└────────────────────────────────────────────────────────────────────────────┘

What You’ll Need

  • n8n — self-hosted or n8n Cloud (any recent version)
  • OpenAI API key — for GPT-4o access (paid plan required)
  • MLS data API — any provider with a REST endpoint (e.g., ATTOM, PropStream)
  • Public records API — ATTOM Property API or CoreLogic
  • Demographic data API — Census Bureau API (free) or Esri ArcGIS
  • Macroeconomic data API — FRED API from the St. Louis Fed (free)
  • Gmail account — connected via OAuth 2.0 in n8n
  • Slack workspace — with a bot added to your investor channel

Estimated build time: 45–90 minutes from scratch, or under 10 minutes with the template.

Step-by-Step Build Guide

1 Daily Analysis Schedule (Schedule Trigger)

This is the entry point of your workflow — it fires every morning at 6:00 AM so your team has fresh data before the trading day begins. Add a Schedule Trigger node, set the interval to “Every Day”, and configure the hour to 6.

💡

Tip: You can trigger the workflow manually during setup by clicking “Execute Workflow” in n8n. Once you’re happy with the output, enable the schedule.

2 Workflow Configuration (Set Node)

This Set node acts as a single control panel. All customizable parameters live here — it’s the only node you’ll need to update when switching markets or adjusting strategy.

Field Name Type Example Value Description
mlsApiUrl String https://api.attomdata.com/v1/assessment/snapshot Your MLS or property data API endpoint
publicRecordsApiUrl String https://api.attomdata.com/v1/sale/snapshot Public sale records endpoint
demographicApiUrl String https://api.census.gov/data/2022/acs/acs5 Demographic data source (Census API is free)
macroeconomicApiUrl String https://api.stlouisfed.org/fred/series/observations FRED API for interest rates, GDP, etc.
targetMarket String Austin, TX The market region to analyze
investmentThreshold Number 75 Minimum score (0–100) to trigger an alert
acquisitionTeamEmail String acquisitions@yourfirm.com Where the email alert is sent
slackChannel String C08XXXXXXXXX Slack channel ID for notifications
📌

The targetMarket value is passed as a query parameter to all four data APIs. Make sure your providers accept a market name in their format — some require a ZIP code or FIPS code instead of a city name.

3 Parallel Data Fetching (4 × HTTP Request Nodes)

Four HTTP Request nodes run in parallel — each pulling a different dataset. Connect the Config node’s output to all four simultaneously (n8n supports multiple connections from one output port).

{
  "url": "={{ $('Workflow Configuration').first().json.mlsApiUrl }}",
  "queryParameters": {
    "market": "={{ $('Workflow Configuration').first().json.targetMarket }}"
  }
}

Duplicate this pattern for all four nodes, swapping the URL. The four sources: MLS Listings (active listings, median prices, days on market), Public Property Records (sale prices, ownership history), Demographic Profiles (population growth, median income), and Macroeconomic Indicators (mortgage rates, GDP, unemployment).

💡

Tip: For APIs requiring authentication, add Authorization: Bearer YOUR_API_KEY in the Headers section of each HTTP Request node.

4 Aggregate All Market Data (Aggregate Node)

The four parallel streams merge into a single item using the Aggregate node set to “Aggregate All Item Data.” This collapses all four API responses into one JSON object the AI agent can work with.

{
  "data": [
    { "source": "mls", "listings": 1247, "medianPrice": 485000, "daysOnMarket": 22 },
    { "source": "publicRecords", "salesVolume": 312, "yoyPriceChange": 0.08 },
    { "source": "demographics", "population": 978908, "populationGrowthRate": 0.032, "medianIncome": 76400 },
    { "source": "macroeconomics", "mortgageRate30yr": 6.82, "unemploymentRate": 0.038 }
  ]
}

5 Investment Opportunity Analyzer (AI Agent)

The brain of the workflow — an AI Agent node powered by GPT-4o with access to a financial calculator and a market research HTTP tool. The agent’s system prompt instructs it to: analyze price trends and demographic shifts, identify emerging investment opportunities, calculate a 0–100 investment score per submarket, predict 12-month value growth, and return a structured JSON with all findings.

Connect the OpenAI GPT-4o LLM node, Financial Calculator Tool, Market Research HTTP Tool, and Structured Investment Output parser to the agent’s sub-connections.

💡

Tip: You can swap gpt-4o-mini into the LLM node to reduce API costs for lower-stakes markets and reserve GPT-4o for your primary targets.

6 Structured Investment Output (Output Parser)

The Structured Output Parser forces GPT-4o to return a predictable JSON schema — no free-form text that breaks downstream nodes. A sample output:

{
  "opportunities": [
    {
      "location": "East Austin, TX",
      "propertyType": "Multifamily",
      "investmentScore": 88,
      "currentMedianPrice": 520000,
      "predictedValueGrowth": 12.4,
      "keyDrivers": ["Tech employer expansion", "Limited new supply", "Strong rental demand"],
      "risks": ["Interest rate sensitivity", "Gentrification pushback"],
      "recommendedAction": "Acquire 4-8 unit multifamily within 90 days",
      "timeframe": "6-18 months hold"
    }
  ],
  "marketSummary": "Austin remains a high-growth market. East Austin shows the strongest risk-adjusted opportunity.",
  "topOpportunity": {
    "location": "East Austin, TX",
    "reason": "Score of 88 driven by strong rental demand, limited inventory, and 12.4% predicted growth."
  }
}

7 Check Investment Score Threshold (IF Node)

An IF node gates the alert system. It compares the top opportunity’s investment score against your investmentThreshold (default: 75). Score ≥ 75 fires both alerts. Below threshold, the workflow ends silently — no alert spam on quiet days.

8 Email Acquisition Team (Gmail Node)

A Gmail node sends a formatted HTML email to your acquisition team with the top opportunity details, market summary, and a table of all high-scoring submarkets. Subject line is dynamically generated: “Investment Opportunity Detected — East Austin, TX”

💡

Tip: To send to multiple team members, use a comma-separated list in the “To” field: james.carter@yourfirm.com, emily.rodriguez@yourfirm.com.

9 Notify Investors on Slack (Slack Node)

Simultaneously, a Slack node posts a formatted message to your investor channel. The channelId field uses the channel’s Slack ID (starts with C) — find it by right-clicking the channel in Slack → “View channel details.”

The Data Structure

This workflow is stateless by default — real-time analysis and alerting only. To track scores over time, add a Google Sheets or Airtable node after the IF check.

Field Type Example Description
location String East Austin, TX Specific neighborhood or submarket identified
propertyType String Multifamily Best property type for this opportunity
investmentScore Number 88 GPT-4o’s 0–100 rating of investment potential
currentMedianPrice Number 520000 Current median sale price in USD
predictedValueGrowth Number 12.4 Predicted % price growth over 12 months
keyDrivers Array [“Tech expansion”, “Low supply”] Top reasons this submarket is attractive
risks Array [“Rate sensitivity”] Risk factors to monitor
recommendedAction String Acquire 4-8 unit within 90 days Specific, actionable recommendation
timeframe String 6-18 months hold Recommended investment horizon
📌

The investmentScore is what the IF node evaluates. Default threshold 75 = strong buy signal. Scores 60–74 = watch list. Below 60 = low priority.

Full System Flow

┌─────────────────────────────────────────────────────────────────────────┐
│  COMPLETE PIPELINE — Daily Run at 6:00 AM                               │
│                                                                         │
│  [Schedule: 6 AM daily]                                                 │
│         │                                                               │
│  [Set: Target Market, Threshold, Recipients, API URLs]                  │
│         │                                                               │
│  DATA COLLECTION (parallel)                                             │
│  ┌──────┴──────┬────────────────┬────────────────┐                     │
│  [MLS API] [Public Records] [Demographics] [Macroeconomics]             │
│  └──────┬──────┴────────────────┴────────────────┘                     │
│         │                                                               │
│  [Aggregate All Market Data → single JSON object]                       │
│         │                                                               │
│  [GPT-4o Agent] + [Calculator Tool] + [Market Research Tool]            │
│  [Structured Output Parser enforces JSON schema]                        │
│         │                                                               │
│  [IF: investmentScore >= 75?]                                           │
│         │ YES                                                           │
│  ┌──────┴──────────────┐                                                │
│  [Gmail: Alert Email]  [Slack: Investor Notification]                   │
└─────────────────────────────────────────────────────────────────────────┘

Testing Your Workflow

  1. Click Execute Workflow manually in n8n (skip the schedule for now).
  2. Verify all four HTTP Request nodes return data from your APIs. Authentication errors (401) mean a missing or wrong API key in the headers.
  3. Confirm the Aggregate node outputs a single item containing all four data sources.
  4. Check that the AI Agent returns a valid JSON object with an opportunities array and investmentScore values.
  5. Temporarily set investmentThreshold to 0 in the Config node to force the IF condition to pass, then verify both Gmail and Slack receive alerts.
  6. Restore your threshold and toggle the workflow Active.
Problem Likely Cause Fix
HTTP node returns 401 Missing or expired API key Add Authorization: Bearer YOUR_KEY in the Headers section
Aggregate node empty One HTTP request failed silently Enable “Continue on Fail” on each HTTP node
AI Agent returns unstructured text Output parser not connected Ensure Structured Output Parser is on the ai_outputParser sub-port
IF node never passes Score field path is wrong Path: $('Investment Opportunity Analyzer').item.json.output.opportunities[0].investmentScore
Slack message not delivered Wrong channel ID format Use channel ID starting with C, not the channel name. Invite the bot first.
Gmail auth error OAuth token expired Reconnect credential in n8n Settings → Credentials

Frequently Asked Questions

Can I analyze multiple markets at once instead of just one?

Yes — wrap the workflow in a loop using a Split in Batches or Code node that generates an array of market names. Each iteration runs the full pipeline for that market. Be mindful of OpenAI API rate limits if processing many markets simultaneously.

What MLS data provider should I use?

Popular options include ATTOM Data Solutions, PropStream (investor-focused), and RentCast (strong for rental market data). Any provider returning JSON over HTTP works — just point the URL fields at your provider’s endpoint. Many MLS boards also offer direct API access via RETS or RESO Web API.

How much does the OpenAI API cost per run?

With GPT-4o, expect roughly $0.03–$0.12 per daily run depending on data volume. A typical run with compact API responses costs under $0.05. Analyzing a dozen markets per day keeps monthly cost well under $20 — a fraction of one analyst hour.

Can I add more data sources beyond the four included?

Yes — the Market Research HTTP Tool lets GPT-4o fetch additional data on demand during its analysis. You can also add a fifth parallel HTTP Request node for any fixed data source you always want included.

What happens if one API is down when the workflow runs?

By default, a failed HTTP Request stops the workflow. Enable “Continue on Fail” on each HTTP node to handle this gracefully — the Aggregate node collects whichever responses arrived, and GPT-4o analyzes what’s available, noting any missing sources in its summary.

Can I store results historically to track score trends?

Yes — add a Google Sheets node after the AI Agent (before the IF check) to append each run’s results. Over time you’ll build a time-series dataset showing how each submarket’s score evolves — invaluable for spotting momentum shifts early.

Get the Real Estate Submarket Analyzer Template

Skip the 90-minute build. Get the complete, ready-to-import n8n workflow JSON, a step-by-step setup guide, and a credentials walkthrough — everything you need to have your AI market analyst running by tomorrow morning.

Get the Template →

Instant download · Works on n8n Cloud and self-hosted · 14-day money-back guarantee

💡

Already building? Grab the template to skip the credential setup docs and JSON structure headaches — it’s pre-wired and tested.

What’s Next?

  • Historical trend logging: Add a Google Sheets append step to track investment scores over time and visualize momentum for each submarket.
  • Comparable sales report: Extend the AI agent’s prompt to generate a full comps report for the top opportunity and attach it to the email.
  • Multi-market leaderboard: Loop through 5–10 markets and generate a daily ranked leaderboard of the best opportunities across your entire portfolio universe.
  • Deal pipeline integration: When score exceeds threshold, auto-create a deal in HubSpot, Salesforce, or Airtable pre-populated with the GPT-4o analysis.
  • Risk dashboard: Feed the risks array into a Google Sheets risk register for a live view of what to watch in each market.
n8n
Real Estate
GPT-4
OpenAI
Gmail
Slack
Investment Analysis
AI Automation

How to Build Voice AI Customer Support for WooCommerce with n8n and VAPI

Imagine a customer calls your store on a Friday evening asking about their order status—but your team has already left for the weekend. The phone rings unanswered. The customer leaves frustrated and takes their business elsewhere. This scenario plays out thousands of times every day in e-commerce. Now imagine if your WooCommerce store had a tireless AI agent that could answer customer calls 24/7, look up orders, provide tracking information, and answer FAQs using your own knowledge base—all through a simple phone call.

Prefer to skip the setup? Grab the ready-made template → and be up and running in under 10 minutes.

In this guide, you’ll learn how to build exactly that: a voice AI customer support system that combines multiple cutting-edge AI technologies (VAPI for voice, GPT-4o-mini for intelligent conversations, Gemini for knowledge retrieval, and Qdrant for vector search) with n8n as the orchestration engine. By the end, you’ll have a fully functional voice assistant that handles post-sales support and product questions.

What You’ll Build

This n8n workflow creates a complete voice AI customer support solution with two primary flows:

  1. Post-Sales Agent Flow — A GPT-4o-mini powered conversational agent that customers can call to ask about their orders. It verifies identity using email and order number, retrieves real-time order information from WooCommerce, fetches tracking details via a sub-workflow, and speaks the results back to the caller through VAPI.
  2. RAG Q&A Flow — A Retrieval-Augmented Generation system using Google Gemini 1.5 Flash that searches a Qdrant vector database for product information, policies, and FAQs, delivering contextual answers directly to customers asking product questions.
  3. Tracking Sub-Workflow — A helper workflow that queries the WooCommerce REST API using the YITH tracking plugin to extract shipping carrier URLs, tracking codes, and pickup dates.

All three flows are triggered via webhooks from VAPI, your voice AI platform, and connected to Twilio phone numbers for inbound calling.

The Big Picture: How It All Works Together

Here’s a visual representation of the system architecture:

┌────────────────────────────────────────────────────────────────────┐
│                       CUSTOMER CALLS TWILIO NUMBER                    │
└──────────────────────────────┬──────────────────────────────────────┘
                                │
                                ▼
                      ┌───────────────────────┐
                      │   VAPI Voice AI        │
+                      │   (Processes Speech)  │
                      └───────┬───────┬───────┘
                              │       │
                     ┌────────┘       └────────┐
                    ▼                           ▼
      ┌──────────────────────────┐   ┌──────────────────────┐
      │  POST-SALES AGENT FLOW   │   │  RAG Q&A FLOW       │
      │  (Order Lookups)         │   │  (Product Questions) │
      └────────┬─────────────────┘   └──────────┬───────────┘
               │                              │
               ▼                               ▼
      ┌──────────────────────────┐   ┌──────────────────────┐
      │  n8n Post-Sales Webhook  │   │ n8n RAG Webhook      │
      │                         │   │                       │
      │ 1. GPT-4o-mini Agent     │   │ 1. Question & Answer │
      │ 2. WooCommerce API Call  │   │ 2. Gemini 1.5 Flash  │
      │ 3. Tracking Sub-Workflow │   │ 3. Qdrant Vector DB  │
      │ 4. Format Response       │   │ 4. Return Response   │
      └────────┬─────────────────┘   └──────────┬───────────┘
               │                               │
               └────────────┬──────────────────┘
                              ▼
                    ┌─────────────────────┐
                   │  VAPI Returns Audio │
                   │  to Caller          │
                   └─────────────────────┘

Prerequisites

Before you start building, make sure you have access to these services and accounts:

  • WooCommerce Store — A working WooCommerce installation with REST API enabled. We’ll authenticate using API keys (Consumer Key & Consumer Secret).
  • VAPI Account — Sign up at vapi.ai to create voice assistants. You’ll need to create tools that point to your n8n webhooks.
  • Twilio Account — Create a Twilio account to provision inbound phone numbers. VAPI integrates directly with Twilio.
  • OpenAI API Key — For GPT-4o-mini and OpenAI embeddings. Ensure you have billing enabled.
  • Google Gemini API Key — For the Gemini 1.5 Flash model used in the RAG flow.
  • Qdrant Vector Database — Either a cloud Qdrant instance or self-hosted. You’ll need the API key and collection name with pre-populated embeddings.
  • n8n Instance — Cloud or self-hosted n8n with execution enabled.
  • YITH WooCommerce Order Tracking Plugin — Free plugin to store tracking metadata. Install it on your WordPress site.

Building Flow 1: Post-Sales Agent

The post-sales agent handles customer calls asking about their orders. Here’s how to build it step-by-step:

Step 1: Create the VAPI Post-Sales Webhook

Start with a webhook node that receives requests from VAPI. This node waits for incoming POST requests containing customer data (email address and order number) sent by VAPI when a customer calls the dedicated phone number.

In n8n, add a Webhook node and configure it as follows:

  • Set HTTP Method to POST
  • Set Response Mode to responseNode (we’ll send the response later from a dedicated response node)
  • Copy the webhook URL to use in VAPI later
💡

Tip: The webhook path is auto-generated. Note it down—you’ll paste this URL into VAPI’s tool configuration.

Step 2: Add the GPT-4o-mini Agent Node

The agent is the brain of your post-sales support system. It’s a GPT-4o-mini powered node with tools that can look up orders, retrieve customer information, and get tracking details.

Add an Agent node (type: @n8n/n8n-nodes-langchain.agent) and configure:

  • Language Model: Connect your OpenAI credentials and select gpt-4o-mini
  • Input Text: Set to ={{ $json.body.email }} and {{ $json.body.n_order }} to pass the customer email and order number from the webhook
  • System Message: Paste a detailed prompt telling the agent its role, how to verify customer identity, and which tools to use (see the workflow for the full prompt)

The system message is critical. It instructs the agent to:

  • Always verify that the email matches the order number
  • Refuse to share order details if the email is incorrect
  • Use available tools (get_order, get_orders, get_user, get_tracking, Calculator) to answer questions
  • Provide clear, professional responses suitable for voice output

Step 3: Connect Tool Nodes for Order Lookup

The agent needs tools to retrieve information. Add four WooCommerce tool nodes:

get_order Node: Retrieves a single order by ID.

  • Resource: order
  • Operation: get
  • Order ID: Leave this for the agent to fill dynamically via $fromAI()
  • Connect WooCommerce credentials with your store URL/li>

get_orders Node: Searches for multiple orders (e.g., by customer email).

  • Resource: order
  • Operation: getAll
  • Search: Leave for agent to fill via $fromAI()

get_user Node: Retrieves customer profile information by email.

  • Resource: customer
  • Operation: getAll
  • Filter by Email: ={{ $fromAI('Email', '', 'string') }}

Calculator Node: Allows the agent to perform math (e.g., calculate shipping costs, discounts). Use the built-in calculator tool from LangChain.

Connect all four of these nodes to the agent’s ai_tool output.

📌

Security Note: The agent’s system prompt includes strict identity verification logic. Always ensure that order details are only shared after email verification. Never allow the agent to bypass this check.

Step 4: Add the Tracking Sub-Workflow Tool

Instead of querying WooCommerce directly for tracking, we call a separate workflow using a tool workflow node. This keeps your main workflow clean and allows the tracking sub-workflow to be tested independently.

Add a Tool Workflow node (type: @n8n/n8n-nodes-langchain.toolWorkflow):

  • Name: get_tracking
  • Workflow ID: Select the tracking sub-workflow (you’ll create this in the next section)
  • Description: “Get tracking number for a specific order by providing the order number. The tool retrieves the unique tracking code that allows customers to monitor their shipment’s current status and location.”
  • Input Schema: Define one input parameter: order_number (string)

Connect this to the agent’s ai_tool output as well.

Step 5: Format and Return the Response

After the agent generates an answer, format it and send it back to VAPI.

Add a Set node to extract the agent’s output message:

  • Assignment: Set a field called message to ={{ $json.output }}

Then add a Respond to Webhook node:

  • This sends the JSON response back to VAPI with the agent’s message
  • VAPI will convert this text to speech and play it to the caller

Building Flow 2: RAG Q&A System

The second flow handles customer questions about products, policies, and FAQs by searching your knowledge base. Here’s how to build it:

Step 1: Create the RAG Webhook

Add another Webhook node for the RAG flow:

  • HTTP Method: POST
  • Response Mode: responseNode
  • Path: Give it a distinct path like rag-webhook

This webhook will receive search queries from VAPI when customers ask product questions.

Step 2: Add the Question & Answer Chain

Add a Chain Retrieval QA node (type: @n8n/n8n-nodes-langchain.chainRetrievalQa):

  • Input Text: ={{ $json.body.search }} to use the search query from VAPI
  • System Prompt Template: Set a prompt that instructs the model to use retrieved context to answer questions. Example: “You are an assistant for question-answering tasks. Use the following pieces of retrieved context to answer the question. If you don’t know the answer, just say that you don’t know.”
  • Prompt Type: define

This node will automatically search the vector store and synthesize an answer based on retrieved documents.

Step 3: Connect the Language Model (Gemini 1.5 Flash)

Add a Chat Google Gemini node (type: @n8n/n8n-nodes-langchain.lmChatGoogleGemini):

  • Model: models/gemini-1.5-flash (the fastest and most cost-effective Google model)
  • Add your Google Gemini API credentials

Connect this to the Question & Answer Chain’s ai_languageModel input.

Step 4: Set Up Vector Store Retrieval

Add a Vector Store Retriever node (type: @n8n/n8n-nodes-langchain.retrieverVectorStore):

  • Top K: 5 (retrieve the 5 most relevant documents)

Connect this to the Question & Answer Chain’s ai_retriever input.

Step 5: Connect Qdrant Vector Store

Add a Qdrant Vector Store node (type: @n8n/n8n-nodes-langchain.vectorStoreQdrant):

  • Add your Qdrant API credentials
  • Collection: Select the collection name containing your product embeddings (e.g., “product-knowledge”)

Connect this to the Vector Store Retriever’s ai_vectorStore input.

Step 6: Add OpenAI Embeddings

Add an Embeddings OpenAI node (type: @n8n/n8n-nodes-langchain.embeddingsOpenAi):

  • Add your OpenAI API credentials
  • This generates embeddings for the search query to match against your Qdrant collection

Connect this to the Qdrant Vector Store’s ai_embedding input.

💡

Tip: Make sure your Qdrant collection was populated with embeddings from the same OpenAI model (text-embedding-3-small or similar). Mismatched embeddings will give poon search results.

Step 7: Return RAG Response

Add a Respond to Webhook node to send the RAG answer back to VAPI. The Question & Answer Chain’s output will automatically include the synthesized answer in $json.output.

Building the Tracking Sub-Workflow

The tracking sub-workflow is a separate workflow that the main workflow calls. This keeps your logic modular and testable. Here’s how to build it:

Step 1: Add Workflow Trigger

Create a new workflow and add an Execute Workflow Trigger node (type: n8n-nodes-base.executeWorkflowTrigger):

  • Input Source: jsonExample
  • JSON Example: { "order_number": "order number" }

This allows the main workflow to pass an order number to this sub-workflow.

Step 2: Query WooCommerce REST API

Add an HTTP Request node:

  • Method: GET
  • URL: https://YOUR_STORE_URL/wp-json/wc/v3/orders/{{ $json.order_number }}
  • Authentication: Use HTTP Basic Auth with your WordPress credentials

This fetches the full order object from WooCommerce, including the meta_data field where YITH stores tracking information.

Step 3: Extract Tracking Details

Add a Set node to parse the tracking metadata:

Assignments:
- tracking_code: $json["meta_data"].find(item => item.key === "ywot_tracking_code").value
- carrier_url: $json["meta_data"].find(item => item.key === "ywot_carrier_url").value
- pick_up: $json["meta_data"].find(item => item.key === "ywot_pick_up_date").value

These fields come from the YITH plugin’s meta data structure. The agent will use these fields to provide tracking links and pickup information to customers.

📌

Important: Make sure the YITH plugin is installed and configured on your WooCommerce store. If the meta_data fields don’t exist, this node will error. Test with a real order that has tracking information.

VAPI Configuration: Connecting Voice to Your Workflows

Now that your n8n workflows are built, connect them to VAPI so that incoming phone calls trigger the workflows.

Step 1: Create API Request Tools in VAPI

Log in to your VAPI dashboard and navigate to the Tools section.

Create Tool 1: WooCommerce Order Lookup

  • Tool Type: API Request
  • Name: Check Order Status
  • Request Method: POST
  • Request URL: Paste the webhook URL from your VAPI Post-Sales Webhook node
  • Request Body Format: JSON
  • Parameters:
    • Name: email, Type: string, Description: “Customer’s email address”
    • Name: n_order, Type: string, Description: “Order number to look up”

Create Tool 2: Product Knowledge RAG

  • Tool Type: API Request
  • Name: Search Product Knowledge
  • Request Method: POST
  • Request URL: Paste the webhook URL from your RAG Webhook node
  • Request Body Format: JSON
  • Parameters:
    • Name: search, Type: string, Description: “Search query for product information, policies, or FAQs”

Step 2: Create or Update Your Voice Assistant

In VAPI, go to the Assistants section and create a new assistant or edit an existing one:

  • Name: “WooCommerce Support Agent”
  • Model: Select your preferred model (GPT-4 Turbo, Claude, etc.)
  • System Prompt: Craft a prompt that tells the voice assistant to greet customers, explain the available tools, and guide them to either check their order status or ask product questions. Example:

    “You are a friendly customer support agent for an online store. When someone calls, greet them warmly and ask whether they want to (1) check on an existing order by providing their order number and email, or (2) ask a product question. Use the appropriate tool based on their request.”

  • Voice: Choose a voice under the Voice tab (e.g., “Alloy” for a neutral tone, “Juniper” for friendliness)
  • Tools: In the Tools tab, add the two tools you created above

Step 3: Set Up Twilio Phone Number

In your VAPI dashboard, go to Phone Numbers and either:

  • Create a new phone number with VAPI (it provisions through Twilio), or
  • Import an existing Twilio phone number into VAPI

Configure the phone number as “Inbound” and associate it with your WooCommerce Support Assistant.

Once configured, any call to this number will trigger your VAPI assistant, which will prompt the caller, and route requests to your n8n workflows via the webhooks.

💡

Tip: Test the end-to-end flow by calling the Twilio number from your phone. Listen for the greeting, and try asking about an order or a product question. Check your n8n execution logs to debug any issues.

Testing and Debugging

Once everything is wired up, test thoroughly before going live:

Test the Post-Sales Agent

  1. Create a test order in WooCommerce with a known order number and email address
  2. Call your Twilio number and ask to check the order status
  3. Provide the correct email and order number when prompted
  4. Verify that the agent retrieves and reads the order information correctly
  5. Try with an incorrect email to verify the security check works (agent should refuse)

Test the RAG Q&A

  1. Call the Twilio number and ask a product question (e.g., “What are your return policies?” or “Do you ship internationally?”)
  2. Verify that the assistant searches your Qdrant collection and returns relevant answers
  3. Check the n8n execution logs to see which documents were retrieved

Check n8n Execution Logs

In your n8n dashboard, navigate to the execution history of your workflows. Look for:

  • Successful webhook trigger (check the request body has the correct email and order number)
  • Agent node executing without errors
  • WooCommerce API calls returning data
  • Correct JSON response sent back to VAPI

If any step fails, the agent will explain the error to the caller, so listen carefully and check the logs.

Frequently Asked Questions

Can I use a different LLM instead of GPT-4o-mini for the post-sales agent?

Yes, absolutely. The workflow uses GPT-4o-mini because it’s fast and cost-effective, but n8n supports many LLMs: Claude (Anthropic), Gemini Pro, Mistral, Llama, and others. You can swap it out by changing the language model node’s credentials and model selection. Just ensure the model supports function calling (tool use) for the agent to work properly.

How do I populate my Qdrant collection with product knowledge?

You need to create a separate n8n workflow or script that:

  1. Fetches your product data (from WooCommerce, a CSV, or a documentation site)
  2. Chunks the data into smaller pieces (e.g., 500-1000 characters per chunk)
  3. Generates embeddings using OpenAI’s embedding model
  4. Uploads the chunks and embeddings to your Qdrant collection

The n8n marketplace and documentation have templates for this. Once set up, you can keep your Qdrant collection updated with new products automatically using a scheduled workflow.

What happens if a customer doesn’t provide a valid order number or email?

The agent is instructed to ask the customer to provide the correct information. If the email doesn’t match the order, it politely refuses to share details and asks them to provide the correct email. The agent never reveals what email is associated with an order—this is a critical security feature to prevent unauthorized access.

Can I customize the voice assistant’s personality or tone?

Yes! Both in n8n and in VAPI. In the agent’s system prompt (the Post-Sales Agent node), you can adjust the tone and instructions. In VAPI, you can choose different voices and customize the opening greeting. Together, these let you create a brand-aligned assistant—friendly, professional, playful, or formal.

Will this workflow handle multiple customers calling at the same time?

Yes! Both VAPI and n8n scale horizontally. When multiple customers call, VAPI handles multiple concurrent conversations independently, and each call triggers a separate n8n workflow execution. As long as your n8n instance is configured for concurrent executions (it is by default), you can handle multiple simultaneous callers. If you reach scale limits, you can upgrade your n8n or VAPI plan.

What’s Next: Advanced Enhancements

Your voice AI assistant is now live, but you can keep improving it. Here are some ideas:

  • Sentiment Analysis: Add a sentiment analysis node after the conversation to detect if the customer is frustrated. Route frustrated customers to a human agent queue.
  • Call Recording & Transcription: Enable VAPI’s call recording and use n8n to transcribe calls and log them to a database for training or compliance.
  • CRM Integration: After each call, push the conversation summary and customer info to your CRM (HubSpot, Salesforce, Pipedrive) automatically.
  • Multi-Language Support: Use VAPI’s language detection and route to different language-specific workflows in n8n.
  • Proactive Outbound Calls: Use n8n to trigger VAPI outbound calls for shipping notifications or follow-ups when orders ship.
  • Dynamic Pricing Lookup: Extend the agent to query real-time pricing or inventory from WooCommerce before answering product questions.
  • Live Agent Handoff: Add a “transfer to human agent” tool that routes the call to your support team in a queuing system like Zendesk or Twilio Flex.

Final Thoughts

Building a voice AI customer support system once seemed like a luxury for large enterprises, but with VAPI, n8n, and modern LLMs, it’s now accessible to any online store owner. Your WooCommerce customers can now call 24/7 and get instant support—no waiting, no frustration, just answers.

The workflows you’ve built today are production-ready, but they’re also highly customizable. Adjust the system prompts, add more tools, change the models, integrate other services—n8n’s visual builder makes all of it possible without writing code.

Start small: test with a single phone number and a small set of test orders. Once you’re confident, promote it to your customers via email, your website, and social media. The result? Better customer satisfaction, reduced support costs, and a competitive edge in your market.

🚀 Ready to Deploy This Workflow?

Get the complete, production-ready n8n workflow with all nodes pre-configured, detailed documentation, and setup guides.

Download the Workflow Template •

Instant download · Works on n8n Cloud and self-hosted

voice-ai
n8n
vapi
woocommerce
customer-support
rag
vector-search
gpt-4o
gemini
twilio
automation

How to Auto-Repost TikTok Videos to YouTube Shorts with n8n

You’ve spent hours filming, editing, and posting a killer TikTok video. Your creator account is gaining traction. But here’s the thing—you’re leaving money on the table if that video only lives on TikTok. YouTube Shorts has a completely different audience, different monetization rules, and different growth potential. The problem? Manually downloading from TikTok, re-uploading to YouTube, writing metadata, and repeating this process for every video is a soul-crushing grind that pulls you away from creating.

What if you could automate the entire repurposing pipeline? Post to TikTok once, and within minutes, your video automatically appears on YouTube Shorts with optimized metadata, proper formatting, and zero manual intervention. That’s exactly what we’re building today with n8n.

Save hours each week by automating your cross-platform distribution. Grab the ready-made template and skip the setup headaches.

What You’ll Build

By the end of this guide, you’ll have a fully automated workflow that handles every step of repurposing TikTok content to YouTube Shorts. Here’s what your system will do:
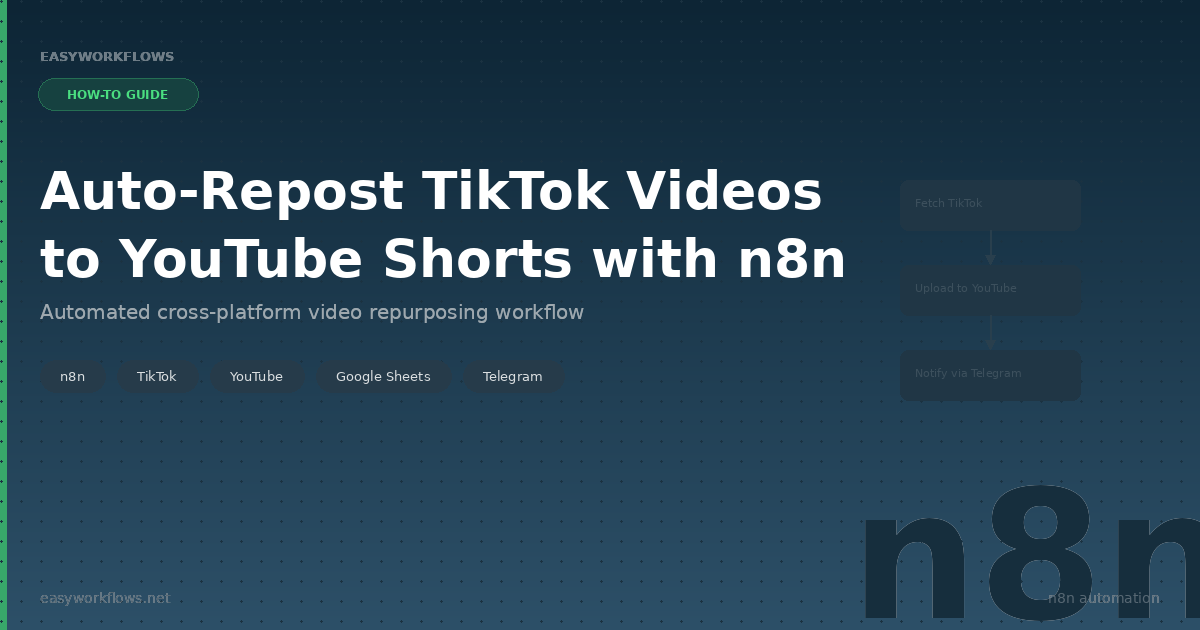
  1. Monitor your TikTok profile — Every 6 hours, the workflow automatically checks your TikTok account for new videos using the RapidAPI TikTok Scraper.
  2. Detect fresh uploads — A filtering system identifies videos you haven’t already repurposed, preventing duplicates and wasted resources.
  3. Download video files — Your videos are fetched directly from TikTok in YouTube-compatible formats.
  4. Generate YouTube metadata — The system automatically creates optimized titles, descriptions, and tags based on your TikTok content.
  5. Upload to YouTube Shorts — Videos are submitted via YouTube’s Data API v3 with proper resumable session handling for reliability.
  6. Log everything to Google Sheets — You get a growing inventory of what’s been repurposed, timestamps, and upload status.
  7. Trigger alerts via Telegram — You’re notified the moment a video hits YouTube, plus you can manually trigger reposts via a Telegram command.

How It Works—The Big Picture

This workflow operates on a dual-trigger model. It can run on a schedule (every 6 hours) or be triggered manually through Telegram. Let’s map out the flow:

┌─────────────────────────────────────────────────────────────┐
│                       TWO ENTRY POINTS                      │
├─────────────────────────────────────────────────────────────┤
│                                                               │
│  Trigger A: Schedule (Every 6 Hours)    Trigger B: Telegram │
│  │                                       │                   │
│  └──────────────────┬──────────────────┬─┘                   │
│                     │                  │                     │
│              Set TikTok Username    Parse Telegram           │
│                     │                  │ /repost @username   │
│                     └──────────────────┘                     │
│                            │                                  │
│                   Fetch TikTok Videos                        │
│                 (HTTP: RapidAPI Scraper)                    │
│                            │                                  │
│                  Filter New Videos Only                      │
│                  (Code: Parse Response)                      │
│                            │                                  │
│              ┌─────────────┴─────────────┐                   │
│              │                           │                   │
│        Log to Google Sheets      Prepare YouTube Metadata    │
│              │                           │                   │
│              └─────────────┬─────────────┘                   │
│                            │                                  │
│            Create YouTube Upload Session                     │
│           (YouTube API v3: Resumable)                       │
│                            │                                  │
│          Download TikTok Video (Temp)                        │
│                            │                                  │
│      Upload Video to YouTube Shorts                          │
│            (YouTube API v3)                                  │
│                            │                                  │
│       Send Telegram Notification                             │
│              (Success Alert)                                  │
│                                                               │
└─────────────────────────────────────────────────────────────┘

What You’ll Need

Before we build, make sure you have these pieces in place. The entire setup takes about 30–45 minutes.

  • n8n account (free tier works, but Pro is recommended for multiple simultaneous workflows)
  • RapidAPI account with an active TikTok Scraper subscription ($10–30/month depending on request volume)
  • YouTube Data API v3 enabled in Google Cloud Console with OAuth 2.0 credentials
  • Google Sheets API enabled in the same GCP project
  • Telegram Bot Token from BotFather (free, takes 2 minutes)
  • Google Account with OAuth access for YouTube and Sheets
  • Creator account on both TikTok and YouTube (with YouTube Studio access)
  • Minimum 2GB free storage on n8n for temporary video files

Step 1: Create the Schedule Trigger

1 Schedule Trigger Node

Start with n8n’s built-in Schedule node. This will kick off your workflow every 6 hours, allowing you to check for new TikTok videos automatically.

Node Configuration:

  • Set trigger to Every 6 hours
  • Leave timezone as default (your account timezone)
  • Check the box for “Activate node immediately on deployment”

The Schedule trigger feeds directly into a Set TikTok Username node, which we’ll cover next.

Step 2: Add Manual Trigger with Telegram

2 Telegram Bot Trigger

To give yourself on-demand control, add a Telegram trigger. This lets you manually request a repost without waiting for the 6-hour schedule.

Setup steps:

  1. Message @BotFather on Telegram and create a new bot (copy the token)
  2. In n8n, create a Telegram trigger node
  3. Add your Bot Token (paste from BotFather)
  4. Set trigger to New Message
  5. Configure message filter: Message starts with /repost

This trigger runs independently of the schedule, so you can trigger reposts manually anytime via Telegram.

Step 3: Set TikTok Username

3 Set Username Node (Code)

Both triggers converge here. This code node normalizes the TikTok username input—whether it came from the schedule default or a Telegram command.

Node configuration:

  • Node type: Code
  • Language: JavaScript

Code snippet:

// If triggered via Telegram, extract username from message
// Otherwise, use default username

if (items[0].json.message !== undefined) {
  // Telegram trigger: extract username from /repost @username
  const messageText = items[0].json.message;
  const parts = messageText.split(' ');
  const username = parts[1] ? parts[1].replace('@', '') : 'erinchen_creates';

  return [{
    json: {
      tikTokUsername: username,
      source: 'telegram'
    }
  }];
} else {
  // Schedule trigger: use default
  return [{
    json: {
      tikTokUsername: 'erinchen_creates',
      source: 'schedule'
    }
  }];
}

This node creates a standardized output that the next nodes can reliably consume, regardless of trigger source.

Step 4: Fetch TikTok Videos via HTTP Request

4 HTTP Request Node (RapidAPI)

Now we actually fetch the TikTok video data. We’re using RapidAPI’s TikTok Scraper—a reliable, legal way to pull public TikTok metadata.

Node configuration:

  • Method: GET
  • URL: https://tiktok-api.p.rapidapi.com/user/posts

Headers (add all three):

x-rapidapi-key: YOUR_RAPIDAPI_KEY
x-rapidapi-host: tiktok-api.p.rapidapi.com
Accept: application/json

Query parameters:

Parameter Value
username {{ $node["Set TikTok Username"].json.tikTokUsername }}
limit 10
sort newest

The response includes video ID, caption, duration, engagement metrics, and download URL. You’ll parse this in the next step.

💡

Pro tip: RapidAPI requests are rate-limited based on your subscription. Start with a 6-hour schedule and adjust frequency based on your usage tier to avoid overages.

Step 5: Filter New Videos with Code

5 Filter Code Node

The RapidAPI response might include videos you’ve already repurposed. This code node filters the response, comparing against your Google Sheets log of uploaded videos.

Node configuration:

  • Node type: Code
  • Language: JavaScript

Code snippet:

// Parse TikTok API response
const videos = items[0].json.data || [];

// Get list of already-uploaded video IDs from Sheets context
const uploadedIds = items[1]?.json?.uploadedVideoIds || [];

// Filter to only new videos
const newVideos = videos.filter(video => {
  return !uploadedIds.includes(video.id);
});

// Return filtered array (will create one item per video)
return newVideos.map(video => {
  return {
    json: {
      videoId: video.id,
      caption: video.desc,
      downloadUrl: video.downloadUrl,
      duration: video.duration,
      likes: video.stats?.likes || 0,
      shares: video.stats?.shares || 0,
      comments: video.stats?.comments || 0,
      createTime: video.createTime
    }
  };
});

The output is now one item per new video, ready to fan out across parallel processing.

Step 6: Log to Google Sheets

6 Google Sheets Append Node

Keep a permanent record of every repurposed video. This becomes your audit log and prevents duplicate uploads.

Setup:

  1. Create a new Google Sheet named “TikTok Reposts” (or similar)
  2. Create columns: TikTok Video ID, Caption, Duration, Likes, Date Posted, YouTube Link, Upload Status, Timestamp
  3. In n8n, add a Google Sheets node
  4. Authenticate with your Google account (OAuth 2.0)

Node configuration:

  • Operation: Append
  • Spreadsheet: Select “TikTok Reposts”
  • Sheet: Select your data sheet
  • Map columns to video data from the filter node

Column mappings:

Sheet Column Source Data
TikTok Video ID {{ $node["Filter Code"].json.videoId }}
Caption {{ $node["Filter Code"].json.caption }}
Duration {{ $node["Filter Code"].json.duration }}
Upload Status Pending
Timestamp {{ new Date().toISOString() }}

This node executes in parallel with the YouTube upload process—we’re logging first, then processing.

Step 7: Prepare YouTube Metadata

7 Prepare Metadata (Code Node)

YouTube has strict requirements for title, description, and tags. This node transforms your TikTok caption into YouTube-optimized metadata.

Code snippet:

// Transform TikTok caption to YouTube metadata
const tiktokCaption = items[0].json.caption || '';
const videoId = items[0].json.videoId;

// Generate YouTube title (max 100 chars)
let youtubeTitle = tiktokCaption.substring(0, 100);
if (tiktokCaption.length > 100) {
  youtubeTitle += '...';
}

// Generate YouTube description
const description = `Originally posted on TikTok. Subscribe for more shorts!\n\n${tiktokCaption}\n\n#Shorts #TikTok #YouTubeShorts`;

// Extract hashtags from caption for YouTube tags
const hashtags = tiktokCaption.match(/#\w+/g) || [];
const tags = [...hashtags, 'shorts', 'tiktok', 'video'].slice(0, 30); // YouTube max 30 tags

return [{
  json: {
    title: youtubeTitle,
    description: description,
    tags: tags,
    privacyStatus: 'public',
    categoryId: '24', // Entertainment category
    duration: items[0].json.duration,
    downloadUrl: items[0].json.downloadUrl,
    videoId: videoId
  }
}];

This ensures your YouTube content is discoverable and follows platform best practices.

Step 8: Create YouTube Upload Session

8 YouTube API: Create Resumable Session

YouTube requires a two-step upload process: first create a resumable session, then upload the file. This prevents re-uploads if the connection drops.

Node type: HTTP Request

Method: POST

URL:

https://www.googleapis.com/youtube/v3/videos?uploadType=resumable&part=snippet,status

Headers:

Header Value
Authorization Bearer {{ $env.YOUTUBE_TOKEN }}
Content-Type application/json
X-Goog-Upload-Protocol resumable

Body (JSON):

{
  "snippet": {
    "title": "{{ $node['Prepare Metadata'].json.title }}",
    "description": "{{ $node['Prepare Metadata'].json.description }}",
    "tags": {{ JSON.stringify($node['Prepare Metadata'].json.tags) }},
    "categoryId": "24"
  },
  "status": {
    "privacyStatus": "public",
    "selfDeclaredMadeForKids": false
  }
}

YouTube responds with a resumable session URL in the Location header. Store this for the next step.

Step 9: Download TikTok Video

9 HTTP Request: Download Video

Fetch the actual video file from TikTok. n8n will store this temporarily in memory.

Node type: HTTP Request

Method: GET

URL:

{{ $node["Filter Code"].json.downloadUrl }}

Options:

  • Set “Response Format” to File
  • Add header User-Agent: Mozilla/5.0 (Windows NT 10.0; Win64; x64)
  • Set timeout to 60 seconds

The downloaded file is automatically staged for upload in the next step.

⚠️

Important: n8n’s free tier has memory limits. Videos larger than 256MB may fail. For larger files, consider using n8n’s S3 integration to stage files in cloud storage first.

Step 10: Upload Video to YouTube

10 YouTube API: Upload Video Chunk

Now upload the downloaded video file to YouTube using the resumable session created in Step 8.

Node type: HTTP Request

Method: PUT

URL:

{{ $node["Create Upload Session"].headers.location }}

Headers:

Header Value
Content-Type video/mp4
Content-Length {{ $node["Download Video"].data.fileSize }}

Body: Set to Binary and map the file from the Download Video node.

Upon success, YouTube returns a 200 response with video metadata including the id field (your new YouTube video ID).

Step 11: Send Telegram Notification

11 Telegram Bot Send Message

Celebrate the successful upload. Send yourself a Telegram notification with the YouTube link.

Node type: Telegram

Configuration:

  • Operation: Send Message
  • Bot Token: (same as Step 2)
  • Chat ID: Your personal Telegram user ID

Message text:

✅ Video Uploaded to YouTube!

Title: {{ $node['Prepare Metadata'].json.title }}
YouTube URL: https://youtube.com/shorts/{{ $node['Upload Video'].json.id }}
Duration: {{ $node['Filter Code'].json.duration }}s
Likes: {{ $node['Filter Code'].json.likes }}

Check it out and update the sheet when ready.

This becomes your real-time alert system—you’ll know instantly when each video goes live.

The Data Structure

Your Google Sheets log is the backbone of the system. Here’s what your tracking sheet should look like:

TikTok Video ID Caption Duration Likes Date Posted YouTube Video ID Upload Status Timestamp
7261849372941234567 Morning coffee thoughts #coffee #viral 59 12,340 2026-04-13 dQw4w9WgXcQ Success 2026-04-13 09:42:17
7261847295837265100 New fitness routine! #gym #fitnessmotivation 45 8,920 2026-04-12 jNQXAC9IVRw Success 2026-04-12 18:15:03

Each row represents one repurposed video. Over time, this sheet becomes your content inventory—searchable, sortable, and exportable for analytics.

Full System Flow

Here’s the complete, end-to-end picture of your automated workflow:

┌──────────────────────────────────────────────────────────────┐
│                    START: DUAL TRIGGERS                      │
├──────────────────────────────────────────────────────────────┤
│                                                                │
│   Schedule: Every 6 hours          Telegram: /repost cmd      │
│   (Morning, Noon, Evening, Night)  (Manual on-demand)         │
│                                                                │
│   └──────────────────────┬──────────────────────┘            │
│                          │                                    │
│                   [Set TikTok Username]                       │
│              Extract or use default username                 │
│                          │                                    │
│          [HTTP: Fetch TikTok Videos via RapidAPI]            │
│               Get latest 10 videos, newest first              │
│                          │                                    │
│              [Code: Filter New Videos Only]                  │
│        Compare against Sheets log, skip already-uploaded    │
│                          │                                    │
│              ┌───────────┴───────────┐                        │
│              │ (Loop: Per New Video) │                        │
│              └───────────┬───────────┘                        │
│                          │                                    │
│         ┌────────────────┴────────────────┐                   │
│         │                                 │                   │
│    [Google Sheets]              [Code: Prepare YouTube     │
│    Append Row                    Metadata & Tags]            │
│    - Video ID                    - Title (max 100 chars)     │
│    - Caption                     - Description + Hashtags    │
│    - Duration                    - Category: Entertainment   │
│    - Likes/Shares                - Privacy: Public           │
│    - Status: Pending             - Tags: 30 max             │
│         │                                 │                  │
│         └────────────────┬────────────────┘                   │
│                          │                                    │
│      [YouTube API: Create Resumable Session]                 │
│           POST to /videos?uploadType=resumable               │
│           Receive: X-Goog-Upload-Protocol Location           │
│                          │                                    │
│         [HTTP: Download TikTok Video File]                    │
│           Temporary storage in n8n memory/disk                │
│                          │                                    │
│      [YouTube API: Upload Video File (PUT)]                  │
│      Send binary file to resumable session URL               │
│                          │                                    │
│         [Code: Extract YouTube Video ID]                     │
│           Parse response, get youtu.be ID                    │
│                          │                                    │
│    [Google Sheets: Update Row]                               │
│    - YouTube Video ID column                                 │
│    - Status: Success                                         │
│    - Timestamp: Upload completion time                       │
│                          │                                    │
│    [Telegram: Send Notification]                             │
│    "✅ Video uploaded: [title] [youtube.com/shorts/ID]"      │
│                          │                                    │
│             [Workflow End for This Video]                    │
│      (Loop continues for next new video if exists)           │
│                          │                                    │
│         ┌────────────────┴────────────────┐                   │
│    [All videos processed?]                                   │
│         Yes ↓              No ↓                               │
│    [Workflow Done]    [Continue loop]                        │
│                                                                │
└──────────────────────────────────────────────────────────────┘

Testing Your Workflow

Before activating on the real 6-hour schedule, test everything in isolation. Here’s a systematic approach:

Test Plan

  1. Test TikTok Fetch (Step 4)
    • Run just the HTTP RapidAPI node with a username you know has videos
    • Check that the response contains video objects with id, desc, downloadUrl
    • Verify API rate limit isn’t exceeded (check RapidAPI dashboard)
  2. Test Filter Logic (Step 5)
    • Mock the RapidAPI response with sample video data
    • Verify the filter code correctly identifies new vs. already-uploaded videos
    • Use a small test Sheets with 1-2 pre-existing IDs to confirm filtering works
  3. Test YouTube OAuth (Step 8)
    • Create a test n8n YouTube node and authenticate
    • Verify your token is valid and has youtube.upload scope
    • Try creating a resumable session (you can discard it—don’t upload yet)
  4. Test End-to-End with a Real Video
    • Use the workflow’s “Test” button to run from the Schedule trigger
    • Upload one real video to YouTube to verify the full pipeline
    • Check the YouTube Studio to confirm the video appears with correct metadata
    • Verify Telegram notification was sent
    • Verify Google Sheets row was created and updated

Troubleshooting Guide

Error Likely Cause Solution
“Invalid API key” from RapidAPI Wrong or expired RapidAPI key Check x-rapidapi-key header, regenerate key if needed
“403 Forbidden” from YouTube API YouTube OAuth token expired or missing scopes Disconnect and re-authenticate YouTube in n8n; verify youtube.upload scope
Video file too large, upload fails TikTok video exceeds n8n memory limit Use n8n S3 integration to stage files; OR upgrade n8n plan
“Telegram message not sent” Bot token invalid or wrong chat ID Verify Bot Token from BotFather; get chat ID via telegram.me/IDBot
Duplicate videos uploaded (filter not working) Sheets lookup returning empty list Check Google Sheets read node before filter; ensure column names match
YouTube metadata missing/incomplete Prepare Metadata code node failed silently Check TikTok caption contains valid data; add error handling to code node

Frequently Asked Questions

Can I upload to multiple YouTube channels?

Yes, but you’ll need separate YouTube OAuth credentials for each channel. Add a “Select Channel” node before the upload, and loop through each channel’s upload session. Alternatively, use YouTube’s channel switching feature if all channels are on one Google account.

What happens if a video upload fails halfway through?

YouTube’s resumable upload protocol is designed for this. If the connection drops, the next upload attempt resumes from where it stopped (within 24 hours). n8n will retry failed HTTP requests if you enable “Retry on Fail” in the upload node. Always check your YouTube Studio for duplicate uploads after failures.

Can I customize the YouTube description and tags automatically?

Absolutely. The “Prepare Metadata” code node (Step 7) extracts hashtags from your TikTok caption. You can extend it to pull from a lookup table, add timestamps, or include affiliate links. Just be careful to follow YouTube’s community guidelines on self-promotion.

How do I handle videos that are too short or too long for YouTube Shorts?

YouTube Shorts accepts videos 15 seconds to 10 minutes. Add a duration check in the Filter node (Step 5): skip videos under 15 seconds, and split videos over 60 seconds into multiple Shorts. For splitting, you’d need to integrate a video processing tool like FFmpeg via n8n’s SSH or webhook triggers.

Can I monetize the YouTube videos once they’re uploaded?

YouTube’s Partner Program requires 1,000 subscribers and 4,000 watch hours. The workflow doesn’t affect eligibility, but note that repurposed content may have different monetization rules. Check YouTube’s policies on content reuse. Once you’re monetized, ensure the original TikTok and YouTube videos aren’t flagged as duplicates—different timestamps and metadata help.

Ready to automate your content pipeline?

Stop spending hours on manual uploads. The ready-made n8n template handles every step—from TikTok fetching to YouTube scheduling to Telegram alerts. All the nodes are pre-configured; you just add your API keys.

Get the Template Now

Includes full documentation, test data, and 30-day email support

What’s Next?

Once your core workflow is humming, consider these extensions:

  • Instagram Reels Integration — Add Instagram Data API to cross-post to Reels with the same metadata pipeline. Instagram and YouTube have slightly different format requirements, so you’d branch the metadata preparation.
  • Analytics Tracking — Pull daily YouTube Analytics API data for each uploaded video and log performance metrics (views, watch time, CTR) back to your Sheets. Identify which TikToks perform best on YouTube.
  • Smart Scheduling — Use n8n’s AI nodes to analyze your audience timezone and schedule uploads when your audience is most active. YouTube Shorts have different peak times than TikTok.
  • Content Moderation — Add a screening step using OpenAI’s moderation API to flag videos with potentially problematic content before they go live on YouTube.
  • Thumbnail Generation — Automatically extract a frame from each TikTok and use an image-to-text API to generate optimized YouTube thumbnail text overlays.
  • Multi-Platform Dashboard — Build a custom UI with Webflow or Bubble that displays your reposts, engagement metrics, and upload history—no more spreadsheet hunting.

The modular nature of n8n means each extension is just a few new nodes. Start simple, and scale as your workflow matures.

n8n
TikTok
YouTube Shorts
Automation
Content Marketing
RapidAPI
YouTube API
Google Sheets
Telegram Bot
Workflow

How to Automate Market Demand Research with n8n, GPT-4o and XPOZ MCP

Manual market research is a time sink most founders and marketers can’t afford. You open Reddit, Twitter, Product Hunt, and Google — spend two hours reading threads — and come away with a vague sense that “people seem frustrated with X.” That’s not intelligence. That’s noise. This workflow changes that by running a fully automated market demand analysis every week, scanning public discussions across Google Search, Twitter/X, and Instagram, extracting real buying signals with GPT-4o, and delivering a polished report straight to your Notion workspace and email inbox — no human effort required.

Don’t want to build it from scratch? Grab the ready-made template → and be live in under 15 minutes.

What You’ll Build

  1. A weekly schedule trigger that fires the workflow automatically — no manual runs needed.
  2. A research context node where you define your niche, keywords, and analyst focus in plain text.
  3. An AI research agent (GPT-4o + XPOZ MCP) that scans Google Search, Twitter/X, and Instagram for real demand signals and pain points.
  4. A second AI formatter agent that converts raw insights into a clean Notion summary and a professional stakeholder email.
  5. Parallel delivery to Notion (for long-term research tracking) and Gmail (for immediate stakeholder awareness) — plus an error-alert branch that emails you if anything breaks.

How It Works — The Big Picture

┌────────────────────────────────────────────────────────────────────────────┐
│  AI MARKET DEMAND ANALYZER                                                 │
│                                                                            │
│  [Schedule Trigger]                                                        │
│       │                                                                    │
│       ▼                                                                    │
│  [Inject Research Context]   ← niche / query / analyst notes              │
│       │                                                                    │
│       ▼                                                                    │
│  [AI Research Agent] ← GPT-4o + XPOZ MCP (Google/Twitter/Instagram)       │
│       │                                                                    │
│       ▼                                                                    │
│  [Format Insights Agent] ← GPT-4o (Notion summary + email body)           │
│       │                                                                    │
│       ▼                                                                    │
│  [Parse & Validate JSON Output]                                            │
│       │                  │                                                 │
│       ▼                  ▼                                                 │
│  [Save to Notion]   [Send Gmail]                                           │
│                                                                            │
│  ── Error Branch ──                                                        │
│  [Error Trigger] → [Send Error Alert Email]                                │
└────────────────────────────────────────────────────────────────────────────┘

What You’ll Need

  • n8n — self-hosted or n8n Cloud (any recent version)
  • OpenAI API key — GPT-4o access required (GPT-4o mini also works with slightly lower depth)
  • XPOZ API token — get yours at xpoz.ai; powers social intelligence search across Google, Twitter/X, and Instagram
  • Notion integration token + database — your research database with at least a Title property
  • Gmail OAuth2 connection in n8n — for sending insight emails and error alerts

Time to build from scratch: ~45 minutes. Time with the template: ~15 minutes (credential setup only).


Building the Workflow — Step by Step

1 Scheduled Market Research Trigger (Schedule Trigger)

This is the heartbeat of the workflow. Every time it fires, the full research pipeline runs end to end. By default the template is configured to run every Monday at 8:00 AM, but you can change this to daily, bi-weekly, or any custom cron schedule.

In n8n, open the node and set:

  • Trigger interval: Weeks
  • Weeks between triggers: 1
  • Trigger on weekday: Monday
  • At hour: 8 (8:00 AM)
💡

Tip: If you’re tracking fast-moving niches (crypto, AI tools, trending SaaS), switch to a daily trigger. For stable B2B markets, weekly is usually sufficient and keeps your API costs low.

2 Inject Research Context (Set)

This is your configuration panel. Instead of hardcoding research parameters inside the AI prompt, they live here — which means you can change your niche or focus topic without touching any agent prompt logic.

Three fields to configure:

Field What it does Example value
body.niche The market or industry you’re researching SaaS project management tools
body.query Specific keywords or research question Asana alternatives for remote teams
body.notes Analyst guidance for the AI Focus on pricing complaints and feature gaps. Ignore generic how-to content.

After this node runs, the output looks like:

{
  "body": {
    "niche": "SaaS project management tools",
    "query": "Asana alternatives for remote teams",
    "notes": "Focus on pricing complaints and feature gaps."
  }
}

3 AI Research Agent — GPT-4o + XPOZ MCP

This is where the heavy lifting happens. An n8n AI Agent node powered by GPT-4o receives your research context and uses the XPOZ MCP connector as a tool to search across Google Search, Twitter/X, and Instagram in real time.

The agent’s system prompt instructs it to act as a growth intelligence analyst — extracting only high-signal findings: real frustrations, competitor weaknesses, switching intent, unmet feature requests, and pricing dissatisfaction. Generic content (tutorials, press releases, promotional posts) is explicitly filtered out.

XPOZ MCP node configuration:

  • Endpoint URL: https://mcp.xpoz.ai/mcp
  • Authentication: Bearer Auth — paste your XPOZ API token
💡

Tip: The agent is set to maxIterations: 30, giving it enough room to make multiple search calls and cross-reference findings. Don’t reduce this below 10 or you’ll get shallow results.

4 Format Insights into Notion Summary and Email (AI Agent)

A second GPT-4o agent takes the raw insight text and transforms it into two clean deliverables as a single JSON object.

{
  "notion_summary": "Remote teams cite per-seat pricing as barrier. Common complaints: no built-in time tracking, clunky Slack integration. Competitors gaining ground: Linear, ClickUp. Buying intent detected in 12 threads asking for free Asana alternatives.",
  "email": {
    "subject": "Weekly Market Intelligence: Asana Alternatives (April 2026)",
    "body": "Hi James,\n\nThis week's scan surfaced strong demand signals for lightweight project management tools targeting remote-first teams..."
  }
}
📌

Note: The system prompt explicitly bans markdown, emojis, and hallucinated data. The AI only uses content from the research agent’s output. This matters — you don’t want fabricated market insights landing in your Notion database.

5 Parse and Validate AI Output (Code)

This JavaScript node handles both clean JSON and JSON wrapped in markdown code fences. It also validates that both required fields (notion_summary and email) are present before allowing data to continue downstream — throwing meaningful errors if anything is missing.

6 Save to Notion + Send Gmail (Parallel)

After validation, the workflow splits into two parallel branches. The Notion node saves the summary as a new database page for long-term research archiving. The Gmail node sends the formatted email to your configured stakeholder address. Both run simultaneously — no sequential bottleneck.

💡

Tip: Want to send to multiple stakeholders? Add multiple recipients in the Gmail node’s To field separated by commas, or use the CC/BCC options in the node’s Options panel.

The Notion Database Schema

Create a Notion database for your market research archive. At minimum you need one property:

Property name Type Example value Notes
summery Title Remote teams cite Asana’s pricing as a barrier… Must match the key in the Notion node’s propertiesUi config. Rename in Notion if preferred — just update the node’s key field to match.
Date (optional) Date April 14, 2026 Use a Created time property in Notion for automatic timestamping.
Niche (optional) Text SaaS project management Extend the workflow to add this field automatically if needed.
📌

Important: The template’s Notion node references property key summery|title. If you create a fresh database, name your title property summery — or update the key in the node to match your own property name.

Error Handling Branch

The workflow includes a dedicated error handling branch. Any node that fails mid-execution triggers the Error Trigger node, which immediately sends an alert email including the failed node name, error message, and timestamp. You’ll know within seconds if the XPOZ API returns an error, GPT-4o rate-limits your request, or the Notion API rejects the page — no manual log monitoring needed.

Testing Your Workflow

  1. Click Test Workflow in n8n (runs the Schedule Trigger manually).
  2. Watch the AI Research Agent execute — it makes several XPOZ tool calls. Typically takes 30–90 seconds.
  3. Inspect the Parse and Validate AI Output node — confirm a valid JSON object with both keys.
  4. Check your Notion database for a new entry and your Gmail inbox for the insight email.
  5. If all looks good, activate the workflow via the Active toggle.
Problem Likely cause Fix
XPOZ node returns 401 Invalid or expired Bearer token Regenerate XPOZ API key and update the n8n credential
Parse node throws JSON error GPT-4o returned non-JSON text Check the formatter agent’s output and adjust the system prompt slightly
Notion page created with empty title Property key mismatch Match the key in the Notion node to your database’s title property name exactly
Gmail not sending OAuth scope issue Re-authorize the Gmail credential in n8n
Agent times out Too many XPOZ search iterations Provide a more specific body.query to reduce search surface

Frequently Asked Questions

Does this workflow search the web in real time or use cached data?

It uses real-time data via the XPOZ MCP connector, which queries Google Search, Twitter/X, and Instagram live at execution time. Every run reflects the current state of public discussions — not cached snapshots. Results will vary between runs, which is exactly what you want for tracking how market sentiment shifts over time.

Can I research multiple niches in a single run?

The default template handles one niche per run to keep analysis focused and costs predictable. To research multiple niches, either run the workflow multiple times with different Set node configurations, or extend it by adding a loop before the AI agent that iterates over an array of niche/query pairs stored in a Google Sheet or Airtable.

How much does this cost to run per week?

A typical analysis run consumes roughly 8,000–15,000 GPT-4o tokens across both agents, putting the OpenAI cost at around $0.10–$0.25 per run. Add XPOZ API costs based on your plan tier. For a weekly run, total API cost is generally under $1/month.

Can I use a different AI model instead of GPT-4o?

Yes. Swap the two OpenAI LLM nodes for any model supported by n8n’s LangChain nodes — Claude, Gemini, Mistral, or a locally hosted Ollama model. If you switch models, you may need to adjust the formatting prompt to ensure clean JSON output.

Can I save results somewhere other than Notion?

Absolutely. Replace the Notion node with a Google Sheets, Airtable, or Slack node. The parsed JSON output is clean and structured, so it plugs into any destination node with minimal reconfiguration.

What happens if XPOZ finds no relevant discussions?

The AI research agent is instructed to state clearly when demand signals are weak or non-existent rather than fabricating insights. The Notion summary will reflect “low demand signal detected” — which is itself a useful data point. Refine your query in the Set node to search with different keywords.


🚀 Get the AI Market Demand Analyzer Template

You now know exactly how this workflow is built. The ready-made template includes the complete n8n workflow JSON (import in one click), a step-by-step Setup Guide PDF, and a Credentials Guide showing exactly where to get each API key.

Download the Template — $14.99 →

Instant download · Works on n8n Cloud and self-hosted · One-time purchase

What’s Next

  • Competitor monitoring: Replace the niche query with specific competitor product names to track sentiment around their offerings over time.
  • Keyword trend scoring: Add a Code node after parsing to count signal frequency across runs and flag niches with accelerating demand.
  • Slack digest: Add a Slack node alongside the Gmail output to post a weekly #market-intel summary to your team channel.
  • Multi-niche portfolio: Pair with a Google Sheets trigger to iterate over a list of niches, running a full analysis sweep across your entire product portfolio in one go.

How to Add LinkedIn Post Commenters to HubSpot CRM with n8n (Auto-Enriched)

Every person who comments on your LinkedIn post is a warm lead — they’ve already seen your content and engaged with it. But manually copying names, finding emails, and entering contacts into your CRM? That’s an afternoon of soul-crushing data entry for every post you publish. This n8n workflow changes that: paste a LinkedIn post URL into a form, and within minutes every commenter is automatically enriched with professional data and waiting in your HubSpot CRM as a ready-to-contact lead.

Prefer to skip the setup? Grab the ready-made template → and be up and running in under 10 minutes.

What You’ll Build

  1. You paste a LinkedIn post URL into a simple web form and hit submit.
  2. n8n fetches every comment on that post via the ConnectSafely LinkedIn API — names, profile URLs, and comment text included.
  3. Each commenter’s LinkedIn profile is sent to an Apify actor that returns their full professional details: email address, job title, company name, location, and more.
  4. The workflow filters out any profile where no email was found, so your CRM stays clean.
  5. Verified contacts are automatically created (or updated, if they already exist) in HubSpot with all enriched fields pre-populated — first name, last name, email, title, company, city, and country.

How It Works — The Big Picture

The workflow runs in two logical phases: fetching the comment list, then looping through each commenter to enrich and sync. Here’s the full flow at a glance:

┌──────────────────────────────────────────────────────────────────────┐
│  LINKEDIN → HUBSPOT CRM PIPELINE                                     │
│                                                                      │
│  [Form Trigger]  →  [Fetch Post Comments]  →  [Split Array]          │
│   (Post URL)         (ConnectSafely)           (per commenter)       │
│                                                                      │
│                    ┌─── [Loop Over Items] ────────────────┐          │
│                    │         ↓                            │          │
│                    │  [Enrich with Apify]                 │          │
│                    │         ↓                            │          │
│                    │  [Check Email Exists]                │          │
│                    │    ↓ YES        ↓ NO                 │          │
│                    │  [Create/Update  [Continue Loop] ────┘          │
│                    │   HubSpot]           ↑                          │
│                    │          └────────────┘                         │
│                    └──────────────────────────────────────┘          │
└──────────────────────────────────────────────────────────────────────┘

What You’ll Need

  • n8n (self-hosted, version 1.0+) — the ConnectSafely node is a community node that requires self-hosted n8n
  • ConnectSafely LinkedIn API — a paid third-party service that safely retrieves LinkedIn data without violating platform ToS
  • Apify account — free tier works for small volumes; the specific actor used is the LinkedIn Profile Scraper (Actor ID: UMdANQyqx3b2JVuxg)
  • HubSpot account ��� any plan with API access; you’ll need a Private App token
  • A published LinkedIn post with existing comments to test against

Estimated build time: 45–60 minutes from scratch, or under 10 minutes with the template.

📌

Self-hosted n8n required: The ConnectSafely community node is not available on n8n Cloud. You’ll need a self-hosted n8n instance to use this workflow. If you’re on Cloud, reach out to us at support@easyworkflows.net — we can discuss an alternative approach using HTTP Request nodes.

Building the Workflow — Step by Step

1 Form Trigger — Enter Post URL (n8n-nodes-base.formTrigger)

This node creates a simple hosted web form that any team member can use to kick off the pipeline. No coding, no API calls — just paste a URL and click submit.

To configure it: open the node and set the Form Title to something descriptive like “LinkedIn Post Engagement Automation.” Add one field with the label LinkedIn Post URL, mark it as required, and add a placeholder showing the expected URL format. n8n will generate a unique public URL for the form — copy it and share it with your sales or marketing team.

When the form is submitted, this data object flows to the next node:

{
  "LinkedIn Post URL": "https://www.linkedin.com/posts/james-carter_ai-sales-automation-activity-7190000000000000000-XXXX"
}
💡

Tip: You can add a second field asking for a “Campaign Tag” or “Lead Source” label. Pass that value to HubSpot as a custom property so you know which LinkedIn post generated each contact.

2 Fetch Post Comments (ConnectSafely LinkedIn)

This community node uses the ConnectSafely API to retrieve all comments on the LinkedIn post. ConnectSafely is a compliant third-party LinkedIn data provider — it handles authentication and rate limiting so your account stays safe.

Configuration: set Post URL to ={{ $json['LinkedIn Post URL'] }} and set the operation to Get Post Comments. Attach your ConnectSafely API credential. The node returns an array of comment objects, each containing the commenter’s name, profile URL, comment text, and timestamp.

{
  "comments": [
    {
      "name": "Emily Rodriguez",
      "profileUrl": "https://www.linkedin.com/in/emily-rodriguez-sales",
      "commentText": "This is exactly what our team needs! Great post.",
      "timestamp": "2026-04-10T14:32:00Z"
    },
    {
      "name": "Michael Chen",
      "profileUrl": "https://www.linkedin.com/in/michael-chen-b2b",
      "commentText": "Saved this — we're evaluating tools like this right now.",
      "timestamp": "2026-04-10T15:10:00Z"
    }
  ]
}

3 Split Comments Array (splitOut)

The Split Out node takes the comments array from the previous step and breaks it into individual items — one n8n item per commenter. This is necessary so the loop in the next step can process each person separately.

Set Field To Split Out to comments. After this node, each item looks like a single commenter object.

4 Loop Over Items (splitInBatches)

The Split In Batches node processes commenters one at a time (or in small batches), which prevents you from hammering the Apify API with too many simultaneous requests. Leave the Batch Size at the default (1) for reliability, or increase it to 5 if you have a high Apify plan and want faster processing.

This node has two outputs: output 0 fires when the loop is complete (all items processed), and output 1 fires for batches — connect output 1 to the Apify enrichment node.

5 Enrich Profile with Apify (Apify)

This is where the magic happens. For each commenter’s LinkedIn profile URL, this node runs an Apify actor that scrapes their public profile and returns rich contact data — including, when available, their work email address.

Configuration: set the Actor ID to https://console.apify.com/actors/UMdANQyqx3b2JVuxg, set the operation to Run actor and get dataset, and in Custom Body enter:

={{ JSON.stringify({ "linkedin": $json.profileUrl }) }}

Attach your Apify API key credential. The actor typically takes 10–30 seconds per profile. The output contains detailed professional information mapped to numbered field keys:

{
  "02_First_name": "Emily",
  "03_Last_name": "Rodriguez",
  "04_Email": "emily.rodriguez@techcorp.com",
  "07_Title": "VP of Sales",
  "13C_Current_address": "1428 Elm St, Austin, TX 78701",
  "14_City": "Austin",
  "15_Country": "United States",
  "16_Company_name": "TechCorp Solutions"
}
💡

Tip: Email availability depends on LinkedIn profile privacy settings. Expect 30–60% of profiles to return an email. Use the Apify Console to inspect the full schema and add more fields.

6 Check Email Exists (IF)

Not every enriched profile will include an email address — some LinkedIn users keep theirs private. This IF node filters them out before they reach HubSpot, keeping your CRM free of incomplete records.

Configuration: add one condition — Value 1 = ={{ $json['04_Email'] }}, operator = Is not empty. Profiles with a valid email go to TRUE; those without go to FALSE (Continue Loop).

7 Create or Update HubSpot Contact (HubSpot)

The final action node upserts the contact in HubSpot using the email address as the unique identifier. If the contact already exists, their record is updated with the latest data. New contacts are created fresh.

Set Authentication to App Token and attach your HubSpot Private App credential. Map the fields:

HubSpot Field n8n Expression Example Value
Email ={{ $json['04_Email'] }} emily.rodriguez@techcorp.com
First Name ={{ $json['02_First_name'] }} Emily
Last Name ={{ $json['03_Last_name'] }} Rodriguez
Job Title ={{ $json['07_Title'] }} VP of Sales
Company ={{ $json['16_Company_name'] }} TechCorp Solutions
City ={{ $json['14_City'] }} AustinRodriguez
Job Title ={{ $json['07_Title'] }} VP of Sales
Company ={{ $json['16_Company_name'] }} TechCorp Solutions
City ={{ $json['14_City'] }} Austin
Country ={{ $json['15_Country'] }} United States
Street Address ={{ $json['13_Current_address'] }} 1428 Elm St, Austin, TX 78701
💡

Tip: In HubSpot, create a custom contact property called “LinkedIn Source Post” and map it to the original post URL using ={{ $('Form Trigger - Enter Post URL').item.json['LinkedIn Post URL'] }}. This lets you track which post each lead came from directly in your CRM.

8 Continue Loop (No Operation)

This placeholder node serves as the merge point for both branches of the IF node — whether a contact was created in HubSpot (TRUE branch) or skipped due to missing email (FALSE branch), both paths converge here and loop back to Loop Over Items to process the next commenter. No configuration needed.

Full System Flow

Here’s the complete end-to-end picture — from a LinkedIn post URL to a fully enriched HubSpot contact record:

  User submits LinkedIn post URL via Form
             ↓
  [Form Trigger] receives URL
             ↓
  [ConnectSafely] fetches all commenters
  → Returns: [{name, profileUrl, comment}, ...]
             ↓
  [Split Out] → individual commenter items
             ↓
  ┌──────────────── [Loop Over Items] ─────────────────┐
  │  For each commenter:                               │
  │         ↓                                         │
  │  [Apify Actor] enriches LinkedIn profile           │
  │  → Returns: email, name, title, company, city      │
  │         ↓                                         │
  │  [IF: Email Exists?]                               │
  │    ↓ YES                    ↓ NO                  │
  │  [HubSpot: Create/Update]  [Skip]                 │
  │  Contact with enriched data   ↓                   │
  │         ↓                    ↓                    │
  │       [Continue Loop] ←──────┘                    │
  │             ↑                                     │
  └─────────────┘ (next commenter)                    │
             ↓ (all done)                             │
        Workflow complete                             │
        All reachable commenters → HubSpot CRM        │
└─────────────────────────────────────────────────────┘

Testing Your Workflow

  1. Activate the workflow and open the form URL provided by the Form Trigger node.
  2. Paste in a LinkedIn post URL that you own (one with at least 3–5 comments for a meaningful test).
  3. Submit the form and watch the execution in the n8n editor — you should see items flowing through each node.
  4. After the run completes, open HubSpot CRM → Contacts and confirm new contacts appear with all fields populated.
  5. For a commenter whose profile you know (yourself or a colleague), verify that the email and company fields are correct.
Problem Likely Cause Fix
ConnectSafely node shows authentication error API credential not configured Re-enter your ConnectSafely API key in the credential modal
Apify returns empty dataset Actor still running; n8n timed out waiting Increase the HTTP timeout in Apify node settings to 120 seconds
HubSpot returns 409 Conflict Contact already exists with same email Normal behavior — HubSpot updates the existing contact; no action needed
0% of profiles return email Testing with private LinkedIn accounts Try with public LinkedIn profiles; email availability varies by privacy settings
Loop never finishes Continue Loop not connected back to Loop Over Items Ensure both IF branches connect to Continue Loop, and Continue Loop connects back to Loop Over Items input 0

Frequently Asked Questions

Does this workflow violate LinkedIn’s Terms of Service?

ConnectSafely is specifically designed to access LinkedIn data within LinkedIn’s permitted boundaries — it doesn’t use scraping bots or credential stuffing. That said, always review the current ToS for your specific use case. The Apify enrichment step retrieves publicly available profile data only. We recommend consulting your legal team for enterprise use.

What percentage of commenters will have an email address?

Typically 30–60%, depending on your audience. B2B professionals in sales, marketing, and tech tend to have higher email availability on LinkedIn. The IF node ensures only enriched contacts reach your CRM, so partial data never clutters your records.

Can I run this on n8n Cloud instead of self-hosted?

Not with the ConnectSafely community node, which only installs on self-hosted n8n. If you’re on Cloud, it’s possible to replicate the comment-fetching step using an HTTP Request node pointed at a LinkedIn-compliant API — reach out to support@easyworkflows.net for guidance on the alternative setup.

How long does the workflow take to run for a post with 100 comments?

About 15–30 minutes, depending on Apify’s queue. Each enrichment call takes 10–30 seconds per profile, and the loop processes them sequentially. For large volumes, consider running on a schedule or splitting the job into smaller batches using a Filter node to process only the newest commenters since the last run.

Can I add commenters to a HubSpot list or pipeline stage automatically?

Yes — after the “Create or Update HubSpot Contact” node, add a HubSpot node set to “Add contact to list” or “Create deal” and reference the contact’s ID from the previous node’s output. This lets you instantly enroll new LinkedIn-sourced leads into a nurture sequence or sales pipeline.

What if I want to save commenters to Google Sheets instead of HubSpot?

Simply swap the HubSpot node for a Google Sheets “Append Row” node and map the same Apify fields to your sheet columns. The rest of the workflow stays identical. This makes it easy to adapt to any CRM or spreadsheet — just change the final destination node.


🚀 Get the LinkedIn → HubSpot CRM Template

Download the ready-to-import n8n workflow JSON, plus a step-by-step Setup Guide and a Credentials Guide covering ConnectSafely, Apify, and HubSpot — everything you need to go live today.

Get the Template →

Instant download · Works on self-hosted n8n · Includes PDF guides

What’s Next?

  • Auto-enroll in email sequence: After creating the HubSpot contact, trigger a HubSpot workflow to enroll them in a LinkedIn-specific nurture email sequence automatically.
  • Slack notification: Add a Slack node after HubSpot to alert your sales team in real time whenever a high-value contact (e.g., VP or Director title) is added.
  • Run on a schedule: Swap the Form Trigger for a Schedule trigger combined with a stored list of your recent post URLs to process new commenters every morning automatically.
  • Score leads by comment sentiment: Add an OpenAI node before the Apify step to analyze the comment text and assign a lead score — prioritize contacts who left buying-intent comments.
n8n
LinkedIn
HubSpot
Apify
CRM automation
lead generation
sales automation

How to Build an AI Invoice Analyzer & Cash Flow Predictor with n8n, Gemini, Google Sheets & Slack

Every finance team faces the same slow, error-prone cycle: invoices arrive by email, someone manually logs them in a spreadsheet, another person checks if the vendor looks legitimate, and a third person tries to figure out how this payment affects the month-end cash position. This tutorial shows you how to collapse all four of those steps into a single n8n workflow powered by Google Gemini AI — one that analyzes invoices for fraud, logs them automatically, predicts cash flow impact, and emails a report to your team.

By the end you’ll have a live automation that accepts invoice submissions through a form, uses Gemini Flash to flag anomalies and classify spend categories, alerts your Slack channel when a high-risk invoice appears, appends every invoice to a Google Sheets financial database, runs a 30-day cash flow prediction, and delivers a formatted HTML report via Gmail. Total setup time: about 30 minutes.

💡 Who this is for: Freelancers, small businesses, and ops teams processing more than 10–15 invoices per month who want AI-assisted review without paying for expensive AP automation software.

Want to skip the build and get the ready-to-import template? Download the workflow + setup guides here.

What the Workflow Does

Here’s the full automation at a glance:

  1. Invoice Upload Form — An n8n form page your team can bookmark. Vendors or staff submit invoice details (vendor, amount, dates, description).
  2. Format Invoice Data — A Code node that normalizes the input, calculates days-until-due, and timestamps the submission.
  3. AI Invoice Analyzer (Gemini) — Sends the invoice to Gemini Flash with a structured prompt. Returns fraud risk level, spend category, payment priority, and a one-line summary — all as JSON.
  4. Parse AI Response — Extracts the JSON from Gemini’s output with a safe fallback in case of model formatting errors.
  5. Fraud Risk Check (IF node) — Routes the flow: high-risk invoices go to Slack and Google Sheets; normal invoices go directly to Sheets.
  6. Send Fraud Alert to Slack — Posts a formatted block message to #fraud-alerts with vendor, amount, and a list of the specific risk reasons Gemini identified.
  7. Log to Financial Database — Appends a row to your Google Sheets invoice tracker (12 columns: date, vendor, amount, category, fraud risk, etc.).
  8. Cash Flow Predictor (Gemini) — A second Gemini chain that takes the logged invoice data and returns a cash flow assessment: impact direction, urgency score 1–10, recommended payment date, and three action items.
  9. Email Cash Flow Report — Sends a formatted HTML email via Gmail with the full analysis — everything from fraud risk to recommended payment date.

Prerequisites

Before you import the workflow, make sure you have the following:

  • n8n — self-hosted (v1.0+) or n8n Cloud. The workflow uses nodes available in both.
  • Google Gemini API key — Free tier works for low volumes. Get yours at aistudio.google.com.
  • Google Sheets — Create a spreadsheet called “Invoice Tracker” with a sheet tab named “Invoices”. Leave the first row for headers (the workflow will create them on first run).
  • Slack workspace — Create a #fraud-alerts channel (or rename to match an existing one).
  • Gmail account — Any Gmail or Google Workspace account for sending reports.

Step-by-Step Setup

1Import the Workflow into n8n

Download the .json file from the template package. In n8n, click + New Workflow → Import from File. Select the JSON and click Import. The canvas will load with all 16 nodes connected and labeled.

Note: The workflow imports in inactive state. Do not activate it until you’ve connected all credentials and updated the two placeholder values below.

2Connect Your Credentials

Open each node that has a credential warning (indicated by a red dot) and connect the appropriate account:

Node Credential Type Where to Get It
Gemini Flash – Invoice Analysis Google Gemini (PaLM) API Google AI Studio → API Keys
Gemini Flash – Cash Flow Google Gemini (PaLM) API Same key as above
Log to Financial Database Google Sheets OAuth2 n8n Credentials → Google Sheets OAuth2
Send Fraud Alert to Slack Slack OAuth2 Slack App → OAuth tokens
Email Cash Flow Report Gmail OAuth2 n8n Credentials → Gmail OAuth2

The Credentials Guide PDF (included in the download) walks through each one with exact screenshots and scopes required.

3Update the Two Placeholders

Open the Log to Financial Database node. In the Document ID field, replace YOUR_SPREADSHEET_ID with your Google Sheets spreadsheet ID — the long alphanumeric string in the sheet’s URL between /d/ and /edit.

Open the Email Cash Flow Report node. In the To field, replace YOUR_FINANCE_EMAIL@company.com with the email address that should receive cash flow reports.

4Set Up Your Google Sheet Structure

The workflow will auto-append rows, but it expects the “Invoices” sheet to exist. Open your spreadsheet, rename Sheet1 to Invoices, and optionally add these headers in row 1 (the workflow will use them for column matching):

Submitted At | Vendor | Invoice Number | Invoice Date | Due Date | Amount | Currency | Category | Fraud Risk | Fraud Reasons | Payment Priority | Summary

5Configure the Slack Alert Channel

Open the Send Fraud Alert to Slack node. The default channel is #fraud-alerts. Change this to match your Slack channel name. Make sure the Slack app you connected has the chat:write permission scope.

6Test with a Sample Invoice

Before activating, run a manual test. Click the Invoice Upload Form node, then click Test StepOpen Test URL. A form page opens in your browser. Submit a test invoice:

  • Vendor: Test Vendor Ltd
  • Invoice #: INV-2024-001
  • Amount: 9999 (high amount triggers fraud check)
  • Due Date: tomorrow’s date (short due date = fraud indicator)
  • Description: leave blank (missing description = another indicator)

This combination should produce a high fraud risk result, triggering the Slack alert path. Watch the n8n canvas — green checkmarks confirm each node ran successfully.

7Activate and Share the Form URL

Once your test passes, toggle the workflow to Active. Go back to the Invoice Upload Form node and copy the production form URL. Share this with your team or embed it in your internal tools documentation. Anyone with the link can submit invoices — no n8n account needed.

Understanding the Gemini Prompts

The workflow uses two separate Gemini chains, each with a specific job. Understanding them helps you customize the AI behavior.

Invoice Analysis Prompt

The first chain asks Gemini to evaluate fraud risk based on five signals: unusually round amounts, very short due dates (under 3 days), missing service descriptions, high total amounts, and suspicious vendor name patterns. It returns a structured JSON object with fraudRisk (low/medium/high), fraudReasons (an array of specific red flags), category (spend type), and paymentPriority.

You can tune the sensitivity by editing the prompt in the AI Invoice Analyzer node. For example, adding your company’s typical invoice range (e.g., “invoices over $50,000 require extra scrutiny”) will make the fraud detection more context-aware.

Cash Flow Prediction Prompt

The second chain receives the analyzed invoice plus the days-until-due count and asks Gemini to assess impact on your 30-day cash position. It returns cashFlowImpact (positive/negative/neutral), an urgencyScore from 1–10, a recommendedPaymentDate, and three concrete actionItems.

The model used in both chains is Gemini 1.5 Flash — fast and affordable. For larger invoices or more complex categorization, you can switch the model name to models/gemini-1.5-pro in both Gemini nodes with no other changes required.

Customization Ideas

  • Add a budget limit check — Insert an IF node after the Sheets log to check if amount > 10000 and route those to a separate “large purchase approval” Slack channel.
  • Multi-approver flow — For high-priority invoices, add a Wait node + webhook to pause the workflow until a manager clicks an approval link in Slack or email before the report is sent.
  • Recurring invoice detection — Add a Google Sheets read step to compare the vendor name against your existing database. Flag invoices from known vendors that arrive outside their normal billing cycle.
  • Currency conversion — Insert an HTTP Request node before the Sheets log to call a live exchange rate API (e.g., Frankfurter) and normalize all amounts to your base currency.
  • Airtable instead of Google Sheets — Replace the Google Sheets node with an Airtable “Create Record” action. The data structure maps 1:1.

Troubleshooting

Gemini returns text instead of JSON — The prompt explicitly says “no markdown, no code fences.” If Gemini occasionally wraps the JSON in triple backticks, the Parse AI Response Code node handles this with a regex fallback. No action needed.

Google Sheets “Resource not found” error — Double-check the spreadsheet ID in the Log to Financial Database node. The ID is the long string in your sheet URL: https://docs.google.com/spreadsheets/d/THIS_PART/edit.

Slack “channel_not_found” error — Make sure the Slack app is installed in the workspace and the channel name in the node matches exactly (including the # or without it — n8n accepts both).

Form not accessible after activation — The form URL only works when the workflow is active. Check the toggle in the top-right of the workflow editor.

The Complete Node Structure

Node Type Purpose
Invoice Upload Form Form Trigger Accept submissions from team/vendors
Format Invoice Data Code Normalize fields, calculate days-until-due
AI Invoice Analyzer LLM Chain Gemini fraud analysis + categorization
Gemini Flash – Invoice Analysis Google Gemini Chat Model AI sub-node for Invoice Analyzer chain
Parse AI Response Code Extract JSON from AI output (with fallback)
Fraud Risk Check IF Route high-risk vs normal invoices
Send Fraud Alert to Slack Slack Block message to #fraud-alerts channel
Log to Financial Database Google Sheets Append row to Invoices tracker
Cash Flow Predictor LLM Chain Gemini 30-day cash flow analysis
Gemini Flash – Cash Flow Google Gemini Chat Model AI sub-node for Cash Flow Predictor chain
Email Cash Flow Report Gmail Send formatted HTML report

Get the Ready-to-Use Template

Includes the workflow JSON, a step-by-step Setup Guide PDF, and a Credentials Guide PDF with screenshots for every API connection.

Download — $14.99

How to Build an AI Lead Processing Pipeline with Apify, Gemini & Google Sheets in n8n

Your sales team is drowning in raw lead data. You’ve scraped thousands of contacts from LinkedIn, Apollo, or custom sources — but half have missing emails, the phone formats are inconsistent, and nobody wants to manually clean 2,000 rows in a spreadsheet before Monday’s call list is ready. There has to be a better way.

There is. This guide walks you through building a fully automated AI lead processing pipeline in n8n that scrapes leads with Apify, validates and deduplicates them using Google Gemini, writes clean records to Google Sheets, and sends your team a Telegram summary — all without touching a single CSV file.

Prefer to skip the build? Grab the ready-made template → and have it running in under 10 minutes.

What You’ll Build

  1. A parent workflow (or manual trigger) fires this sub-workflow, passing along scraping parameters.
  2. n8n sends a POST request to kick off your Apify actor (e.g., Apollo scraper, LinkedIn scraper, or any custom actor).
  3. After a 30-second wait, the workflow polls Apify for results and feeds them into a batching loop.
  4. Google Gemini AI processes up to 1,000 leads per batch — validating required fields, deduplicating by email, generating unique Lead IDs, and formatting phone/location data.
  5. Validated leads are appended to a Google Sheet. Your team receives a Telegram message per batch showing exactly how many leads were added, flagged, or rejected.

How It Works — The Big Picture

+————————————————————————-+
| AI LEAD PROCESSING PIPELINE |
| |
| [Execute Trigger] -> [POST Apify] -> [Loop/Batch] |
| | |
| +——+——+ |
| v (batch out) | (done) |
| [AI Agent] [Wait 30s] -> [GET Apify] |
| | ^ |
| | +– (feeds back to Loop) |
| v |
| [Telegram Batch Report] |
| |
| AI Agent Tools: [Append to Sheets] [Check for Duplicates] |
+————————————————————————-+

The workflow uses n8n’s SplitInBatches node as a loop controller. Output 0 sends the current batch to the AI agent; output 1 routes through a 30-second wait to poll Apify for fresh data, which feeds back into the loop.

What You’ll Need

  • n8n instance (self-hosted or cloud) — n8n.io
  • Apify account — apify.com (free tier: 5 compute units/month; paid from $49/mo)
  • Google account with Gemini API access — aistudio.google.com
  • Google Sheets spreadsheet (lead database)
  • Telegram Bot (via @BotFather — free)
  • Build time: ~45 minutes from scratch | Template time: ~8 minutes

Step-by-Step Build

Step 1 — When Executed by Another Workflow (Trigger)

This workflow runs as a sub-workflow called by a parent orchestrator. Using executeWorkflowTrigger with passthrough mode means any data the parent sends flows directly into this pipeline.

  1. Add an Execute Workflow Trigger node.
  2. Set Input Source to passthrough.
  3. In your parent workflow, use an Execute Workflow node pointing to this workflow’s ID.
Tip: Test standalone by temporarily replacing the trigger with a Manual Trigger node during development.

Step 2 — Trigger Apify Scrape (HTTP POST)

This HTTP Request node fires your Apify actor to start scraping.

  1. Set Method to POST.
  2. Set URL: https://api.apify.com/v2/acts/YOUR_ACTOR_ID/runs
  3. Add Authorization header: Bearer YOUR_APIFY_API_TOKEN
  4. Set Body to JSON with your actor’s input schema.
// Example: Apollo.io scraper input
{
  "searchUrl": "https://app.apollo.io/#/people?sortByField=...",
  "maxResults": 1000
}
Tip: Find your Actor ID in Apify Store → your actor → API tab. Token at apify.com/account/integrations.

Step 3 — Loop Over Items (SplitInBatches)

The SplitInBatches node processes data in chunks of 1,000 and routes through two paths.

  1. Set Batch Size to 1000.
  2. Set Options → Reset to false.
  • Output 0 (current batch): routes to the AI Agent.
  • Output 1 (done): routes to Wait → Apify GET → back to loop.

Step 4 — Wait 30s for Apify

Pauses 30 seconds for the Apify actor to complete before polling results.

  1. Set Amount to 30, Unit to Seconds.
Tip: For 5,000+ result jobs, increase to 60–120s or use Apify’s webhook callback to n8n — more reliable for production.

Step 5 — Fetch Apify Results (HTTP GET)

Retrieves all scraped leads from the last Apify actor run.

  1. Set Method to GET.
  2. Set URL: https://api.apify.com/v2/acts/YOUR_ACTOR_ID/runs/last/dataset/items
  3. Same Authorization header as Step 2.
// Example Apify lead record
{
  "name": "Sarah Thompson",
  "email": "sarah.thompson@acmecorp.com",
  "phone": "+1 512 867 5309",
  "company": "Acme Corp",
  "title": "VP of Marketing",
  "location": "Austin, TX"
}

Step 6 — AI Lead Processing Agent (Google Gemini)

A Langchain AI Agent powered by Google Gemini validates and deduplicates leads using two Google Sheets tool calls.

Per batch, the agent:

  1. Validates required fields: Name, Email, Company Name.
  2. Deduplicates by checking existing emails in the sheet.
  3. Generates Lead IDs: AP-DDMMYY-xxxx (e.g. AP-110426-0001).
  4. Formats phones (prefers mobile, wraps in quotes) and location (City, Country).
  5. Writes valid leads to Google Sheets one row at a time.
  6. Returns one consolidated Telegram summary for the entire batch.
Tip: Use gemini-1.5-flash for high-volume batches — faster and cheaper than Pro with no quality loss for data validation tasks.

Step 7 — Append Lead to Google Sheets (AI Tool)

AI-callable tool that appends a validated lead row. The agent calls this once per valid lead.

  1. Set Operation to Append, connect your Google Sheets OAuth2 credential.
  2. Set Document ID (from sheet URL) and Sheet Name.
  3. Map columns via $fromAI('FieldName') expressions.

Step 8 — Check for Duplicate Leads (AI Tool)

AI-callable tool that reads existing emails to detect duplicates before writing.

  1. Set Operation to Read Rows, same document and sheet as Append tool.
  2. Connect as an AI Tool to the agent.
Tip: For sheets with 10,000+ rows, use a Lookup operation on the Email column instead of reading all rows.

Step 9 — Send Batch Report via Telegram

Sends the AI agent’s structured summary to your Telegram chat.

  1. Set Chat ID to your chat ID (from @userinfobot).
  2. Set Text to ={{ $json.output }}.
Sample Telegram output:
✅ Batch Complete
Total Processed: 47 | Added: 41 | Flagged: 4 | Skipped: 2

Contacts Added:
- James Carter -- Acme Corp -- james.carter@acmecorp.com
- Emily Rodriguez -- TechVentures -- emily.r@techventures.io
- Michael Chen -- GrowthLabs -- m.chen@growthlabs.com
(+38 more)

⚠️ Flagged: Lead 12 missing LinkedIn; Lead 28 missing Job Title
❌ Skipped: Lead 5 missing Email; Lead 33 missing Company Name

Google Sheets Schema

Column Type Example Notes
Lead ID Text AP-110426-0001 Auto-generated — required
Name Text James Carter Required field
Email Text james.carter@acmecorp.com Required — deduplication key
Phone Number Text “(512) 867-5309” Quoted to preserve format
Company Name Text Acme Corp Required field
Job Title Text VP of Marketing Optional — flagged if missing
Website / LinkedIn URL linkedin.com/in/jamescarter Optional
Address Text Austin, TX City + State/Country only
Company Summary Text B2B SaaS, marketing automation Optional — AI-generated
Relevant Partner Text HubSpot Optional

Customization Ideas

  • Multiple Apify actors: Chain this workflow for Apollo, LinkedIn, or Instagram scrapers all feeding one clean sheet.
  • Apify webhook: Replace the Wait node with an Apify webhook that POSTs results to n8n instantly — more reliable at scale.
  • CRM push: Add a HubSpot or Salesforce node after Google Sheets to sync validated leads directly to your CRM.
  • Lead scoring: Extend the Gemini agent prompt to assign a 1–10 score based on title, industry, and company size.
  • Slack alerts: Replace Telegram with a Slack node to post batch reports to your #leads channel.

Skip the Build — Get the Template

Full workflow JSON, Setup Guide PDF, and Credentials Guide PDF — ready to import and activate.

Get the Template — $14.99 →

Troubleshooting

  • Agent returns empty output: Check Gemini API key validity and confirm model name (gemini-1.5-flash or gemini-1.5-pro).
  • Apify GET returns empty array: Actor still running — increase Wait to 60–120s or switch to Apify webhooks.
  • Google Sheets “Not found”: Verify Document ID and Sheet GID in both tool nodes match the actual URL.
  • Telegram not sending: Confirm bot token is valid and Chat ID is numeric (check with @userinfobot).
  • Memory key error: Static session key is intentional for sub-workflow isolation — change to dynamic if needed.