How to Build an AI Invoice Analyzer & Cash Flow Predictor with n8n, Gemini, Google Sheets & Slack

New to n8n? Start with our step-by-step setup guide, then come back to build this workflow.

Every finance team faces the same slow, error-prone cycle: invoices arrive by email, someone manually logs them in a spreadsheet, another person checks if the vendor looks legitimate, and a third person tries to figure out how this payment affects the month-end cash position. This tutorial shows you how to collapse all four of those steps into a single n8n workflow powered by Google Gemini AI, one that analyzes invoices for fraud, logs them automatically, predicts cash flow impact, and emails a report to your team.

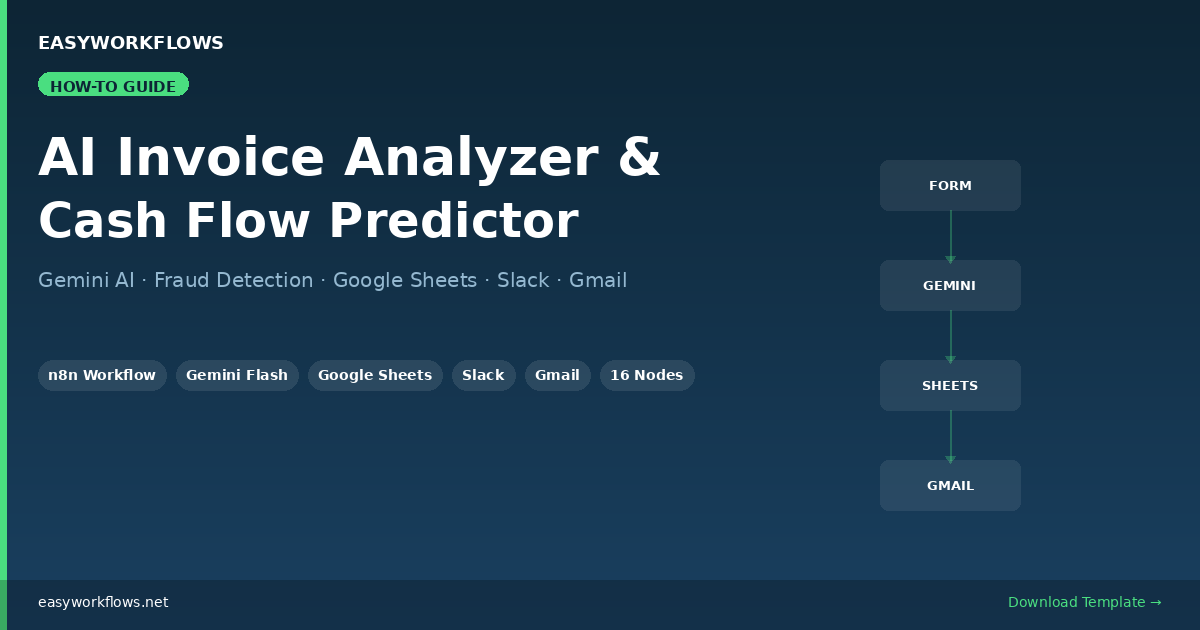
By the end you’ll have a live automation that accepts invoice submissions through a form, uses Gemini Flash to flag anomalies and classify spend categories, alerts your Slack channel when a high-risk invoice appears, appends every invoice to a Google Sheets financial database, runs a 30-day cash flow prediction, and delivers a formatted HTML report via Gmail. Total setup time: about 30 minutes.

πŸ’‘ Who this is for: Freelancers, small businesses, and ops teams processing more than 10 to 15 invoices per month who want AI-assisted review without paying for expensive AP automation software.

Want to skip the build and get the ready-to-import template? Download the workflow + setup guides here.

What the Workflow Does

Here’s the full automation at a glance:

  1. Invoice Upload Form: An n8n form page your team can bookmark. Vendors or staff submit invoice details (vendor, amount, dates, description).
  2. Format Invoice Data: A Code node that normalizes the input, calculates days-until-due, and timestamps the submission.
  3. AI Invoice Analyzer (Gemini): Sends the invoice to Gemini Flash with a structured prompt. Returns fraud risk level, spend category, payment priority, and a one-line summary, all as JSON.
  4. Parse AI Response: Extracts the JSON from Gemini’s output with a safe fallback in case of model formatting errors.
  5. Fraud Risk Check (IF node): Routes the flow: high-risk invoices go to Slack and Google Sheets; normal invoices go directly to Sheets.
  6. Send Fraud Alert to Slack: Posts a formatted block message to #fraud-alerts with vendor, amount, and a list of the specific risk reasons Gemini identified.
  7. Log to Financial Database: Appends a row to your Google Sheets invoice tracker (12 columns: date, vendor, amount, category, fraud risk, etc.).
  8. Cash Flow Predictor (Gemini): A second Gemini chain that takes the logged invoice data and returns a cash flow assessment: impact direction, urgency score 1 to 10, recommended payment date, and three action items.
  9. Email Cash Flow Report: Sends a formatted HTML email via Gmail with the full analysis: everything from fraud risk to recommended payment date.

Prerequisites

Before you import the workflow, make sure you have the following:

  • n8n: self-hosted (v1.0+) or n8n Cloud. The workflow uses nodes available in both.
  • Google Gemini API key: Free tier works for low volumes. Get yours at aistudio.google.com.
  • Google Sheets: Create a spreadsheet called “Invoice Tracker” with a sheet tab named “Invoices”. Leave the first row for headers (the workflow will create them on first run).
  • Slack workspace: Create a #fraud-alerts channel (or rename to match an existing one).
  • Gmail account: Any Gmail or Google Workspace account for sending reports.

Step-by-Step Setup

1Import the Workflow into n8n

Download the .json file from the template package. In n8n, click + New Workflow β†’ Import from File. Select the JSON and click Import. The canvas will load with all 16 nodes connected and labeled.

Note: The workflow imports in inactive state. Do not activate it until you’ve connected all credentials and updated the two placeholder values below.

2Connect Your Credentials

Open each node that has a credential warning (indicated by a red dot) and connect the appropriate account:

Node Credential Type Where to Get It
Gemini Flash, Invoice Analysis Google Gemini (PaLM) API Google AI Studio β†’ API Keys
Gemini Flash, Cash Flow Google Gemini (PaLM) API Same key as above
Log to Financial Database Google Sheets OAuth2 n8n Credentials β†’ Google Sheets OAuth2
Send Fraud Alert to Slack Slack OAuth2 Slack App β†’ OAuth tokens
Email Cash Flow Report Gmail OAuth2 n8n Credentials β†’ Gmail OAuth2

The Credentials Guide PDF (included in the download) walks through each one with exact screenshots and scopes required.

3Update the Two Placeholders

Open the Log to Financial Database node. In the Document ID field, replace YOUR_SPREADSHEET_ID with your Google Sheets spreadsheet ID, the long alphanumeric string in the sheet’s URL between /d/ and /edit.

Open the Email Cash Flow Report node. In the To field, replace YOUR_FINANCE_EMAIL@company.com with the email address that should receive cash flow reports.

4Set Up Your Google Sheet Structure

The workflow will auto-append rows, but it expects the “Invoices” sheet to exist. Open your spreadsheet, rename Sheet1 to Invoices, and optionally add these headers in row 1 (the workflow will use them for column matching):

Submitted At | Vendor | Invoice Number | Invoice Date | Due Date | Amount | Currency | Category | Fraud Risk | Fraud Reasons | Payment Priority | Summary

5Configure the Slack Alert Channel

Open the Send Fraud Alert to Slack node. The default channel is #fraud-alerts. Change this to match your Slack channel name. Make sure the Slack app you connected has the chat:write permission scope.

6Test with a Sample Invoice

Before activating, run a manual test. Click the Invoice Upload Form node, then click Test Step β†’ Open Test URL. A form page opens in your browser. Submit a test invoice:

  • Vendor: Test Vendor Ltd
  • Invoice #: INV-2024-001
  • Amount: 9999 (high amount triggers fraud check)
  • Due Date: tomorrow’s date (short due date = fraud indicator)
  • Description: leave blank (missing description = another indicator)

This combination should produce a high fraud risk result, triggering the Slack alert path. Watch the n8n canvas. Green checkmarks confirm each node ran successfully.

7Activate and Share the Form URL

Once your test passes, toggle the workflow to Active. Go back to the Invoice Upload Form node and copy the production form URL. Share this with your team or embed it in your internal tools documentation. Anyone with the link can submit invoices, no n8n account needed.

Understanding the Gemini Prompts

The workflow uses two separate Gemini chains, each with a specific job. Understanding them helps you customize the AI behavior.

Invoice Analysis Prompt

The first chain asks Gemini to evaluate fraud risk based on five signals: unusually round amounts, very short due dates (under 3 days), missing service descriptions, high total amounts, and suspicious vendor name patterns. It returns a structured JSON object with fraudRisk (low/medium/high), fraudReasons (an array of specific red flags), category (spend type), and paymentPriority.

You can tune the sensitivity by editing the prompt in the AI Invoice Analyzer node. For example, adding your company’s typical invoice range (e.g., “invoices over $50,000 require extra scrutiny”) will make the fraud detection more context-aware.

Cash Flow Prediction Prompt

The second chain receives the analyzed invoice plus the days-until-due count and asks Gemini to assess impact on your 30-day cash position. It returns cashFlowImpact (positive/negative/neutral), an urgencyScore from 1 to 10, a recommendedPaymentDate, and three concrete actionItems.

The model used in both chains is Gemini 1.5 Flash, fast and affordable. For larger invoices or more complex categorization, you can switch the model name to models/gemini-1.5-pro in both Gemini nodes with no other changes required.

Customization Ideas

  • Add a budget limit check: Insert an IF node after the Sheets log to check if amount > 10000 and route those to a separate “large purchase approval” Slack channel.
  • Multi-approver flow: For high-priority invoices, add a Wait node + webhook to pause the workflow until a manager clicks an approval link in Slack or email before the report is sent.
  • Recurring invoice detection: Add a Google Sheets read step to compare the vendor name against your existing database. Flag invoices from known vendors that arrive outside their normal billing cycle.
  • Currency conversion: Insert an HTTP Request node before the Sheets log to call a live exchange rate API (e.g., Frankfurter) and normalize all amounts to your base currency.
  • Airtable instead of Google Sheets: Replace the Google Sheets node with an Airtable “Create Record” action. The data structure maps 1:1.

Troubleshooting

Gemini returns text instead of JSON: The prompt explicitly says “no markdown, no code fences.” If Gemini occasionally wraps the JSON in triple backticks, the Parse AI Response Code node handles this with a regex fallback. No action needed.

Google Sheets “Resource not found” error: Double-check the spreadsheet ID in the Log to Financial Database node. The ID is the long string in your sheet URL: https://docs.google.com/spreadsheets/d/THIS_PART/edit.

Slack “channel_not_found” error: Make sure the Slack app is installed in the workspace and the channel name in the node matches exactly (including the # or without it, n8n accepts both).

Form not accessible after activation: The form URL only works when the workflow is active. Check the toggle in the top-right of the workflow editor.

The Complete Node Structure

Node Type Purpose
Invoice Upload Form Form Trigger Accept submissions from team/vendors
Format Invoice Data Code Normalize fields, calculate days-until-due
AI Invoice Analyzer LLM Chain Gemini fraud analysis + categorization
Gemini Flash, Invoice Analysis Google Gemini Chat Model AI sub-node for Invoice Analyzer chain
Parse AI Response Code Extract JSON from AI output (with fallback)
Fraud Risk Check IF Route high-risk vs normal invoices
Send Fraud Alert to Slack Slack Block message to #fraud-alerts channel
Log to Financial Database Google Sheets Append row to Invoices tracker
Cash Flow Predictor LLM Chain Gemini 30-day cash flow analysis
Gemini Flash, Cash Flow Google Gemini Chat Model AI sub-node for Cash Flow Predictor chain
Email Cash Flow Report Gmail Send formatted HTML report

Get the Ready-to-Use Template

Includes the workflow JSON, a step-by-step Setup Guide PDF, and a Credentials Guide PDF with screenshots for every API connection.

Download $14.99

How to Monitor Your Aave DeFi Portfolio Automatically with n8n, Moralis & GPT-4o

New to n8n? Start with our step-by-step setup guide, then come back to build this workflow.

If you’ve got funds in Aave V3, you’ve probably had the thought: “What if my health factor drops while I’m asleep and I get liquidated?” Checking manually every few hours isn’t realistic, and missing a warning can cost thousands of dollars. This guide shows you how to build a fully automated Aave portfolio monitor using n8n, the Moralis blockchain API, and GPT-4o-mini, delivering polished health reports straight to your Telegram and email on a fixed schedule. You’ll build it step by step, understand every node, and walk away with a system that protects your DeFi positions around the clock.

Prefer to skip the setup? Grab the ready-made template β†’ and have it running in under 10 minutes.

What You’ll Build

  1. A scheduled n8n workflow that fires every hour (or any interval you choose).
  2. A Google Sheets wallet list: add or remove wallets without touching n8n at all.
  3. An AI Agent powered by GPT-4o-mini that calls three Moralis endpoints to fetch your Aave V3 positions, health factors, and liquidation risk.
  4. An automated Telegram message summarizing each wallet’s position in readable format.
  5. A formatted HTML email delivered to your inbox with the same data, beautifully styled.

How It Works: The Big Picture

β”Œβ”€β”€β”€β”€β”€β”€β”€β”€β”€β”€β”€β”€β”€β”€β”€β”€β”€β”€β”€β”€β”€β”€β”€β”€β”€β”€β”€β”€β”€β”€β”€β”€β”€β”€β”€β”€β”€β”€β”€β”€β”€β”€β”€β”€β”€β”€β”€β”€β”€β”€β”€β”€β”€β”€β”€β”€β”€β”€β”€β”€β”€β”€β”€β”€β”€β”€β”€β”€β”€β”€β”€β”€β”
β”‚  AAVE PORTFOLIO AI AGENT β€” n8n Workflow                                β”‚
β”‚                                                                        β”‚
β”‚  [Schedule Trigger]                                                    β”‚
β”‚       β”‚ (every hour)                                                   β”‚
β”‚       β–Ό                                                                β”‚
β”‚  [Google Sheets] ──── reads wallet_address rows                        β”‚
β”‚       β”‚                                                                β”‚
β”‚       β–Ό                                                                β”‚
β”‚  [Set Variables] ──── Wallet_Address, current_date                     β”‚
β”‚       β”‚                                                                β”‚
β”‚       β–Ό                                                                β”‚
β”‚  [AAVE Portfolio AI Agent]  ◄── GPT-4o-mini (OpenAI Chat Model)        β”‚
β”‚       β”‚         ◄── [Fetch DeFi Protocol Summary]  (Moralis)           β”‚
β”‚       β”‚         ◄── [Fetch DeFi Positions Summary] (Moralis)           β”‚
β”‚       β”‚         ◄── [Fetch Aave V3 Positions]      (Moralis)           β”‚
β”‚       β”‚                                                                β”‚
β”‚       β”œβ”€β”€β”€β”€β”€β”€β”€β”€β”€β”€β”€β”€β”€β”€β”€β”€β”€β”€β”€β”€β”€β”€β”€β”€β”€β”€β”€β”€β”€β”€β”€β”€β”€β”€β”€β”€β”€β”€β”                         β”‚
β”‚       β–Ό                                      β–Ό                         β”‚
β”‚  [Send Telegram Report]            [Format Email Report]               β”‚
β”‚  (instant Telegram message)               β”‚                            β”‚
β”‚                                           β–Ό                            β”‚
β”‚                                  [Send Email Report]                   β”‚
β”‚                                  (Gmail HTML email)                    β”‚
β””β”€β”€β”€β”€β”€β”€β”€β”€β”€β”€β”€β”€β”€β”€β”€β”€β”€β”€β”€β”€β”€β”€β”€β”€β”€β”€β”€β”€β”€β”€β”€β”€β”€β”€β”€β”€β”€β”€β”€β”€β”€β”€β”€β”€β”€β”€β”€β”€β”€β”€β”€β”€β”€β”€β”€β”€β”€β”€β”€β”€β”€β”€β”€β”€β”€β”€β”€β”€β”€β”€β”€β”€β”˜

The workflow loops through every row in your Google Sheet, running the full AI analysis for each wallet address. You can monitor as many wallets as you want. Just add another row.

What You’ll Need

  • n8n: self-hosted (free) or n8n Cloud (~$20/mo). If you don’t have it, install n8n first.
  • Google account: for Google Sheets and Gmail (OAuth2).
  • Moralis account: free tier available at moralis.io. Generous free limits for personal use.
  • OpenAI account: pay-per-use, roughly $0.0002 per report generation.
  • Telegram bot: free, created via @BotFather in under 2 minutes.
  • Build time: ~45 to 60 minutes from scratch. Using the template: under 10 minutes.

Step 1: Set Up Your Google Sheets Wallet List

Before touching n8n, create your wallet tracker spreadsheet. This is where the workflow reads wallet addresses each time it runs, with no code changes needed to add or remove wallets.

Node: Wallet Addresses to Monitor (Google Sheets)

  1. Create a new Google Spreadsheet. Name the first sheet Aave Wallet Address.
  2. In cell A1, type exactly: wallet_address (lowercase, no spaces).
  3. Add wallet addresses in rows below, one per row:
| wallet_address                             |
|--------------------------------------------|
| 0xA221674eDB403A8F714F66Af74a2332c3CB5C0c3 |
| 0x742d35Cc6634C0532925a3b8D4C9E7A2B1234567 |

In n8n, configure the node to read from this sheet. The workflow iterates over each row, passing $json.wallet_address downstream.

πŸ’‘ Tip: You can find active Aave V3 wallet addresses on Etherscan by looking at recent Aave V3 contract interactions. Use one for your initial test.

Step 2: Set Variables: Wallet Address + Current Date

The Set Wallet Variables node extracts the wallet address from the sheet row and generates today’s date. These values are referenced by every downstream node.

Node: Set Wallet Variables (Set)

Configure two fields:

Field Name Value (n8n Expression) Purpose
Wallet_Address ={{ $json.wallet_address }} Passes wallet to AI Agent and API calls
current_date ={{ new Date().toISOString().split('T')[0] }} Adds today’s date to the report header

Data snapshot after this node:

{
  "Wallet_Address": "0xA221674eDB403A8F714F66Af74a2332c3CB5C0c3",
  "current_date": "2026-04-10"
}

Step 3: The AI Agent + Three Moralis Tools

This is the engine of the workflow. An n8n AI Agent (powered by GPT-4o-mini) orchestrates three HTTP Request Tool nodes to pull live Aave data from Moralis, then writes a structured health report.

Step 3a: OpenAI Chat Model

The OpenAI Chat Model node connects to the AI Agent as its language model. Configure it with your OpenAI API key and set the model to gpt-4o-mini: fast, cheap, and more than capable for data formatting tasks.

Node: Fetch DeFi Protocol Summary (HTTP Request Tool)

Calls: GET https://deep-index.moralis.io/api/v2.2/wallets/{wallet}/defi/summary

Returns the list of all DeFi protocols the wallet is currently interacting with (Aave, Compound, Uniswap, etc.).

Authentication: Header Auth with header name X-API-Key and your Moralis API key as the value.

Example response structure:

{
  "protocols": [
    { "protocol_name": "aave-v3", "chain": "eth", "positions": 3 },
    { "protocol_name": "uniswap-v3", "chain": "eth", "positions": 1 }
  ]
}

Node: Fetch DeFi Positions Summary (HTTP Request Tool)

Calls: GET https://deep-index.moralis.io/api/v2.2/wallets/{wallet}/defi/positions

Returns protocol-level summary: total supply, borrow, and collateral values across all DeFi positions.

This gives the AI Agent a high-level picture before drilling into Aave V3 specifics.

{
  "active_protocols": 2,
  "total_usd_value": "22415.50",
  "protocol_breakdown": [
    {
      "protocol": "aave-v3",
      "supply_usd": "15000.00",
      "borrow_usd": "7500.00",
      "net_usd": "7500.00"
    }
  ]
}

Node: Fetch Aave V3 Positions (HTTP Request Tool)

Calls: GET https://deep-index.moralis.io/api/v2.2/wallets/{wallet}/defi/aave-v3/positions

This is the most detailed endpoint: returns pool-level Aave data including health factors, liquidation thresholds, and individual asset balances.

{
  "positions": [
    {
      "pool_address": "0x87870...",
      "pool_name": "Aave Lending Pool",
      "supply_balance_usd": "15000.00",
      "borrow_balance_usd": "7500.00",
      "collateral_value_usd": "15000.00",
      "health_factor": "1.87",
      "liquidation_threshold": "0.85",
      "liquidation_risk": false,
      "underlying_assets": [
        { "name": "Wrapped Ether", "symbol": "WETH", "balance": "4.2500" },
        { "name": "USD Coin", "symbol": "USDC", "balance": "5000.00" }
      ]
    }
  ]
}
πŸ’‘ Health Factor is the most important number: above 1.0 = safe, below 1.0 = liquidation. The AI Agent is instructed to flag anything below 1.2 as a risk.

Step 3b: The AI Agent System Prompt

The AI Agent’s system prompt instructs GPT-4o-mini to call all three tools, collect the data, and format it into a structured Telegram-friendly report. Key formatting rules embedded in the prompt:

  • Format large numbers with commas: 15,000 not 15000
  • Display ETH values to 4 decimal places
  • Flag health factors below 1.2 with a ⚠️ liquidation risk warning
  • If no Aave V3 positions found, send: ❌ No Aave V3 positions found for this wallet.

Example Telegram output generated by the AI:

πŸ“Š Aave DeFi Health Report
Wallet: 0xA221674...CBf0c3
Date: 2026-04-10

β–ͺ️ Pool: Aave Lending Pool
β€’ Supply: $15,000.00
β€’ Borrowed: $7,500.00
β€’ Collateral: $15,000.00
β€’ Health Factor: 1.87
β€’ Liquidation Threshold: 85%
β€’ Liquidation Risk: No βœ…

Underlying Assets:
- Wrapped Ether (WETH): 4.2500
- USD Coin (USDC): 5,000.00

Step 4: Format the Email Report

The Format Email Report Code node takes the AI Agent’s plain text output and wraps it in an HTML email template: clean, readable, and professional.

Node: Format Email Report (Code, JavaScript)

The code extracts the wallet address from the AI output (via regex), converts markdown-style line breaks to HTML <br> tags, and wraps everything in a styled <div>:

const aiOutput = $json.output || "No data available.";
const date = new Date().toISOString().split('T')[0];

const walletMatch = aiOutput.match(/Wallet:\s*(0x[a-fA-F0-9]{40})/);
const wallet = walletMatch ? walletMatch[1] : "Unknown Wallet";

const htmlFormatted = aiOutput
  .replace(/---/g, '<hr>')
  .replace(/\n{2,}/g, '<br><br>')
  .replace(/\n/g, '<br>');

const htmlBody = `
  <div style="font-family: Arial, sans-serif; font-size: 14px; line-height: 1.6;">
    <h2 style="color: #1a56db;">Aave DeFi Health Report β€” ${date}</h2>
    ${htmlFormatted}
  </div>
`;

return [{ json: { wallet, subject: \`πŸ›‘οΈ Aave DeFi Health Report – ${date}\`, htmlBody } }];

Step 5: Send Telegram + Email

The AI Agent’s output splits into two parallel branches, one for Telegram, one for email, so you get both notifications simultaneously.

Node: Send Telegram Report (Telegram)

Text: ={{ $json.output }}, the raw AI Agent output, which is already formatted for Telegram’s Markdown-like rendering.

Set your Chat ID to your personal Telegram chat ID (or a group chat for team-wide monitoring).

Node: Send Email Report (Gmail)

Subject: ={{ $json.subject }} (e.g., “πŸ›‘οΈ Aave DeFi Health Report, 2026-04-10”)
Message: ={{ $json.htmlBody }}, the styled HTML from the previous Code node.
Set Send To to your email address.

The Data Structure: Google Sheets Schema

The Google Sheet that drives this workflow is intentionally minimal. Here’s the full schema:

Column Type Example Description
wallet_address Text 0xA221674eDB403...C0c3 Ethereum wallet address to monitor. Must start with 0x.
πŸ“Œ The column header must be exactly wallet_address, lowercase, no spaces. The n8n expression ={{ $json.wallet_address }} references this exact name. If you rename it, update the Set Variables node too.

Sample sheet layout:

wallet_address
0xA221674eDB403A8F714F66Af74a2332c3CB5C0c3
0x742d35Cc6634C0532925a3b8D4C9E7A2B1234567
0x1F98431c8aD98523631AE4a59f267346ea31F984

Full System Flow

  Google Sheet (wallet addresses)
          β”‚
          β–Ό
  Row: { wallet_address: "0xA221..." }
          β”‚
          β–Ό
  Set Variables β†’ { Wallet_Address, current_date }
          β”‚
          β–Ό
  AI Agent ────► Moralis /defi/summary          β†’ protocol list
             β”œβ”€β”€β–Ί Moralis /defi/positions        β†’ supply/borrow totals
             └──► Moralis /defi/aave-v3/positions β†’ health factor, assets
          β”‚
          β–Ό
  GPT-4o-mini formats report
          β”‚
    β”Œβ”€β”€β”€β”€β”€β”΄β”€β”€β”€β”€β”€β”€β”€β”€β”€β”€β”€β”€β”€β”€β”€β”€β”€β”€β”€β”€β”€β”
    β–Ό                           β–Ό
Telegram: text message    Code Node: HTML wrap
                               β”‚
                               β–Ό
                         Gmail: HTML email

Testing Your Workflow

Run through this sequence to confirm everything is wired correctly:

  1. Add one known Aave V3 wallet to your Google Sheet (you can find examples on Etherscan by checking Aave V3 contract interactions).
  2. Click Test workflow in n8n.
  3. Watch the execution, each node should show a green checkmark.
  4. Check your Telegram, you should receive a formatted report within 15 to 30 seconds.
  5. Check your Gmail inbox, the HTML email should arrive within a minute.
Issue Likely Cause Fix
Moralis returns 401 Invalid API key Check the X-API-Key header value
AI returns “No Aave V3 positions” Wallet has no active Aave positions Use a different wallet known to have Aave V3 activity
Telegram not receiving Wrong Chat ID Message your bot first, then re-fetch via /getUpdates
Gmail auth error OAuth2 scope issue Re-authorize the Gmail credential in n8n
Google Sheets returns no rows Column header mismatch Ensure cell A1 is exactly: wallet_address

Frequently Asked Questions

How much does this cost to run?

The Moralis free tier gives you 40,000 compute units per month. Each wallet scan uses roughly 15 to 30 CU (three API calls). For 5 wallets scanned every hour: ~1,080 wallet scans/month = ~32,400 CU, comfortably within the free limit. OpenAI GPT-4o-mini costs approximately $0.0002 per report. For 5 wallets Γ— 24 hourly runs = ~$0.024/day. Well under a dollar per day.

Can I monitor wallets on other chains, not just Ethereum?

Yes. Moralis supports multiple chains including Polygon, Arbitrum, Base, Optimism, and more. You’d need to modify the API endpoint URLs to include the chain parameter (e.g., ?chain=polygon). The rest of the workflow stays the same. For a multi-chain setup, consider adding a chain column to your Google Sheet alongside wallet_address.

What happens if a wallet’s health factor drops below 1.2?

The AI Agent is instructed to flag this with a ⚠️ warning in the Telegram message and email. However, this workflow is a monitoring system: it doesn’t automatically add collateral or repay debt. If you want automated liquidation protection, you’d need to extend the workflow with an Aave protocol interaction node (which requires additional DeFi-specific tooling).

Can I add more wallets without restarting the workflow?

Yes, that’s the whole point of the Google Sheets design. Just add a new row to your sheet with the wallet address. The next scheduled run will pick it up automatically. No changes to n8n required.

Can I run this more frequently than every hour?

Absolutely. Open the Schedule Trigger node and change the interval to 30 minutes, 15 minutes, or even every 5 minutes. Just be mindful of your Moralis API usage at higher frequencies.

Is gpt-4o-mini accurate enough for DeFi data analysis?

GPT-4o-mini is not doing the math; it’s formatting pre-calculated data from Moralis. The health factor, supply/borrow values, and liquidation thresholds come directly from Moralis’s API (which sources from on-chain data). GPT-4o-mini just turns that structured data into readable text. Accuracy of the underlying numbers is entirely dependent on Moralis data quality, which is production-grade.

Get the Ready-Made Template

πŸš€ AAVE Portfolio AI Agent: n8n Template

Skip the 45-minute build. Get the complete, importable workflow JSON plus a Setup Guide PDF and Credentials Guide PDF. Works on n8n Cloud and self-hosted.

Download the Template β†’

Instant download Β· One-time purchase Β· Lifetime access

What’s Next

  • Multi-chain support: Extend the Moralis calls to Polygon or Arbitrum by adding a ?chain=polygon parameter and a chain column in your Google Sheet.
  • Slack alerts: Replace or add a Slack node alongside the Telegram node to notify your team’s DeFi channel.
  • Notion dashboard: Store each report run in a Notion database for historical health factor tracking and trend analysis.
  • Threshold alerts only: Add an IF node before the Telegram/email nodes so you only get notified when the health factor falls below a custom threshold (e.g., 1.3), reducing notification noise.

How to Auto-Send Invoices on Stripe Payment with n8n and Gmail

New to n8n? Start with our step-by-step setup guide, then come back to build this workflow.

Every successful Stripe payment should trigger a professional invoice, but wiring that up manually is tedious and error-prone. Maybe you’re copying payment details into a Google Doc, exporting Stripe receipts one by one, or worse, forgetting to send invoices entirely. Your customers deserve better, and your bookkeeping shouldn’t depend on you remembering to open a spreadsheet at 11 PM.

In this guide, you’ll build an n8n workflow that listens for Stripe payments in real time, generates a polished HTML invoice, emails it to the customer through Gmail, and logs every transaction to Google Sheets, all without writing a single line of code outside the workflow editor. The whole thing runs on autopilot once you flip the switch.

Prefer to skip the setup? Grab the ready-made template β†’ and be up and running in under 10 minutes.

What You’ll Build

  1. A customer completes a payment on your Stripe-powered site or app.
  2. Stripe fires a webhook to your n8n instance within seconds.
  3. n8n validates the event, extracts the payment details, and generates a branded HTML invoice.
  4. The invoice is emailed to the customer via your Gmail account: professional layout, correct amounts, zero manual effort.
  5. Every payment is simultaneously logged to a Google Sheet so you have a running financial record.

How It Works: The Big Picture

The workflow is a single linear pipeline with one branch at the end. Stripe pushes the data in, n8n processes it, and two outputs happen in parallel: the customer gets their invoice, and your spreadsheet gets a new row.

β”Œβ”€β”€β”€β”€β”€β”€β”€β”€β”€β”€β”€β”€β”€β”€β”€β”€β”€β”€β”€β”€β”€β”€β”€β”€β”€β”€β”€β”€β”€β”€β”€β”€β”€β”€β”€β”€β”€β”€β”€β”€β”€β”€β”€β”€β”€β”€β”€β”€β”€β”€β”€β”€β”€β”€β”€β”€β”€β”€β”€β”€β”€β”€β”€β”€β”€β”€β”€β”€β”€β”€β”€β”€β”€β”€β”€β”
β”‚  AUTO-SEND INVOICES ON STRIPE PAYMENT                                     β”‚
β”‚                                                                           β”‚
β”‚  [Stripe Webhook] β†’ [Validate Event] β†’ [Extract Details] β†’ [Build Email] β”‚
β”‚                                                              ↓         ↓  β”‚
β”‚                                                     [Send Gmail]  [Log to β”‚
β”‚                                                                   Sheets] β”‚
β””β”€β”€β”€β”€β”€β”€β”€β”€β”€β”€β”€β”€β”€β”€β”€β”€β”€β”€β”€β”€β”€β”€β”€β”€β”€β”€β”€β”€β”€β”€β”€β”€β”€β”€β”€β”€β”€β”€β”€β”€β”€β”€β”€β”€β”€β”€β”€β”€β”€β”€β”€β”€β”€β”€β”€β”€β”€β”€β”€β”€β”€β”€β”€β”€β”€β”€β”€β”€β”€β”€β”€β”€β”€β”€β”€β”˜
  

What You’ll Need

  • A Stripe account with at least one product or payment link configured. Free to set up. You only need access to the Developers β†’ Webhooks section.
  • A Gmail account for sending invoices. Any Google Workspace or personal Gmail works.
  • A Google Sheets spreadsheet to serve as your payment log. Create a blank sheet named “Payments” with the column headers listed in the Data Structure section below.
  • An n8n instance, self-hosted or n8n Cloud. The webhook node needs to be publicly reachable so Stripe can POST to it.

Estimated build time: 25 to 35 minutes from scratch, or under 10 minutes with the template.

Building the Workflow Step by Step

1 Stripe Payment Webhook (Webhook)

This is your entry point. The Webhook node creates a unique URL that Stripe will POST to every time a payment event occurs. Once the workflow is active, n8n listens at this URL around the clock.

  1. Add a Webhook node to the canvas.
  2. Set HTTP Method to POST.
  3. Set Path to stripe-invoice-webhook (or any slug you prefer).
  4. Leave Response Mode as “When node receives data”. This immediately returns a 200 OK to Stripe so it doesn’t retry.
  5. Save the workflow and copy the Production URL shown at the top of the node panel.

After completing this step, the webhook data structure will look like this when Stripe sends a payment_intent.succeeded event:

{
  "id": "evt_3PqR7sLk2xYaB9c0",
  "type": "payment_intent.succeeded",
  "data": {
    "object": {
      "id": "pi_1NrQ8fLk2xYaB9c0RvK4mT3z",
      "amount": 4999,
      "currency": "usd",
      "receipt_email": "james.carter@gmail.com",
      "billing_details": {
        "name": "James Carter",
        "email": "james.carter@gmail.com"
      },
      "description": "Pro Plan β€” Annual Subscription",
      "payment_method_types": ["card"]
    }
  }
}
πŸ’‘

Tip: In Stripe Dashboard β†’ Developers β†’ Webhooks, create a new endpoint with the production URL you copied. Select only the payment_intent.succeeded event. This keeps your webhook focused and avoids processing events you don’t need.

2 Validate Payment Event (IF)

Stripe might send test events, retries, or events you didn’t filter at the dashboard level. This IF node acts as a gatekeeper. It only lets payment_intent.succeeded events through.

  1. Add an IF node and connect it to the webhook output.
  2. Set the condition: {{ $json.type }} equals payment_intent.succeeded.
  3. The “true” branch continues to the next step. The “false” branch ends silently, no action needed for irrelevant events.
πŸ’‘

Tip: If you also sell subscriptions and want to handle recurring invoice payments, you can add a second condition for invoice.payment_succeeded and adjust the data extraction accordingly.

3 Extract Payment Details (Code)

Stripe’s webhook payloads are deeply nested. This Code node reaches into the payload, pulls out the fields you actually need, generates a unique invoice number, and packages everything into a flat, clean object that downstream nodes can reference easily.

  1. Add a Code node and connect it to the “true” output of the IF node.
  2. Paste the extraction script (included in the template). It does the following:
    • Extracts amount (converts from cents to dollars), currency, customer_email, customer_name, and description.
    • Generates an invoice number in the format INV-YYYYMMDD-HHMMSS.
    • Throws an error if no customer email is found, you can’t send an invoice without a recipient.

After extraction, the data looks like this:

{
  "invoice_number": "INV-20260409-143022",
  "payment_id": "pi_1NrQ8fLk2xYaB9c0RvK4mT3z",
  "amount": "49.99",
  "currency": "USD",
  "customer_email": "james.carter@gmail.com",
  "customer_name": "James Carter",
  "description": "Pro Plan β€” Annual Subscription",
  "payment_method": "card",
  "payment_date": "April 9, 2026",
  "status": "Paid"
}
πŸ“Œ

Stripe stores amounts in the smallest currency unit (cents for USD). The code divides by 100 so your invoice shows $49.99 instead of 4999.

4 Build Invoice Email (Code)

This is where the magic happens. A second Code node takes the clean payment data and assembles a fully styled HTML invoice that renders beautifully in every major email client: Gmail, Outlook, Apple Mail, and mobile.

  1. Add another Code node after Extract Payment Details.
  2. Paste the invoice template script (included in the template). Customize the company details at the top of the script:
    • company.name: your business name
    • company.address and company.city: your business address
    • company.email: your billing email
    • company.color: your brand’s primary hex color (default is #2563EB)

The template produces a clean invoice with a colored header bar, from/to addresses, a line-item table, a total amount callout, and a thank-you footer. It also generates a plain-text fallback for email clients that don’t render HTML.

πŸ’‘

Tip: The invoice uses inline CSS (not external stylesheets) because that’s what email clients require. If you want to tweak colors or fonts, edit the style attributes directly in the HTML string.

5 Send Invoice to Customer (Gmail)

The Gmail node sends the HTML invoice as a rich email. No PDF attachment needed. The invoice renders directly in the email body, which is how most modern billing systems (Stripe, Paddle, Gumroad) handle it.

  1. Add a Gmail node. Connect it to the Build Invoice Email output.
  2. Select your Gmail OAuth2 credential (or create one, see the Credentials Guide).
  3. Set To to the expression {{ $json.customer_email }}.
  4. Set Subject to {{ $json.email_subject }}.
  5. Set Message to {{ $json.invoice_html }}.
  6. Under Options, turn off “Append n8n attribution” if you want a clean footer.
πŸ“Œ

Gmail’s sending limits: personal Gmail allows ~500 emails/day; Google Workspace allows ~2,000/day. If you process more payments than that, consider using an SMTP node with a transactional email service like SendGrid or Mailgun instead.

6 Log Payment to Google Sheets (Google Sheets)

Every invoice should leave a paper trail. This Google Sheets node appends a row to your payment log spreadsheet, giving you a live financial record that’s easy to search, filter, and export for accounting.

  1. Add a Google Sheets node. Connect it to the same Build Invoice Email output (it runs in parallel with the Gmail node).
  2. Select your Google Sheets OAuth2 credential.
  3. Set Operation to “Append or Update Row”.
  4. Choose your spreadsheet and select the “Payments” sheet.
  5. Map each column to its corresponding expression: Invoice Number β†’ {{ $json.invoice_number }}, and so on for all 10 columns.

The Data Structure

Create a Google Sheets spreadsheet with a sheet named Payments. Add these column headers in row 1:

Column Type Example Description
Invoice Number Text INV-20260409-143022 Unique invoice identifier generated by the workflow
Payment ID Text pi_1NrQ8fLk2xYaB9c0RvK4mT3z Stripe PaymentIntent ID for cross-referencing
Customer Name Text James Carter Name from Stripe billing details
Customer Email Email james.carter@gmail.com Where the invoice was sent
Amount Number 49.99 Payment amount in currency units (not cents)
Currency Text USD Three-letter currency code
Description Text Pro Plan, Annual Subscription What the customer paid for
Payment Method Text card How the customer paid
Date Date April 9, 2026 Human-readable payment date
Status Text Paid Always “Paid” since we only process successful payments
πŸ“Œ

Column names must match exactly. The Google Sheets node maps data by header name. Copy-paste them from the table above to avoid typos.

Here’s what a few rows look like after the workflow runs:

Invoice Number Customer Name Amount Currency Date Status
INV-20260409-143022 James Carter 49.99 USD April 9, 2026 Paid
INV-20260409-151247 Emily Rodriguez 149.00 USD April 9, 2026 Paid
INV-20260410-091530 Michael Chen 29.99 USD April 10, 2026 Paid

Full System Flow

β”Œβ”€β”€β”€β”€β”€β”€β”€β”€β”€β”€β”€β”€β”€β”€β”€β”€β”€β”€β”€β”€β”€β”€β”€β”€β”€β”€β”€β”€β”€β”€β”€β”€β”€β”€β”€β”€β”€β”€β”€β”€β”€β”€β”€β”€β”€β”€β”€β”€β”€β”€β”€β”€β”€β”€β”€β”€β”€β”€β”€β”€β”€β”€β”€β”€β”€β”€β”€β”€β”€β”€β”€β”€β”€β”€β”€β”€β”€β”
β”‚                                                                             β”‚
β”‚  STRIPE DASHBOARD                        n8n WORKFLOW                       β”‚
β”‚  ───────────────                         ────────────                       β”‚
β”‚                                                                             β”‚
β”‚  Customer pays $49.99                                                       β”‚
β”‚       β”‚                                                                     β”‚
β”‚       β–Ό                                                                     β”‚
β”‚  payment_intent.succeeded ──POST──→ [Stripe Payment Webhook]               β”‚
β”‚                                           β”‚                                 β”‚
β”‚                                           β–Ό                                 β”‚
β”‚                                    [Validate Payment Event]                 β”‚
β”‚                                      β”‚ type == "payment_intent.succeeded"?  β”‚
β”‚                                      β”‚                                      β”‚
β”‚                                  YES β–Ό           NO β†’ (end)                 β”‚
β”‚                                    [Extract Payment Details]                β”‚
β”‚                                      β”‚ invoice_number, amount, email...     β”‚
β”‚                                      β”‚                                      β”‚
β”‚                                      β–Ό                                      β”‚
β”‚                                    [Build Invoice Email]                    β”‚
β”‚                                      β”‚ HTML invoice + plain text            β”‚
β”‚                                      β”‚                                      β”‚
β”‚                                 β”Œβ”€β”€β”€β”€β”΄β”€β”€β”€β”€β”                                β”‚
β”‚                                 β–Ό         β–Ό                                β”‚
β”‚                          [Send Gmail]  [Log to Sheets]                     β”‚
β”‚                              β”‚              β”‚                               β”‚
β”‚                              β–Ό              β–Ό                               β”‚
β”‚                     Customer receives   Row added to                        β”‚
β”‚                     invoice email       Payments sheet                      β”‚
β”‚                                                                             β”‚
β””β”€β”€β”€β”€β”€β”€β”€β”€β”€β”€β”€β”€β”€β”€β”€β”€β”€β”€β”€β”€β”€β”€β”€β”€β”€β”€β”€β”€β”€β”€β”€β”€β”€β”€β”€β”€β”€β”€β”€β”€β”€β”€β”€β”€β”€β”€β”€β”€β”€β”€β”€β”€β”€β”€β”€β”€β”€β”€β”€β”€β”€β”€β”€β”€β”€β”€β”€β”€β”€β”€β”€β”€β”€β”€β”€β”€β”€β”˜
  

Testing Your Workflow

  1. Activate the workflow in n8n (toggle the Active switch).
  2. Send a test event from Stripe: Go to Stripe Dashboard β†’ Developers β†’ Webhooks β†’ select your endpoint β†’ click “Send test webhook” β†’ choose payment_intent.succeeded.
  3. Check your Gmail: you should receive the invoice email within a few seconds. Open it and verify the layout renders correctly.
  4. Check your Google Sheet: a new row should appear in the Payments sheet with the test data.
  5. Make a real test payment using Stripe’s test mode (card number 4242 4242 4242 4242) to verify the full end-to-end flow with real data.
Problem Likely Cause Fix
Webhook not triggering Workflow is not active, or Stripe has the wrong URL Make sure the workflow is toggled ON. Copy the production URL (not the test URL) and verify it matches what’s in Stripe Webhooks.
Email not received Gmail credential expired or customer_email is empty Re-authorize your Gmail OAuth2 credential. Check the Stripe PaymentIntent, make sure receipt_email or billing_details.email is set.
Google Sheet not updating Column names don’t match or sheet name is wrong Verify the sheet is named exactly “Payments” and that column headers match the mapping in the node (case-sensitive).
Invoice shows $0.00 Test event doesn’t include real amount data Stripe’s “Send test webhook” uses placeholder data. Make a test payment in Stripe test mode instead.
Error: “No customer email found” PaymentIntent was created without an email When creating PaymentIntents via API, always set receipt_email. For Checkout Sessions, email is collected automatically.

Frequently Asked Questions

Does this work with Stripe Checkout Sessions or only direct PaymentIntents?

It works with both. Stripe Checkout Sessions create a PaymentIntent under the hood, so a payment_intent.succeeded event fires either way. The customer email is automatically captured during checkout.

Can I add my company logo to the invoice?

Yes. In the “Build Invoice Email” code node, replace the company name text in the header with an <img> tag pointing to a publicly hosted version of your logo. Most email clients render images up to 600px wide reliably.

What if I need to send a PDF attachment instead of an HTML email?

You can add an HTTP Request node between the Build Invoice Email and Gmail nodes that calls a PDF conversion API (like html2pdf.app or DocRaptor). The API returns a binary PDF that you attach to the email. The template’s HTML is already designed to render well in PDF format.

Will this handle international currencies and non-USD payments?

Yes. The workflow reads the currency field directly from Stripe and displays it on the invoice. It works with EUR, GBP, JPY, and every other currency Stripe supports. The cent-to-unit conversion (dividing by 100) works for all standard currencies. For zero-decimal currencies like JPY, you’d want to skip the division in the Code node.

What happens if my n8n instance is down when a payment comes in?

Stripe automatically retries failed webhook deliveries for up to 3 days with exponential backoff. When your n8n instance comes back online, it will receive the event and process it normally. No payments are lost.

Can I customize the invoice design to match my brand?

The Build Invoice Email node uses a single company.color variable that controls the header, accent, and total amount colors. Change it to your brand hex code and the entire invoice updates. You can also edit fonts, spacing, and layout by modifying the inline CSS in the HTML template.

Get the Stripe Auto-Invoice Template

Skip the setup and get the complete workflow JSON, a pre-built Google Sheets template, step-by-step setup guide, and credentials walkthrough. Import it into n8n and start sending invoices in under 10 minutes.

Get the Template β†’

Instant download Β· Works on n8n Cloud and self-hosted

What’s Next?

  • Add refund handling: Listen for charge.refunded events and send a credit note email using the same invoice template with a negative amount.
  • Multi-currency formatting: Add a Code node that formats amounts with the correct currency symbol ($, €, Β£) and decimal conventions based on the currency field.
  • Monthly revenue dashboard: Use a scheduled trigger to pull data from your Payments sheet weekly and send a summary report to your Slack or email.
  • Overdue payment reminders: For invoices tied to subscriptions, build a companion workflow that checks for failed payments and sends polite reminder emails.
n8n
Stripe
Gmail
Google Sheets
invoices
payment automation
webhooks

How to Build an Aave DeFi Portfolio Monitor with n8n and AI

New to n8n? Start with our step-by-step setup guide, then come back to build this workflow.

Build an automated Aave V3 portfolio monitoring system using n8n, GPT-4o-mini, and the Moralis API. This guide walks you through creating a professional-grade workflow that analyzes your DeFi positions hourly and delivers insights via Telegram and email.

What You’ll Build: A scheduled workflow that reads your Ethereum wallet addresses from Google Sheets, queries the Moralis API for real-time Aave V3 data, uses AI to synthesize insights about health factors and liquidation risk, and automatically sends reports to your phone via Telegram and detailed records via Gmail.

Key Features:

  • Hourly automated execution with zero manual intervention
  • Multi-wallet support: monitor as many positions as you need
  • AI-powered analysis using GPT-4o-mini for intelligent insights
  • Real-time Aave V3 data including health factors and collateral breakdown
  • Dual delivery: Telegram for quick alerts, email for detailed records

Requirements: n8n account, Google Sheets API, OpenAI API key, Moralis API key, Telegram Bot, and Gmail account. No coding experience needed.

Get Started: Download the complete workflow template including setup guide and credentials walkthrough at: easyworkflows.net/downloads/aave-defi-portfolio-ai-agent-n8n/

How to Auto-Extract Invoice Data from PDF with AI Using n8n

New to n8n? Start with our step-by-step setup guide, then come back to build this workflow.

Every month, the same grind: open an email, download the PDF, squint at the invoice number, manually type the amount into a spreadsheet, and pray you didn’t transpose a digit. If your business processes more than a handful of invoices per week, that manual routine is silently eating hours you could spend on work that actually matters. What if every PDF invoice that landed in your inbox was automatically read, parsed, and filed into a clean database, without you touching it once?

That’s exactly what you’ll build in this guide. Using n8n, OpenAI’s GPT-4o mini, and Airtable, you’ll create a workflow that watches your Gmail inbox for invoice emails, extracts text from attached PDFs, sends that text to AI for structured parsing, and logs every field (vendor name, invoice number, amounts, line items, due dates) into an Airtable base. The whole thing runs on autopilot every 30 minutes.

Prefer to skip the setup? Grab the ready-made template β†’ and be up and running in under 10 minutes.

What You’ll Build

  1. A schedule trigger checks your Gmail inbox every 30 minutes for unread emails with PDF attachments matching invoice-related subjects.
  2. The workflow downloads the PDF, extracts raw text, and sends it to OpenAI with a carefully tuned prompt that returns structured JSON: vendor name, invoice number, dates, amounts, line items, and payment status.
  3. A Code node validates and formats the AI output, then pushes a clean record into your Airtable base with 13 fields covering every detail you’d normally type by hand.
  4. The source email is marked as read so it won’t be processed twice.

How It Works: The Big Picture

The workflow runs as a single linear pipeline with one conditional branch. Emails without PDF attachments are silently skipped, while PDFs flow through extraction, AI parsing, and database logging.

β”Œβ”€β”€β”€β”€β”€β”€β”€β”€β”€β”€β”€β”€β”€β”€β”€β”€β”€β”€β”€β”€β”€β”€β”€β”€β”€β”€β”€β”€β”€β”€β”€β”€β”€β”€β”€β”€β”€β”€β”€β”€β”€β”€β”€β”€β”€β”€β”€β”€β”€β”€β”€β”€β”€β”€β”€β”€β”€β”€β”€β”€β”€β”€β”€β”€β”€β”€β”€β”€β”€β”€β”€β”€β”€β”€β”
β”‚  INVOICE DATA EXTRACTOR β€” AI POWERED                                     β”‚
β”‚                                                                          β”‚
β”‚  [Schedule]  β†’  [Gmail: Fetch]  β†’  [IF: Has PDF?]                       β”‚
β”‚                                         β”‚ Yes          β”‚ No              β”‚
β”‚                                         ↓              ↓                β”‚
β”‚                                  [Extract PDF]    [Skip]                β”‚
β”‚                                         ↓                               β”‚
β”‚                                  [OpenAI: Parse]                        β”‚
β”‚                                         ↓                               β”‚
β”‚                                  [Code: Format]                         β”‚
β”‚                                         ↓                               β”‚
β”‚                                  [Airtable: Save]                       β”‚
β”‚                                         ↓                               β”‚
β”‚                                  [Gmail: Mark Read]                     β”‚
β””β”€β”€β”€β”€β”€β”€β”€β”€β”€β”€β”€β”€β”€β”€β”€β”€β”€β”€β”€β”€β”€β”€β”€β”€β”€β”€β”€β”€β”€β”€β”€β”€β”€β”€β”€β”€β”€β”€β”€β”€β”€β”€β”€β”€β”€β”€β”€β”€β”€β”€β”€β”€β”€β”€β”€β”€β”€β”€β”€β”€β”€β”€β”€β”€β”€β”€β”€β”€β”€β”€β”€β”€β”€β”€β”˜
  

What You’ll Need

  • n8n: self-hosted or cloud (version 1.0 or higher)
  • Gmail account: with OAuth2 credentials configured in n8n
  • OpenAI API key: with access to the gpt-4o-mini model (or gpt-4o for higher accuracy on complex invoices)
  • Airtable account: free tier works fine; you’ll need one base with a table matching the schema below

Estimated build time: 30 to 45 minutes from scratch, or under 10 minutes with the template.

Building the Workflow

1 Check Inbox Every 30 Minutes (Schedule Trigger)

This node kicks off the workflow on a regular interval. Open n8n, create a new workflow, and add a Schedule Trigger node. Set it to run every 30 minutes. You can adjust this later, every 15 minutes if you process high volumes, or once per hour if invoices trickle in slowly.

πŸ’‘

Tip: During testing, switch this to “manual” execution so you can trigger runs on demand without waiting for the timer.

2 Fetch Unread Invoice Emails (Gmail)

Add a Gmail node and set the operation to Get Many. This node searches your inbox for unread emails that have PDF attachments and match invoice-related subject lines. Configure it as follows:

  • Limit: 10 (processes up to 10 emails per run)
  • Search query: has:attachment filename:pdf is:unread subject:(invoice OR receipt OR bill)
  • Download Attachments: Enabled, with prefix attachment_

The search query is the key here: it filters for only unread emails containing a PDF file whose subject mentions “invoice,” “receipt,” or “bill.” You can customize these keywords to match the vocabulary your vendors use.

{
  "id": "18e3a5b7c9d2f100",
  "subject": "Invoice #INV-2026-0847 from Acme Supplies",
  "from": { "emailAddress": "billing@acmesupplies.com" },
  "attachment_0": {
    "fileName": "INV-2026-0847.pdf",
    "mimeType": "application/pdf"
  }
}
πŸ’‘

Tip: If you receive invoices from specific vendors, tighten the query with from:billing@vendor.com to avoid picking up random PDFs like flight confirmations.

3 Has PDF Attachment? (IF Node)

Add an IF node to verify that the attachment is actually a PDF. Check that attachment_0.mimeType equals application/pdf. Emails that pass go to the extraction step. Emails that fail (wrong attachment type, or the attachment was an image) are routed to a No Operation node and silently skipped.

πŸ“Œ

This guard prevents errors downstream. Some emails match the search query but attach Excel files or images instead of PDFs, and the IF node filters those out cleanly.

4 Extract Text from PDF (Extract From File)

Add an Extract From File node. Set the operation to PDF and the binary property name to attachment_0 (matching the prefix you set in the Gmail node). This node converts the PDF binary data into raw text that the AI can read.

After this node runs, the output looks like this:

{
  "data": "INVOICE\nAcme Supplies Inc.\n742 Evergreen Terrace\nSpringfield, IL 62704\n\nBill To: Carter & Associates LLC\nInvoice #: INV-2026-0847\nDate: March 28, 2026\nDue Date: April 27, 2026\n\nDescription          Qty    Price     Amount\nConsulting Services    40   $150.00   $6,000.00\nSoftware License        1   $499.00     $499.00\n\nSubtotal: $6,499.00\nTax (8.25%): $536.17\nTotal: $7,035.17\n\nPayment Terms: Net 30"
}
πŸ’‘

Tip: The Extract From File node works well with text-based PDFs. If your invoices are scanned images (no selectable text), you’ll need to add an OCR step before this node. Tools like Google Cloud Vision or AWS Textract can handle that.

5 Parse Invoice with AI (OpenAI)

This is where the magic happens. Add an OpenAI node configured for the Chat resource. Set the model to gpt-4o-mini (fast, cheap, and surprisingly accurate for structured extraction) and the temperature to 0.1 (low randomness = consistent output).

The prompt instructs the AI to return a strict JSON object with 12 fields covering every piece of data you’d want from an invoice. Here’s what the prompt asks for:

Field Type Example
vendor_name String Acme Supplies Inc.
vendor_address String 742 Evergreen Terrace, Springfield, IL 62704
invoice_number String INV-2026-0847
invoice_date Date 2026-03-28
due_date Date 2026-04-27
subtotal Number 6499.00
tax_amount Number 536.17
total_amount Number 7035.17
currency String USD
payment_status String unpaid
line_items Array [{description, qty, unit_price, amount}]
notes String Payment Terms: Net 30
πŸ’‘

Tip: For invoices with complex layouts or non-English text, switch the model to gpt-4o. It costs a bit more per call but handles edge cases much better. At typical invoice lengths (under 1,000 tokens), even gpt-4o costs less than a penny per invoice.

6 Format Extracted Data (Code Node)

The AI returns a JSON string inside its message content. This Code node does three things: extracts the JSON from the response (handling cases where the AI wraps it in markdown code blocks), validates each field with fallback defaults, and formats the line items array into a human-readable string for Airtable’s long text field.

The node also carries forward metadata from the original email (the subject line and sender address) so you always know where each invoice came from.

{
  "vendor_name": "Acme Supplies Inc.",
  "invoice_number": "INV-2026-0847",
  "invoice_date": "2026-03-28",
  "due_date": "2026-04-27",
  "subtotal": 6499.00,
  "tax_amount": 536.17,
  "total_amount": 7035.17,
  "currency": "USD",
  "payment_status": "unpaid",
  "line_items_text": "1. Consulting Services β€” Qty: 40 Γ— $150 = $6000\n2. Software License β€” Qty: 1 Γ— $499 = $499",
  "notes": "Payment Terms: Net 30",
  "source_email_from": "billing@acmesupplies.com",
  "processed_at": "2026-04-08T14:30:00.000Z"
}

7 Save to Airtable

Add an Airtable node set to the Create operation. Point it at your base and table, then map each field from the Code node output to the corresponding Airtable column. The mapping uses n8n expressions like ={{ $json.vendor_name }} to pull values dynamically.

Every processed invoice becomes a new row in your Airtable base, fully structured, searchable, and ready for reporting.

πŸ“Œ

Make sure your Airtable column names match exactly, including capitalization and spaces. “Invoice Number” is not the same as “invoice_number” in Airtable.

8 Mark Email as Read (Gmail)

The final node marks the original email as read so it won’t be picked up again on the next run. It references the email ID from the “Fetch Unread Invoice Emails” node using the expression ={{ $('Fetch Unread Invoice Emails').item.json.id }}.

πŸ’‘

Tip: Want extra safety? Add a Gmail “Add Label” step before this one to move processed emails into a “Processed Invoices” label. That gives you an audit trail even if something goes wrong with Airtable.

The Data Structure

Before activating the workflow, create an Airtable base called “Invoice Tracker” with a single table named “Invoices” using this schema:

Column Type Example Description
Vendor Name Single line text Acme Supplies Inc. Company that issued the invoice
Invoice Number Single line text INV-2026-0847 Unique invoice identifier
Invoice Date Date 2026-03-28 Date the invoice was issued
Due Date Date 2026-04-27 Payment deadline
Subtotal Currency $6,499.00 Amount before tax
Tax Currency $536.17 Tax amount
Total Amount Currency $7,035.17 Final amount due
Currency Single line text USD Currency code
Payment Status Single select unpaid Options: paid, unpaid, unknown
Line Items Long text 1. Consulting, 40 Γ— $150 Formatted breakdown of charges
Notes Long text Net 30 Payment terms, PO numbers, etc.
Source Email Email billing@acmesupplies.com Sender of the original email
Processed At Date 2026-04-08 Timestamp when the workflow ran
πŸ“Œ

Column names must match the mapping in the Airtable node exactly. The easiest way: duplicate the table from the template’s included Airtable CSV, or create columns one by one following this schema.

Full System Flow

β”Œβ”€β”€β”€β”€β”€β”€β”€β”€β”€β”€β”€β”€β”€β”€β”€β”€β”€β”€β”€β”€β”€β”€β”€β”€β”€β”€β”€β”€β”€β”€β”€β”€β”€β”€β”€β”€β”€β”€β”€β”€β”€β”€β”€β”€β”€β”€β”€β”€β”€β”€β”€β”€β”€β”€β”€β”€β”€β”€β”€β”€β”€β”€β”€β”€β”€β”€β”€β”€β”€β”€β”€β”€β”€β”€β”€β”€β”€β”€β”
β”‚                                                                              β”‚
β”‚   GMAIL INBOX                          AIRTABLE                             β”‚
β”‚   β”Œβ”€β”€β”€β”€β”€β”€β”€β”€β”€β”€β”€β”€β”€β”€β”                     β”Œβ”€β”€β”€β”€β”€β”€β”€β”€β”€β”€β”€β”€β”€β”€β”€β”€β”€β”€β”                 β”‚
β”‚   β”‚ Unread email  β”‚                     β”‚ Invoice Tracker   β”‚                β”‚
β”‚   β”‚ + PDF attach  β”‚                     β”‚ β”Œβ”€β”€β”€β”€β”€β”€β”€β”€β”€β”€β”€β”€β”€β”€β” β”‚                β”‚
β”‚   β””β”€β”€β”€β”€β”€β”€β”¬β”€β”€β”€β”€β”€β”€β”€β”˜                     β”‚ β”‚ Vendor: Acme β”‚ β”‚                β”‚
β”‚          ↓                             β”‚ β”‚ #INV-0847    β”‚ β”‚                β”‚
β”‚   [Schedule: 30 min]                   β”‚ β”‚ $7,035.17    β”‚ β”‚                β”‚
β”‚          ↓                             β”‚ β””β”€β”€β”€β”€β”€β”€β”€β”€β”€β”€β”€β”€β”€β”€β”˜ β”‚                β”‚
β”‚   [Gmail: Fetch unread]                 β””β”€β”€β”€β”€β”€β”€β”€β”€β–²β”€β”€β”€β”€β”€β”€β”€β”€β”€β”˜                β”‚
β”‚          ↓                                       β”‚                          β”‚
β”‚   [IF: Has PDF?]──No──→ [Skip]                   β”‚                          β”‚
β”‚          β”‚ Yes                                   β”‚                          β”‚
β”‚          ↓                                      β”‚                          β”‚
β”‚   [Extract PDF Text]                            β”‚                          β”‚
β”‚          ↓                                      β”‚                          β”‚
β”‚   [OpenAI: Parse JSON]                          β”‚                          β”‚
β”‚          ↓                                      β”‚                          β”‚
β”‚   [Code: Format Data]β”€β”€β”€β”€β”€β”€β”€β”€β”€β”€β”€β”€β”€β”€β”€β”€β”€β”€β”€β”€β”€β”€β”€β”€β”€β”€β†’β”˜                          β”‚
β”‚          ↓                                                                 β”‚
β”‚   [Gmail: Mark Read]                                                       β”‚
β”‚                                                                              β”‚
β””β”€β”€β”€β”€β”€β”€β”€β”€β”€β”€β”€β”€β”€β”€β”€β”€β”€β”€β”€β”€β”€β”€β”€β”€β”€β”€β”€β”€β”€β”€β”€β”€β”€β”€β”€β”€β”€β”€β”€β”€β”€β”€β”€β”€β”€β”€β”€β”€β”€β”€β”€β”€β”€β”€β”€β”€β”€β”€β”€β”€β”€β”€β”€β”€β”€β”€β”€β”€β”€β”€β”€β”€β”€β”€β”€β”€β”€β”€β”˜
  

Testing Your Workflow

  1. Send yourself a test email with a sample PDF invoice attached. Use a subject line like “Invoice #TEST-001 from Test Vendor” so it matches the search query.
  2. In n8n, click Test Workflow (the play button) to trigger a manual run.
  3. Watch the execution. Each node should show a green checkmark. Click any node to inspect its output data.
  4. Check your Airtable base. You should see a new row with all 13 fields populated from the test invoice.
  5. Verify the original email is now marked as read in Gmail.
Problem Likely Cause Fix
Gmail node returns 0 items No unread emails match the search query Send a test email with “invoice” in the subject and a PDF attached, then wait a moment for Gmail to index it
Extract From File returns empty text The PDF is a scanned image, not text-based Add an OCR step (Google Cloud Vision or AWS Textract) before the extraction node
OpenAI returns malformed JSON Invoice text was too garbled or incomplete Check the extracted text. If it’s unreadable, the source PDF may need OCR. Also try switching to gpt-4o for better handling
Airtable node fails with “field not found” Column name mismatch between n8n mapping and Airtable Compare column names character by character, watching for extra spaces, capitalization differences, or missing columns
Same invoice processed twice Mark as Read step failed or email wasn’t marked before the next scheduled run Check the Gmail node credentials have write permissions. Consider adding a label-based filter as a secondary guard

Frequently Asked Questions

How much does each invoice cost to process with OpenAI?

Very little. A typical invoice is 300 to 800 tokens of input text. With GPT-4o mini at $0.15 per million input tokens, processing one invoice costs roughly $0.0001, less than a hundredth of a penny. Even at 1,000 invoices per month, your OpenAI bill would be under $0.50.

Does this work with scanned PDF invoices (images, not text)?

The Extract From File node handles text-based PDFs natively. For scanned invoices where the text is embedded in an image, you’ll need to add an OCR step before extraction. Google Cloud Vision, AWS Textract, or the n8n HTTP Request node calling an OCR API all work. The rest of the workflow stays the same.

Can I use Google Sheets instead of Airtable?

Yes. Replace the Airtable node with a Google Sheets “Append Row” node and map the same fields to spreadsheet columns. The rest of the workflow doesn’t need any changes. Airtable gives you richer field types (currency, single select, date pickers), but Sheets is perfectly functional.

What if I use Outlook instead of Gmail?

Swap the two Gmail nodes for their Microsoft Outlook equivalents: “Microsoft Outlook Trigger” for fetching emails and “Microsoft Outlook” for marking as read. The search query syntax differs slightly, but the concept is identical. Update the credential type in n8n accordingly.

Can the workflow handle invoices in languages other than English?

GPT-4o mini handles most major languages well. The prompt asks for specific JSON field names in English, but the AI will extract data from French, Spanish, German, and many other languages and map it into the English schema. For best results with non-Latin scripts, consider upgrading to GPT-4o.

What happens if two invoices arrive in the same email?

The current workflow processes the first PDF attachment per email. If a sender regularly attaches multiple PDFs to one email, you can modify the workflow to loop through all attachments by adding a “Split In Batches” node after the IF check and adjusting the binary property name dynamically.

Get the Invoice Data Extractor Template

Stop building from scratch and get the complete workflow JSON, Airtable schema, and step-by-step setup guides. Import it, add your credentials, and start processing invoices in under 10 minutes.

Get the Template β†’

Instant download Β· Works on n8n Cloud and self-hosted

What’s Next?

  • Add Slack notifications: send a message to your #accounting channel whenever a high-value invoice (over $5,000) is processed.
  • Auto-flag overdue invoices: add a second scheduled workflow that checks Airtable daily and flags rows where the due date has passed and payment status is still “unpaid.”
  • Build a payment approval flow: route invoices above a threshold to a manager via email for approval before marking them as “approved” in Airtable.
  • Connect to accounting software: push the structured data into QuickBooks, Xero, or FreshBooks via their APIs to eliminate double entry entirely.
n8n
PDF
OpenAI
Airtable
invoice processing
automation
AI
accounts payable

How to Build a Telegram Crypto Price Alert Bot with n8n

New to n8n? Start with our step-by-step setup guide, then come back to build this workflow.

Missing a Bitcoin pump or getting wrecked by a sudden drop you didn’t see coming. That’s the hidden cost of watching charts manually. Most crypto traders either stare at their screen all day or miss the exact moment they needed to act. This tutorial shows you how to build an automated Telegram bot that watches your chosen coins every 15 minutes and pings you the instant prices break your personal alert thresholds, or when any coin moves more than 5% in 24 hours. No coding background required. Just n8n, a free CoinGecko API key, and a Telegram bot.

Prefer to skip the setup? Grab the ready-made template β†’ and be up and running in under 10 minutes.

What You’ll Build

  1. A scheduled n8n workflow that fires every 15 minutes and fetches live prices for Bitcoin, Ethereum, Solana, BNB, and XRP from CoinGecko’s free API.
  2. A smart code node that checks each coin against your custom price thresholds (e.g., “alert me when BTC goes above $75,000 or below $55,000”) and flags any coin with a 24-hour move greater than 5%.
  3. A conditional gate that only fires when something actually matters, with no noisy, irrelevant pings.
  4. A clean, formatted Telegram message delivered straight to your phone listing current prices plus a highlighted alert block showing exactly what triggered.

How It Works: The Big Picture

The workflow is a simple five-node pipeline. A schedule wakes it up every 15 minutes, a single HTTP call fetches all prices at once, a JavaScript code node crunches the numbers against your thresholds, and an IF gate decides whether your phone needs to know about it.

β”Œβ”€β”€β”€β”€β”€β”€β”€β”€β”€β”€β”€β”€β”€β”€β”€β”€β”€β”€β”€β”€β”€β”€β”€β”€β”€β”€β”€β”€β”€β”€β”€β”€β”€β”€β”€β”€β”€β”€β”€β”€β”€β”€β”€β”€β”€β”€β”€β”€β”€β”€β”€β”€β”€β”€β”€β”€β”€β”€β”€β”€β”€β”€β”€β”€β”€β”€β”€β”€β”€β”€β”€β”€β”€β”€β”
β”‚  TELEGRAM CRYPTO PRICE ALERT BOT                                         β”‚
β”‚                                                                          β”‚
β”‚  [Schedule Trigger]  β†’  [Get Crypto Prices]  β†’  [Check Alert Thresholds] β”‚
β”‚     every 15 min          CoinGecko API           Code node (JS)         β”‚
β”‚                                                          β”‚               β”‚
β”‚                                              β”Œβ”€β”€β”€β”€β”€β”€β”€β”€β”€β”€β”€β”΄β”€β”€β”€β”€β”€β”€β”€β”€β”€β”€β”€β”   β”‚
β”‚                                         hasAlerts?               no alertβ”‚
β”‚                                              β”‚                       β”‚   β”‚
β”‚                                    [Send Alert to Telegram]   [Skip]     β”‚
β”‚                                       Telegram bot                       β”‚
β””β”€β”€β”€β”€β”€β”€β”€β”€β”€β”€β”€β”€β”€β”€β”€β”€β”€β”€β”€β”€β”€β”€β”€β”€β”€β”€β”€β”€β”€β”€β”€β”€β”€β”€β”€β”€β”€β”€β”€β”€β”€β”€β”€β”€β”€β”€β”€β”€β”€β”€β”€β”€β”€β”€β”€β”€β”€β”€β”€β”€β”€β”€β”€β”€β”€β”€β”€β”€β”€β”€β”€β”€β”€β”€β”˜

What You’ll Need

  • n8n: self-hosted or n8n Cloud (free tier works fine for this workflow)
  • CoinGecko account: free plan; no API key required for the public endpoint used here (rate limit: 10 to 30 calls/min, well within our 15-minute schedule)
  • Telegram account: you’ll create a bot via BotFather (free, takes 2 minutes)
  • Your Telegram chat ID: we’ll show you exactly how to find it below

Estimated build time: 25 to 35 minutes from scratch, or under 10 minutes with the ready-made template.

Part 1: Building the Workflow

1 Schedule Trigger (n8n-nodes-base.scheduleTrigger)

This is the heartbeat of the workflow. It wakes up n8n every 15 minutes and kicks off the entire pipeline. Add a Schedule Trigger node and configure it like this:

  • Mode: Interval
  • Every: 15 Minutes

The trigger produces a single output item with a timestamp. That’s all the next node needs. It just needs to know it’s time to fetch prices.

πŸ’‘

Tip: Prefer a 1-hour interval to reduce noise? Change the minutes value to 60. If you want minute-level granularity (great for active trading sessions), drop it to 5. CoinGecko’s free tier handles this comfortably.

2 Get Crypto Prices (n8n-nodes-base.httpRequest)

Add an HTTP Request node. This single API call fetches prices and 24-hour change data for all five coins simultaneously, with no need for separate calls per coin.

  • Method: GET
  • URL: https://api.coingecko.com/api/v3/simple/price
  • Query Parameters (add each as a separate row):
Parameter Value
ids bitcoin,ethereum,solana,binancecoin,ripple
vs_currencies usd
include_24hr_change true
include_market_cap true

No authentication needed for this endpoint. The API returns a flat JSON object where each key is a coin ID:

{
  "bitcoin":     { "usd": 67543.21, "usd_24h_change": 2.45,  "usd_market_cap": 1330000000000 },
  "ethereum":    { "usd": 3421.56,  "usd_24h_change": -1.23, "usd_market_cap": 411000000000  },
  "solana":      { "usd": 178.92,   "usd_24h_change": 6.11,  "usd_market_cap": 83000000000   },
  "binancecoin": { "usd": 587.44,   "usd_24h_change": 0.87,  "usd_market_cap": 87000000000   },
  "ripple":      { "usd": 0.5821,   "usd_24h_change": -2.34, "usd_market_cap": 32000000000   }
}
πŸ’‘

Tip: To add more coins, find their CoinGecko ID on the coin’s page (e.g., cardano, polkadot, avalanche-2) and append them comma-separated to the ids parameter. Also add matching entries to the thresholds and coinLabels objects in Step 3.

3 Check Alert Thresholds (n8n-nodes-base.code)

This is where the logic lives. Add a Code node (JavaScript mode) and paste the script below. It loops through every coin, checks prices against your thresholds, flags large 24-hour moves, and assembles a formatted Telegram message ready to send.

Here’s the config block at the top of the script, the only section you need to customize:

// ─── USER CONFIG ─────────────────────────────────────────────
const thresholds = {
  bitcoin:     { low: 55000,  high: 75000 },
  ethereum:    { low: 2800,   high: 4000  },
  solana:      { low: 120,    high: 220   },
  binancecoin: { low: 400,    high: 700   },
  ripple:      { low: 0.40,   high: 0.80  },
};

// Alert if any coin moves more than this % in 24 hours
const CHANGE_ALERT_PCT = 5;
// ─────────────────────────────────────────────────────────────

After running, the node outputs a single item with this shape:

{
  "hasAlerts":   true,
  "alertCount":  1,
  "message":     "πŸ“Š *Crypto Price Update β€” Apr 7, 02:30 PM ET*\n\n🟒 *BTC*: $67,543.21 (+2.45%)\nπŸ”΄ *ETH*: $3,421.56 (-1.23%)\n🟒 *SOL*: $178.92 (+6.11%)\n...\n\nπŸ”” *ALERTS*\n⚑ *Solana (SOL)* surged +6.11% in 24h β€” now $178.92",
  "timestamp":   "2026-04-07T18:30:00.000Z"
}
πŸ“Œ

Note: The full JavaScript code is included in the downloadable template JSON. When you import the workflow, the code node is pre-filled, so you only need to update the threshold values in the USER CONFIG block at the top.

4 Has Alerts? (n8n-nodes-base.if)

Add an IF node to act as the gate. Configure one condition:

  • Value 1: {{ $json.hasAlerts }}
  • Operator: is true

The true branch connects to the Telegram node. The false branch connects to a No-Op (do nothing) node, which prevents n8n from throwing an “unconnected branch” warning while keeping the workflow clean.

πŸ’‘

Tip: Want a periodic price summary even when no alerts fire? Connect the false branch to a second Telegram node that sends just the priceReport field instead of the full message. Great for a morning digest.

5 Send Alert to Telegram (n8n-nodes-base.telegram)

Add a Telegram node and connect it to the true output of the IF node. Before configuring it, you need a bot token and your chat ID.

Creating your Telegram bot:

  1. Open Telegram and search for @BotFather
  2. Send /newbot, give it a name (e.g., “My Crypto Alerts”) and a username ending in bot
  3. BotFather sends you a token like 7123456789:AAHxxxxxxxxxxxxxxxxxxxxxxxxxxxxxxxx, save it
  4. Start a conversation with your new bot (click “Start” or send any message)
  5. Visit https://api.telegram.org/bot<YOUR_TOKEN>/getUpdates in your browser, find your chat.id in the response (it’s a number like 123456789)

Configuring the Telegram node:

  • Credential: Create a new Telegram API credential β†’ paste your bot token
  • Chat ID: YOUR_TELEGRAM_CHAT_ID (the number you found above)
  • Text: ={{ $json.message }}
  • Additional Fields β†’ Parse Mode: Markdown

When an alert fires, the message delivered to your phone looks like this:

πŸ“Š Crypto Price Update β€” Apr 7, 02:30 PM ET

🟒 BTC: $67,543.21 (+2.45%)
πŸ”΄ ETH: $3,421.56 (-1.23%)
🟒 SOL: $178.92 (+6.11%)
🟒 BNB: $587.44 (+0.87%)
πŸ”΄ XRP: $0.58 (-2.34%)

πŸ”” ALERTS
⚑ Solana (SOL) surged +6.11% in 24h β€” now $178.92
πŸ’‘

Tip: To send alerts to a Telegram group or channel instead of just yourself, add the bot as an admin to your group, then use the group’s chat ID (starts with a minus sign, e.g., -1001234567890) as the Chat ID value.

Full System Flow

Every 15 minutes
      β”‚
      β–Ό
[Schedule Trigger]
      β”‚
      β–Ό
[HTTP Request β†’ CoinGecko API]
  GET /simple/price
  ids=bitcoin,ethereum,solana,bnb,xrp
  include_24hr_change=true
      β”‚
      β–Ό (raw price JSON)
[Check Alert Thresholds β€” Code Node]
  β”œβ”€β”€ Loop each coin
  β”œβ”€β”€ Compare price vs. low/high thresholds
  β”œβ”€β”€ Flag if |24h change| β‰₯ 5%
  β”œβ”€β”€ Build formatted Telegram message
  └── Output: { hasAlerts, message, ... }
      β”‚
      β–Ό
[Has Alerts? β€” IF Node]
  hasAlerts === true?
      β”‚                     β”‚
     YES                   NO
      β”‚                     β”‚
      β–Ό                     β–Ό
[Send Alert to Telegram]  [No-Op β€” Skip]
  Parse Mode: Markdown
  Delivered to your phone

Testing Your Workflow

Before enabling the schedule, run the workflow manually once to confirm everything is wired up correctly:

  1. Open the workflow in the n8n editor and click Test Workflow (the play button).
  2. Click on the Get Crypto Prices node, you should see live price data in the output panel on the right.
  3. Click on Check Alert Thresholds: verify the message field contains a formatted price string and that hasAlerts shows the expected value.
  4. To force an alert for testing, temporarily set a threshold your current price has already crossed, e.g., set BTC high to 1000 so it always triggers. Run again, and your Telegram should receive a message within seconds. Reset the threshold afterward.
  5. Once confirmed, toggle the workflow Active switch. It will now run automatically every 15 minutes.
Problem Likely Cause Fix
HTTP Request returns 429 CoinGecko rate limit hit Increase the schedule interval to 30 min, or sign up for a CoinGecko Demo API key and add it as a header
Telegram node says “Forbidden” Bot hasn’t been started Open Telegram, find your bot, and send it any message first, since bots can’t initiate conversations
Message sends but formatting is broken Parse Mode not set to Markdown In the Telegram node β†’ Additional Fields β†’ set Parse Mode to Markdown
No alerts ever fire Thresholds set outside realistic price ranges Check the thresholds object and make sure low/high values bracket actual current prices
Workflow runs but nothing happens IF node false branch reached (no alerts) Expected behavior. Set a temporary low threshold to trigger a test alert as described above

Frequently Asked Questions

Does this cost anything to run?

No, CoinGecko’s public API used in this workflow is completely free with no API key required. The only costs are your n8n hosting (free on self-hosted, or the n8n Cloud free tier covers this comfortably) and your Telegram bot (always free). Total running cost: $0.

Can I track more than 5 coins?

Yes. Add more coin IDs to the ids query parameter in the HTTP Request node (comma-separated, using CoinGecko’s lowercase coin IDs like cardano, chainlink, or avalanche-2). Then add matching entries to the thresholds and coinLabels objects in the Code node. CoinGecko’s free tier supports up to ~250 coin IDs per request.

Can I send alerts to multiple Telegram chats or a group?

Absolutely. Duplicate the Telegram node and set a different Chat ID for each recipient, or add your bot to a Telegram group and use the group’s chat ID (a negative number like -1001234567890). You can find a group’s chat ID the same way as your personal one: visit the getUpdates URL after the bot receives a message in the group.

What happens if CoinGecko is down when the workflow runs?

The HTTP Request node will throw an error, which n8n logs in the execution history. The workflow won’t crash permanently. It simply skips that execution and runs again 15 minutes later. For higher reliability, enable the Retry on Fail option on the HTTP Request node (set to 2 retries, 5 second delay).

Can I get alerts for percentage-based price changes rather than fixed thresholds?

Yes, the Code node already handles this. The CHANGE_ALERT_PCT constant (default: 5) fires an alert whenever any coin moves more than 5% in 24 hours, in either direction. Adjust that number to any value you prefer.

Can I use this with a CoinGecko Pro API key for more features?

Yes. If you upgrade to CoinGecko’s Demo or Pro plan, you get a personal API key that unlocks lower rate limits and additional endpoints (like real-time prices). Add it as an HTTP header named x-cg-demo-api-key in the HTTP Request node’s Headers section. The rest of the workflow stays identical.


πŸš€ Get the Telegram Crypto Price Alert Bot Template

Skip the build and get the pre-configured n8n workflow JSON, a step-by-step Setup Guide PDF, and a Credentials Guide PDF, everything you need to be live in under 10 minutes.

Get the Template β†’

Instant download Β· Works on n8n Cloud and self-hosted

What’s Next?

  • Add a daily digest: Connect the false branch of the IF node to a second Telegram send that fires a clean price summary every morning at 9 AM, regardless of alerts, using a separate Schedule Trigger.
  • Log alerts to Google Sheets: Add a Google Sheets node after the Telegram send to log every triggered alert with a timestamp. Track your alert history over time.
  • Add portfolio tracking: Extend the Code node to calculate the current USD value of your holdings (e.g., “1.5 BTC Γ— $67,543 = $101,315”) and include it in the Telegram message.
  • Connect to a trading signal: Feed alert data into a webhook that triggers a paper trade or signals a human review, building toward a semi-automated trading assistant.
n8n
Telegram
CoinGecko
crypto
price alerts
automation
no-code
trading bots

How to Auto-Process Stripe Payments and Log to Google Sheets with n8n

New to n8n? Start with our step-by-step setup guide, then come back to build this workflow.

Every Stripe payment you receive can be automatically logged to Google Sheets in real time, no manual exports, no missed transactions, no more downloading CSVs at the end of the month. With this n8n workflow, the moment a payment succeeds in Stripe, a new row appears in your spreadsheet with the customer name, email, amount, description, and payment method already filled in. If the payment is above a threshold you set, you’ll get an email alert too.

Prefer to skip the setup? Grab the ready-made template → and be up and running in under 10 minutes.

What You’ll Build

  1. A Stripe webhook listener that fires the moment a payment succeeds, no polling, no delays.
  2. A data formatting step that converts Stripe’s raw event data (amounts in cents, Unix timestamps) into clean, human-readable fields.
  3. An automatic Google Sheets append that logs every payment as a new row in a structured ledger.
  4. A conditional check that sends you an email notification for any payment over $500 so you never miss a big order.

How It Works: The Big Picture

n8n listens for Stripe’s payment_intent.succeeded webhook event. Each time a payment completes, the workflow wakes up, reformats the data into tidy fields, writes a row to your Google Sheet, then checks whether the amount qualifies as high-value, sending an alert email if so.

+----------------------------------------------------------------+
|  AUTO-PROCESS STRIPE PAYMENTS to GOOGLE SHEETS                 |
|                                                                |
|  [Stripe Trigger]                                              |
|        |  payment_intent.succeeded fires                       |
|        v                                                       |
|  [Format Payment Data]                                         |
|        |  cents-to-dollars, Unix-to-date, map fields           |
|        v                                                       |
|  [Log to Google Sheets]                                        |
|        |  append row: ID, date, name, email, amount            |
|        v                                                       |
|  [Check High Value Payment]                                    |
|        | amount >= $500?                                       |
|       YES -------------------------------------------+         |
|        |                                             v         |
|       NO (end)                        [Send High Value Alert]  |
|                                          email notification    |
+----------------------------------------------------------------+
  

What You’ll Need

  • An n8n instance: cloud or self-hosted (n8n.io; free tier works)
  • A Stripe account with at least one product or payment link set up
  • A Google account with Google Sheets access (free)
  • An SMTP account for alert emails, Gmail App Password, SendGrid, or any SMTP provider (optional but recommended)
  • A Google Sheet with the correct column headers (details in the Data Structure section below)

Estimated build time: 35 to 50 minutes from scratch, or under 10 minutes with the template.

Building the Workflow: Step by Step

1 Stripe Trigger (stripeTrigger)

This node creates a webhook endpoint in n8n that Stripe calls whenever a payment event fires. It’s the entry point for the entire workflow, everything else is downstream of this single trigger.

To configure it:

  1. In n8n, add a new node and search for Stripe Trigger.
  2. Connect your Stripe credential. If you don’t have one yet, click Create new, paste your Stripe Restricted API key (with webhook read permissions), and save.
  3. Under Events, select payment_intent.succeeded. This fires every time a payment is fully authorized and captured.
  4. Save the workflow. n8n will display a webhook URL, copy it.
  5. In your Stripe dashboard, go to Developers → Webhooks → Add endpoint, paste the n8n URL, and select the payment_intent.succeeded event.
💡

Tip: Use Stripe’s Send test webhook button right after adding the endpoint to confirm n8n receives it. You’ll see the raw payload in n8n’s execution log, this is what the next node will process.

A typical Stripe payment_intent.succeeded payload looks like this:

{
  "id": "pi_3QxT4kABCDEFGHIJ12345678",
  "object": "payment_intent",
  "amount": 4999,
  "currency": "usd",
  "status": "succeeded",
  "description": "Order #1042 β€” Premium Plan",
  "receipt_email": "emily.rodriguez@gmail.com",
  "billing_details": {
    "name": "Emily Rodriguez",
    "email": "emily.rodriguez@gmail.com"
  },
  "created": 1743865200,
  "payment_method_types": ["card"]
}

Notice that amount is in cents (4999 = $49.99) and created is a Unix timestamp. The next node handles the conversion.

2 Format Payment Data (Set)

The raw Stripe payload is useful, but messy. This Set node maps the data into clean, consistently named fields that Google Sheets can receive directly, no JavaScript required inside the sheet.

Add a Set node connected to the Stripe Trigger, then add these fields in Manual mapping mode:

Field Name n8n Expression Result Example
payment_id ={{ $json.id }} pi_3QxT4kABC…
customer_name ={{ $json.billing_details?.name || 'Unknown' }} Emily Rodriguez
customer_email ={{ $json.receipt_email || 'N/A' }} emily.rodriguez@gmail.com
amount_usd ={{ ($json.amount / 100).toFixed(2) }} 49.99
currency ={{ $json.currency.toUpperCase() }} USD
description ={{ $json.description || 'Payment' }} Order #1042, Premium Plan
status ={{ $json.status }} succeeded
payment_date ={{ new Date($json.created * 1000).toLocaleDateString('en-US') }} 4/5/2026
payment_method ={{ $json.payment_method_types?.[0] || 'card' }} card
💡

Tip: The ?.name optional chaining prevents the workflow from erroring when billing_details is null, which happens with some payment types like bank transfers. The || 'Unknown' fallback ensures your sheet always gets a value.

After this node, data looks like this:

{
  "payment_id": "pi_3QxT4kABCDEFGHIJ12345678",
  "customer_name": "Emily Rodriguez",
  "customer_email": "emily.rodriguez@gmail.com",
  "amount_usd": "49.99",
  "currency": "USD",
  "description": "Order #1042 β€” Premium Plan",
  "status": "succeeded",
  "payment_date": "4/5/2026",
  "payment_method": "card"
}

3 Log to Google Sheets (googleSheets)

This node appends a new row to your Payments sheet every time a payment is processed. It uses the Append or Update operation, if a payment ID already exists (e.g., a duplicate webhook retry), it updates the existing row instead of creating a duplicate.

  1. Add a Google Sheets node and connect your Google OAuth2 credential.
  2. Set Operation to Append or Update.
  3. Paste your Spreadsheet ID (the long string in your Google Sheet’s URL).
  4. Set Sheet Name to Payments.
  5. Under Columns, switch to Define below and map each column header to its expression from the previous Set node (e.g., Payment ID={{ $json.payment_id }}).
  6. Set Matching Columns to Payment ID so duplicate events update instead of duplicate.
📌

Note: The column headers in your Google Sheet must match exactly, including capitalization and spacing. If you name the column “payment id” (lowercase) but the node sends “Payment ID”, the data will land in the wrong column or create a new one.

4 Check High Value Payment (IF)

After logging, the workflow checks whether the payment amount is $500 or more. Payments that clear this threshold go down the true branch to trigger an email alert; all others exit quietly.

  1. Add an IF node connected to the Google Sheets node.
  2. Set the Value 1 expression to ={{ parseFloat($('Format Payment Data').item.json.amount_usd) }}.
  3. Set Operation to Greater than or equal to.
  4. Set Value 2 to 500.
💡

Tip: You can change the threshold to any amount that makes sense for your business. A SaaS charging $29/month might alert at $200; an agency billing clients might only care about payments above $2,000.

5 Send High Value Alert (emailSend)

When a payment exceeds the threshold, this node fires off an email with all the relevant details so you can follow up personally, flag the account, or just celebrate a big win.

  1. Add a Send Email node to the true output of the IF node.
  2. Connect your SMTP credential (Gmail App Password works great; see the Credentials Guide).
  3. Set From to your sender address and To to your notification email.
  4. Set Subject to: =High-Value Payment: ${{ $('Format Payment Data').item.json.amount_usd }} from {{ $('Format Payment Data').item.json.customer_name }}
  5. Add a plain-text or HTML body with all the payment fields from the Format node.

A sample alert email body:

High-Value Payment Received

Customer: James Carter
Email: james.carter@gmail.com
Amount: $1,250.00
Description: Order #2089 β€” Enterprise Annual License
Date: 4/5/2026
Payment ID: pi_3QxT4kABCDEFGHIJ12345678

The Data Structure

Your Google Sheet needs a tab named Payments with these column headers in row 1 (exact capitalization matters):

Column Header Type Example Description
Payment ID Text pi_3QxT4kABC… Stripe’s unique payment intent ID, used to deduplicate retried webhooks
Date Text 4/5/2026 US-formatted payment date derived from Stripe’s Unix timestamp
Customer Name Text Emily Rodriguez Billing name from Stripe; falls back to “Unknown” if not provided
Customer Email Text emily.rodriguez@gmail.com Receipt email address; falls back to “N/A” if absent
Amount (USD) Number 49.99 Payment amount in dollars (converted from cents)
Currency Text USD ISO currency code, uppercased
Description Text Order #1042, Premium Plan Stripe payment description or product name
Status Text succeeded Payment status from Stripe (always “succeeded” for this trigger)
Payment Method Text card Payment method type (card, bank_transfer, etc.)

Here’s what a few rows look like once data starts flowing:

Payment ID Date Customer Name Amount (USD) Status
pi_3QxT4k… 4/5/2026 Emily Rodriguez 49.99 succeeded
pi_3QxT7m… 4/5/2026 James Carter 1250.00 succeeded
pi_3QxV2n… 4/5/2026 Sarah Thompson 29.00 succeeded
📌

Create the sheet and add the column headers before activating the workflow. n8n’s Google Sheets node expects the headers to already exist in row 1, it doesn’t create them automatically.

Full System Flow

  Customer Pays via Stripe
          |
          v
  Stripe fires payment_intent.succeeded
          |
          v
  +----------------------------+
  |   n8n Stripe Trigger       |  <-- webhook endpoint registered in Stripe dashboard
  +------------+---------------+
               | raw Stripe payload (cents, Unix timestamps)
               v
  +----------------------------+
  |  Format Payment Data       |  <-- Set node: converts & maps fields
  +------------+---------------+
               | clean fields: name, email, $amount, date
               v
  +----------------------------+
  |  Log to Google Sheets      |  <-- appends or updates row by Payment ID
  +------------+---------------+
               | row written OK
               v
  +----------------------------+
  | Check High Value Payment   |  <-- IF: amount_usd >= 500?
  +------+-------------+-------+
        YES            NO
         |              |
         v             end
  +-----------------+
  | Send Alert Email|  <-- SMTP: notify you of big payment
  +-----------------+
  

Testing Your Workflow

Before going live, test with Stripe’s built-in test mode:

  1. In Stripe dashboard, switch to Test mode (toggle in the top-left).
  2. Go to Developers → Webhooks → select your endpoint → click Send test webhook → choose payment_intent.succeeded.
  3. Open n8n’s execution log, you should see the workflow trigger and all 5 nodes complete successfully.
  4. Check your Google Sheet, a new row should appear with the test payment data.
  5. To test the high-value alert, temporarily lower the threshold to $1 in the IF node, trigger another test, and check your inbox.
Problem Likely Cause Fix
Workflow doesn’t trigger at all Webhook URL not registered in Stripe, or n8n not publicly reachable Check Stripe → Webhooks; for self-hosted n8n, ensure your instance has a public URL (not localhost)
Google Sheets shows data in wrong columns Column header mismatch Check that headers in row 1 of your sheet exactly match the field names in the Set node (case-sensitive)
Amount appears as “NaN” or empty $json.amount is undefined for some event types Confirm the trigger is set to payment_intent.succeeded not charge.succeeded
Duplicate rows in Google Sheets Stripe retries the webhook if n8n doesn’t return 200 fast enough Ensure your Matching Columns is set to “Payment ID” in the Google Sheets node
High-value alert email not arriving SMTP credential invalid, or spam filter Test SMTP connection in n8n; check spam folder; use an App Password for Gmail

Frequently Asked Questions

Does this work with Stripe Checkout, Payment Links, and direct API charges?

Yes, the payment_intent.succeeded event fires for all of them. Whether the payment comes from a Stripe Checkout session, a Payment Link, a subscription renewal, or a manual API charge, a PaymentIntent is always created under the hood and this workflow will catch it.

What happens if Stripe sends the same webhook twice (retry)?

Stripe retries failed webhooks up to 3 days. Because the Google Sheets node is configured with Append or Update and Payment ID as the matching column, a duplicate event will update the existing row instead of creating a second one. Your ledger stays clean.

Can I log refunds or failed payments too?

Absolutely. In the Stripe Trigger node, add additional events: charge.refunded for refunds and payment_intent.payment_failed for failures. You can add an IF or Switch node after the trigger to route each event type to a different sheet tab.

Can I use this with n8n Cloud, or does it need to be self-hosted?

Either works. n8n Cloud instances have a public URL by default, so webhook registration in Stripe is straightforward. Self-hosted instances need a public URL too, if yours is behind a router, use a service like Cloudflare Tunnel or ngrok to expose it. Once the URL is registered, behavior is identical.

Can I send the alert to Slack instead of email?

Yes, just swap the Send Email node for a Slack node set to Post Message. Connect your Slack OAuth credential, pick your alert channel, and use the same expressions to build the message text. You can even have both: add both a Send Email and a Slack node to the true branch of the IF node.

What if a customer’s name or email is missing from the Stripe event?

The Set node uses JavaScript optional chaining (?.name) and fallback values (|| 'Unknown' and || 'N/A'). This means even if Stripe sends an event with no billing details, the workflow will still complete and log the row, just with placeholder values instead of blank cells.

🚀 Get the Stripe to Google Sheets Template

Skip the setup and get the complete n8n workflow JSON, a pre-configured Google Sheet template, a step-by-step Setup Guide PDF, and a Credentials Guide PDF, everything you need to go live in minutes.

Get the Template →

Instant download · Works on n8n Cloud and self-hosted

What’s Next?

  • Add a Slack notification for every payment (not just high-value), great for small teams who want a #payments channel in real time.
  • Create a monthly revenue summary by adding a scheduled workflow that queries your Google Sheet, calculates MRR, and emails you a report on the 1st of each month.
  • Sync to a CRM: add a HubSpot or Airtable node after the Google Sheets step to create or update a deal every time a payment lands.
  • Handle subscriptions separately: listen for invoice.payment_succeeded to capture recurring Stripe subscription payments on their own sheet tab with subscriber lifetime value tracking.
n8n
Stripe
Google Sheets
payment automation
no-code
webhooks
automation