How to Monitor RSS Feeds and Post AI Summaries to Discord with n8n

New to n8n? Start with our step-by-step setup guide, then come back to build this workflow.

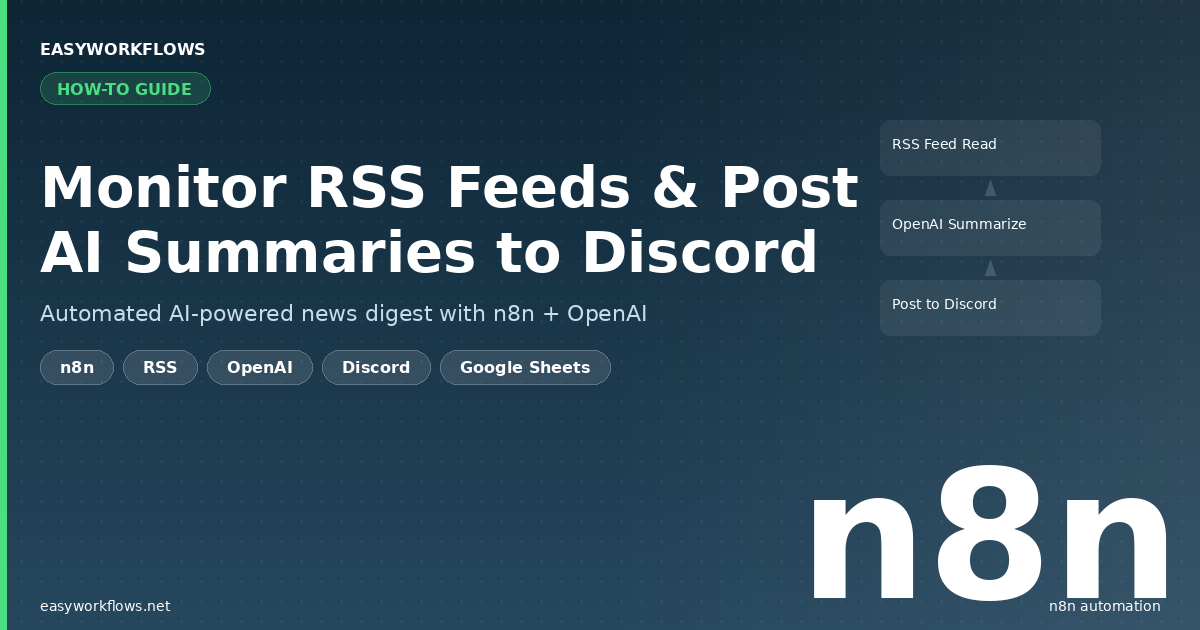
Your team is drowning in newsletters and blog feeds. Important articles get missed and nobody has time to read everything. What if an AI bot automatically scanned your favorite RSS feeds every hour, wrote a crisp two-sentence summary of each new article, and posted it straight to your Discord channel? That’s exactly what you’ll build here: a fully automated n8n workflow that monitors RSS feeds, uses OpenAI to generate smart summaries, and delivers them to Discord, with a Google Sheet keeping track so nothing gets posted twice.

Prefer to skip the setup? Grab the ready-made template → and be up and running in under 10 minutes.

What You’ll Build

  1. A scheduled n8n workflow that wakes up every hour and fetches the latest items from any RSS feed you choose.
  2. A deduplication layer backed by Google Sheets so the same article is never posted twice, even across restarts.
  3. An OpenAI call that reads each article’s title and snippet and writes a punchy 2 to 3 sentence summary tailored for a Discord audience.
  4. An automatic Discord post that drops the summary, the article title, and the link into your chosen channel, formatted and ready to read.
  5. A log entry written back to Google Sheets so the system stays in sync across all future runs.

How It Works: The Big Picture

The workflow runs on a timer, pulls from your RSS feed, filters out anything already posted, summarizes the new items with AI, and delivers them to Discord, all without you touching a thing.

┌──────────────────────────────────────────────────────────────────┐
│  RSS FEED AI SUMMARIZER TO DISCORD                               │
│                                                                  │
│  [Schedule Trigger]                                              │
│       │  (every 1 hour)                                          │
│       ▼                                                          │
│  [RSS Feed Read]                                                 │
│       │  (fetch all items from feed)                             │
│       ▼                                                          │
│  [Get Tracked URLs] ◄── Google Sheets (Tracked tab)             │
│       │  (read previously posted URLs)                           │
│       ▼                                                          │
│  [Filter New Articles]                                           │
│       │  (Code node: remove duplicates, cap at 5 items)          │
│       ▼                                                          │
│  [Summarize with OpenAI]                                         │
│       │  (HTTP Request → OpenAI Chat Completions API)            │
│       ▼                                                          │
│  [Build Discord Message]                                         │
│       │  (Set node: format title + summary + link)               │
│       ▼                                                          │
│  [Post to Discord]                                               │
│       │  (HTTP Request → Discord Webhook URL)                    │
│       ▼                                                          │
│  [Log URL to Sheet]                                              │
│       (Append row: url, title, summary, posted_at)               │
└──────────────────────────────────────────────────────────────────┘

What You’ll Need

  • n8n: self-hosted (v1.0+) or n8n Cloud (any paid plan)
  • An RSS feed URL: any public feed (TechCrunch, Hacker News, a podcast, a company blog…)
  • An OpenAI account: API key from platform.openai.com; GPT-4o-mini usage is very cheap (roughly $0.002 per summary)
  • A Google account: for the tracking spreadsheet (Google Sheets OAuth2)
  • A Discord server: with permission to create a Webhook URL in the target channel

Estimated build time: 35 to 50 minutes from scratch, or under 10 minutes with the ready-made template.

Part 1: The Workflow, Node by Node

1 Schedule Trigger (Schedule Trigger)

This is the engine that starts the whole thing. It fires the workflow automatically on a fixed interval so you never have to run it manually. Set Trigger Interval to Hours and the value to 1. The workflow will now run every hour.

💡

Tip: For high-volume feeds (like Hacker News), consider 30 minutes. For low-volume feeds (weekly newsletters), daily is plenty.

2 RSS Feed Read (RSS Feed Read)

Fetches the RSS feed and returns all available items as individual records, typically 10 to 25 per feed. Paste your RSS feed URL into the URL field. For example, TechCrunch’s feed is https://techcrunch.com/feed/.

{
  "title": "Anthropic Raises $4B Series E at $18B Valuation",
  "link": "https://techcrunch.com/2026/04/05/anthropic-series-e/",
  "pubDate": "Sat, 05 Apr 2026 14:22:00 +0000",
  "contentSnippet": "Anthropic, the AI safety company behind Claude, has raised $4 billion..."
}

3 Get Tracked URLs (Google Sheets)

Before processing anything, the workflow reads a Google Sheet to see which article URLs have already been posted to Discord. Connect your Google Sheets OAuth2 credential, set Document ID to your spreadsheet ID, sheet name to Tracked, and operation to Read.

📌

On the very first run, your sheet will be empty. That’s fine. The filter node handles an empty result gracefully and all items will be treated as new.

4 Filter New Articles (Code)

This JavaScript node cross-references the RSS items against the tracked URLs and returns only articles that haven’t been posted yet. It also caps the output at 5 items per run to prevent Discord channel flooding. Set the node to Run Once for All Items mode.

const rssItems = $('RSS Feed Read').all();
const trackedItems = $('Get Tracked URLs').all();
const trackedUrls = new Set(
  trackedItems.map(item => (item.json.url || item.json.URL || '').trim()).filter(Boolean)
);
const newItems = rssItems.filter(item => {
  const url = (item.json.link || item.json.url || '').trim();
  return url && !trackedUrls.has(url);
});
return newItems.slice(0, 5).map(item => ({ json: item.json }));

5 Summarize with OpenAI (HTTP Request)

Sends each new article’s title and snippet to the OpenAI API and gets back a tight 2 to 3 sentence summary. Set method to POST, URL to https://api.openai.com/v1/chat/completions. Set authentication to HTTP Header Auth with header Authorization: Bearer YOUR_API_KEY.

{
  "model": "gpt-4o-mini",
  "messages": [
    {"role": "system", "content": "Summarize this article in 2-3 sentences for a Discord audience."},
    {"role": "user", "content": "Title: {{ $json.title }}\nContent: {{ $json.contentSnippet }}"}
  ],
  "max_tokens": 200
}
💡

Tip: GPT-4o-mini costs roughly $0.003 per summary, less than $0.10/day for continuous hourly operation.

6 Build Discord Message (Set)

This node assembles the final Discord message by combining the article title, AI summary, link, and timestamp. Add an assignment named discord_message:

📰 **{{ $('Filter New Articles').item.json.title }}**

{{ $json.choices[0].message.content }}

🔗 Read more: {{ $('Filter New Articles').item.json.link }}

_{{ $now.format('MMMM d, yyyy · h:mm a') }} UTC_

7 Post to Discord (HTTP Request)

Sends the formatted message to your Discord channel using a Webhook URL. To create a webhook: go to your Discord server → right-click the channel → Edit ChannelIntegrationsWebhooksNew Webhook. Copy the URL and paste it as the node’s URL. Set method to POST with this JSON body:

{
  "content": "{{ $json.discord_message }}",
  "username": "RSS News Bot"
}

8 Log URL to Sheet (Google Sheets)

After posting, this node appends a row to the Google Sheet with the article URL, title, AI summary, and timestamp. Set operation to Append, use the same spreadsheet and Tracked sheet, and map columns: url, title, summary, posted_at.

The Data Structure

The Google Sheet is the workflow’s memory. Create a sheet named Tracked with these column headers in row 1:

Column Type Example Description
url Text https://techcrunch.com/2026/04/05/article/ The canonical URL, this is the deduplication key
title Text Anthropic Raises $4B Series E Article title for human review
summary Text Anthropic has secured $4B… The AI-generated summary that was posted
posted_at Text 2026-04-05 14:22:00 UTC timestamp of when it was posted
📌

The column name url must be lowercase. If you rename it, update the Code node’s lookup logic to match.

Full System Flow

Schedule Trigger (every hour)
       │
       ▼
RSS Feed Read → [10-25 items: title, link, contentSnippet]
       │
       ▼
Get Tracked URLs (Google Sheets READ) → [list of previously posted URLs]
       │
       ▼
Filter New Articles (Code) → [0-5 new items only]
       │
       ▼  (for each new item)
Summarize with OpenAI → [2-3 sentence AI summary]
       │
       ▼
Build Discord Message → [formatted text with title + summary + link]
       │
       ▼
Post to Discord (Webhook) → [message appears in channel]
       │
       ▼
Log URL to Sheet (Google Sheets APPEND) → [new row: url|title|summary|time]
       │
       ↑ cycle repeats next hour

Testing Your Workflow

  1. Before activating, run the workflow manually using the Test workflow button in n8n’s top toolbar.
  2. After the RSS Feed Read executes, click it and confirm you see article items in the output panel.
  3. On the first run your sheet is empty. Filter New Articles should pass through up to 5 items.
  4. Check your Discord channel: formatted news messages should appear within seconds.
  5. Check your Google Sheet, the Tracked tab should have rows for each posted article.
  6. Run the workflow a second time manually. Filter should return 0 items, deduplication is working.
Problem Likely Cause Fix
No items from RSS Feed Read Invalid RSS URL or feed is down Test the URL in a browser, it should return XML
All items filtered on first run Sheet already has URLs from a previous test Clear data rows in your Tracked sheet and re-run
OpenAI returns 401 API key missing or incorrectly configured Check Authorization header starts with “Bearer ” (with space)
Discord message not appearing Webhook URL invalid or deleted Regenerate webhook in Discord and update the URL in the node
Duplicate posts in Discord Column name mismatch in Google Sheet Ensure sheet header is exactly url (lowercase)

Frequently Asked Questions

Can I monitor multiple RSS feeds at once?

Yes, the simplest way is to add multiple RSS Feed Read nodes and use a Merge node to combine their outputs before the Filter node. The Google Sheet tracks deduplicated URLs across all feeds since URLs are globally unique.

Will it post to multiple Discord channels?

Add additional HTTP Request nodes after the Post to Discord node, each pointing to a different webhook URL. You can add an IF node before them to route different feed categories to different channels.

What happens if OpenAI is down or returns an error?

Enable Continue on Fail in the OpenAI node’s settings, the workflow will skip that item and continue. You can also set up an Error Trigger workflow in n8n to notify you via Telegram or email when something fails.

How do I change the AI summary style or tone?

Edit the system prompt inside the Summarize with OpenAI node. Change it to “summarize in one sentence with a market angle” or “write as a witty tech commentator”. The AI follows prompt instructions reliably for this task.

Will this work on n8n Cloud, or only self-hosted?

It works on both. The workflow uses only standard HTTP Requests and core n8n nodes, no special configuration is needed for cloud vs. self-hosted.

How much will the OpenAI API cost per month?

Running every hour, posting up to 5 articles per run on GPT-4o-mini: roughly $0.003 per summary, less than $0.10/day, under $3/month for continuous operation.

🚀 Get the RSS Feed AI Summarizer Template

Skip the build. Get the complete workflow JSON, a step-by-step Setup Guide, and a Credentials Guide covering every API key. Works on n8n Cloud and self-hosted.

Get the Template →

Instant download · Works on n8n Cloud and self-hosted

What’s Next?

  • Add Slack support: Duplicate the Discord posting step and route summaries to a Slack channel.
  • Filter by keyword: Add an IF node to only process articles containing keywords like “AI”, “funding”, or your company name.
  • Weekly digest: Change the Schedule Trigger to run weekly and bundle all new items into a single long-form Discord post.
  • Add sentiment scoring: Extend the OpenAI prompt to return a sentiment score, then route only positive articles to your channel.
n8n
RSS
Discord
OpenAI
Google Sheets
automation
news bot
AI summarization

How to Build a Slack Knowledge Base Bot with AI and n8n

New to n8n? Start with our step-by-step setup guide, then come back to build this workflow.

Every team has that one Slack channel, the one where the same five questions get asked every single week. “Where’s the onboarding doc?” “What’s the refund policy?” “How do I reset my API key?” Your senior engineers are answering these instead of shipping. Your support lead is copy-pasting the same response for the third time today. With this n8n workflow, you’ll build an AI-powered Slack bot that reads incoming questions, searches your company knowledge base using semantic vector search, and posts precise answers back in the thread, automatically, in about 2 seconds.

Prefer to skip the setup? Grab the ready-made template → and be running in under 10 minutes.

What You’ll Build

  1. A Slack bot that listens for messages in any channel it’s invited to
  2. An OpenAI step that converts each incoming question into a 1,536-dimensional vector embedding
  3. A Pinecone semantic search that retrieves the most relevant chunks from your knowledge base
  4. A GPT-4o-mini step that reads the retrieved context and writes a clear, grounded answer
  5. An automatic thread reply in Slack so teammates get instant answers without leaving the channel

How It Works: The Big Picture

This workflow uses the RAG pattern, Retrieval-Augmented Generation. Instead of asking an AI to recall facts from its training data (which goes stale), you store your up-to-date company knowledge in Pinecone as vector embeddings. When a question arrives, the bot finds the semantically closest knowledge chunks and hands them to GPT-4o-mini as context. The result: factual, grounded answers drawn only from your approved content.

┌─────────────────────────────────────────────────────────────────────┐
│  SLACK KNOWLEDGE BASE BOT                                           │
│                                                                     │
│  [Slack Trigger]                                                    │
│        ↓                                                            │
│  [Filter Bot Messages] ──(bot message)──→ (stop — no loop)         │
│        ↓ (user message)                                             │
│  [Generate Question Embedding]  (OpenAI text-embedding-3-small)    │
│        ↓ 1,536-dim vector                                           │
│  [Query Pinecone]  (top-5 semantic matches from knowledge base)     │
│        ↓ matched chunks + scores                                    │
│  [Extract Context]  (filter score > 0.7, join top 3 chunks)        │
│        ↓ formatted context string                                   │
│  [Generate AI Answer]  (GPT-4o-mini + RAG prompt)                  │
│        ↓ natural language answer                                    │
│  [Post Answer to Slack]  (reply in the original thread)            │
└─────────────────────────────────────────────────────────────────────┘

What You’ll Need

  • n8n, self-hosted (v1.0+) or n8n Cloud
  • Slack app with Events API enabled and a Bot User Token (starts with xoxb-)
  • OpenAI account: API key with access to text-embedding-3-small and gpt-4o-mini
  • Pinecone account: free Starter plan is plenty; create an index with dimension 1536 and metric cosine
  • A pre-populated Pinecone namespace called knowledge-base (the Credentials Guide includes a Python ingestion script)

Estimated build time: 45 to 60 minutes from scratch, or under 10 minutes with the template.

Building the Bot: Step by Step

1 Slack Trigger

This node opens a webhook endpoint that Slack’s Events API calls every time a message is posted in a channel your bot belongs to. It’s the entry point for everything.

  1. Add a Slack Trigger node to your canvas.
  2. Select your Slack Bot Token credential (or create one, see the Credentials Guide).
  3. Set the Trigger to Message.
  4. Copy the Webhook URL n8n displays. Paste it into your Slack app’s Event Subscriptions → Request URL field.
  5. In Slack app settings, enable the message.channels and message.groups event scopes, then reinstall the app to your workspace.

A message event payload looks like this:

{
  "type": "message",
  "text": "What is our refund policy for annual subscriptions?",
  "user": "U04ABCDEF12",
  "channel": "C06XYZABC99",
  "ts": "1743784201.000100",
  "subtype": null
}
💡

Tip: Slack sends events for bot messages too, including the bot’s own replies. Without the next filter node, every answer the bot posts would re-trigger the workflow and create an infinite loop.

2 Filter Bot Messages (IF)

This IF node stops the workflow from processing bot messages. It’s a one-condition check that routes user messages forward and drops everything else.

  1. Add an IF node connected to the Slack Trigger output.
  2. Set Value 1 to ={{ $json.subtype }}.
  3. Condition: Is Not Equal Tobot_message.
  4. Connect the True output to Step 3. Leave False unconnected.
💡

Tip: You can add a second condition here to limit the bot to a specific channel, filter $json.channel equals C06XYZABC99. This is useful if you want the bot active only in #ask-the-bot and not everywhere.

3 Generate Question Embedding (HTTP Request → OpenAI)

This node calls the OpenAI Embeddings API and converts the user’s question into a 1,536-dimensional vector, a list of numbers that captures the semantic meaning of the sentence. Pinecone will use this to find similar content.

  1. Add an HTTP Request node.
  2. Method: POST | URL: https://api.openai.com/v1/embeddings
  3. Authentication: Generic Credential Type → HTTP Header Auth. Create a credential with Name = Authorization and Value = Bearer YOUR_OPENAI_API_KEY.
  4. Body Content Type: JSON. Paste this body:
{
  "input": "={{ $('Slack Trigger').item.json.text }}",
  "model": "text-embedding-3-small"
}

The response contains the embedding inside data[0].embedding:

{
  "object": "list",
  "data": [
    {
      "object": "embedding",
      "index": 0,
      "embedding": [0.0023, -0.0189, 0.0341, "...1,533 more values..."]
    }
  ],
  "model": "text-embedding-3-small",
  "usage": { "prompt_tokens": 11, "total_tokens": 11 }
}
💡

Tip: text-embedding-3-small costs $0.02 per million tokens. A team of 50 people asking 200 questions a day will spend about half a cent on embeddings. If you need higher search accuracy, switch to text-embedding-3-large (3,072 dimensions), but update your Pinecone index dimension to match before doing so.

4 Query Pinecone (HTTP Request)

This node sends the question vector to Pinecone and gets back the five most semantically similar knowledge chunks, each scored between 0 (irrelevant) and 1 (identical).

  1. Add another HTTP Request node.
  2. Method: POST | URL: https://YOUR_PINECONE_INDEX_HOST/query (replace with your index host from the Pinecone console, it looks like my-index-abc123.svc.us-east-1.pinecone.io)
  3. Add a header: Name = Api-Key, Value = YOUR_PINECONE_API_KEY.
  4. Body Content Type: JSON. Use this expression as the body:
{
  "vector": "={{ $json.data[0].embedding }}",
  "topK": 5,
  "includeMetadata": true,
  "namespace": "knowledge-base"
}

Pinecone responds with the top matches and their stored metadata:

{
  "matches": [
    {
      "id": "doc-refund-annual-001",
      "score": 0.921,
      "metadata": {
        "text": "Annual subscriptions may be refunded within 30 days of purchase for a full refund. After 30 days, refunds are prorated based on remaining months.",
        "source": "help-center/billing",
        "last_updated": "2026-03-01"
      }
    },
    {
      "id": "doc-refund-annual-002",
      "score": 0.874,
      "metadata": {
        "text": "To request a refund, email billing@acme-corp.com with your order number and reason for cancellation. Refunds are processed within 5 business days.",
        "source": "help-center/billing",
        "last_updated": "2026-03-01"
      }
    }
  ],
  "namespace": "knowledge-base"
}
📌

Your Pinecone index must be pre-populated before the bot can answer anything. Each vector record needs a text field in its metadata. The Credentials Guide PDF bundled with the template includes a ready-to-run Python ingestion script that embeds and uploads your documents in minutes.

5 Extract Context (Code)

This JavaScript node processes the Pinecone results: filters low-confidence matches, takes the top 3 chunks, formats them into a numbered context string, and bundles the data for the next node.

const matches = $input.item.json.matches || [];
const slackData = $('Slack Trigger').item.json;

if (matches.length === 0) {
  return [{
    json: {
      context: 'No relevant information found in the knowledge base.',
      question: slackData.text,
      channel: slackData.channel,
      thread_ts: slackData.ts
    }
  }];
}

const context = matches
  .filter(m => m.score > 0.7)
  .slice(0, 3)
  .map((m, i) => `[${i + 1}] ${m.metadata.text}`)
  .join('\n\n');

return [{
  json: {
    context: context || 'No highly relevant information found.',
    question: slackData.text,
    channel: slackData.channel,
    thread_ts: slackData.ts
  }
}];

After this node, the data is clean and ready for the AI:

{
  "context": "[1] Annual subscriptions may be refunded within 30 days...\n\n[2] To request a refund, email billing@acme-corp.com...",
  "question": "What is our refund policy for annual subscriptions?",
  "channel": "C06XYZABC99",
  "thread_ts": "1743784201.000100"
}
💡

Tip: The 0.7 score threshold is a good starting point. If the bot returns off-topic answers, raise it to 0.8. If it says “no information found” for questions you know are in the knowledge base, lower it to 0.65 or check that your Pinecone namespace name matches exactly.

6 Generate AI Answer (HTTP Request → OpenAI Chat)

This node sends the retrieved context and the original question to GPT-4o-mini. The system prompt instructs the model to answer strictly from the provided context, with no hallucinating facts that aren’t in your knowledge base.

  1. Method: POST | URL: https://api.openai.com/v1/chat/completions
  2. Reuse your OpenAI HTTP Header Auth credential.
  3. Body (JSON):
{
  "model": "gpt-4o-mini",
  "messages": [
    {
      "role": "system",
      "content": "You are a helpful company knowledge base assistant. Answer questions using ONLY the provided context. If the context does not contain the answer, say so clearly and suggest the user contact the team directly. Keep answers concise and actionable."
    },
    {
      "role": "user",
      "content": "Context:\n={{ $json.context }}\n\nQuestion: ={{ $json.question }}"
    }
  ],
  "max_tokens": 500,
  "temperature": 0.2
}
💡

Tip: temperature: 0.2 keeps answers factual and consistent. For a knowledge base bot you want determinism, not creativity. max_tokens: 500 keeps responses Slack-readable, roughly 3 to 5 paragraphs maximum.

7 Post Answer to Slack

The final node takes GPT-4o-mini’s answer and posts it as a thread reply, so the answer lives directly under the original question rather than flooding the main channel.

  1. Add a Slack node. Resource: Message, Operation: Post.
  2. Channel: ={{ $('Extract Context').item.json.channel }}
  3. Text: ={{ $json.choices[0].message.content }}
  4. Under Other Options, set Thread Timestamp to ={{ $('Extract Context').item.json.thread_ts }}
  5. Use the same Slack credential as the Slack Trigger.
💡

Tip: Want to brand the reply? Change the text field to: 🤖 *Knowledge Base Bot:* {{ $json.choices[0].message.content }}. The asterisks render as bold in Slack, making it clear this is an automated response.

The Data Flow

Here’s how a single question moves through all seven nodes, from Slack message to bot reply:

Stage Data Present Key Field
After Slack Trigger Raw Slack event payload text, channel, ts
After Filter Same payload, confirmed user message subtype is null
After OpenAI Embeddings 1,536-number float array data[0].embedding
After Pinecone Query Top 5 knowledge chunks + similarity scores matches[].score, matches[].metadata.text
After Extract Context Formatted context + original question context, question, thread_ts
After OpenAI Chat Full ChatGPT response object choices[0].message.content
Posted to Slack Plain text answer in thread Visible to all channel members instantly

Pinecone Knowledge Base Schema

Every vector record you upsert into Pinecone must follow this structure. The text metadata field is required, and the Extract Context node reads it directly.

Field Type Example Description
id String doc-refund-001 Unique identifier for this knowledge chunk
values Float[1536] [0.023, -0.019, …] Embedding from text-embedding-3-small
metadata.text String "Annual subscriptions are refunded within 30 days…" The raw knowledge chunk, required
metadata.source String help-center/billing Where this content came from (optional)
metadata.last_updated String 2026-03-01 Last update date for freshness tracking (optional)
📌

Keep each knowledge chunk between 100 and 500 words. Too short and the chunk loses context; too long and the embedding gets diluted. One concept per chunk is a good rule of thumb. For example, one chunk for the refund policy, a separate chunk for the cancellation process.

Full System Flow

User posts question in Slack
          │
          ▼
┌─────────────────────┐
│    Slack Trigger    │  Receives message.channels event via webhook
└─────────────────────┘
          │
          ▼
┌─────────────────────┐
│ Filter Bot Messages │──── subtype = "bot_message"? ──→ STOP
└─────────────────────┘
          │ user message passes
          ▼
┌──────────────────────────┐
│ Generate Question        │  POST https://api.openai.com/v1/embeddings
│ Embedding (OpenAI)       │  model: text-embedding-3-small → 1,536-dim vector
└──────────────────────────┘
          │
          ▼
┌──────────────────────────┐
│ Query Pinecone           │  POST {index-host}/query
│ (vector search)          │  topK=5 · namespace: knowledge-base
└──────────────────────────┘
          │ top matches with metadata + scores
          ▼
┌──────────────────────────┐
│ Extract Context          │  Filter: score > 0.7
│ (Code node)              │  Join top 3 chunks into context string
└──────────────────────────┘
          │
          ▼
┌──────────────────────────┐
│ Generate AI Answer       │  POST https://api.openai.com/v1/chat/completions
│ (GPT-4o-mini)            │  RAG prompt · temperature: 0.2 · max_tokens: 500
└──────────────────────────┘
          │ grounded answer text
          ▼
┌──────────────────────────┐
│ Post Answer to Slack     │  Thread reply on original message
└──────────────────────────┘
          │
          ▼
Team member sees the answer in 2 to 3 seconds ✓

Testing Your Workflow

  1. Make sure the workflow is toggled to Active in n8n.
  2. Invite your bot to a test channel: type /invite @YourBotName.
  3. Post a question you know is covered in your knowledge base, for example: “What’s the refund policy for annual plans?”
  4. Within 2 to 3 seconds, a thread reply should appear with a grounded answer drawn from your Pinecone content.
  5. Post a question that’s definitely not in your knowledge base. The bot should say it doesn’t have that information and suggest contacting the team.
  6. Check the n8n Execution log to confirm all 7 nodes completed with green checkmarks and no errors.
Problem Likely Cause Fix
Bot doesn’t respond at all Workflow not Active, or Slack webhook URL mismatch Toggle workflow to Active; verify webhook URL in Slack app settings matches n8n exactly
Bot replies to its own messages Filter Bot Messages node misconfigured Check the True output of the IF node connects to Step 3; False output should be unconnected
“No relevant information found” for everything Pinecone index empty or wrong namespace Run the ingestion script from the Credentials Guide; confirm namespace is exactly knowledge-base
Off-topic or wrong answers Score threshold too low or chunks too large Raise score threshold to 0.8 in the Extract Context node; re-chunk content into shorter segments
OpenAI 401 Unauthorized API key missing or expired Regenerate key at platform.openai.com and update the HTTP Header Auth credential in n8n
Slack “not_in_channel” error Bot not invited to the channel Run /invite @YourBotName in the channel before testing

Frequently Asked Questions

Do I need to load content into Pinecone before the bot will work?

Yes, without content in Pinecone, every query returns empty results and the bot will say “no information found.” The template package includes a Python ingestion script (in the Credentials Guide PDF) that takes any plain text or Markdown file, splits it into chunks, generates embeddings, and uploads them to Pinecone. You can have a basic knowledge base loaded in 10 to 15 minutes.

How do I prevent the bot from answering questions it shouldn’t?

The system prompt in Step 6 instructs GPT-4o-mini to answer only from the provided context. If a question doesn’t match anything in Pinecone above the 0.7 threshold, the Extract Context node sends a “no information found” message as the context, and the AI is instructed to honestly say so and redirect to the team. You control what goes into Pinecone, so you control what the bot can answer.

How much does this cost to run per month?

For a team of 50 people asking roughly 200 questions a day: OpenAI embedding calls cost about $0.005/day, and GPT-4o-mini answers cost about $0.10/day. Pinecone’s free Starter plan handles up to 100,000 vectors, more than enough for a thorough company knowledge base. Total cost: roughly $3 to $4/month in API fees.

Can I restrict the bot to specific Slack channels?

Yes. In the Filter Bot Messages IF node (Step 2), add a second condition: $json.channel equals your target channel ID. The bot will only respond in that specific channel. You can find a channel’s ID by right-clicking it in Slack and selecting “Copy link.” The ID is the string starting with C at the end of the URL.

How do I keep the knowledge base current as our docs change?

Build a second n8n workflow that watches for document updates, a Google Drive trigger that fires when a doc is modified, re-embeds the content, and upserts it to Pinecone by the same id. Since Pinecone’s upsert operation overwrites by ID, you won’t accumulate duplicates. You can also just re-run the ingestion script manually after major documentation updates.

Does this work on n8n Cloud, or only self-hosted?

It works on both. The workflow uses only HTTP Request nodes, a Code node, the Slack Trigger, and the Slack node, all available in n8n Cloud and every self-hosted version from 1.0 onwards. No custom nodes or community packages are required.

🚀 Get the Slack Knowledge Base Bot Template

You now know exactly how this workflow is built. The template gets you there in under 10 minutes: it includes the ready-to-import workflow JSON, a Setup Guide PDF with step-by-step activation instructions, and a Credentials Guide PDF with a working Python ingestion script to load your knowledge base into Pinecone.

Get the Template →

Instant download · Works on n8n Cloud and self-hosted

What’s Next?

  • Add answer feedback: Let users react 👍 or 👎 on bot replies, log reactions to Airtable, and use quality scores to identify gaps in your knowledge base.
  • Auto-ingest from Notion or Confluence: Build a companion n8n workflow that watches for document updates and automatically re-embeds modified pages into Pinecone.
  • Add a Slack slash command: Create a /ask command so users can query the bot privately in DMs without cluttering a shared channel.
  • Multi-namespace routing: Create separate Pinecone namespaces for HR, Engineering, and Sales, and route questions to the right namespace based on which Slack channel they came from.
n8n
Slack
OpenAI
Pinecone
RAG
AI automation
knowledge base
vector search

How to Build a Telegram Reminder Bot with n8n

ai-smm-manager-n8n

New to n8n? Start with our step-by-step setup guide, then come back to build this workflow.

Turn a single Telegram message into a fully automated reminder system: saved, scheduled, and delivered without touching a server.

You’re in the middle of something and a task pops into your head. You don’t want to open a dedicated app, create an account, or navigate a dashboard; you just want to type it somewhere and know it won’t slip through the cracks. This workflow gives you exactly that: send Remind 14:30 Call the client to your Telegram bot, and it handles everything else. At exactly 14:30, your phone buzzes with the reminder.

In this guide, you’ll build a two-workflow n8n automation that uses Telegram as the input interface and Google Sheets as the brain. No coding, no monthly subscription, no app install. Just a bot that listens, stores, and delivers.

Prefer to skip the setup? Grab the ready-made template → and be up and running in under 10 minutes.

What You’ll Build

  1. You send a message to your Telegram bot: Remind 14:30 Call the client
  2. The bot validates the format, saves the reminder to a Google Sheet, and sends you a confirmation instantly.
  3. Every minute, a background workflow checks the sheet for due reminders.
  4. At exactly 14:30, your Telegram receives: 🔔 REMINDER: Task: Call the client
  5. The reminder is automatically marked as Done so it never fires twice.

How It Works: The Big Picture

The system is built from two separate n8n workflows that share a Google Sheet as their bridge. Workflow 1 handles input; Workflow 2 handles delivery.

┌──────────────────────────────────────────────────────────────────┐
│  WORKFLOW 1 - Reminder Creator                                   │
│                                                                  │
│  [Telegram Trigger] -> [Parse Command] -> [Route / Switch]       │
│                                               │           │      │
│                                        (valid)│     (error│      │
│                                               ↓           ↓      │
│                                      [Save to Sheet]  [Send      │
│                                               │        Info/Err] │
│                                               ↓                  │
│                                      [Send Confirmation]         │
└──────────────────────────────────────────────────────────────────┘

                    ↕  Shared Google Sheet ("Rappels" tab)

┌──────────────────────────────────────────────────────────────────┐
│  WORKFLOW 2 - Checker (runs every 1 minute)                      │
│                                                                  │
│  [Schedule Trigger] -> [Read Sheet] -> [Filter by Time]          │
│                                               │                  │
│                                        (match)↓                  │
│                                      [Send Telegram Alert]       │
│                                               │                  │
│                                               ↓                  │
│                                      [Mark Row as Done]          │
└──────────────────────────────────────────────────────────────────┘

What You’ll Need

  • A free n8n account (cloud or self-hosted)
  • A Telegram bot token; create one for free via @BotFather in 2 minutes
  • A Google account with access to Google Sheets
  • A Google Cloud Service Account for authentication (we’ll walk through it)

Estimated build time: 30-45 minutes from scratch, or under 10 minutes with the ready-made template.


Part 1: The Reminder Creator Workflow

This workflow lives at the input end of the system. It listens for Telegram messages, validates the format, stores valid reminders, and immediately confirms receipt.

1 Telegram Trigger

What it does: Listens continuously for any new message sent to your Telegram bot and fires the workflow the moment one arrives.

How to configure it:

  1. Add a Telegram Trigger node to a new workflow.
  2. Set Updates to Watch to message.
  3. Connect your Telegram bot credentials (the API token from BotFather).
  4. Click Test node, then send any message to your bot and you’ll see the raw data appear.

The raw data that flows out of this node looks like this:

{
  "message": {
    "message_id": 42,
    "chat": {
      "id": 123456789
    },
    "text": "Remind 14:30 Call the client"
  }
}
💡

Tip: Save the chat.id value from your test run, as you’ll need it later when configuring the Checker workflow to know where to send notifications.

2 Parse Command (Code Node)

What it does: Reads the message text, checks whether it starts with Remind, and extracts the time and task, or returns a clear error if the format is wrong.

How to configure it:

  1. Add a Code node after the Telegram Trigger.
  2. Set the language to JavaScript.
  3. Paste in the parsing logic (included in the template).

The code checks for the Remind prefix (case-insensitive), then extracts two pieces of information using a regular expression: the time in HH:MM format and everything after it as the task description. It returns one of three output types:

Output typeWhen it’s returned
remindValid format; time and task extracted, ready to save
errorStarted with “Remind” but time or task was missing or malformed
chatMessage didn’t start with “Remind” at all

For a valid input like Remind 14:30 Call the client, the output looks like this:

{
  "type": "remind",
  "tache": "Call the client",
  "date_heure": "2026-03-14 14:30",
  "raw_time": "14:30"
}

For an invalid input like Remind callmom, it returns:

{
  "type": "error",
  "message": "❌ Incorrect format\n\nExpected: Remind HH:MM Task\nExample: Remind 14:30 Call the client"
}
💡

Tip: Want to use a different command keyword? Replace 'remind ' in the code with anything you like: 'task ', 'set ', or even your own name. Just make sure to match the character count in the substring() call that strips the prefix.

3 Route (Switch Node)

What it does: Acts as a traffic controller. Valid reminders go down one path; errors and help messages go down another.

How to configure it:

  1. Add a Switch node after Parse Command.
  2. Create two output routes:
    • Route “reminder”: condition {{ $json.type }} equals remind
    • Route “info”: condition {{ $json.type }} does not equal remind

This node is the guardian of your data. Nothing reaches the Google Sheet unless the format is clean.

4 Save to Sheet (Google Sheets)

What it does: Appends a new row to the Rappels tab in your Google Sheet, recording the task, scheduled time, and an initial status of “pending”.

How to configure it:

  1. Add a Google Sheets node on the “reminder” output of the Switch.
  2. Set the operation to Append row.
  3. Connect your Google Service Account credentials.
  4. Select your spreadsheet and the Rappels sheet tab.
  5. Map the columns as shown below.
Sheet columnValue to map
Tache={{ $json.tache }}
Date_Heure={{ $json.date_heure }}
StatutEn attente (hardcoded)
TypeReminder (hardcoded)

5 Send Confirmation (Telegram)

What it does: Immediately sends a success message back to the user confirming that their reminder was saved.

How to configure it:

  1. Add a Telegram node after Save to Sheet.
  2. Set Chat ID to ={{ $('Telegram Trigger').item.json.message.chat.id }}; this dynamically targets the person who sent the original message.
  3. Set the message text to something like:
✅ REMINDER SAVED
📝 Task: {{ $json.Tache }}
⏰ Time: {{ $json.Date_Heure }}
I'll remind you at the scheduled time! 🔔
💡

Tip: Notice we reference $('Telegram Trigger') directly here; after the Google Sheets node, the original message data is no longer in the current item scope. Always pull chat.id from the trigger node by name.

There’s also a Send Info/Error node on the Switch’s second output. It simply sends back the message field from the Parse Command output, which is either a usage hint or a formatted error. No extra configuration needed beyond setting the chat ID the same way.


Part 2: The Checker Workflow

This second workflow runs silently in the background every minute, checking whether any saved reminder is due. When it finds one, it fires the notification and marks the row complete.

1 Schedule Trigger

What it does: Fires the workflow automatically every 60 seconds, regardless of user activity.

How to configure it:

  1. Create a new workflow and add a Schedule Trigger node.
  2. Set the interval to Every 1 minute.
💡

Tip: Because the trigger runs every 60 seconds, reminders fire within a 1-minute window of their scheduled time. For most personal use cases this is perfectly fine. If you need exact-second precision you’d need a different approach, but the complexity isn’t worth it for a reminder bot.

2 Get Reminders (Google Sheets)

What it does: Reads all rows from the Rappels tab, every saved reminder whether pending or done.

How to configure it:

  1. Add a Google Sheets node set to Read rows.
  2. Connect to the same spreadsheet and Rappels tab.

n8n automatically splits the sheet rows into individual items; each reminder becomes a separate item flowing through the rest of the workflow.

3 Check Time (Filter Node)

What it does: Keeps only the rows where the scheduled time matches right now. Everything else is silently dropped.

How to configure it:

  1. Add a Filter node.
  2. Set the condition: {{ $json.Date_Heure }} contains ={{ $now.format('yyyy-MM-dd H:mm') }}

The contains operator (rather than strict equality) is intentional; it makes the time comparison more resilient to minor formatting differences between the stored string and the current timestamp.

📌

If no reminders match the current minute, the workflow ends here with zero items. This is normal. It runs every minute, so the vast majority of executions will simply do nothing. That’s by design.

4 Send Telegram Alert

What it does: Sends the reminder notification to your Telegram account.

How to configure it:

  1. Add a Telegram node.
  2. Set the Chat ID to your personal Telegram user ID (find it by messaging @userinfobot).
  3. Set the message text:
🔔 REMINDER 🔔

Task: {{ $json.Tache }}
Scheduled for: {{ $json.Date_Heure }}

5 Update Status (Google Sheets)

What it does: Marks the reminder row as Done so it never fires again.

How to configure it:

  1. Add a Google Sheets node set to Update row.
  2. Match on row_number (n8n tracks this automatically when reading rows).
  3. Set Statut = Done.

This is the closing loop that keeps the system clean. Without this step, the same reminder would fire every minute for the rest of the day.


The Data Structure

Your Google Sheet is the shared brain between both workflows. It has one tab named Rappels with exactly four columns:

ColumnTypeExampleDescription
Tache Text Call the client The task description, extracted from the Telegram message
Date_Heure Text 2026-03-14 14:30 Scheduled date and time in YYYY-MM-DD HH:MM format; must be exact
Statut Text En attente Status flag; starts as En attente (pending), becomes Done after the reminder fires
Type Text Reminder The reminder type; useful if you extend the system later with other types

Here’s what the lifecycle of a row looks like, from creation to completion:

TacheDate_HeureStatutType
Call the client 2026-03-14 14:30 En attente (just saved) Reminder
Call the client 2026-03-14 14:30 Done (after firing) Reminder
📌

Column names are case-sensitive. Create the sheet with the exact names shown above: Tache, Date_Heure, Statut, Type, before running the workflow for the first time. A mismatch will cause the Google Sheets node to fail silently.


Full System Flow

Here’s the entire journey, from the moment you type a message to the moment the reminder fires:

YOU ──────────────────────────────────────────────────────────────────────
│
│  Send: "Remind 14:30 Call the client"
│
↓
[Telegram Trigger]
    │
    ↓
[Parse Command]  ──────────────────────────────────────────
    │                                                      │
    │ type: "remind"                          type: "error" or "chat"
    ↓                                                      │
[Route / Switch]                                           ↓
    │                                         [Send Info/Error -> YOU]
    ↓
[Save to Sheet] ──── Appends row to Google Sheets
    │                  Tache | Date_Heure       | Statut     | Type
    │                  ──────────────────────────────────────────────
    │                  Task  | 2026-03-14 14:30 | En attente | Reminder
    ↓
[Send Confirmation -> YOU]
    "✅ REMINDER SAVED - I'll remind you at 14:30!"

═══════════════════════════════════════════════════════════════════════════
  (every minute, Workflow 2 runs in the background)

[Schedule Trigger]
    │
    ↓
[Read All Rows from Google Sheets]
    │
    ↓
[Filter: Date_Heure = now?] ── (no match -> stop, wait 1 min)
    │ (match found)
    ↓
[Send Telegram Alert -> YOU]
    "🔔 REMINDER: Task: Call the client"
    │
    ↓
[Update Row: Statut = "Done"]  ──── Row never fires again

Testing Your Workflow

Before activating both workflows, run through this test sequence:

  1. Activate Workflow 1 in n8n.
  2. Open your Telegram bot and send: Remind 14:30 Test reminder
  3. You should receive a confirmation message within 2-3 seconds.
  4. Open your Google Sheet; a new row should appear with Statut = En attente.
  5. Now create a reminder for 2 minutes from now: Remind HH:MM Watch for this
  6. Activate Workflow 2.
  7. Wait. The notification should arrive within 60 seconds of the scheduled time.
  8. Check the sheet; the row’s Statut should now be Done.

If something doesn’t work, here are the most common culprits:

ProblemLikely CauseFix
No confirmation message after sending Telegram credentials wrong or bot token expired Re-enter the bot token from BotFather in your n8n credentials
Row not appearing in the sheet Google Service Account lacks edit permission on the sheet Share the sheet with the Service Account email address as Editor
Reminder never fires Workflow 2 not activated, or wrong Chat ID in Send Message node Activate Workflow 2; verify the Chat ID matches your Telegram user ID
Reminder fires repeatedly Update Status node isn’t updating the correct row Make sure the Update node matches on row_number, not a text field
Error: “Format incorrect” for valid input Extra space or different capitalization in “Remind” The parser is case-insensitive; check for hidden characters in the message

Frequently Asked Questions

Can I set a reminder for a future date, not just today?

The current workflow automatically uses today’s date. To schedule for a future date, you’d modify the Parse Command node to accept an optional date before the time, for example Remind 2026-03-20 14:30 Pay invoice. The parsing logic in the Code node would need a small update to detect the date pattern.

What happens if n8n is offline when a reminder is due?

The reminder will be missed for that minute. If Workflow 2 is down and the minute passes, the row stays as En attente but the notification won’t fire, and the time filter won’t match again later. For critical reminders, self-hosting n8n on a reliable VPS or using n8n Cloud (which has uptime guarantees) is worth it.

Can multiple people use the same bot?

Workflow 1 already handles this; it captures each user’s chat.id dynamically and sends confirmation back to whoever sent the message. The challenge is in Workflow 2: the current version sends all notifications to a single hardcoded Chat ID. To support multiple users, you’d store each user’s chat.id in the sheet alongside the reminder and reference it in the Send Message node.

Can I change the “Remind” keyword to something else?

Yes, easily. In the Parse Command node, find the line text.toLowerCase().startsWith('remind ') and replace 'remind ' with your preferred keyword (keep the trailing space and use lowercase). The substring(7) call strips the prefix; if your new keyword has a different length, update that number to match.

Does this cost anything to run?

The n8n free tier covers this workflow comfortably; both workflows are lightweight and use no AI nodes. Telegram bots are completely free. Google Sheets API access via a Service Account is also free within Google’s generous limits. The only potential cost is hosting if you run n8n self-hosted on a VPS.

Can I add recurring reminders?

Not out of the box, but it’s a natural extension. After the reminder fires, instead of setting Statut = Done, you could update Date_Heure to the next occurrence (tomorrow, next week, etc.) and keep the status as En attente. You’d need a small logic layer to calculate the next date based on a recurrence rule stored in an extra column.

🚀 Get the Telegram Reminder Bot Template

You’ve seen exactly how it works. The template gives you both workflows pre-wired, the Google Sheet structure ready to copy, and a step-by-step credential setup guide, so you go from zero to running bot in under 10 minutes.

Buy the template →

Instant download · Works on n8n Cloud and self-hosted · One-time purchase

What’s Next?

Once your reminder bot is up and running, here are some natural directions to take it:

  • Multi-user support: store each sender’s chat.id in the sheet so the bot works for a whole team
  • Recurring reminders: add a recurrence column and auto-reschedule rows after they fire
  • List your reminders: add a List command that reads pending rows and sends them back to Telegram as a summary
  • Calendar integration: connect Google Calendar to auto-create reminders from upcoming events without any manual input
  • Priority levels: extend the command format to include urgency (Remind 14:30 urgent Call the client) and style the notification differently
n8n Telegram Google Sheets automation reminder bot no-code productivity