How to Connect Shopify to n8n in 2026 (New Developer Dashboard Method)

If you tried to connect Shopify to n8n recently and could not find the old “Develop apps” option, you are not imagining it. On January 1, 2026, Shopify stopped letting you create new custom apps from the store admin. This guide covers what changed, what still works, and the exact way to connect Shopify to n8n in 2026 using the new Developer Dashboard.

What changed on January 1, 2026

  • You can no longer create new custom apps in the Shopify admin (the old Settings, Apps and sales channels, Develop apps path).
  • Existing custom apps keep working. If you already have one, its Admin API access token still works, so nothing breaks for you.
  • New apps are created in the Shopify Developer Dashboard (dev.shopify.com) or the Shopify CLI.
  • New apps use an OAuth flow to get their token, and those tokens are short lived (they refresh roughly every 24 hours) instead of the old permanent shpat_ tokens. This is a security improvement: tokens can be revoked and scoped tightly.

Which path is yours

You already have a custom app: nothing to do. Keep using your existing Admin API access token with n8n’s Shopify Access Token credential.

You are setting up fresh: create an app in the Developer Dashboard and connect it to n8n with OAuth2. The steps are below. Do not try to paste a static token, because the new tokens expire within a day. n8n’s OAuth2 credential handles the refresh for you.

Step 1: Create an app in the Shopify Developer Dashboard

  1. Go to dev.shopify.com and open the Developer Dashboard.
  2. Create a new app and give it a name like n8n automation.
  3. Under the Admin API scopes, add only what your workflow needs. For most automations: read_orders, write_orders, read_products, write_products, and read_customers if you work with customers.
  4. Install the app on your store.
  5. Open the app settings and copy the Client ID and Client Secret. Note your store domain, the part that looks like your-store.myshopify.com.

Shopify’s own walkthrough for generating access tokens is the source of truth for the exact screens, since the dashboard UI moves around: see the Shopify docs link at the end.

Step 2: Connect it in n8n with OAuth2

  1. In any Shopify node, set Authentication to OAuth2.
  2. Create a new Shopify OAuth2 credential and paste in your Client ID, Client Secret, and store subdomain.
  3. Copy the OAuth Redirect URL that n8n shows you, and add it to your app’s allowed redirect URLs in the Developer Dashboard.
  4. Click Connect and approve the prompt. n8n now holds a token it refreshes automatically.
  5. Test by listing a few products. If it returns data, you are connected.

n8n supports both Access Token and OAuth2 for Shopify. Access Token is fine if you have a legacy app with a permanent token. For a new Developer Dashboard app, OAuth2 is the right choice because it deals with the short token lifetime for you.

Common errors and fixes

  • Forbidden or 403 on a request: the scope is missing. Add the matching scope to the app, reinstall, and reconnect.
  • Auth works then fails a day later: you pasted a short lived token into Access Token auth. Switch the node to OAuth2 so n8n refreshes it.
  • Cannot find Develop apps in the admin: expected. That path is gone for new apps. Use the Developer Dashboard.

Put it to work

Once Shopify is connected, you can automate the busywork. Our ready to import Shopify AI agents use this exact connection to write product descriptions, answer customer chat, and tag every order, and they run free on Google Gemini. For the wider picture, see our guide to n8n Shopify automation, or browse all n8n templates.

Frequently asked questions

Can I still create a Shopify custom app in 2026?

Not from the store admin. Since January 1, 2026, new custom apps are created in the Shopify Developer Dashboard or with the Shopify CLI. Apps you created before then still work.

Do my old Shopify access tokens still work with n8n?

Yes. Existing custom app tokens keep working with n8n’s Shopify Access Token credential. Only the creation of new admin custom apps was removed.

Why does my new token stop working after a day?

New Developer Dashboard apps use short lived tokens that refresh about every 24 hours. Use n8n’s OAuth2 credential instead of pasting a token, and n8n handles the refresh automatically.

Which scopes do I need to connect Shopify to n8n?

Add only what your workflow uses. Common ones are read_orders and write_orders, read_products and write_products, and read_customers. Fewer scopes is safer.

Want order and stock alerts on your phone? See how to get Shopify alerts on Telegram with n8n (free templates).

Connected? Two good first builds: the AI product description generator that writes SEO copy on every new product, and the n8n AI chatbot for customer support. Both run free on Gemini.

How to Build a Shopify Repeat Customer Reward Email With n8n

Shopify repeat customer reward email workflow in n8n


This guide builds a shopify repeat customer reward email n8n workflow that watches every new order, spots the moment a shopper places their third order, generates a unique Shopify discount code through the Admin API, and sends a personal thank-you email with Gmail. No loyalty-app subscription and no manual list-pulling. It takes about 35 minutes to wire up and runs free on self-hosted n8n.

Prefer to skip the setup? Grab the ready-made template below and have it live in under 10 minutes.

What it does

Your repeat buyers are the cheapest revenue you will ever earn, yet most stores only thank a customer once, in the order-confirmation receipt. After that, a shopper can place a second and third order and hear nothing. This workflow fixes that quietly in the background.

Every time an order is created in your Shopify store, n8n receives it, reads how many orders that customer has now placed, and waits for the one that turns them into a three-time buyer. At that point it mints a brand-new discount code just for them and emails it as a thank-you. The shopper feels recognized at the exact moment loyalty is forming, and you never touch a spreadsheet.

It is one piece of a larger toolkit. If you are mapping out your whole store, start with the pillar guide on n8n Shopify automation and slot this reward email in alongside your welcome and post-purchase flows.

Why it beats the default

Shopify Flow can tag a repeat customer, but it cannot generate a personal discount code and write a warm email in the same run without bolting on a third-party app. Dedicated loyalty apps do all of this, but they start around 30 to 50 dollars a month and grow with your order volume, and they own the customer relationship instead of you.

Doing it in n8n keeps three things in your hands:

  • The trigger logic. Reward on the third order, the fifth, or a spend threshold. It is one field, not a pricing tier.
  • The email. It sends from your own Gmail address, so it lands in the primary inbox and reads like a note from a shop owner, not a marketing blast.
  • The cost. One n8n instance runs this and dozens of other store workflows for the price of nothing extra.

What you need

  • An n8n instance, cloud or self-hosted (the workflow is identical on both).
  • A Shopify custom app access token with read_orders, write_price_rules, and write_discounts scopes.
  • One price rule created in Shopify admin ahead of time, for example “Repeat customer 15% off”. You will copy its numeric ID.
  • A Gmail account connected to n8n for sending the reward email.

Estimated build time: about 35 minutes from scratch, or under 10 minutes with the template.

Node-by-node list

Five nodes, in a straight line with one branch:

┌──────────────────────────────────────────────────────────────┐
│  SHOPIFY REPEAT CUSTOMER REWARD EMAIL                         │
│                                                              │
│  [Shopify Trigger] → [Edit Fields] → [IF orders = 3]         │
│                                          │ true              │
│                                          ▼                   │
│                              [HTTP: create discount code]    │
│                                          │                   │
│                                          ▼                   │
│                                   [Gmail: send reward]       │
└──────────────────────────────────────────────────────────────┘
  
  1. Shopify Trigger (n8n-nodes-base.shopifyTrigger) on the orders/create topic.
  2. Edit Fields (n8n-nodes-base.set, v3.4) to extract the customer details.
  3. IF (n8n-nodes-base.if, v2.2) to continue only on the third order.
  4. HTTP Request (n8n-nodes-base.httpRequest, v4.2) to create the discount code.
  5. Gmail (n8n-nodes-base.gmail, v2.1) to send the thank-you email.

Step-by-step build

1 Shopify Trigger

Add a Shopify Trigger node and connect your Shopify credential. Set the topic to orders/create. n8n registers the webhook in your store automatically, so a new order now fires the workflow within seconds. The node hands the full order object to the next step. The slice you care about lives under customer:

{
  "order_number": 1042,
  "customer": {
    "id": 6072830012345,
    "first_name": "Emily",
    "email": "emily.rodriguez@gmail.com",
    "orders_count": 3,
    "total_spent": "284.00"
  }
}
💡

Tip: orders_count already includes the order that just triggered the webhook, so a shopper’s third purchase reads as 3. That is the number the IF node checks.

2 Edit Fields

Add an Edit Fields node (the Set node, version 3.4) to pull the four values you need into clean, predictable names. Add these assignments:

Name Type Value
customerEmail String ={{ $json.customer.email }}
firstName String ={{ $json.customer.first_name }}
ordersCount Number ={{ $json.customer.orders_count }}
orderNumber Number ={{ $json.order_number }}

After this node, every downstream step reads $json.customerEmail instead of digging back into the raw payload.

3 IF — is this the third order?

Add an IF node. Create one condition comparing numbers:

  • Left value: ={{ $json.ordersCount }}
  • Operator: Number → Equals
  • Right value: 3

Wire only the true output forward. Every order still flows in, but only the one that makes someone a three-time buyer continues. The false branch is left empty, which silently ignores first orders, second orders, and everything past the third.

📌

Using Equals 3 rather than greater than or equal to 3 is deliberate. Equals fires the reward exactly once. A greater-or-equal check would re-send a code on the fourth, fifth, and every later order.

4 HTTP Request — create the discount code

Add an HTTP Request node (version 4.2). This is where the reward becomes real. You create a unique code under the price rule you set up earlier.

  1. Method: POST
  2. URL: https://YOUR_STORE.myshopify.com/admin/api/2026-04/price_rules/YOUR_PRICE_RULE_ID/discount_codes.json
  3. Authentication: Predefined Credential Type → Shopify API, using the same credential as the trigger.
  4. Body: set Body Content Type to JSON and paste the JSON body below.
{
  "discount_code": {
    "code": "LOYAL15-{{ $json.orderNumber }}"
  }
}

Because the code is built from the order number, every reward is unique and easy to trace back to the order that earned it. Shopify returns the created code:

{
  "discount_code": {
    "id": 13294857263,
    "price_rule_id": 9876543210,
    "code": "LOYAL15-1042"
  }
}
💡

Tip: The price rule decides the actual discount (percentage, usage limits, expiry). Build it once in Discounts → no, use the price rule via the API or the admin, set “Limit to one use per customer”, and the workflow simply attaches fresh codes to it.

5 Gmail — send the reward email

Add a Gmail node (version 2.1), operation Send. Connect your Gmail credential and fill in:

  • To: ={{ $('Edit Fields').item.json.customerEmail }}
  • Subject: A thank-you gift for your third order
  • Email type: HTML
  • Message:
Hi {{ $('Edit Fields').item.json.firstName }},

Three orders in. That means a lot to a small shop, so here is
15% off your next one, just for you:

  {{ $json.discount_code.code }}

Apply it at checkout. Thanks for keeping us in your corner.

Save the workflow and toggle it active. The next customer to reach their third order gets a personal code in their inbox minutes later.

Common mistakes

  • Using greater-or-equal in the IF. It re-rewards the same shopper on every order past the third. Use exact Equals, or a modulo expression like ={{ $json.ordersCount % 5 === 0 }} for an every-fifth-order reward.
  • Missing the write scopes. A token with only read_orders returns a 403 at the HTTP node. Add write_price_rules and write_discounts to the custom app.
  • Sending a plain text body as HTML. If you choose HTML email type, wrap the message in real markup so line breaks render. Or switch the type to Text for the simple version above.
  • Forgetting the price rule limit. Without “one use per customer” on the price rule, a forwarded code can be redeemed by anyone. Set the usage limit on the rule, not the code.
  • Testing with an account that has imported history. If you migrated orders, orders_count may not start at 1. Place a test order and read the real value before trusting the number 3.

Cost at realistic volume

Take a store doing 600 orders a month. Repeat-buyer rates vary, but suppose 40 customers cross into their third order in a given month. That is 40 discount-code API calls and 40 Gmail sends.

Component Usage at this volume Cost
n8n (self-hosted) 600 trigger runs, 40 full runs $0
Shopify Admin API 40 discount-code calls $0 (within rate limits)
Gmail 40 emails (limit ~500/day) $0

The whole thing runs for nothing beyond the server you already pay for. Compare that to a loyalty app at 39 dollars a month and the workflow pays for itself the day you turn it on. On n8n Cloud, these executions sit comfortably inside the entry plan.

🚀 Get the Repeat Customer Reward Email template

The guide above is free to follow. If you would rather skip the build, download the ready-to-import workflow, then just add your credentials. Prefer it installed and tuned for you? See our done-for-you services.

Download the template ($14) →

Instant download · Works on n8n Cloud and self-hosted

FAQ

Does this send a reward on every future order?

No. The IF node checks for an exact orders count of 3, so the reward fires once when the customer becomes a three-time buyer. Change the number, or use a modulo expression, if you want a reward on every fifth order instead.

Do I need a paid loyalty app for this?

No. The workflow uses the native Shopify Admin API to mint discount codes and Gmail to deliver them, so there is no monthly loyalty-app fee. You only need an n8n instance, which runs free when self-hosted and cheaply on Cloud.

Where does the discount code come from?

You create one reusable price rule in Shopify admin, for example fifteen percent off. The workflow then generates a fresh, single-customer code under that price rule on each qualifying order, so every reward code is unique and trackable.

Will the customer count be off by one?

The orders_count on the customer object includes the order that just triggered the webhook, so a third purchase reads as 3. If your store imported historical orders, test with a real account first and adjust the IF value to match what you actually see.

Can I reward by total spend instead of order count?

Yes. The customer object also carries total_spent. Map that field in the Edit Fields node and change the IF condition to a spend threshold, such as greater than 300 dollars, to reward your highest-value buyers instead of counting orders.

Related guides

n8n
Shopify
Gmail
loyalty
automation

Shopify pre-order tag and fulfillment routing with n8n


This Shopify pre-order tag and fulfillment routing n8n workflow watches every new order, detects which line items are pre-orders, and writes a clear tag back to the order so your team never ships a backordered item by mistake. Full pre-order carts get a hold tag, mixed carts get a split-shipment tag, and a Telegram alert plus a Google Sheets log keep everyone aligned. In-stock orders pass through untouched.

What it does

Pre-orders are great for cash flow and demand testing, but they quietly break fulfillment. A customer buys a pre-order hoodie and an in-stock sticker pack in the same cart, and now your warehouse either ships half an order early or sits on the sticker pack for three weeks. Either way you get a support ticket.

This workflow removes the guesswork. Every time Shopify creates an order, n8n reads the line items, decides whether any of them are pre-orders, and tags the order so the right thing happens next:

  • A cart made entirely of pre-order items is tagged pre-order, hold so fulfillment knows to wait for stock.
  • A cart that mixes pre-order and in-stock items is tagged pre-order, partial-preorder so the team can ship the available items now and hold the rest.
  • A normal in-stock cart is left alone and keeps moving through your usual flow.

On top of the tag, the team gets a Telegram message describing the order and a row is appended to a Google Sheet so you have a running record of every pre-order routing decision. It is one of the most useful building blocks in any n8n Shopify automation stack because it sits at the exact point where pre-order chaos usually starts.

Why it beats the default

Shopify on its own treats a pre-order line item the same as any other line item. Unless you pay for a dedicated pre-order app with built-in tagging, nothing on the order tells your packer that one item is not in the building yet. Manual tagging works until volume rises, and then someone forgets, an order ships early, and you are issuing a partial refund.

Shopify Flow can tag orders, but its conditions are limited and it cannot run the line-item logic, message Telegram, and log to Sheets in one place without extra connectors. Doing the same in n8n gives you three advantages:

  • The detection rule is yours. Match a SKU prefix, a cart property, a vendor, or a tag, and change it in seconds.
  • The whole path lives in one workflow you can read top to bottom, version, and reuse for other order types.
  • It is self-hosted, so the per-order cost is effectively zero once n8n is running.

What you need

  • An n8n instance, either self-hosted or n8n Cloud. New to it? Start with how to set up n8n.
  • A Shopify custom app access token with read and write access to Orders.
  • A consistent way pre-order items are marked. The most reliable markers are a SKU prefix like PRE- or a line item property your pre-order app or theme adds to the cart.
  • A Telegram bot token and the chat ID of your fulfillment channel.
  • A Google account with a Sheet ready to receive routing rows.

Node-by-node list

  1. Shopify Trigger, topic orders/create. Fires once per new order.
  2. Code node, “Detect pre-order items”. Classifies each line item and computes the new tag string and a plain message.
  3. IF node. Sends orders that contain at least one pre-order item down the true branch and everything else down the false branch to exit.
  4. Shopify node, Order, Update. Writes the computed tags back to the order.
  5. Set node (Edit Fields). Builds the route type label and the notification fields used downstream.
  6. Telegram node, Send Message. Alerts the fulfillment channel with the order and its routing.
  7. Google Sheets node, Append. Logs the routing decision as one row.

Step-by-step build

  1. Add a Shopify Trigger node and select the topic orders/create. Connect your Shopify access token credential. This is the only trigger in the workflow, and it sits at the start where it belongs.
  2. Add a Code node named “Detect pre-order items”. Loop over $json.line_items and mark an item as a pre-order when its sku starts with PRE- or it carries a property whose name matches preorder. Split the items into a pre-order list and an in-stock list. Set hasPreorder to true when the pre-order list is not empty and allPreorder to true when there are no in-stock items. Build newTags by appending pre-order, hold for a full pre-order cart or pre-order, partial-preorder for a mixed cart to the order’s existing tags. Return orderId, orderName, email, hasPreorder, allPreorder, the two item lists as joined strings, newTags, and total.
  3. Add an IF node. Set the condition to Boolean, value one {{ $json.hasPreorder }}, equals true. The false output stays empty so plain in-stock orders simply end here.
  4. On the true branch, add a Shopify node set to resource Order, operation Update. Set Order ID to {{ $json.orderId }}, then under Update Fields add Tags and set it to {{ $json.newTags }}. This is what stamps the routing decision onto the order itself.
  5. Add a Set node (Edit Fields). Add a string assignment routeType set to {{ $json.allPreorder ? 'Full pre-order (hold)' : 'Partial (ship in-stock, hold pre-order)' }}, and carry forward orderName, email, preorderItems, inStockItems, and newTags so the next two nodes have clean inputs.
  6. Add a Telegram node, operation Send Message. Put your fulfillment chat ID in Chat ID and a Text like: Pre-order routing | {{ $json.orderName }} | Type: {{ $json.routeType }} | Pre-order: {{ $json.preorderItems }} | In stock: {{ $json.inStockItems }} | {{ $json.email }}.
  7. Add a Google Sheets node, operation Append. Select your spreadsheet and tab, then map columns for date, order, email, route type, pre-order items, in-stock items, total, and tags. Use Define Below to map each column to the matching field.
  8. Save, then run a test order in Shopify with a known PRE- SKU. Confirm the order shows the new tags, the Telegram message arrives, and a row lands in the Sheet. Activate the workflow.

Common mistakes

A few things trip people up the first time.

Replacing existing tags instead of appending

The Shopify Update operation overwrites the Tags field. If you set it to just pre-order, you wipe any tags the order already had. The Code node avoids this by reading order.tags first and appending to it, so keep that line in place.

Marking items by guesswork

Do not try to infer a pre-order from inventory levels alone, because a temporary stockout looks identical to a pre-order. Use an explicit marker you control, a SKU prefix or a cart property, so the rule is deterministic.

Expecting the tag to hold the order by itself

A tag is a label, not an action. If you want tagged orders to actually pause, pair the hold tag with a Shopify Flow rule or keep the pre-order lane on manual fulfillment. The tag is the signal that drives that rule.

Forgetting the false branch

If you wire downstream nodes to the wrong IF output, every in-stock order gets tagged too. Leave the false output empty so normal orders exit cleanly.

Cost at realistic volume

On self-hosted n8n this workflow is essentially free. There are no paid API calls in the path: the Shopify Trigger, the order update, Telegram, and Google Sheets are all included with their respective free tiers or your existing plan.

  • At 300 orders per month, you run 300 trigger executions and only update and notify on the subset that contains pre-orders. Cost is zero beyond hosting.
  • At 3,000 orders per month, the same holds. Telegram and Google Sheets have generous free quotas that this volume stays well under.
  • On n8n Cloud, each order counts as one execution against your plan. Even the entry plan covers thousands of executions, so a typical store pays nothing extra.

Compare that to a per-order fee from a dedicated pre-order app, and the workflow pays for itself the moment you have steady pre-order volume.

Ready-to-import template

Want this running today without wiring every node by hand? We package tested, import-ready n8n templates and set them up for you. See our done-for-you services to get the pre-order routing workflow installed, connected to your Shopify store, and validated end to end.

FAQ

How does n8n know which items are pre-orders?

The Code node checks each line item for a SKU prefix such as PRE- or a cart property named preorder. You pick the marker that matches how your pre-order app or theme flags items, so the rule is explicit and no extra Shopify product lookups are needed.

Will this split a mixed cart into two shipments?

The workflow tags a mixed order as partial-preorder so your team can ship the in-stock items now and hold the rest. n8n flags the split for you, then you complete the two fulfillments in Shopify or with your fulfillment app of choice.

Does tagging the order stop it from auto-fulfilling?

Tags alone do not pause fulfillment. Add a hold tag plus a matching Shopify Flow rule that holds tagged orders, or keep the pre-order lane on manual fulfillment and let the tag be the signal your team watches for.

Can I use Slack or email instead of Telegram?

Yes. Swap the Telegram node for a Gmail, Outlook, Slack, or Discord node. The fields built in the Set node stay the same, so only the final notification node changes and the routing logic is untouched.

What happens to normal in-stock orders?

Orders with no pre-order items take the false branch of the IF node and exit without changes. They keep flowing through your existing fulfillment process, so the workflow only ever acts on the orders that genuinely need special routing.

Related guides

Shopify auto-email to supplier on low stock with n8n

Shopify supplier low stock purchase order workflow in n8n


Want Shopify to auto-email your supplier the moment stock runs low? This n8n workflow does exactly that: a scheduled job checks your Shopify inventory once a day, finds every variant at or below its reorder point, and emails the right supplier a ready-to-send purchase order through Gmail. A Google Sheet holds your reorder rules and a sent log, so no supplier ever receives the same request twice. No add-on apps, no Shopify Plus, and nothing to remember.

Prefer to skip the build? Jump to the done-for-you setup → and we will wire it to your store and suppliers for you.

What it does

Running out of a best seller is one of the quietest ways a Shopify store loses money. The product page still ranks, the ads still spend, but the buy button is gone and the order goes to a competitor. Most owners only notice when a customer complains or when they happen to scroll the inventory tab. This workflow closes that gap by turning your reorder process into a daily, automatic email to the supplier.

Here is the job in one sentence: every morning, n8n reads your Shopify inventory, compares each variant against a reorder threshold you set, and emails the matching supplier a purchase order for anything that is too low. It is part of the wider family of n8n Shopify automations that replace manual store admin, and it pairs naturally with an owner-facing low-stock alert if you also want a heads-up in your own inbox.

What the supplier receives is a clean, specific message: the product name, the SKU, how many units are left, and how many to send. Nothing for you to type, and nothing for them to clarify.

Why it beats the default

Shopify can show you a low-stock figure in the admin, and the higher Shopify Plus tier can fire a Shopify Flow action, but neither gives you a true supplier reorder out of the box on a standard plan. Here is where the n8n version pulls ahead.

Approach Emails the supplier directly Per-SKU thresholds and quantities Stops duplicate requests Plan needed
Shopify admin low-stock view No, you read it yourself One global value Manual Any
Shopify Flow email action To staff, not a real PO Limited No Plus / Flow
This n8n workflow Yes, with quantities Yes, from a sheet Yes, 7-day log Any

The reorder rules live in a Google Sheet, so a warehouse assistant can change a threshold or a supplier email without ever opening n8n. And because the workflow writes a last-ordered date back to that sheet, the same SKU never triggers two reorders in the same week. That dedup step is the difference between a tool a supplier trusts and one they start ignoring.

What you need

  • An n8n instance, either n8n Cloud or a self-hosted setup.
  • A Shopify Admin API access token with read_products and read_inventory scopes. You create this from an app in the Shopify Developer Dashboard (dev.shopify.com).
  • A Gmail account connected to n8n through Google OAuth, used to send the purchase orders.
  • A Google Sheet with two tabs: one for reorder rules, one optional log. Column layout is in the data section below.

Build time is around 40 minutes from scratch the first time, most of which is creating the Shopify token and filling in your supplier rows. Once it runs, your involvement drops to zero.

Node-by-node list

Seven nodes, one straight line, a single trigger at the start. Here is the full canvas before we configure anything.

  Schedule Trigger (daily 08:00)
        |
  Get Shopify inventory  (HTTP Request, GET products.json)
        |
  Read reorder rules     (Google Sheets, read SKU -> supplier)
        |
  Match low stock        (Code: keep variants <= threshold)
        |
  Build PO email         (Edit Fields: to / subject / body)
        |
  Email supplier         (Gmail: send purchase order)
        |
  Log reorder            (Google Sheets: write last_ordered)
  
  • Schedule Trigger (n8n-nodes-base.scheduleTrigger) fires the run once a day.
  • Get Shopify inventory (n8n-nodes-base.httpRequest) pulls every product and its variants from the Shopify Admin API.
  • Read reorder rules (n8n-nodes-base.googleSheets) loads your SKU-to-supplier table.
  • Match low stock (n8n-nodes-base.code) flattens the variants and keeps only the ones that need reordering.
  • Build PO email (n8n-nodes-base.set) assembles the recipient, subject, and body.
  • Email supplier (n8n-nodes-base.gmail) sends the purchase order.
  • Log reorder (n8n-nodes-base.googleSheets) stamps today’s date against the SKU so it is not emailed again for a week.

Step-by-step build

  1. Add a Schedule Trigger. Set the rule to trigger at a fixed hour, for example 08:00, in your store timezone. Daily is the right cadence: it is frequent enough to catch a drop overnight and slow enough that no supplier feels pestered.
  2. Add an HTTP Request node named “Get Shopify inventory”. Set the method to GET and the URL to https://YOUR-STORE.myshopify.com/admin/api/2026-04/products.json. Turn on Send Query Parameters and add fields = id,title,variants and limit = 250. For authentication, choose Generic Credential Type, Header Auth, with header name X-Shopify-Access-Token and your token as the value. Because this is a GET, there is no request body to configure.
  3. Add a Google Sheets node named “Read reorder rules”. Operation Get Row(s), point it at your spreadsheet and the Reorder Rules tab. It returns one item per SKU row.
  4. Add a Code node named “Match low stock”. This is where the two data sources meet. Pull the inventory with $('Get Shopify inventory').all() and the rules with $input.all(), flatten every product into one entry per variant, look up each variant’s rule by SKU, and return only the variants whose inventory_quantity is at or below the threshold and whose last_ordered is empty or older than seven days. Variants with no matching rule are ignored.
  5. Add an Edit Fields node named “Build PO email”. Add three string assignments: emailTo set to {{ $json.supplier_email }}, subject set to Reorder request: {{ $json.title }} ({{ $json.sku }}), and body holding your purchase-order text with the SKU, units left, and reorder quantity merged in.
  6. Add a Gmail node named “Email supplier”. Operation Send. Set To to {{ $json.emailTo }}, Subject to {{ $json.subject }}, and the message to {{ $json.body }}. Connect your Gmail OAuth credential.
  7. Add a final Google Sheets node named “Log reorder”. Operation Append or Update Row, matching on the sku column, and set last_ordered to {{ $now.format('yyyy-MM-dd') }}. This is the dedup memory that keeps the next run from re-emailing the same product.
💡

Test it with the threshold set high, for example 9999, so every variant counts as low. You will see the exact emails that would go out without touching real stock levels. Drop the threshold back once you are happy.

The reorder-rules sheet

The whole workflow is driven by one tab. Keep the column names exactly as below, since the Code node and the log step reference them by name.

Column Example What it stores
sku MUG-CERAMIC-12OZ The variant SKU, used as the match key
supplier_name Riverside Ceramics For the email greeting
supplier_email orders@riversideceramics.com Where the purchase order is sent
threshold 20 Reorder when units left is at or below this
reorder_qty 100 How many units to request
last_ordered 2026-06-13 Written by the workflow for 7-day dedup

Common mistakes

  • Forgetting the read_inventory scope on the Shopify token. Without it, inventory_quantity comes back null and nothing ever matches. Add the scope, then reinstall the app.
  • Using the storefront API URL instead of the Admin API. Reorder logic needs /admin/api/.../products.json, not the public endpoint.
  • Leaving the schedule on an interval like every minute. That is what spams suppliers. Daily is the design, and the 7-day log is the backstop.
  • Mismatched SKUs between Shopify and the sheet. A trailing space or different case breaks the match. Trim and lowercase both sides inside the Code node to be safe.
  • Skipping the final log node. Without it there is no dedup, and a product that stays low for three days emails the supplier three times.

Cost at realistic volume

This is about as cheap as automation gets, because every service in the stack has a free tier that comfortably covers a normal store.

Service What it does here Cost at one run a day
n8n One scheduled execution per day Free self-hosted, or well within the Cloud starter plan
Shopify Admin API One products read per run Free, far below rate limits
Gmail Sends purchase orders Free, up to 500 sends a day on a standard account
Google Sheets Rules and dedup log Free

Even a catalog with hundreds of SKUs is a single API read and a handful of emails per day, so a typical store runs this for nothing. Compare that to the cost of one stockout on a product that sells 30 units a day, and the maths is not close.

🚀 Want this wired to your store for you?

The guide above is free to follow. If you would rather skip the build, download the ready-to-import workflow, then just add your credentials. Prefer it installed and tuned for you? See our done-for-you services.

Download the template ($12) →

Instant download · Works on n8n Cloud and self-hosted

FAQ

Does this work on Shopify Basic, or do I need Shopify Plus?

It works on every Shopify plan, including Basic. The workflow reads inventory through the standard Admin API, which all plans expose. You do not need Shopify Plus or the Shopify Flow app, since n8n handles the logic and Gmail sends the email itself.

Will the supplier get spammed every time someone buys a unit?

No. The workflow runs once a day, not on every sale, and it writes a last-ordered date to your Google Sheet after each email. A SKU that was reordered in the last seven days is skipped, so each supplier gets at most one request per product per week.

Can different products go to different suppliers?

Yes. The Google Sheet maps every SKU to its own supplier email, threshold, and reorder quantity. The Code node matches each low-stock variant to the right row, so a single run can email five different suppliers about five different products in one pass.

What if I run several Shopify locations?

The products endpoint returns total inventory across locations. If you reorder per location, switch the HTTP Request to the inventory_levels endpoint with a location_id filter and add that column to your reorder-rules sheet so thresholds are evaluated per location.

Can I send from a real PO address instead of Gmail?

Yes. Swap the Gmail node for the SMTP Send Email node and point it at your business mailbox, or keep Gmail and set a reply-to of purchasing@yourstore.com. The rest of the workflow stays exactly the same.

Related guides

n8n
Shopify
Gmail
Google Sheets
inventory
automation

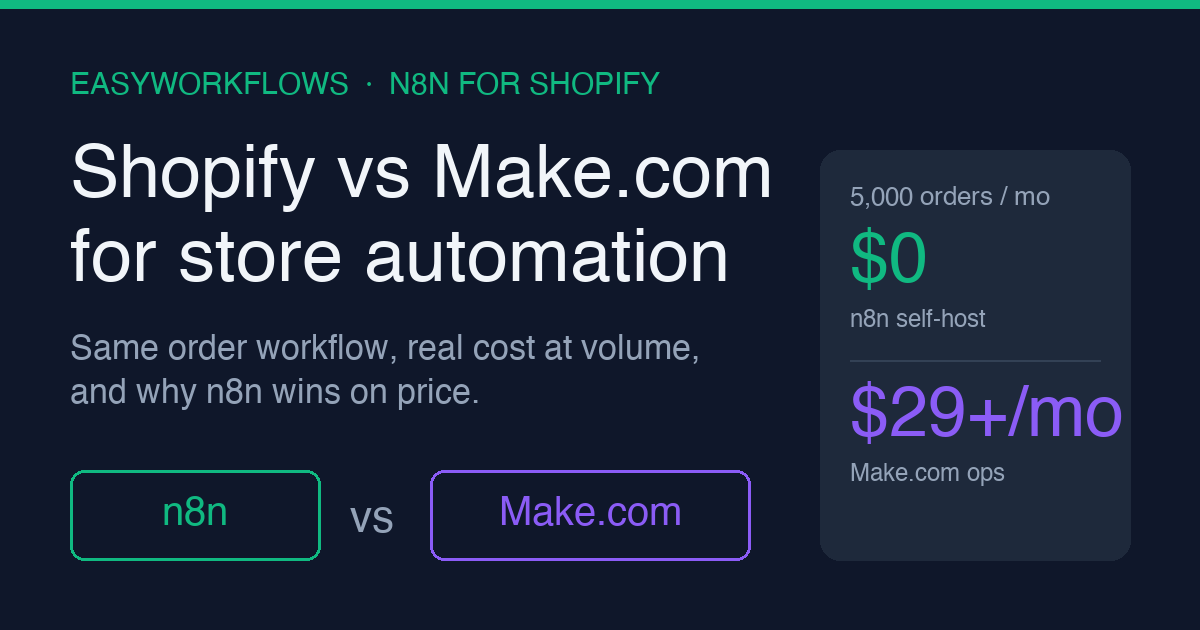
Shopify vs Make.com for store automation: which one to pick in 2026


If you are weighing Shopify vs Make.com for store automation, the short answer is that Make.com is the quickest place to start but the most expensive place to scale. Make bills by operation, so every order that touches several modules burns several operations. This guide rebuilds a real order workflow in n8n, tags VIP customers, logs to Google Sheets, and alerts Slack, then shows the cost at 5,000 orders a month.

What it does

A Shopify store automation does the boring order work for you. When an order comes in, it logs the sale somewhere you can read it, flags your best customers, and tells your team about the orders that matter. The question is not whether to automate that. It is which engine runs it.

This post compares the two engines most store owners land on. Make.com is the polished, fully hosted choice. n8n is the open workflow tool that you can self-host or run on its cloud. To keep the comparison honest, the same Shopify workflow is built in n8n below: one trigger, a Google Sheets log, a VIP tag, and a Slack alert. That is a workload almost every store runs, so the cost numbers later are grounded in a real scenario rather than a marketing chart.

For a wider view of what n8n can drive on a store, see the pillar guide on n8n Shopify automation.

Why it beats the default

Make.com is the default because it is friendly. You sign up, connect Shopify, drag modules, and a scenario runs in minutes. Nothing to host, nothing to patch. For a store doing a handful of orders a day, that convenience is worth paying for and the bill stays small.

The problem is the meter. Make.com charges by operation, and an operation is one module run, not one order. The order workflow in this post touches five modules. So one Shopify order is roughly five operations, before any retries or extra branches. A store doing 5,000 orders a month is therefore spending around 25,000 operations a month on this single workflow, and most stores run more than one workflow.

n8n changes the unit of cost. Self-hosted, it has no per-operation fee at all. You pay for a small server and run as many executions as that server handles. On n8n Cloud you pay by execution, where one execution is the whole workflow for one order, not five separate charges. Either way, the per-order cost stops climbing the moment your store gets busy. That is the core reason n8n beats the Make.com default for an active Shopify store: the tool that is cheapest to start is rarely the one that is cheapest to scale.

Where Make.com still wins

Be fair to Make. If you run very low volume, never want to touch a server, and value a large library of prebuilt app modules, Make is a reasonable home. The break point is volume and the number of workflows, not features. Below a few hundred orders a month the price gap is tiny and convenience can decide it.

What you need

  • A Shopify store with admin access to create an app or use the Shopify connection.
  • An n8n instance, either self-hosted (Docker on a small VPS) or n8n Cloud.
  • A Google account with a Sheet ready to receive order rows, connected through Google Sheets OAuth.
  • A Slack workspace and a channel for order alerts, connected through the Slack OAuth credential.
  • About thirty minutes for the first build, less once you have done it once.

Node-by-node list

The worked example is a single linear workflow with one branch. Here is every node, in order, with the version that matters.

  • Shopify Trigger: fires on the orders/create event. This is the only trigger and it sits at the very start of the flow.
  • Edit Fields (Set, v3.4): normalizes the raw order into four clean fields, order_number, customer_email, total, and currency.
  • Google Sheets (Append, v4): writes one row per order to your tracking sheet.
  • IF (v2): checks whether total is at or above your VIP threshold, for example 100.
  • Shopify (Update customer): on the true branch, adds the VIP tag to the customer record.
  • Slack (Send message, v2): posts the VIP order alert to your team channel using a channel selected through the channel picker.

Connections run Shopify Trigger to Edit Fields to Google Sheets to IF. The IF true output goes to the Shopify update node, which then goes to Slack. The IF false output ends quietly, because a normal order is already logged and needs no alert.

Step-by-step build

  1. Add the Shopify Trigger node. Select your Shopify credential, set the topic to orders/create, and save. n8n registers the webhook with Shopify for you.
  2. Add an Edit Fields node and set it to Manual Mapping. Create four assignments. Name the first order_number with type string and value {{ $json.order_number }}. Add customer_email as string mapped to {{ $json.email }}. Add total as a number mapped to {{ $json.total_price }}. Add currency as string mapped to {{ $json.currency }}.
  3. Add a Google Sheets node. Choose the Append operation, pick your spreadsheet and sheet, and map the four fields from the previous node into the matching columns. Run once to confirm a row lands.
  4. Add an IF node after Google Sheets. Set one condition: value 1 is {{ $json.total }}, the operator is a number that is greater than or equal to, and value 2 is your threshold, for example 100. Match the data type to number so the comparison is numeric, not text.
  5. From the IF true output, add a Shopify node set to Update a customer. Identify the customer by the email captured earlier and add VIP to the customer tags. This is how your best buyers get flagged automatically.
  6. From the Shopify update node, add a Slack node set to Send a Message. Pick the target channel from the channel list, then write a short message such as New VIP order {{ $json.order_number }} for {{ $json.total }} {{ $json.currency }}.
  7. Activate the workflow. Place a test order in Shopify, confirm the row appears in Sheets, the customer gains the VIP tag when over threshold, and the Slack alert posts. You now have the same scenario people build in Make, running for a flat cost.

Common mistakes

A few errors trip up store owners moving from Make.com to n8n. None of them are hard once you know them.

  • Comparing operations to executions. A Make operation is one module run; an n8n execution is the whole workflow. Compare like for like or the price gap looks smaller than it is.
  • Leaving the IF condition as text. If the total is compared as a string, 90 can look larger than 100. Set the data type to number on the IF node.
  • Wiring a second trigger mid-flow. n8n workflows start from one trigger. Do not drop another trigger node in the middle to pull extra data; use a regular node or an HTTP Request instead.
  • Hardcoding the Slack channel as plain text. In recent Slack nodes you select the channel through the channel picker, not by typing a raw string, or the message silently fails to route.
  • Forgetting Shopify API scopes. The customer update needs write access to customers. If tagging fails, check the app scopes before blaming the workflow.

Cost at realistic volume

Here is the part that decides most store choices. Take the five-node workflow above and run it at 5,000 orders a month.

On Make.com, one order is about five operations. Five thousand orders is roughly 25,000 operations a month for this one workflow. Make’s paid tiers are priced in operation bundles, so a single busy workflow can already push you off the cheapest plan, and every extra workflow you build spends from the same operation pool. Add retries, a second branch, or a daily report and the operation count climbs further.

On self-hosted n8n, those same 25,000 executions cost nothing beyond your server. A small VPS that comfortably runs this load is in the range of a few dollars a month, and it runs all your other workflows too, not just this one. On n8n Cloud, you pay by execution rather than by operation, so the same order is one execution instead of five, which keeps the bill far below the operation math even before self-hosting.

The pattern holds across stores: at low volume the difference is pennies, and at real order volume n8n is the cheaper engine by a wide margin because cost does not scale with every module you add.

Ready-to-import template

You can build this workflow from the steps above, or skip the setup. We package the Shopify order workflow as an importable n8n template with the VIP tagging, Google Sheets log, and Slack alert already wired, plus a setup guide. If you would rather have it built, configured, and tested for your store, our team does that for you through EasyWorkflows services.

FAQ

Is Make.com or n8n better for Shopify automation?

Make.com is faster to start and fully hosted, which suits very low volume. n8n wins once a store runs steady order traffic, because self-hosted n8n has no per-operation fee. A busy Shopify store usually pays less and keeps more control on n8n.

Does Make.com charge per Shopify order?

Make.com bills by operation, and each node run inside a scenario counts. A single Shopify order that touches five modules spends five operations. At a few thousand orders a month those operations add up and push you onto a higher paid tier.

Can I move my Make.com scenarios to n8n?

There is no one-click import, but the logic maps almost directly. Each Make module becomes an n8n node, routers become IF or Switch nodes, and Shopify triggers stay the same. Rebuilding a typical store scenario in n8n takes an afternoon, not a project.

Do I need to self-host n8n to save money?

Self-hosting gives the largest saving because there is no usage fee, only a small server bill. n8n Cloud is also available if you prefer no server work; it is priced by executions, not per operation, so it still beats Make.com at order volume.

Is n8n harder to learn than Make.com?

The learning curve is slightly steeper because n8n exposes more raw data and expressions. For Shopify store owners the gap is small. The node layout, triggers, and field mapping follow the same mental model, and you gain code nodes when you need them.

Related guides

Log Shopify New Orders to Google Sheets with n8n

Shopify new orders to Google Sheets workflow in n8n


This guide shows you how to send Shopify new orders to Google Sheets with n8n, so every sale lands in a clean, append-only spreadsheet the moment a customer checks out. You wire a Shopify trigger to an Edit Fields node and a Google Sheets append step — three nodes, no code. The result is a live order log your whole team can filter, pivot, and share, without paying monthly for yet another export app.

Prefer to skip the setup? Grab the ready-made template → and be running in under 10 minutes.

What it does

The workflow listens for new Shopify orders and writes one tidy row to a Google Sheet for each one. As soon as a shopper completes checkout, Shopify fires a webhook to n8n. n8n flattens the messy order payload into the columns you actually care about — order number, date, customer, email, total, items — and appends that row to the bottom of your sheet.

You end up with a running ledger of every order that updates itself. No more exporting CSVs at the end of the week, no copy-paste, no stale numbers. If you want the wider picture of what n8n can do for a store, the n8n Shopify automation guide covers the full set of workflows this one belongs to.

┌──────────────────────────────────────────────────────────────┐
│  SHOPIFY NEW ORDERS → GOOGLE SHEETS                            │
│                                                                │
│  [Shopify Trigger]  →  [Edit Fields]  →  [Google Sheets]       │
│   orders/create        flatten order      append one row       │
└──────────────────────────────────────────────────────────────┘
  

Why it beats the default

Shopify already lets you export orders, so why automate it? Because the built-in export is a manual, point-in-time CSV. Someone has to remember to download it, the file is out of date the second a new order arrives, and you cannot share a live view with a fulfillment partner or accountant without re-sending files.

A live Google Sheet fixes all of that. The data is current to the last order, everyone works from the same tab, and you can build pivot tables, filters, and charts on top without touching Shopify. Compared with paid order-export apps that charge a monthly fee per store, this workflow runs on tools you already have and costs nothing extra if you self-host n8n.

💡

Tip: Keep this sheet append-only. If you need a working copy for notes or edits, duplicate the tab — never edit the raw log, so it stays a clean source of truth.

What you need

  • An n8n instance — n8n Cloud or self-hosted, version 1.0 or newer.
  • A Shopify store with admin access, so you can create an app and an Admin API access token.
  • A Google account with a Google Sheet ready to receive orders.
  • About 30 minutes if you build it from scratch, or under 10 minutes with the template below.

Node-by-node list

Three nodes, wired in a straight line. Here is the whole workflow before we build it:

# Node Type Job
1 Shopify Trigger shopifyTrigger Fires on every new order (topic orders/create)
2 Edit Fields set (v3.4) Flattens the order JSON into clean spreadsheet columns
3 Google Sheets googleSheets (v4) Appends one row to your order log

Step-by-step build

1 Add the Shopify Trigger

Create a new workflow and add a Shopify Trigger node as the starting point. This is the only trigger in the workflow — everything else runs after it.

  1. In the node, click the credential dropdown and choose Create new. Shopify uses an Access Token credential — see the credentials guide in the template for how to create an app and copy the token.
  2. Set Topic to orders/create. This is the key choice: it fires once per new order and never on edits, so you get exactly one row per sale.
  3. Save the node. n8n registers the webhook with Shopify automatically.

When an order comes in, the node outputs the full Shopify order object. It looks roughly like this:

{
  "order_number": 1042,
  "created_at": "2026-06-18T14:32:09-05:00",
  "email": "james.carter@gmail.com",
  "total_price": "84.00",
  "currency": "USD",
  "customer": { "first_name": "James", "last_name": "Carter" },
  "line_items": [
    { "quantity": 2, "title": "Cedar Camp Mug" },
    { "quantity": 1, "title": "Trail Beanie" }
  ],
  "financial_status": "paid",
  "fulfillment_status": null
}
📌

Do not wire the Shopify Trigger anywhere except as the first node. A trigger placed in the middle of a flow is one of the most common reasons an imported workflow refuses to run.

2 Map the order with Edit Fields

Add an Edit Fields node (the node type is Set) right after the trigger. The raw order has dozens of fields and nested objects; this node keeps only what belongs in your log and gives each column a clean name.

  1. Set the mode to Manual Mapping.
  2. Add one assignment per column. Give each a name, choose the String type, and paste the expression below as its value.
Field name Value expression
order_number ={{ $json.order_number }}
order_date ={{ $json.created_at }}
customer_name ={{ ($json.customer?.first_name || '') + ' ' + ($json.customer?.last_name || '') }}
email ={{ $json.email }}
total ={{ $json.total_price }}
currency ={{ $json.currency }}
items ={{ $json.line_items.map(i => i.quantity + 'x ' + i.title).join(', ') }}
financial_status ={{ $json.financial_status }}
fulfillment_status ={{ $json.fulfillment_status || 'unfulfilled' }}

After this node the data is flat and ready for the sheet:

{
  "order_number": "1042",
  "order_date": "2026-06-18T14:32:09-05:00",
  "customer_name": "James Carter",
  "email": "james.carter@gmail.com",
  "total": "84.00",
  "currency": "USD",
  "items": "2x Cedar Camp Mug, 1x Trail Beanie",
  "financial_status": "paid",
  "fulfillment_status": "unfulfilled"
}
💡

Tip: The items expression collapses every line item into one readable cell like 2x Cedar Camp Mug, 1x Trail Beanie. If you would rather log one row per product, skip this and split line items instead — but for a sales ledger, one row per order is cleaner.

3 Append the row to Google Sheets

Add a Google Sheets node as the final step.

  1. Connect your Google credential (OAuth2). Authorize n8n to access your sheets.
  2. Set Resource to Sheet Within Document and Operation to Append Row.
  3. Pick your order-log document and the tab name, for example Orders.
  4. Set the mapping column mode to Map Each Column Manually and match each sheet header to the matching Edit Fields value — order_number to order_number, and so on.
  5. Save and activate the workflow with the toggle in the top right.
📌

The header row in your sheet must match the field names exactly, including lower-case and underscores. A mismatch is the number-one reason the append silently lands in the wrong column.

The order log schema

Create these headers in row 1 of your sheet before you run the workflow:

Column Example What it stores
order_number 1042 Shopify order number for reference
order_date 2026-06-18T14:32:09-05:00 When the order was created
customer_name James Carter First and last name of the buyer
email james.carter@gmail.com Customer email for follow-up
total 84.00 Order total before currency
currency USD Currency code
items 2x Cedar Camp Mug, 1x Trail Beanie Readable line-item summary
financial_status paid paid, pending, refunded, and so on
fulfillment_status unfulfilled Fulfillment state at order time

Common mistakes

  • Picking the wrong topic. Using orders/updated instead of orders/create writes a new row every time an order changes — duplicates everywhere. Stick to orders/create.
  • Headers that do not match. If your sheet header reads Order Number but the field is order_number, the value lands in the wrong column or a brand-new one. Match names exactly.
  • Forgetting the null fulfillment status. New orders have fulfillment_status: null. The || 'unfulfilled' fallback keeps that cell readable instead of blank.
  • Building the Set node the old way. On version 3.4 the node is Edit Fields with named assignments; if you are following an old tutorial that talks about Values to Set, you are on a different version. Use Manual Mapping and add one assignment per column.
  • Testing with the workflow inactive. The Shopify Trigger only registers its webhook when the workflow is active. Toggle it on, then place a test order.

Cost at realistic volume

This is about as cheap as automation gets, because none of the three services bill you for it.

Volume n8n self-hosted n8n Cloud Starter
200 orders / month $0 (plus ~$5 VPS) Well within the plan
1,000 orders / month $0 (plus ~$5 VPS) Comfortable
5,000 orders / month $0 (plus ~$5 VPS) Consider the Pro tier

Each order is a single execution. Google Sheets is free up to its generous cell limit (around 10 million cells per spreadsheet — start a fresh sheet each year if you are a high-volume store). The Shopify webhook is included with every plan at no charge. If you self-host n8n, the workflow itself is effectively free; the only real cost is the small server you already run n8n on.

🚀 Get the Shopify Orders to Google Sheets Template

The guide above is free to follow. If you would rather skip the build, download the ready-to-import workflow, then just add your credentials. Prefer it installed and tuned for you? See our done-for-you services.

Download the template ($9) →

Instant download · Works on n8n Cloud and self-hosted

FAQ

Will this capture orders placed before I turned it on?

No. The Shopify Trigger only fires on orders created after you activate the workflow. To backfill older orders, run a one-time second workflow with a Shopify node set to Get Many Orders, then feed those into the same Edit Fields and Google Sheets append steps.

Does this slow down my Shopify checkout?

No. Shopify sends the order webhook to n8n after checkout completes, so the shopper never waits on your workflow. Even if n8n is briefly down, Shopify retries the webhook for up to 48 hours, so a short outage will not lose an order.

Can I log each month to a separate tab?

Yes. Set the sheet name in the Google Sheets node to an expression such as the current month and year. n8n appends to that tab if it exists. Create the monthly tabs ahead of time with matching headers so the append never fails midway.

Does it work with POS or draft orders?

The orders/create topic fires for online and Shopify POS orders once they become real orders. Draft orders are separate and do not trigger it until they convert. If you only want online sales, add an IF node that checks the source_name field before the append.

How do I also get a Slack or Telegram alert for big orders?

Add an IF node after Edit Fields that checks whether the total exceeds your threshold, then branch to a Telegram or Slack node. The Google Sheets append still runs for every order, while the alert only fires for the high-value ones you care about.

Related guides

n8n
Shopify
Google Sheets
automation

How to Build an n8n AI Chatbot for Shopify Customer Support

Shopify AI customer support chatbot workflow in n8n

This guide shows you how to build an n8n AI chatbot that answers your Shopify shoppers’ questions around the clock. An AI Agent node reads live order status from the Shopify Admin API, pulls answers from your own FAQ in Google Sheets, and emails you a clean handoff when a human is needed. It runs on Google Gemini’s free tier, so there is no per-message cost. You connect your credentials, paste one embed snippet into your theme, and your store has a 24/7 first responder. Build time is about 40 minutes.

Prefer to skip the setup? Grab the ready-made template → and have it running in under 10 minutes.

What it does

A shopper opens the chat bubble on your store and types “Where is my order?” or “What’s your return window?”. Instead of waiting hours for an email reply, they get an instant, accurate answer.

Here is the experience end to end:

  1. The customer types a question into a chat widget embedded on your Shopify storefront.
  2. The AI Agent reads the message and decides which tool it needs.
  3. For an order question, it asks for the checkout email, then queries the Shopify Admin API and reports the live fulfillment status.
  4. For a policy question, it reads your FAQ sheet and answers in your store’s voice.
  5. If it genuinely cannot help, it emails you the full conversation and tells the shopper a human will follow up.

The agent remembers the conversation, so a shopper can ask a follow-up like “and when will that ship?” without repeating their email. That memory is what separates a real support agent from a canned FAQ bot.

Why it beats the default

Shopify’s built-in options and most chat apps fall into two camps. The free ones are dumb autoresponders that only match keywords to canned replies, so “where is order 1043” gets the same generic answer as everything else. The smart ones are paid SaaS tools that charge per seat or per resolved conversation, and your data lives on their servers.

This workflow gives you the smart behaviour without the lock-in:

  • It reads live order data, so “where is my order” returns the actual fulfillment status and tracking, not a link to a help page.
  • Your FAQ lives in a Google Sheet you control, so updating an answer takes seconds and no developer.
  • There are no per-seat or per-conversation fees. You pay cents per chat for the model and nothing else.
  • Everything runs in your own n8n instance, so the conversation and customer data stay with you.

For a deeper look at how these pieces fit together across a store, see our pillar guide on n8n Shopify automation.

What you need

  • An n8n instance, Cloud or self-hosted, on a recent version that includes the AI Agent and Chat Trigger nodes.
  • A Shopify Admin API access token with read_orders scope. Since January 2026 this comes from an app you create in the Shopify Dev Dashboard, not from the old admin custom apps menu. Follow our guide to connect Shopify to n8n in 2026 if you have not set this up yet.
  • A free Google Gemini API key from Google AI Studio. You can swap in OpenAI or Claude if you prefer.
  • A Google account with a Sheet holding your FAQ and policy answers.
  • A Gmail account for the human-handoff emails.

Estimated build time: about 40 minutes from scratch, or under 10 minutes with the ready-made template.

How it works: the big picture

┌──────────────────────────────────────────────────────────────┐
│  SHOPIFY AI CUSTOMER SUPPORT CHATBOT                           │
│                                                                │
│  [Chat Trigger]  ──►  [AI Agent]  ──►  reply to shopper        │
│   (store widget)         │                                     │
│                          ├─ ai_languageModel ─ [Gemini 2.5 Flash]  │
│                          ├─ ai_memory ──────── [Simple Memory] │
│                          ├─ ai_tool ────────── [Order Status (HTTP)] │
│                          ├─ ai_tool ────────── [Store FAQ (Sheets)]  │
│                          └─ ai_tool ────────── [Escalate (Gmail)]    │
└──────────────────────────────────────────────────────────────┘
  

The Chat Trigger is the only entry point. Everything else hangs off the AI Agent as a sub-node: the model that does the thinking, the memory that holds the conversation, and three tools the agent calls when it needs them.

Node-by-node list

NodeTypeRole
Chat Trigger@n8n/n8n-nodes-langchain.chatTriggerEmbeddable storefront chat widget; entry point
AI Agent@n8n/n8n-nodes-langchain.agentReads the message, chooses tools, writes the reply
Google Gemini Chat Model@n8n/n8n-nodes-langchain.lmChatGoogleGeminiThe reasoning model (gemini-2.5-flash, free tier)
Simple Memory@n8n/n8n-nodes-langchain.memoryBufferWindowKeeps the conversation context per session
Order Status@n8n/n8n-nodes-langchain.toolHttpRequestGET request to the Shopify Admin API for order data
Store FAQn8n-nodes-base.googleSheets (as tool)Reads your policy and FAQ rows
Escalate to humann8n-nodes-base.gmail (as tool)Emails you the conversation when the agent is stuck

The Chat Trigger connects to the AI Agent on the normal main output. The other five nodes connect into the agent’s sub-inputs: one into ai_languageModel, one into ai_memory, and three into ai_tool. There are no Set or IF nodes to misconfigure, which removes the most common import failures.

Step-by-step build

1 Add the Chat Trigger

Create a new workflow and add a Chat Trigger node. In its settings, set the mode to Hosted Chat (publicly available). n8n will generate a chat URL and an embed snippet you will paste into your theme later. Leave authentication off for now while you test; you can add basic auth before going live.

💡

Tip: Set an initial greeting in the Chat Trigger options, for example “Hi! Ask me about your order, shipping, or returns.” It sets expectations and nudges shoppers toward questions the agent can actually answer.

2 Add the AI Agent

Add an AI Agent node and connect the Chat Trigger’s main output into it. Open the agent and set the system message. This prompt is the personality and the rulebook:

You are the support assistant for [Store Name].
Be friendly, concise, and never invent facts.

- For order questions, ask for the email used at checkout, then use
  the Order Status tool. Only share details for that exact email.
- For policy, shipping, or returns questions, use the Store FAQ tool.
- If you cannot answer confidently, use the Escalate tool to email
  the team, then tell the customer a human will reply by email.
Never reveal another customer's information.

3 Attach the Google Gemini Chat Model

Add a Google Gemini Chat Model node and connect it to the agent’s ai_languageModel input (the small port under the agent). Get a free API key from Google AI Studio, create the Gemini credential in n8n, and set the model to gemini-2.5-flash. It is fast, more than capable for support triage, and the free tier means your chats cost nothing.

📌

To use OpenAI or Claude instead, swap this one node for the OpenAI or Anthropic chat model node. Nothing else in the workflow changes.

4 Attach Simple Memory

Add a Simple Memory node and connect it to the agent’s ai_memory input. Set the session key to ={{ $json.sessionId }} so each shopper gets their own thread, and a context window of around 10 messages. This is what lets a shopper ask “and when will it ship?” without repeating their email.

5 Add the Order Status tool

Add an HTTP Request Tool and connect it to an ai_tool input. Name it order_status and describe it as “Look up a Shopify order by customer email”. Configure a GET request:

Method:  GET
URL:     https://YOUR-STORE.myshopify.com/admin/api/2026-04/orders.json
Query:   email = {email}      (let the model fill this)
         status = any
Auth:    Header Auth -> X-Shopify-Access-Token: YOUR_TOKEN

Mark the email query value as set by the model, so the agent fills it from what the shopper provided. A successful call returns order data the agent reads back in plain language:

{
  "orders": [
    {
      "name": "#1043",
      "email": "james.carter@gmail.com",
      "financial_status": "paid",
      "fulfillment_status": "fulfilled",
      "fulfillments": [
        { "tracking_company": "USPS", "tracking_number": "9400110200..." }
      ]
    }
  ]
}
💡

Tip: Keep the API version current (here 2026-04). Shopify retires old versions yearly, and a stale version is the number-one reason an order lookup silently returns nothing.

6 Add the Store FAQ tool

Add a Google Sheets node, set the operation to Get Rows, and connect it to a second ai_tool input. Point it at a sheet with two columns, topic and answer. Name the tool store_faq and describe it as “Read store policies, shipping times, and returns”. The agent will scan the rows and answer in your voice.

7 Add the Escalate-to-human tool

Add a Gmail node, set the operation to Send, and connect it to a third ai_tool input. Name it escalate_to_human. Set the recipient to your support inbox and let the model fill the subject and body with the customer’s email and the question it could not resolve. Email keeps a clean, searchable record of every gap in your FAQ.

📌

Escalation by email means nothing depends on you watching a live chat. You reply on your own schedule, and the shopper already knows a human is coming.

8 Embed and test

Save and activate the workflow. Copy the embed snippet from the Chat Trigger and paste it just before the closing </body> tag in your theme.liquid (Online Store -> Themes -> Edit code). Reload your storefront, open the chat bubble, and ask “Where is order #1043?” using a real test email.

Common mistakes

  • Wrong tool port. The model, memory, and tools connect to the small sub-inputs under the AI Agent, not to its main input. Dropping a tool onto the main flow is the most common reason an imported agent does nothing.
  • Missing Shopify scope. If order lookups return empty, your access token probably lacks read_orders. Add the scope to your app in the Dev Dashboard, reinstall it on the store, and generate a fresh token. Shopify does not retrofit scopes onto existing tokens.
  • Stale API version. A retired Shopify API version returns a 404 or empty array with no obvious error. Keep the version string current.
  • No session key on memory. Without ={{ $json.sessionId }} as the key, every shopper shares one memory and the agent gets confused across conversations.
  • Vague tool descriptions. The agent picks tools by their description. “Look up a Shopify order by customer email” works; “orders” does not.

Cost at realistic volume

The model is normally the only per-message cost, and on Google Gemini’s free tier that cost is zero. The API key from Google AI Studio is free, and the free quota comfortably covers the support volume of a typical store, whether that is a hundred chats a month or a few dozen a day.

If your store grows into serious volume and you ever exceed the free tier, Gemini’s paid pricing is still measured in single-digit dollars per thousand conversations, and the swap requires no changes to the workflow. Add your existing n8n plan (free self-hosted) and the Google Sheets and Gmail tools, which are free at this scale. Compared with paid support-chat SaaS that bills per seat or per resolved conversation, you are paying nothing to deflect thousands of tickets.

🚀 Get the Shopify AI Customer Support Chatbot template

The guide above is free to follow. If you would rather skip the build, download the ready-to-import workflow, then just add your credentials. Prefer it installed and tuned for you? See our done-for-you services.

Download the template ($19) →

Instant download · Works on n8n Cloud and self-hosted

FAQ

Do I need to know how to code to build this Shopify AI customer support chatbot?

No. Every part is a node you configure with dropdowns and text fields. The only things resembling code are the Shopify API URL and the agent system prompt, and both are copy-paste. You connect your credentials, paste one embed snippet into your theme, and the chatbot is live on your store.

Will the chatbot share private order data with the wrong customer?

It only returns an order after the shopper supplies the email used at checkout, and the lookup filters on that exact email. The system prompt forbids revealing another customer’s data. For stricter control, add an order-number check on top of the email match before any details are read back.

How much does it cost to run an AI support chatbot on Shopify?

Nothing at typical store volume. The build runs on Google Gemini’s free tier, and the API key from Google AI Studio is free, so there is no per-message cost. Add your existing n8n plan, which is free self-hosted. There are no per-seat or per-conversation SaaS fees.

Can I use OpenAI or Claude instead of Gemini?

Yes. The AI Agent node accepts any chat model, so you can swap the Gemini chat model for an OpenAI or Anthropic Claude model without touching the rest of the workflow. The tools, memory, and escalation logic stay identical. Gemini is the default here because its free tier means zero per-message cost.

What happens when the chatbot cannot answer a question?

The agent calls the Gmail escalation tool, which emails you the full conversation and the shopper’s contact details. It then tells the customer a human will follow up by email. Nothing is dropped, and you build a running list of every question your FAQ does not yet cover.

Related guides

n8n Shopify AI Agent Gemini customer support automation

Ready to import instead of build? The Shopify AI Support Agent Pro is this chatbot packaged as an n8n template, with a live Shopify order lookup added. It answers order status questions itself, and only for the customer who can give both the order number and the email on the order.

How to Build a Shopify Post-Purchase Follow-Up Email with n8n and Gmail

Shopify post-purchase follow-up email workflow in n8n


The sale is the easy part. The harder part is the silence right after it, when a new customer is waiting for a package and quietly deciding whether your store was a one-time thing or somewhere they will come back to. Most stores fill that silence with nothing, or with a generic “thanks for your order” that fires the second the checkout completes and is forgotten by the time the box arrives.

A Shopify post-purchase follow-up email built in n8n closes that gap. This workflow waits a few days after each order is fulfilled, drafts a short personalized line about what the customer actually bought, and sends a warm follow-up through your own Gmail account. It costs almost nothing to run and it asks for the review, the reorder, or the reply at the one moment the customer is most likely to give it.

Prefer to skip the setup? Grab the ready-made template → and be up and running in under 10 minutes.

This guide builds a Shopify post-purchase follow-up email in n8n that runs on a daily schedule, pulls orders fulfilled a set number of days ago from Shopify, uses OpenAI to write one friendly personalized sentence about the product, and sends the email through Gmail. It needs no paid apps, costs a few cents a month, and turns the dead air after delivery into reviews, replies, and repeat orders. Build it from scratch or import the template.

What it does

Every morning the workflow asks Shopify a simple question: which orders were fulfilled exactly N days ago? For each one it pulls the customer’s name, email, order number, and the first product they bought. It hands that to OpenAI to write a single natural sentence that references the actual product, drops that sentence into a clean email template, and sends it from your Gmail address.

The customer receives something that reads like you typed it personally a few days after their package landed: a quick check that everything arrived well, a gentle nudge to leave a review, and an open door to reply. No app to install on the storefront, no third-party email platform, no monthly seat fee.

Why it beats the default

Shopify’s built-in order confirmation and most email apps fire on a trigger the instant the order is placed. That is the wrong moment for a relationship email. The customer has not received anything yet, has nothing to react to, and treats the message as a receipt.

Timing the email to fulfillment plus a few days changes the whole tone. The package has arrived, the customer has formed an opinion, and a short personal note lands as thoughtful rather than automated. Three more reasons this approach wins:

  • It runs from your own Gmail, so replies come straight back to your inbox and the email inherits your existing sender reputation instead of a shared app domain.
  • The personalization is real. Referencing the exact product the customer bought reads completely differently from “Hi {{first_name}}, thanks for shopping with us.”
  • You own every line. There is no plan to upgrade, no send limit, and no vendor sitting between you and your customer list.

If you are mapping out a wider automation stack, this fits alongside the other recipes in our n8n Shopify automation guide.

What you need

  • An n8n instance (Cloud or self-hosted), version 1.0 or newer.
  • A Shopify store with admin access to create an app and an Admin API access token.
  • A Gmail account connected to n8n through Gmail OAuth2.
  • An OpenAI API key on pay-as-you-go billing (optional — you can hardcode a line instead).

Estimated build time: 30–45 minutes from scratch, or under 10 minutes with the template.

How it works — the big picture

┌──────────────────────────────────────────────────────────────┐
│  SHOPIFY POST-PURCHASE FOLLOW-UP                              │
│                                                              │
│  [Schedule 9am] → [Shopify: get orders] → [Code: N days ago] │
│                                               ↓              │
│                        [OpenAI: write line] → [Edit Fields]  │
│                                               ↓              │
│                                          [Gmail: send]       │
└──────────────────────────────────────────────────────────────┘
  

Node-by-node list

# Node Type Job
1 Schedule Trigger scheduleTrigger Runs the workflow once a day at 9am
2 Get Shopify Orders shopify Fetches shipped orders updated in the last several days
3 Keep N-Day-Old Orders code Keeps only orders fulfilled exactly N days ago
4 Write Follow-Up Line @n8n/n8n-nodes-langchain.openAi Drafts one personalized sentence about the product
5 Build Email set Assembles recipient, subject, and HTML body
6 Send Follow-Up gmail Sends the email from your Gmail account

Step-by-step build

1 Schedule Trigger (scheduleTrigger)

This is the entry point. It wakes the workflow once a day so you check for newly arrived orders on a steady cadence.

  1. Add a Schedule Trigger node.
  2. Set the interval to Days, every 1 day.
  3. Set the trigger hour to 9 (9am in your instance timezone).
💡

Tip: Pick a mid-morning hour in your customers’ main timezone. Follow-up emails opened over a morning coffee get more replies than ones that land at 3am.

2 Get Shopify Orders (shopify)

This pulls a manageable batch of recent orders that you will narrow down in the next step.

  1. Add a Shopify node, resource Order, operation Get Many.
  2. Turn Return All on (or set a high limit).
  3. Under Filters, set Fulfillment Status to shipped and Updated At Min to ={{ $now.minus({ days: 10 }).toISO() }}.

Pulling a 10-day window keeps the batch small while making sure the order you want (fulfilled around 5 days ago) is always inside it. A typical order item arrives looking like this:

{
  "order_number": 1042,
  "email": "emily.rodriguez@gmail.com",
  "customer": { "first_name": "Emily", "last_name": "Rodriguez" },
  "line_items": [{ "title": "Cedar & Sage Soy Candle" }],
  "fulfillments": [{ "created_at": "2026-06-10T14:30:00-04:00" }]
}

3 Keep N-Day-Old Orders (code)

This is the heart of the timing logic. It keeps only the orders whose fulfillment happened exactly N days ago, so each order is contacted on one day and one day only.

  1. Add a Code node, mode Run Once for All Items.
  2. Paste the script below and set DAYS_AFTER to your preferred window.
const DAYS_AFTER = 5;
const out = [];

for (const item of $input.all()) {
  const order = item.json;
  const fulfillment = (order.fulfillments || [])[0];
  if (!fulfillment || !order.email) continue;

  const shipped = new Date(fulfillment.created_at);
  const days = Math.floor((Date.now() - shipped.getTime()) / 86400000);
  if (days !== DAYS_AFTER) continue;

  out.push({
    json: {
      email: order.email,
      first_name: order.customer?.first_name || "there",
      order_number: order.order_number,
      product: order.line_items?.[0]?.title || "your order"
    }
  });
}

return out;
💡

Tip: Test with DAYS_AFTER = 0 first so you can place a test order, fulfill it, and see the email the same day instead of waiting five days to confirm it works.

4 Write Follow-Up Line (OpenAI)

This generates one short, natural sentence that mentions the product by name, so the email never reads like a mail merge.

  1. Add an OpenAI node, resource Text, operation Message a Model.
  2. Pick a small, cheap model such as gpt-4o-mini.
  3. Add a user message with this prompt:
Write one warm, casual sentence (max 20 words) checking in with a customer
named {{ $json.first_name }} about their recent purchase of
"{{ $json.product }}". No greeting, no sign-off, just the sentence.

The model returns something like: “Hope the Cedar & Sage candle has been filling the room nicely since it arrived!”

📌

Skip OpenAI entirely if you prefer zero cost — just write one fixed friendly line directly in the next node. The workflow still works exactly the same.

5 Build Email (set)

This assembles the three pieces Gmail needs: who it goes to, the subject, and the HTML body. Use the Edit Fields node (Set v3.4) with one assignment per field.

  1. Add an Edit Fields node.
  2. Add a string field to = ={{ $('Keep N-Day-Old Orders').item.json.email }}.
  3. Add a string field subject = =Quick check-in on order #{{ $('Keep N-Day-Old Orders').item.json.order_number }}.
  4. Add a string field html with the body below.
Hi {{ $('Keep N-Day-Old Orders').item.json.first_name }},<br><br>
{{ $json.message.content }}<br><br>
If everything's good, a quick review would mean a lot. And if anything's
off, just reply to this email — it comes straight to me.<br><br>
Thanks again,<br>The team
💡

Tip: Keep the body plain and short. A follow-up that looks like a personal email out-performs a heavily designed template, because it invites a reply instead of a click.

6 Send Follow-Up (gmail)

The final node sends the message from your connected Gmail account.

  1. Add a Gmail node, operation Send.
  2. To: ={{ $json.to }}
  3. Subject: ={{ $json.subject }}
  4. Message: ={{ $json.html }}, and set Email Type to HTML.
  5. Save the workflow and toggle it Active.

Common mistakes

Problem Likely cause Fix
No emails ever send No order was fulfilled exactly N days ago today Set DAYS_AFTER = 0 and test with a freshly fulfilled order
Same customer emailed twice The follow-up window was widened beyond one day Keep the exact-match filter, or log sent order numbers to a sheet
Email body shows raw expressions Gmail Email Type left as Text Switch the Gmail node Email Type to HTML
Personalized line is missing Wrong field referenced from the OpenAI node Use {{ $json.message.content }} in the body
Orders never appear Fulfillment Status filter set wrong Confirm it is shipped and orders are actually fulfilled in Shopify

Cost at realistic volume

The only paid piece is the OpenAI call, and it is tiny. Each follow-up uses roughly 150 tokens in and 30 tokens out on a small model — well under a hundredth of a cent per email.

Orders / month OpenAI cost Gmail n8n
100 ~$0.02 Free Free (self-hosted)
500 ~$0.10 Free Free (self-hosted)
2,000 ~$0.40 Free* Free (self-hosted)

*Gmail’s free tier sends up to 500 messages per day, which covers most small and mid-size stores. Above that, a Google Workspace account raises the limit to 2,000 per day. Drop the OpenAI node and the running cost is effectively zero.

🚀 Get the Shopify Post-Purchase Follow-Up Template

The guide above is free to follow. If you would rather skip the build, download the ready-to-import workflow, then just add your credentials. Prefer it installed and tuned for you? See our done-for-you services.

Download the template ($14) →

Instant download · Works on n8n Cloud and self-hosted

Frequently asked questions

How many days after fulfillment should the follow-up email go out?

Five to seven days after the order ships works for most stores, because the package has usually arrived by then. Set the number in one place inside the Code node, so you can test a few values and keep whichever earns the best reply and review rate for your products.

Do I need a paid OpenAI plan for this workflow?

No. The personalization call is tiny, so even at a few hundred orders a month the cost is a few cents on a pay-as-you-go OpenAI key. If you would rather spend nothing, you can delete the OpenAI node and write one fixed friendly line in the Edit Fields node instead.

Will this send duplicate emails to the same customer?

No, as long as the Code node matches a single fulfillment date. Because it only keeps orders fulfilled exactly N days ago, each order passes the filter on one day only. If you widen the window, add a Google Sheets check to record which order numbers were already contacted.

Can I use Outlook or plain SMTP instead of Gmail?

Yes. Swap the Gmail node for the Microsoft Outlook node or the Send Email (SMTP) node. The fields you built in the Edit Fields step (recipient, subject, body) map directly, so the rest of the workflow does not change at all.

What if a customer already left a review or asked for a refund?

Add an IF node after the Code node to skip orders with a refund or cancellation, using the financial status from the Shopify order. For reviews, the cleanest approach is to log contacted orders to a sheet and exclude anyone who already replied or reviewed.

Related guides

n8n
Shopify
Gmail
OpenAI
automation

How to build Shopify order tagging automation with n8n

Shopify order tagging automation workflow in n8n

Open your Shopify orders page after a busy week and it is a wall of identical-looking rows. Which ones came from repeat buyers? Which crossed the threshold where you want to send a thank-you gift? Which shipped overseas and need a customs note? Without tags you are scrolling and guessing, and your apps and email flows have nothing to segment on.

A Shopify order tagging automation in n8n fixes that at the source. The moment an order is created, it gets sorted and labeled by your own rules, so every order that lands in your admin is already filterable. This guide walks through the full build, node by node, with the exact configuration for each step. It is part of our wider n8n Shopify automation library.

Prefer to skip the setup? Grab the ready-made template below and have it tagging orders in under 10 minutes.

This Shopify order tagging automation n8n build watches for every new order, runs it through a set of rules, and writes tags like VIP, First-time, Repeat, and International straight back onto the order in Shopify. No paid app and no manual sorting. You get clean, filterable orders the second they come in, plus a Slack message so your team sees exactly how each order was classified and why.

What it does

The workflow has one job: classify orders automatically. Here is the flow from a buyer hitting checkout to a labeled order in your admin.

  1. A customer places an order on your Shopify store.
  2. n8n receives the order data instantly through the Shopify Trigger.
  3. A Code node checks the order against your rules (value, customer history, country, discount use).
  4. Matching tags are merged with any existing tags and written back to the order through the Shopify Admin API.
  5. A short Slack message confirms the order number and the tags that were applied.

The result: an order from a returning customer in Austin who spent 240 dollars shows up tagged VIP, Repeat before you even open the order. An app like Klaviyo, a discount automation, or a simple admin filter can act on those tags right away.

Why it beats the default

Shopify gives you two native options, and both have a real cost.

The first is tagging by hand. It works for ten orders a day and falls apart at fifty. People forget, apply tags inconsistently, and the data you wanted to segment on becomes unreliable.

The second is Shopify Flow. It can tag orders, but it is locked to Shopify Plus, which starts at over 2,000 dollars a month. If you are on Basic, Shopify, or Advanced, Flow is simply not available to you.

The n8n build talks to the standard Admin API that every paid Shopify plan already includes. You write the rules once in plain JavaScript, you own them, and you can branch on any field Shopify returns rather than the limited set Flow exposes. Below is how the pieces fit together.

┌──────────────────────────────────────────────────────────────┐
│  SHOPIFY ORDER TAGGING AUTOMATION                            │
│                                                              │
│  [Shopify Trigger] → [Code: rules] → [HTTP Request] → [Slack]│
│   orders/create       build tags      PUT tags        notify │
│                                                              │
└──────────────────────────────────────────────────────────────┘
  

What you need

  • An n8n instance, either n8n Cloud or a self-hosted setup.
  • A Shopify store on any paid plan with an Admin API access token (created from an app).
  • A Slack workspace if you want the team notification. This step is optional and can be removed.
  • About 40 minutes to build from scratch, or 10 minutes with the template.

For background on getting n8n running, see our n8n Shopify automation guide.

Node-by-node list

The whole automation is four nodes. Here is what each one is and the version to use.

NodeTypeVersionRole
Shopify TriggershopifyTrigger1Fires on every new order
Build Tagscode2Runs the rules, merges tags
Update Order TagshttpRequest4.2Writes tags back to Shopify
Notify Slackslack2.3Posts the result to a channel

Step-by-step build

1 Add the Shopify Trigger

Create a new workflow and add a Shopify Trigger node. Set the topic to orders/create. Connect your Shopify Admin API credential, or create one with an access token from an app (the Shopify Developer Dashboard (dev.shopify.com)). Give the app the read_orders and write_orders scopes. n8n registers the webhook with Shopify automatically when you activate the workflow.

When an order comes in, the trigger outputs the full order object. The fields the rules care about look like this:

{
  "id": 5123987456012,
  "order_number": 1042,
  "total_price": "240.00",
  "total_discounts": "20.00",
  "tags": "",
  "customer": { "orders_count": 4 },
  "shipping_address": { "country_code": "US" }
}
💡

Use a test order or Shopify’s “Send test notification” to pull a real payload into n8n before building the rules. It makes the field names concrete.

2 Build the tagging rules in a Code node

Add a Code node named Build Tags right after the trigger. This is where your logic lives. The script reads the order, starts from the tags it already has so nothing is lost, applies your rules, and returns a clean comma-separated string.

const order = $input.first().json;

// Start from existing tags so we never wipe manual ones
const tags = new Set(
  (order.tags || '').split(',').map(t => t.trim()).filter(Boolean)
);

const total = parseFloat(order.total_price || '0');
const ordersCount = order.customer?.orders_count ?? 0;
const country = order.shipping_address?.country_code || '';

// Value tier
if (total >= 200) tags.add('VIP');
else if (total >= 100) tags.add('High value');

// Customer history
if (ordersCount <= 1) tags.add('First-time');
else tags.add('Repeat');

// Geography
if (country && country !== 'US') tags.add('International');

// Discount used
if (parseFloat(order.total_discounts || '0') > 0) tags.add('Used discount');

return [{
  json: {
    orderId: order.id,
    orderNumber: order.order_number,
    tags: Array.from(tags).join(', ')
  }
}];

For the sample order above, this returns:

{
  "orderId": 5123987456012,
  "orderNumber": 1042,
  "tags": "VIP, Repeat, Used discount"
}
💡

Adjust the thresholds to your average order value. A store selling 30-dollar items wants a far lower VIP line than one selling furniture.

3 Write the tags back with an HTTP Request

Add an HTTP Request node named Update Order Tags. The Shopify node does not expose order tag updates directly, so a direct API call is the clean way to do it.

  1. Method: PUT
  2. URL: https://YOUR_STORE.myshopify.com/admin/api/2026-04/orders/{{ $json.orderId }}.json
  3. Authentication: Predefined Credential Type, then Shopify Access Token API (the same token from step 1).
  4. Set Send Body to on, and Body Content Type to JSON.
  5. Switch the body to Using JSON and paste the expression below.
{
  "order": {
    "id": {{ $json.orderId }},
    "tags": "{{ $json.tags }}"
  }
}

Shopify replaces the entire tags field with this string. Because step 2 already merged in the existing tags, the order keeps everything and gains the new labels.

📌

Keep the API version (2026-04 here) current. Shopify retires old versions on a rolling schedule, so check yours once or twice a year.

4 Notify your team in Slack

Add a Slack node named Notify Slack. Set the resource to Message and operation to Send. For the channel, use the From list selector and pick your channel, for example #orders. In the message text field, paste:

=🏷️ Tagged order #{{ $json.orderNumber }} → {{ $json.tags }}

Now connect the nodes in order: Shopify Trigger to Build Tags, Build Tags to Update Order Tags, Update Order Tags to Notify Slack. Save, then toggle the workflow Active. Your team sees a line like 🏷️ Tagged order #1042 → VIP, Repeat, Used discount within seconds of each sale.

Common mistakes

  • Skipping the merge step. If the Code node does not seed the set with the order’s current tags, the PUT wipes any tag you or another app added. Always read existing tags first.
  • Sending the body as a plain object instead of JSON. In HTTP Request v4.2, set Body Content Type to JSON and use the Using JSON option, otherwise Shopify rejects the payload.
  • Forgetting the write_orders scope. A token with read access alone returns a 403 on the PUT. Recreate the app token with both read and write order scopes.
  • Hardcoding a store URL with a trailing slash or the wrong API version. The endpoint must be exact, with no extra slash before orders.
  • Treating the customer object as always present. Guest checkouts can arrive without a full customer record, so the optional chaining (?.) in the script matters.

Cost at realistic volume

The tagging logic itself is free. Your only real consideration is n8n executions, and this workflow uses one execution per order.

Store volumeOrders / monthn8n executionsTypical cost
Growing store500500Free tier or low self-hosted
Established3,0003,000Covered by Starter Cloud plan
High volume15,00015,000Self-hosted, server cost only

Compare that to Shopify Flow, which requires a Shopify Plus plan starting north of 2,000 dollars a month. For tagging alone, the n8n route is a rounding error. The Shopify Admin API itself does not charge for these calls, and you stay well inside its rate limits at one call per order.

🚀 Get the Shopify order tagging template

The guide above is free to follow. If you would rather skip the build, download the exact four-node workflow ready to import, then just add your Shopify and Slack credentials and tune the thresholds. Prefer it installed and tuned to your products and margins for you? See our done-for-you services.

Download the template ($17) →

Instant download · Works on n8n Cloud and self-hosted

Frequently asked questions

Will this overwrite tags I already added in Shopify?

No, as long as you keep the merge step. The Shopify API replaces the whole tags field on every update, so the Code node reads the order’s current tags first and combines them with the new ones before writing back. Remove that merge and you would lose manual tags.

Do I need Shopify Plus to use order tagging automation?

No. Shopify Flow, the built-in tool, is limited to Shopify Plus plans. This n8n build talks to the standard Admin API, which every paid Shopify plan includes, so a Basic or regular Shopify store can tag orders automatically without upgrading.

Can I add my own tagging rules?

Yes. The rules live in plain JavaScript inside the Code node, so you can tag by product, SKU, discount code, shipping country, line-item count, or any field Shopify returns. Add an if statement, push a tag into the set, and the rest of the workflow handles the write.

What happens if Shopify sends two orders at the same time?

n8n runs each trigger event as its own execution, so two simultaneous orders are tagged independently with no collision. Each execution reads that order’s own current tags before writing, so there is no risk of one order’s tags landing on another.

Will tagging old orders work, or only new ones?

The trigger only fires on new orders. To backfill existing orders, swap the trigger for a Schedule node plus a Shopify node that lists past orders, then loop them through the same Code and HTTP Request nodes. The tagging logic stays identical.

Related guides

n8n Shopify HTTP Request Slack order tagging automation
Connecting Shopify to n8n? Shopify changed the method in January 2026. See our step by step guide: How to connect Shopify to n8n in 2026.

Shopify customer win-back email with n8n (Gmail + Google Sheets)

This guide shows how to build a Shopify customer win-back email with n8n using Google Sheets and Gmail. n8n scans your Shopify orders on a schedule, finds customers who have not bought in 60 days, and emails each one a personal come-back offer from your own address. A Google Sheet remembers who was already contacted so nobody gets the same email twice. No retention app, no per-contact fee, full control over the timing and the copy.

What it does

Every store has a quiet group of customers who bought once, liked it, and then drifted away. They are not angry and they did not unsubscribe. They simply forgot you exist. Winning one of them back costs far less than finding a brand new buyer, yet most stores never send that nudge because doing it by hand is tedious and the apps that do it automatically charge by the contact.

This workflow handles the whole thing inside n8n. On a schedule you choose, it reads your recent Shopify orders, works out the last time each customer placed an order, and flags anyone whose last purchase was more than 60 days ago. For each lapsed customer it sends a short, personal Gmail message with a reason to come back, then writes that person into a Google Sheet so the next run knows to leave them alone.

The result is a steady win-back program that runs on an n8n instance you already own, with messaging you write yourself instead of a template you rent from a retention app.

Why it beats the default

The usual route for a Shopify store is a retention or email platform that prices on list size. Those tools work, but the bill climbs every month as your customer list grows, and you are paying for a templated email that you could write better yourself. You also hand your customer data to another vendor and accept their sending domain, their design limits, and their idea of when a customer counts as lapsed.

Running it in n8n turns that around. Gmail sends from your own address, so the email arrives with your name and your reply-to, and a customer who responds reaches a real inbox. You decide the lapse window, so a fashion store can treat 45 days as cold while a furniture store waits 180. You can branch the logic later, for example offering a bigger discount to customers who spent more in the past, without filing a feature request with an app vendor. Because the contacted list lives in a plain Google Sheet, your team can read it, sort it, and export it whenever they want.

For a wider view of where this sits among store automations, the n8n Shopify automation hub maps out the other flows that pair well with a win-back campaign.

What you need

You need a running n8n instance, either cloud or self-hosted. You need a Shopify store with Admin API access, which means an app with the read_orders and read_customers scopes, both read-only. You need a Google account for the tracking sheet and a Gmail account to send from. That is the whole stack, and every part of it sits on the free or near-free end.

On the Shopify side, create an app in the Shopify Developer Dashboard (dev.shopify.com). Give it the two read scopes above and install it to generate an Admin API access token. On the Google side, one sheet with a handful of columns is enough to begin, and you can grow it later as you add fields like last order value or product category.

Node by node

The workflow uses seven nodes. The Schedule Trigger fires the run on your chosen interval, usually once a day in the early morning. The Shopify node, or an HTTP Request node hitting the Admin API, pulls recent orders along with the customer attached to each one. The Code node groups those orders by customer, finds each customer’s most recent order date, and keeps only the people whose last order is older than your lapse window. The Google Sheets read node loads the list of customers you have already contacted. The IF node compares the lapsed list against the contacted list and passes through only the people who have not been emailed yet. The Gmail node sends the win-back message to each remaining customer. The final Google Sheets append node records that customer’s email and the send date so future runs skip them.

Step by step build

  1. Create a new workflow in n8n and add a Schedule Trigger. Set it to run once a day at a quiet hour, for example 6am in your store’s timezone, so emails land before the morning rush.
  2. Add a Shopify node, or an HTTP Request node calling GET /admin/api/2024-04/orders.json?status=any&limit=250 with your Admin token. Pull enough order history to cover your lapse window plus a margin, for example the last 200 days of orders.
  3. Add a Code node. Loop through the orders, build a map of customer email to their latest order date, then output only the customers whose latest order is more than 60 days before today. Attach each customer’s first name and email to the output so the email step has them.
  4. Add a Google Sheets read node that loads your Contacted sheet. This sheet holds every customer you have already sent a win-back email to, which is how the workflow avoids repeating itself.
  5. Add an IF node, or a Code filter, that checks whether each lapsed customer’s email already appears in the contacted list. Send only the new ones forward and let the rest end quietly.
  6. Add a Gmail node on the passing branch. Write a short subject like “We saved your spot, James” and a friendly body that references the time since their last order and gives one clear reason to return, such as a small discount or a new arrival.
  7. Finish with a Google Sheets append node that writes the customer’s email, first name, and today’s date to the Contacted sheet. Save, activate, and run it once by hand against a small order history to confirm the right people are selected.

The contacted sheet

The Google Sheet is the memory of the whole workflow. Keep it simple at first and add columns only when you need them.

Column Type Example Description
email Text james.carter@gmail.com The customer’s email, used to match against future runs
first_name Text James Pulled from the order, used to personalize the subject and body
last_order_date Date March 14, 2026 The most recent order date the workflow found for this customer
contacted_date Date June 15, 2026 The day the win-back email was sent, so you can re-target much later if you want

Common mistakes

The most common mistake is skipping the contacted sheet, which turns a thoughtful win-back into a daily nag that emails the same lapsed customer every morning until they unsubscribe. The append step at the end is not optional, and you should test it once before going live. A second mistake is sloppy date math. Make sure your Code node compares dates in the same timezone, because an off-by-one-day error near the edge of your window will either skip people or email them too early.

People also pull too few orders. If you only read the last 30 days of orders but your lapse window is 60 days, a customer whose last purchase was 90 days ago never appears in the data, so they are never selected. Always pull more history than your window. Finally, watch your Gmail sending limits. A free Gmail account caps around 500 messages a day, so a large first run against years of lapsed customers should batch across several days or move to a Google Workspace account with a higher limit.

Cost at realistic volume

Assume a store with a few thousand past customers that emails 300 lapsed buyers a month once the initial backlog is cleared. Self-hosted n8n on a small VPS runs about 5 to 7 dollars a month and carries this workflow without noticing. Google Sheets is free at this scale. Gmail is free up to its daily limit, or 6 dollars a month on Workspace if you want a higher cap and your own domain on the sending address. So the realistic monthly cost sits between roughly 5 and 13 dollars, flat, no matter how large your customer list grows. A retention app priced per contact would commonly run 30 to 150 dollars a month at the same list size, and that number only climbs as you add customers, while this one stays put.

Ready to import template

You can build this from the steps above, or skip straight to a working version. The ready-to-import JSON template, plus a setup guide and a credentials guide, is available on the downloads page. Import it, paste in your Shopify token and Google credentials, set your lapse window, and you are live in a few minutes.

If you would rather have it installed and tested for you on your own n8n instance, the done-for-you setup service handles the Shopify app, the credentials, and the go-live so you can stay focused on selling.

FAQ

How do I decide the right lapse window?

Look at your typical reorder gap. If most repeat buyers come back within 30 days, then 60 days of silence is a real signal they have drifted. Slower categories like furniture or electronics need a longer window, sometimes 120 to 180 days. Start with 60 and adjust once you see who the workflow selects.

Will a customer get the same win-back email twice?

Not if you keep the final append node. After an email sends, that customer’s address is written to the Contacted sheet, and the IF node filters them out on every future run. Duplicates only happen when the append step is removed or the sheet match is misconfigured, so test it once before going live.

Can I use Outlook or SMTP instead of Gmail?

Yes. n8n has native nodes for Outlook and generic SMTP, so you can swap the Gmail node for either one and map the same fields. The rest of the workflow stays identical. Pick whichever account gives you the sending limit and deliverability that match your volume.

Does this write anything to my Shopify store?

No. The workflow only reads orders and customers, using read-only scopes. It never changes an order, a customer record, or inventory. Everything it tracks lives in your Google Sheet, so there is no risk of the automation altering your store data.

How do I add a discount code to the email?

Two options. You can create a single reusable code in Shopify and drop it into the Gmail body, which is the simplest path. Or you can add a step that generates a unique code per customer through the Shopify Admin API before the email sends, which prevents code sharing but adds a node and a little setup.

Related guides

Pair this with the Shopify new customer welcome email so first-time buyers get a warm start, and the Shopify abandoned checkout email sequence to recover sales before they slip away. Browse the full Shopify automation category for more store-ready templates.