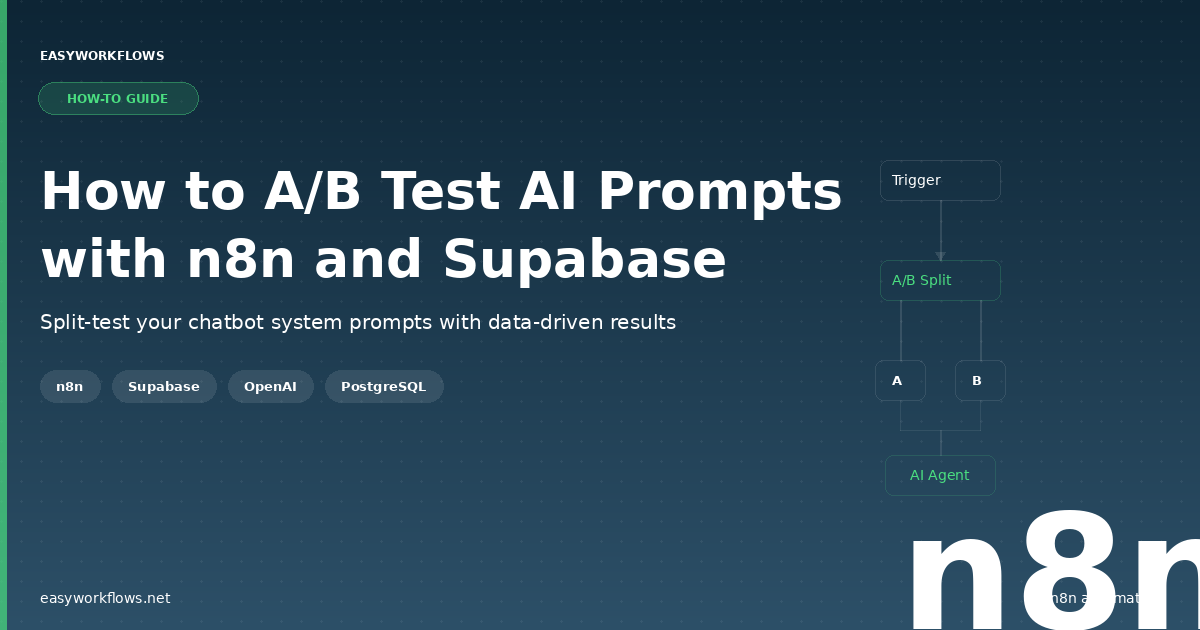
How to A/B Test AI Prompts with n8n, Supabase, and OpenAI

New to n8n? Start with our step-by-step setup guide, then come back to build this workflow.

Most AI builders pick their chatbot’s system prompt based on gut feeling. They write something that sounds good, deploy it, and hope for the best. But what if you could actually test two prompt variants on real users and measure which one performs better? This n8n workflow does exactly that: it randomly assigns users to either a baseline or alternative system prompt, remembers their assignment, and lets you collect data on which version gets better results. No guessing. Just data-driven prompt optimization.

Prefer to skip the setup? Grab the ready-made template and import it into your n8n instance in minutes: get the A/B testing template here.


What You’ll Build

By the end of this guide, you’ll have a fully functional A/B testing system that:

  1. Accepts incoming chat messages with user session IDs
  2. Stores two distinct system prompt variants (baseline and alternative)
  3. Checks whether the session has been assigned to a test group before
  4. Automatically assigns new users to one of the two variants using a 50/50 random split
  5. Ensures returning users always see the same prompt variant they were originally assigned
  6. Passes the correct prompt to your AI agent (OpenAI GPT-4o-mini)
  7. Maintains full conversation history in PostgreSQL so the AI remembers previous messages
  8. Records session and test assignment data for later analysis

How It Works: The Big Picture

Here’s the flow from incoming message to AI response:

┌────────────────────────────────────────────────────────────────┐
│  A/B TEST AI PROMPTS                                           │
│                                                                │
│  [Chat Trigger] → [Define Test Prompts] → [Check Session]     │
│                                              ↓                 │
│                                    [Session Assigned?]         │
│                                     ↙ Yes        ↘ No         │
│                              [Select Prompt]  [Assign Random]  │
│                                     ↘             ↙            │
│                                  [Select Prompt]               │
│                                       ↓                        │
│                                  [AI Agent]                    │
│                              (OpenAI + Memory)                 │
└────────────────────────────────────────────────────────────────┘

The workflow listens for incoming chat messages, queries Supabase to see if the user’s session already exists, and branches based on the result. New users get randomly assigned to one of two prompt variants; returning users get their original variant. Both paths converge at a single AI Agent node that uses the correct system prompt and maintains conversation memory through PostgreSQL.


What You’ll Need

  • Supabase account (free tier is fine). You’ll need a PostgreSQL database and the ability to run SQL queries
  • OpenAI API key with access to GPT-4o-mini (cost: typically less than $1 per 1M tokens)
  • n8n instance, either n8n Cloud (free or paid plans) or self-hosted
  • Basic familiarity with n8n: understanding nodes, inputs, and outputs will help

Build time: 25-35 minutes from scratch, under 10 minutes if you import the ready-made template.


Step-by-Step Setup

1 Set Up Your Chat Trigger

Start with a Chat Trigger node (or HTTP Request if you’re building a custom endpoint). This node receives incoming user messages along with a session ID. The session ID is crucial. It’s how you identify repeat users.

Your incoming payload should look like this:

{
  "sessionId": "sess_7f3a2b91",
  "userId": "user_4c2e9k10",
  "message": "Hello, what's your recommendation for a CRM?"
}
📝

Session ID strategy: If you’re embedding this in a web app, generate a unique session ID and store it in localStorage or a cookie. For API-driven usage, your backend can generate UUIDs or slugs.

2 Define Your Test Prompts

Add a Set node after the Chat Trigger. This node stores both system prompt variants. Here’s an example with a customer support chatbot:

Baseline prompt (friendly):

"You are a helpful customer support agent for an e-commerce platform. Be warm, approachable, and conversational. Always put the customer's needs first. If you don't know something, admit it and offer to escalate."

Alternative prompt (professional):

"You are a professional customer support specialist. Provide concise, accurate answers. Use technical terminology where appropriate. Focus on efficiency and quick resolution. Maintain professional boundaries while remaining courteous."

Store these as variables in your Set node. For example:

{
  "baseline_prompt": "You are a helpful customer support agent...",
  "alternative_prompt": "You are a professional customer support specialist..."
}

You can customize these prompts however you want: adjust tone, instructions, constraints, anything. The point is to test meaningful variations.

3 Query Supabase for Existing Sessions

Add a Supabase node (Query Rows) to check if this session has been assigned before. Set up the query like this:

Table: split_test_sessions

Filter: session_id = (incoming session_id)

This will return an empty array if the session is new, or one row if the session already exists. Save the result to a variable like session_lookup.

4 Add a Conditional: Is the Session Already Assigned?

Use an IF node to check whether the session exists:

session_lookup.length > 0

If true (session exists), branch to “Select Active Prompt”. If false (new session), branch to “Assign Random Variant”.

5 Assign a Random Variant to New Users

In the “false” branch, add a Function node that generates a random coin flip and inserts a new row into Supabase:

// Generate 50/50 random boolean
const show_alternative = Math.random() < 0.5;

// Return the assignment for the next node
return {
  show_alternative: show_alternative,
  session_id: $input.all()[0].json.sessionId,
  timestamp: new Date().toISOString()
};

Follow this with a Supabase Insert Rows node that saves the assignment to the database:

Table: split_test_sessions

Columns:

{
  "session_id": $input.all()[0].json.sessionId,
  "show_alternative": show_alternative,
  "created_at": new Date().toISOString()
}
💡

Tip: Use Supabase's connection pooler for faster queries, especially if you're running high volume. It's in your project settings under "Database" → "Connection Pooling".

6 Select the Active Prompt

Both paths (existing and new sessions) converge at a Set node that picks the correct system prompt. This node needs to check whether show_alternative is true or false and return the matching prompt:

{
  "system_prompt": $input.all()[0].json.show_alternative
    ? $input.all()[0].json.alternative_prompt
    : $input.all()[0].json.baseline_prompt
}

Make sure this node receives the show_alternative boolean from either the database query (existing session) or the assignment function (new session).

7 Configure the AI Agent with Memory

Add an OpenAI node configured as an AI Agent. Set it up like this:

Model: gpt-4o-mini

System prompt: Use the system_prompt variable from the previous Set node

Chat memory: Enable PostgreSQL memory using your Supabase connection. Configure it with:

  • Connection: Your Supabase PostgreSQL connection
  • Session ID: The incoming sessionId
  • Memory type: Buffer memory or summarization (your choice based on conversation length)

This ensures the AI remembers all previous messages in the session, maintaining context across turns.


The Data Structure

You need a PostgreSQL table in Supabase to track session assignments. Here's the schema:

Column Name Type Description
id BIGINT (auto-increment) Primary key, auto-generated
session_id TEXT (unique) Unique identifier for the user session, e.g. "sess_7f3a2b91"
show_alternative BOOLEAN true = user sees alternative prompt, false = user sees baseline prompt
created_at TIMESTAMP When the assignment was created, useful for sorting and analysis

To create this table in Supabase, go to the SQL Editor and run:

CREATE TABLE split_test_sessions (
  id BIGSERIAL PRIMARY KEY,
  session_id TEXT NOT NULL UNIQUE,
  show_alternative BOOLEAN NOT NULL,
  created_at TIMESTAMP DEFAULT CURRENT_TIMESTAMP
);

CREATE INDEX idx_session_id ON split_test_sessions(session_id);

The index on session_id speeds up lookups when users return.


Full System Flow with Data

Let's trace a complete example with realistic data:

1. User message arrives:

{
  "sessionId": "sess_7f3a2b91",
  "userId": "user_4c2e9k10",
  "message": "Hello, what CRM do you recommend for a 50-person startup?"
}

2. Query Supabase:

SELECT * FROM split_test_sessions WHERE session_id = 'sess_7f3a2b91';
// Result: [] (empty, this is a new user)

3. Assign random variant:

Math.random() < 0.5  // Returns true, assign alternative
// Insert into Supabase:
{
  "session_id": "sess_7f3a2b91",
  "show_alternative": true,
  "created_at": "2026-04-08T14:32:05.000Z"
}

4. Select the correct prompt:

// show_alternative is true, so use:
system_prompt = "You are a professional customer support specialist..."

5. AI Agent responds:

The OpenAI node receives the alternative system prompt and the user's message. With PostgreSQL memory enabled, it also pulls any previous messages from this session (none on first message). It generates a response:

"For a 50-person startup, I'd recommend HubSpot or Pipedrive. Both scale efficiently and offer the customization you'll need. What's your primary use case, sales pipeline or customer support?"

6. On the next turn (same session):

{
  "sessionId": "sess_7f3a2b91",
  "userId": "user_4c2e9k10",
  "message": "Mainly sales pipeline. What about pricing?"
}

Query returns the existing row with show_alternative: true. The same professional prompt is used. Memory context includes the entire conversation.


Testing Your Workflow

Before running it live, test each step:

  1. Test the Chat Trigger: Send a sample message with a session ID through the webhook or chat interface. Check that the payload arrives correctly.
  2. Test Supabase connectivity: Run a simple query (e.g., SELECT * FROM split_test_sessions LIMIT 1;) to verify the connection works.
  3. Test the random assignment: Run the workflow 10 times with different session IDs and verify that Supabase records are created with roughly 50% true/false split.
  4. Test the conditional logic: Create a session, run the workflow, then re-run with the same session ID. Verify that the second run retrieves the existing assignment instead of creating a new one.
  5. Test the AI Agent: Verify the AI receives the correct system prompt by checking the API logs or n8n execution history.
  6. Test memory persistence: Send multiple messages in the same session and confirm the AI remembers previous context.

Common Issues and Troubleshooting

Issue Likely Cause Solution
Supabase query returns empty even for existing sessions Session ID mismatch (case sensitivity, extra whitespace) Normalize session IDs: trim whitespace, convert to lowercase
AI Agent fails with authentication error Invalid OpenAI API key or quota exceeded Check your API key in n8n credentials; verify you have billing enabled in OpenAI account
Duplicate session assignments (multiple true/false values) Missing UNIQUE constraint on session_id Add UNIQUE constraint to split_test_sessions.session_id
Conversation memory not working PostgreSQL connection not configured or memory table missing Verify Supabase PostgreSQL credentials in n8n; ensure memory table exists
Workflow executes but AI returns generic responses System prompt not being passed correctly Debug: log the system_prompt variable before the AI Agent node, verify it's not empty
🔍

Debugging tip: Use n8n's Execute Workflow button and inspect the input/output of each node. The execution history shows exactly what data is flowing through your workflow.


Measuring Results

Now that your A/B test is running, how do you measure which prompt is better? A few approaches:

  • User feedback: Add a thumbs-up/thumbs-down button after each AI response and record votes in a feedback table, tagged with session_id and show_alternative.
  • Conversation length: Query Supabase to see average message count per session for each variant. Longer conversations might indicate more engaging prompts.
  • Resolution time: If this is customer support, track how many turns it takes to resolve issues per variant.
  • Manual review: Export a sample of responses from each variant and have a human evaluate quality, tone, and accuracy.
  • Custom metrics: Log additional data (response time, token usage, user satisfaction score) to your Supabase table for analysis.

Run each variant for at least 100-200 sessions before drawing conclusions. Statistical significance matters.


Frequently Asked Questions

Can I test more than two prompts?

Yes, absolutely. Instead of a boolean show_alternative column, use an integer or enum to represent three or more variants. Adjust the random assignment logic to distribute evenly (e.g., if 3 variants: Math.floor(Math.random() * 3)). Update the "Select Active Prompt" node to use a switch statement or nested ternary.

How do I measure which prompt performs better?

Add a feedback mechanism (thumbs-up/down buttons or a satisfaction rating) tied to each session. Store results in Supabase with the variant ID. Then query Supabase to calculate average scores per variant. You can also measure conversation length, resolution time, or cost per variant.

Does this work with models other than GPT-4o-mini?

Yes. The workflow is model-agnostic. You can use GPT-4, GPT-3.5 Turbo, Claude (via Anthropic API), or any LLM with an n8n integration. Just swap the model in the AI Agent node and ensure you have valid API credentials.

What happens if Supabase goes down?

If Supabase is unavailable, the workflow will fail at the session lookup step. To add resilience, wrap Supabase queries in try-catch blocks or add error handling nodes that fall back to a default prompt (e.g., always use baseline if the database is unreachable).

Can I use this for testing different temperatures or models?

Absolutely. Extend the workflow to test different model parameters. For example, add a temperature and model_name column to split_test_sessions. In the AI Agent node, dynamically set the temperature and model based on the session's assigned variant. This lets you A/B test creativity (high temperature) vs. consistency (low temperature).

Can I run multiple A/B tests simultaneously?

Yes. Use separate columns in split_test_sessions for each test (e.g., prompt_test, temperature_test, model_test). Each column holds the variant assignment for that specific test. The workflow then reads all relevant columns and applies them simultaneously to the AI Agent. This is called multivariate testing.


Get the A/B Prompt Testing Template

Stop guessing which prompt works best. Import this ready-made n8n workflow, connect your Supabase and OpenAI accounts, and start testing in minutes.

Get the Template →

Instant download · Works on n8n Cloud and self-hosted

What's Next: Extending the Workflow

Once you have the basic A/B test working, consider these enhancements:

  • Automatic winner selection: Set up a scheduled workflow that analyzes results every week and automatically switches all new users to the winning variant.
  • Progressive rollout: Instead of 50/50, shift traffic gradually (90/10, 80/20, etc.) as one variant proves better.
  • Segmented testing: Run different tests for different user segments (new vs. returning, by industry, by region).
  • Prompt versioning: Store all prompt versions in Supabase with timestamps so you can track which exact variant each user saw.
  • Multivariate testing: Test system prompt, temperature, and model all at once to find the optimal combination.
  • Cost tracking: Log token usage per variant to see if one prompt is more efficient.
n8n
Supabase
OpenAI
A/B Testing
AI Prompts
Chatbot
Automation
PostgreSQL
Data-Driven

How to Build a Telegram AI Customer Support Bot with n8n

New to n8n? Start with our step-by-step setup guide, then come back to build this workflow. Connecting a store too? See how to connect Shopify to n8n in 2026.

Running customer support around the clock without burning out your team is one of the hardest operational problems a growing business faces. Customers expect instant replies, but hiring an agent for every timezone is expensive and unsustainable. This n8n workflow connects a Telegram bot, Google Gemini, and Supabase to build a support bot that reads conversation history, generates intelligent replies, and responds in under 3 seconds, around the clock, automatically. Telegram is free with no per-message fee, and Gemini’s free tier means the AI costs nothing to run at typical volume.

Want a ready-made agent instead? The Shopify AI Customer Support Agent is a tested, import-ready template built on the same idea.

What You’ll Build

  1. A customer sends a message to your Telegram bot at any hour.
  2. n8n receives the message through the Telegram Trigger node.
  3. The workflow fetches the customer’s last 10 messages from Supabase so the AI has full context.
  4. Google Gemini reads the conversation history and generates a helpful, on-brand reply.
  5. The exchange is saved to Supabase and the reply is sent back to the customer, typically within 2 to 3 seconds.

How It Works: The Big Picture

The workflow is a single pipeline triggered by the Telegram Trigger node. Every incoming message flows through a filter, a context-retrieval step, an AI generation step, and two write operations, one to store the conversation and one to deliver the reply.

┌──────────────────────────────────────────────────────────┐
│  TELEGRAM AI CUSTOMER SUPPORT BOT                        │
│                                                          │
│  [Telegram Trigger]                                      │
│         |                                                │
│         v                                                │
│  [Is Text Message?] --(No)--> [Stop]                     │
│         | (Yes)                                          │
│         v                                                │
│  [Extract Message Data]                                  │
│         |                                                │
│         v                                                │
│  [Get History · Supabase]                                │
│         |                                                │
│         v                                                │
│  [Build Gemini Request]                                  │
│         |                                                │
│         v                                                │
│  [Google Gemini · generateContent]                       │
│         |                                                │
│         v                                                │
│  [Store Conversation · Supabase]                         │
│         |                                                │
│         v                                                │
│  [Send Telegram Reply]                                   │
└──────────────────────────────────────────────────────────┘
  

What You’ll Need

  • n8n instance: Cloud or self-hosted (v1.0 or higher)
  • Telegram bot token: created in two minutes with @BotFather, completely free, no approval or phone number setup
  • Google Gemini API key: from Google AI Studio, free tier, no credit card, no OpenAI subscription needed
  • Supabase account: the free tier handles thousands of daily conversations
  • One conversations table in Supabase (SQL provided below)

Estimated build time: 40 to 50 minutes from scratch.

Part 1: Building the Workflow Step by Step

1 Create your Telegram bot (2 minutes)

Open Telegram and message @BotFather. Send /newbot, give it a name and a username, and BotFather replies with a bot token that looks like 7123456789:AAH.... Copy it. That single token is all the authentication your bot needs, there is no business verification, phone number, or app review to wait on.

2 Telegram Trigger (Telegram Trigger node)

Add the Telegram Trigger node. Create a Telegram credential and paste your bot token, then set Updates to message. n8n registers the webhook with Telegram for you, so there is no URL to copy or verify by hand.

Here is what a typical incoming update looks like:

{
  "message": {
    "message_id": 4021,
    "from": { "id": 15551234567, "first_name": "James" },
    "chat": { "id": 15551234567, "type": "private" },
    "date": 1775745137,
    "text": "Hi, where is my order #1042?"
  }
}
Tip:

Telegram also sends updates for edited messages, joins, and other events. The next step keeps only real text messages so nothing else reaches the AI.

3 Is Text Message? (IF node)

Not every update is a customer message. Edits, stickers, and service events arrive through the same trigger without a plain message.text. This IF node gates those out to avoid errors downstream.

Configure the condition:

  1. Left Value: {{ $json.message.text }}
  2. Operation: exists (is not empty)

The True branch continues to message processing. The False branch simply ends, Telegram does not need any acknowledgment from your workflow.

4 Extract Message Data (Set node)

This Set node flattens the fields we need into a clean object so every downstream node can reference data without long expression chains. The chat ID is the key that identifies each customer’s conversation.

Field Name n8n Expression
chatId ={{ $json.message.chat.id }}
message ={{ $json.message.text }}
messageId ={{ $json.message.message_id }}
firstName ={{ $json.message.from.first_name }}
timestamp ={{ $now.toISO() }}

After this node, the data looks like:

{
  "chatId": 15551234567,
  "message": "Hi, where is my order #1042?",
  "messageId": 4021,
  "firstName": "James",
  "timestamp": "2026-04-05T14:32:17.000Z"
}

5 Get Conversation History (HTTP Request to Supabase)

Before calling Gemini, we fetch the customer’s history so the AI understands context: was this their first message? Did they already explain the issue? This node queries Supabase’s REST API for the last 10 messages from this chat.

  1. Method: GET
  2. URL: https://YOUR_SUPABASE_PROJECT_REF.supabase.co/rest/v1/conversations
  3. Header apikey: your Supabase anon/public key
  4. Header Authorization: Bearer YOUR_SUPABASE_ANON_KEY
  5. Query param chat_id: eq.{{ $('Extract Message Data').item.json.chatId }}
  6. Query param order: created_at.desc
  7. Query param limit: 10

Returns up to 10 rows, or an empty array for a brand-new customer, which is handled gracefully in the next step.

6 Build Gemini Request (Code node)

This is the brain of the operation. The Code node takes the Supabase history, reverses it to chronological order, and builds the exact request body Google Gemini’s generateContent API expects: a system_instruction that sets the bot’s personality, and a contents array of the conversation so far.

const history = $input.all();
const current = $('Extract Message Data').item.json.message;
const chatId  = $('Extract Message Data').item.json.chatId;

// System instruction defines the bot's personality and knowledge
const systemText = `You are a friendly and professional customer support assistant
for our online store. Be concise, empathetic, and helpful.
Answer questions about orders, shipping, returns, and products.
If you cannot resolve an issue, ask the customer to email
support@yourstore.com with their order number.
Keep replies under 150 words.`;

// Gemini uses role "user" and "model"; map stored "assistant" to "model"
const contents = history.map(i => i.json)
  .filter(m => m.role && m.content)
  .reverse()
  .map(m => ({
    role: m.role === 'assistant' ? 'model' : 'user',
    parts: [{ text: m.content }]
  }));

// Add the current incoming message
contents.push({ role: 'user', parts: [{ text: current }] });

return [{ json: {
  chatId,
  currentMessage: current,
  body: {
    system_instruction: { parts: [{ text: systemText }] },
    contents
  }
} }];
Tip:

The system instruction is where you make this bot yours. Add your return policy, shipping timeframes, or a short FAQ. The more specific it is, the fewer cases the bot escalates to a human.

7 Google Gemini (HTTP Request to generateContent)

Sends the full conversation to Gemini and receives a natural, contextual reply. Using an HTTP Request node gives you full control over the request format, and Gemini’s free tier keeps this step free at typical support volume.

  1. Method: POST
  2. URL: https://generativelanguage.googleapis.com/v1beta/models/gemini-2.5-flash:generateContent
  3. Header x-goog-api-key: YOUR_GEMINI_API_KEY
  4. Header Content-Type: application/json
  5. Body (JSON expression): ={{ $json.body }}

The response object looks like this:

{
  "candidates": [{
    "content": {
      "role": "model",
      "parts": [{ "text": "Hi! I'd be happy to look into order #1042 for you. Could you confirm the email on the order so I can pull it up?" }]
    },
    "finishReason": "STOP"
  }]
}

Access the reply downstream with $json.candidates[0].content.parts[0].text.

Tip:

Gemini’s free tier covers a generous number of requests per day at no cost. If you outgrow it, gemini-2.5-flash is still one of the cheapest capable models available.

8 Store Conversation (HTTP Request to Supabase)

Saves both the customer’s message and the AI’s reply to Supabase in a single bulk insert. This is what gives the bot memory: every message is persisted for future context retrieval.

  1. Method: POST
  2. URL: https://YOUR_SUPABASE_PROJECT_REF.supabase.co/rest/v1/conversations
  3. Headers: same apikey and Authorization as Step 5, plus Content-Type: application/json and Prefer: return=minimal
  4. Body: a JSON array with two objects, the user message and the assistant reply
=[
  {
    "chat_id": "={{ $('Build Gemini Request').item.json.chatId }}",
    "role": "user",
    "content": "={{ $('Build Gemini Request').item.json.currentMessage }}"
  },
  {
    "chat_id": "={{ $('Build Gemini Request').item.json.chatId }}",
    "role": "assistant",
    "content": "={{ $json.candidates[0].content.parts[0].text }}"
  }
]

9 Send Telegram Reply (Telegram node)

Delivers the AI-generated response back to the customer. Add the Telegram node (not the trigger), reuse your bot credential, and configure:

  1. Resource: Message, Operation: Send Message
  2. Chat ID: ={{ $('Extract Message Data').item.json.chatId }}
  3. Text: ={{ $('Google Gemini').item.json.candidates[0].content.parts[0].text }}

That is the whole delivery step. No phone number formatting, no Graph API version, no message templates to get approved.

The Data Structure

The entire conversation memory lives in a single Supabase table. Create it by running this SQL in the Supabase dashboard under SQL Editor:

CREATE TABLE conversations (
  id          bigint primary key generated always as identity,
  chat_id     text        not null,
  role        text        not null check (role in ('user', 'assistant')),
  content     text        not null,
  created_at  timestamptz not null default now()
);

CREATE INDEX idx_conversations_chat_id    ON conversations(chat_id);
CREATE INDEX idx_conversations_created_at ON conversations(created_at);
Column Type Example Description
id bigint 42 Auto-incrementing primary key
chat_id text 15551234567 Telegram chat ID (the conversation key)
role text user Either user or assistant
content text Hi, where is my order #1042? Full message text
created_at timestamptz 2026-04-05T14:32:17Z Auto-set on insert
Important:

The table name must be exactly conversations and column names must match the workflow expressions exactly. Column names are case-sensitive in Supabase’s REST API.

Testing Your Workflow

  1. Open Telegram, find your bot by its username, and send it a message like “Hi, where is my order #1042?”
  2. Open n8n and watch the Executions panel, a new execution should appear within a second.
  3. Verify the IF node routed to the True branch and every node shows a green checkmark.
  4. Check your Supabase conversations table, two new rows should appear (role=user and role=assistant).
  5. Check Telegram, the AI reply should have arrived.
Problem Likely Cause Fix
Trigger never fires Wrong bot token, or the workflow is not active Re-check the token from @BotFather, save the credential, and turn the workflow Active
403 from Supabase Wrong API key or missing RLS policy Use the anon/public key (not service role), and in Supabase enable Row Level Security with a policy allowing insert/select
400 from Gemini Malformed contents array or empty message Confirm each item has a role and parts[].text, and that the current message is not empty
Gemini 403 or 429 Missing key or free-tier rate limit hit Check the x-goog-api-key header, and if you are testing rapidly, wait a moment between messages
Bot has no memory between sessions Supabase table or column name mismatch Confirm the table is conversations with columns chat_id, role, content, created_at, exact case

Frequently Asked Questions

Do I need a paid account to run a Telegram support bot?

No. Telegram bots are completely free, with no per-message fee and no business verification. You create a bot with @BotFather in about two minutes, and the only other cost is your n8n hosting, which is free when self hosted.

How many messages back does the bot remember?

By default the workflow fetches the last 10 messages (5 exchanges). Change the limit=10 query parameter in Step 5 to any number you prefer. Higher limits give the AI more context, and on Gemini’s free tier the extra tokens still cost nothing at typical volume.

Can I customize the AI’s tone and knowledge?

Yes, that is the whole point of the system instruction in Step 6. Edit the systemText in the Build Gemini Request node to reflect your brand voice, product catalog, return policies, or specific FAQ answers. The more specific it is, the fewer cases the bot escalates to a human.

What happens if Gemini is temporarily unavailable?

n8n marks the execution as an error and the customer will not receive a reply. To handle this gracefully, add an Error Trigger workflow that catches failures and sends a fallback Telegram message such as “We are having a brief technical issue, a team member will respond within the hour.” You can also enable retry on the Gemini HTTP Request node.

Can I hand off to a human agent when needed?

Yes. In the Build Gemini Request node, check whether the incoming message contains phrases like “speak to a human” or “agent.” If detected, skip the Gemini step and send a Slack or email notification to your support team instead. The conversation history in Supabase gives them full context immediately.

Can the bot look up real order data?

Yes. Add a Shopify node before the Gemini step that fetches the order by number, then include that data in the system instruction so the AI answers with real status. See Shopify order status lookups with n8n for that pattern.

Get the ready-made support agent

You now have everything to deploy a 24/7 Telegram AI support bot with full conversation memory. Prefer to import than build? The Shopify AI Customer Support Agent is a tested, ready-to-import template that runs free on Gemini, so you skip the setup and go straight to testing.

Get the Agent →

Instant download, works on n8n Cloud and self-hosted

What’s Next?

  • Add order lookup: connect your Shopify store so the bot can answer with real-time order status by number.
  • Detect frustrated customers: add a sentiment check, and if the AI detects frustration, route to a Slack alert so a human can jump in.
  • Go multilingual: Gemini already replies in the customer’s language when you ask it to in the system instruction, no extra step needed.
  • Build a weekly digest: use a Schedule trigger to query Supabase for weekly conversation summaries and email them to your team every Monday.

Browse more ready-to-run options in the best n8n AI agent templates for Shopify, or get order and stock alerts on Telegram.

n8n
Telegram
Google Gemini
Supabase
customer support
chatbot
automation