How to Build an AI Candidate Screening Pipeline with n8n (LinkedIn + Gemini)

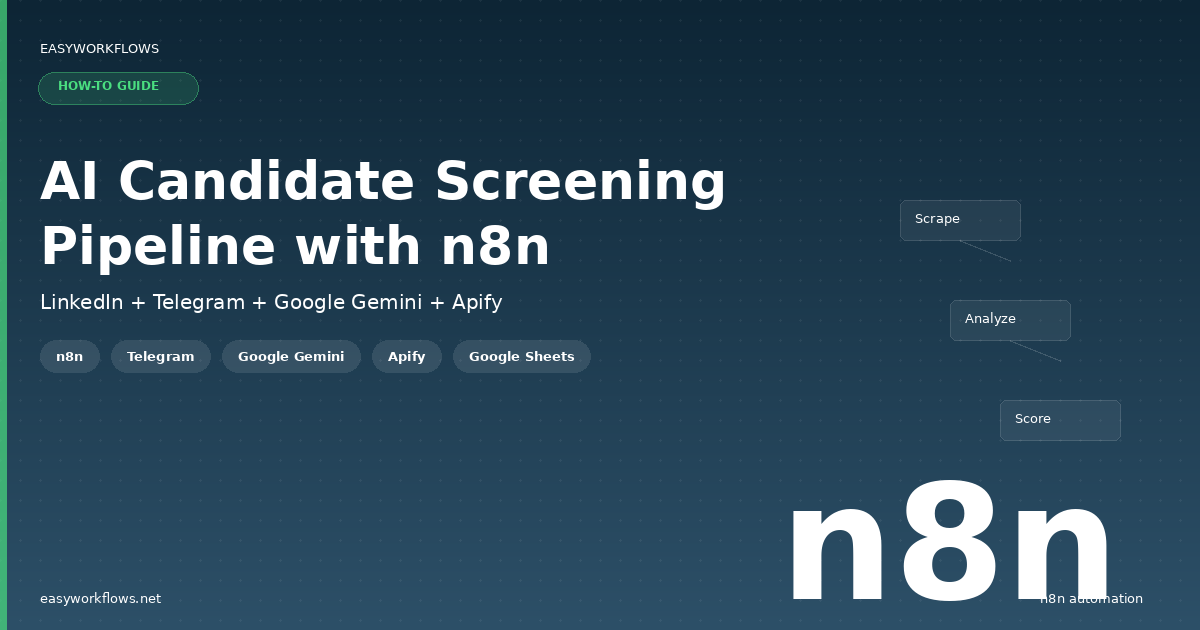
Recruiting teams spend hours on first-round screening—parsing LinkedIn profiles, cross-referencing job requirements, and writing candidate summaries. It’s critical work, but it’s repetitive and error-prone. What if you could automate the entire initial review, freeing your team to focus on real conversations with the best candidates?

This n8n workflow does exactly that: a recruiter sends a LinkedIn profile URL via Telegram, three AI agents powered by Google Gemini analyze the candidate against the job requirements, and a formatted assessment comes back within seconds. Everything is logged to Google Sheets for your records. Let’s build it.

Prefer to skip the setup? Grab the ready-made template → and be up and running in under 10 minutes.

What You’ll Build

  1. A Telegram bot receives a LinkedIn profile URL from a recruiter
  2. The workflow scrapes the candidate’s profile data using Apify
  3. It retrieves the job description from your Google Drive folder
  4. Three specialized AI agents evaluate the candidate: one scores JD match, one delivers a detailed analysis, and one synthesizes a recruiter-ready recommendation
  5. Results are stored as a row in Google Sheets for future reference
  6. A formatted summary is sent back to Telegram with the screening verdict

How It Works — The Big Picture

The workflow orchestrates a multi-stage evaluation: it gathers data from three sources (LinkedIn, Google Drive, Apify), processes it through three independent LLM agents, consolidates the results, and delivers them both to a persistent data store and back to the recruiter in real time.

┌──────────────────────────────────────────────────────────────────────────┐
│  AI CANDIDATE SCREENING PIPELINE                                        │
│                                                                          │
│  1. Telegram Trigger                                                     │
│         ↓                                                                │
│  2. Extract LinkedIn URL → 3. Apify Scraper (LinkedIn Profile)         │
│         ↓                                                                │
│  4. Poll Apify Status → 5. Get Apify Results                            │
│         ↓                                                                │
│  6. Google Drive: Fetch Job Description                                 │
│  7. Extract PDF Text                                                    │
│         ↓                                                                │
│  8–10. Three Parallel LLM Agents (Gemini 2.5 Pro)                       │
│        • Agent 1: JD Matching Score                                     │
│        • Agent 2: Detailed Candidate Analysis                           │
│        • Agent 3: Recruiter Recommendation                              │
│         ↓                                                                │
│  11. Merge Agent Results                                                │
│  12. Add to Google Sheets                                               │
│  13. Format & Send Telegram Summary                                     │
│         ↓                                                                │
│  14. Telegram Send (Final Message)                                      │
└──────────────────────────────────────────────────────────────────────────┘
  

What You’ll Need

  • n8n account (Cloud or self-hosted, version 1.0+)
  • Telegram Bot API—a bot token created via BotFather
  • Google Account with access to Google Drive, Google Sheets, and the Gemini API
  • Apify Account with API access and a LinkedIn Scraper actor already configured
  • Google Drive Folder containing job description PDFs (one per role)
  • Google Sheets Document where candidate results will be stored
  • LinkedIn URL(s) to test with—public profiles work best

Estimated build time: 45–60 minutes from scratch, or under 10 minutes with the template.

Part 1 — The Trigger and Data Collection

Step 1: Telegram Trigger and URL Extraction

The workflow starts when your recruiter sends a message with a LinkedIn profile link. The Telegram trigger node listens for incoming messages, and a Set node extracts the LinkedIn URL for processing.

Configuration: Set the Telegram Bot token in the credential field. The trigger fires every time a message arrives. A downstream Set node extracts the URL string from the message text using a simple expression.


{
  "message": "Please screen this candidate: https://www.linkedin.com/in/james-carter-52a1b3c/",
  "linkedinUrl": "https://www.linkedin.com/in/james-carter-52a1b3c/",
  "timestamp": "2026-04-08T10:15:00Z"
}
  
💡

Tip: Make sure your recruiter includes the full LinkedIn profile URL in their message. Private or incomplete URLs will cause the Apify scraper to fail silently. Train users to send the full URL like https://www.linkedin.com/in/username/.

Step 2: Apify LinkedIn Scraper Trigger and Polling

Once you have the URL, send it to Apify’s LinkedIn Profile Scraper actor. Apify will queue the job asynchronously, so you need to poll for results. The workflow launches the actor, then checks its status repeatedly until it’s done.

Configuration: In the Apify node, set the Actor ID to your LinkedIn Scraper actor, pass the LinkedIn URL as input, and call the actor. Store the Run ID for polling. Use a Wait node to space out polling calls (2–3 seconds apart, 30–40 attempts). Once the status shows “Succeeded,” fetch the results from the Apify output dataset.


{
  "runId": "YOUR_RUN_ID_FROM_APIFY",
  "status": "Succeeded",
  "profile": {
    "name": "James Carter",
    "headline": "Senior Software Engineer at TechCorp",
    "location": "Austin, TX, USA",
    "about": "10+ years building scalable systems. Expertise in cloud architecture and team leadership.",
    "experience": [
      {
        "title": "Senior Software Engineer",
        "company": "TechCorp Inc.",
        "duration": "2022–Present",
        "description": "Led platform modernization, reducing infrastructure costs by 35%."
      }
    ],
    "skills": ["Python", "AWS", "System Design", "Leadership", "Docker", "Kubernetes"],
    "endorsements": 247
  }
}
  
📌

Important: Apify’s LinkedIn scraper may hit rate limits if called too frequently. Keep polling intervals at 2–3 seconds and fail gracefully if a profile can’t be scraped (use an IF node to check the status).

Step 3: Fetch Job Description from Google Drive

Your Google Drive folder holds job descriptions as PDFs. In parallel with the Apify scrape, the workflow fetches the correct job description. A Set node stores the job title or folder ID for lookup, and a Google Drive node finds and downloads the PDF.

Configuration: Use Google Drive credentials (OAuth2). Set the operation to “Download File” and specify your folder structure. You may hard-code the folder ID or pass it dynamically based on recruiter input. Extract the PDF file ID and download the binary content.


{
  "jobDescriptionFile": {
    "id": "1a2b3c4d5e6f7g8h9i0j_JOB_DESC",
    "name": "Senior_Software_Engineer_2026.pdf",
    "mimeType": "application/pdf",
    "size": 45230,
    "downloadUrl": "https://drive.google.com/file/d/1a2b3c4d5e6f7g8h9i0j_JOB_DESC/view"
  }
}
  

Part 2 — Document Processing and AI Analysis

Step 4: Extract Text from PDF Job Description

PDF files need to be converted to plain text before the AI agents can analyze them. An n8n PDF Extractor node (or a Code node using a library like pdfkit) parses the PDF and outputs clean text.

Configuration: Feed the downloaded PDF binary into a PDF Extract node. Set it to extract all text. The output is clean, line-broken text suitable for LLM processing.


{
  "jobDescriptionText": "Senior Software Engineer - Full-Time, Austin, TX\n\nAbout the Role:\nWe're seeking a Senior Software Engineer to lead our platform modernization initiative...\n\nKey Responsibilities:\n- Design and implement scalable microservices\n- Mentor junior engineers\n- Collaborate with product and design teams\n\nRequired Skills:\n- 8+ years software engineering experience\n- Proficiency in Python, Go, or Rust\n- AWS or GCP certification preferred\n- Strong system design fundamentals\n\nCompensation:\n$180,000–$220,000 + equity"
}
  

Step 5–7: Three Parallel AI Agents (Gemini 2.5 Pro with LangChain)

This is where the intelligence happens. Three specialized LangChain agents, each powered by Google Gemini 2.5 Pro, evaluate the candidate from different angles. They run in parallel for speed, each receiving the same candidate profile and job description but with a different prompt.

Agent 1: JD Matching Agent
Purpose: Assign a match score (0–100%) and list which job requirements the candidate meets and which they lack.
Prompt: “You are a recruitment analyst. Compare this candidate’s profile to the job description. Score the match from 0–100%. List which required skills are present, which are missing, and which desired skills the candidate has. Be precise and numerical.”


{
  "matchScore": 78,
  "requiredSkillsMet": ["Python", "AWS", "System Design", "Leadership"],
  "requiredSkillsMissing": [],
  "desiredSkillsPresent": ["Docker", "Kubernetes"],
  "reasoning": "Strong match on core backend skills and architecture. Leadership experience aligns with mentoring expectations."
}
  

Agent 2: Detailed Analysis Agent
Purpose: Provide a deep-dive evaluation of the candidate’s background, strengths, gaps, and how they’d perform in the role.
Prompt: “You are a senior recruiter reviewing this candidate. Write a comprehensive 2–3 paragraph evaluation of their fit for the role. Consider their experience trajectory, demonstrated technical depth, leadership maturity, and any red flags or concerns. Be constructive but honest.”


{
  "analysis": "James Carter presents a strong profile for this role. His 10 years in software engineering, with the last 4 focused on platform modernization at TechCorp, directly mirror the responsibilities outlined. His experience leading infrastructure cost optimization demonstrates both technical depth and business acumen. However, his background is predominantly in established, large-scale systems; this role will require exposure to startup-pace decision-making. His skill set is very current—Docker, Kubernetes, and AWS are all heavily weighted in the job description. No significant gaps identified beyond the typical onboarding curve."
}
  

Agent 3: Recruiter Recommendation Agent
Purpose: Synthesize the other two analyses and produce a hiring recommendation for the recruiter (e.g., “Strong Yes,” “Yes with caveats,” “No”).
Prompt: “Based on the candidate profile, job description, and the above analyses, provide a short hiring recommendation. Choose from: ‘Strong Yes—move to phone screen,’ ‘Yes, with caveats,’ ‘Maybe—needs clarification on specific skills,’ ‘No—not a fit.’ Explain your recommendation in 1–2 sentences.”


{
  "recommendation": "Strong Yes—move to phone screen",
  "rationale": "Carter's technical skills and leadership experience are a strong fit. His platform modernization background directly aligns with the role's core responsibility. Recommend phone screen to assess cultural fit and career motivation."
}
  
💡

Tip: Parallel execution is critical for speed. All three agents should start at the same time (use a Merge node to combine their outputs). If one agent times out, the workflow won’t block the others—use error handlers to catch and log failures gracefully.

Part 3 — Results Storage and Final Output

Step 8: Merge Agent Results and Add to Google Sheets

Once all three agents finish, a Merge node combines their outputs into a single structured result. This consolidated data is then added as a new row to your Google Sheets document, creating a searchable archive of all screening decisions.

Configuration: Set up the Merge node to combine all agent outputs under a single object. In the Google Sheets node, configure the operation to “Append Row” into your spreadsheet. Map each agent result to a column: matchScore, analysis, recommendation, linkedinUrl, timestamp, and candidateName.


{
  "linkedinUrl": "https://www.linkedin.com/in/james-carter-52a1b3c/",
  "candidateName": "James Carter",
  "timestamp": "2026-04-08T10:15:00Z",
  "matchScore": 78,
  "requiredSkillsMet": "Python, AWS, System Design, Leadership",
  "requiredSkillsMissing": "None",
  "analysis": "James Carter presents a strong profile...",
  "recommendation": "Strong Yes—move to phone screen"
}
  

Step 9: Format and Send Telegram Summary

The final step sends a formatted message back to the recruiter via Telegram. The message includes the match score, the recommendation, and a brief summary for quick review.

Configuration: Use a Set node to format the output as a readable Telegram message (emoji, line breaks, bold text). Then use a Telegram Send node to deliver it to the recruiter’s chat ID (or the original chat where they sent the URL).


{
  "telegramMessage": "✅ SCREENING COMPLETE\\n\\nCandidate: James Carter\\nMatch Score: 78%\\nRecommendation: Strong Yes—move to phone screen\\n\\nProfile: Senior Software Engineer at TechCorp (10 yrs exp)\\nKey Fit: Python, AWS, System Design, Leadership all present.\\n\\nFull analysis saved to screening sheet.",
  "chatId": "YOUR_RECRUITER_CHAT_ID"
}
  
💡

Tip: Add a conditional branch here. If the recommendation is “No,” prefix the Telegram message with a ⛔ emoji. If it’s “Strong Yes,” use a 🚀 emoji. This gives the recruiter instant visual feedback before they even read the details.

The Data Structure

All screening results are logged to a Google Sheets document. This becomes your searchable candidate database. Each row captures one screening event, with columns for the LinkedIn URL, candidate name, all three agent outputs, and the timestamp.

Column Type Example Description
Date Date 2026-04-08 Screening date (auto-populate with workflow timestamp)
Candidate Name Text James Carter Full name from LinkedIn profile
LinkedIn URL URL https://www.linkedin.com/in/james-carter-52a1b3c/ Link to original profile
Job Title Screened For Text Senior Software Engineer Which job description was used
Match Score Number 78 0–100 from Agent 1
Required Skills Met Text Python, AWS, System Design, Leadership Comma-separated list from Agent 1
Required Skills Missing Text (none) Gaps the candidate should address
Detailed Analysis Long Text James Carter presents a strong profile… Full paragraph from Agent 2
Recommendation Text Strong Yes—move to phone screen Decision from Agent 3
📌

Important: Set up the Google Sheets document with these column headers before importing the workflow. The column names must match exactly—the workflow expects Candidate Name, Match Score, etc. If you rename columns, update the field mappings in the Google Sheets node.

Full System Flow

Here’s the complete end-to-end journey, from recruiter message to final Telegram response:

┌─────────────────────────────────────────────────────────────────────────┐
│                    FULL AI SCREENING PIPELINE                          │
│                                                                         │
│  TRIGGER                                                                │
│  ┌──────────────────┐                                                   │
│  │ Telegram Message │ (Recruiter sends LinkedIn URL)                   │
│  └────────┬─────────┘                                                   │
│           │                                                             │
│  DATA GATHERING (Parallel)                                             │
│           ├──→ Apify LinkedIn Scraper ────→ Poll for Results           │
│           │                                                             │
│           └──→ Google Drive ────→ Download Job Description PDF         │
│                                           │                            │
│                                   Extract PDF Text                     │
│           │                                                             │
│           ↓ (Wait for both)                                            │
│           │                                                             │
│  AI ANALYSIS (3 Parallel Agents)                                       │
│           ├──→ Agent 1: JD Match Score & Skills Gap                    │
│           ├──→ Agent 2: Detailed Candidate Analysis                    │
│           └──→ Agent 3: Recruiter Recommendation                       │
│           │                                                             │
│           ↓ (Merge all agent outputs)                                  │
│           │                                                             │
│  PERSISTENCE & OUTPUT                                                  │
│           ├──→ Add Row to Google Sheets                                │
│           │                                                             │
│           └──→ Format & Send Telegram Summary                          │
│                                                                         │
│  ┌──────────────────────────────────────┐                              │
│  │ Recruiter Receives Summary in Telegram│ (with score + recommendation)
│  └──────────────────────────────────────┘                              │
│                                                                         │
│  ✅ Full screening complete in 30–60 seconds                           │
│                                                                         │
└─────────────────────────────────────────────────────────────────────────┘
  

Testing Your Workflow

Before letting your team loose on the workflow, run through this test plan to confirm everything is wired correctly.

  1. Send a test LinkedIn URL via Telegram: Use a public profile (e.g., your own LinkedIn or a known public figure). Send a message to your bot like: “Please screen: https://www.linkedin.com/in/sarah-thompson-engineering/”
  2. Monitor the n8n execution: Open the workflow’s execution history in n8n and watch for successful node completion. Check that Apify returns profile data, Google Drive successfully downloads the PDF, and all three agents produce output.
  3. Check Telegram for the response: Within 30–60 seconds, you should receive a formatted message with a match score and recommendation.
  4. Verify the Google Sheets row: Open your screening spreadsheet and confirm that a new row was added with all the candidate details and agent analysis.
Problem Likely Cause Fix
Telegram message not triggering workflow Bot token incorrect or Telegram node not listening on the right chat Re-check bot token in Telegram credential. Confirm you’re messaging the correct bot.
Apify scraper returns empty profile LinkedIn profile is private or URL is malformed Test with a public profile. Ensure recruiter sends full URL (https://www.linkedin.com/in/username/).
Google Drive node returns “File not found” Job description PDF is not in the specified folder, or folder ID is wrong Double-check folder ID in Google Drive config. Confirm PDF file exists and is accessible.
Gemini agents time out or return empty responses API quota exceeded, malformed prompt, or credential not authenticated Check Google Cloud console for quota limits. Re-authenticate Gemini credential. Simplify the prompt if needed.
Google Sheets append fails Column names don’t match, sheet is read-only, or credentials lack write access Verify column headers match exactly. Check sheet permissions. Re-authenticate Google Sheets credential.
Telegram response is delayed (>2 minutes) Apify polling is slow, or Gemini API is slow Reduce polling interval slightly (1–2 sec). Check n8n logs for slow node execution.

Frequently Asked Questions

Can I screen candidates for multiple jobs at once?

Yes. Instead of hard-coding a single job description, modify the workflow to accept a job title as an input parameter. Add a conditional step that looks up the corresponding PDF from Google Drive based on the title sent in the Telegram message. For example, if the recruiter sends “Screen for Senior Software Engineer,” the workflow finds and uses that specific job description.

What if Apify can’t scrape a LinkedIn profile?

Apify may fail on private profiles, suspended profiles, or if LinkedIn rate-limits the scraper. Add an error handler branch after the Apify polling step. If the status is “Failed,” send a message back to the recruiter explaining the issue and ask them to provide a public-facing profile link or a resume PDF instead. You can then use a PDF extractor node to parse the resume and proceed with the same AI agents.

How much does this cost to run?

Costs depend on your service usage. Gemini API charges per 1,000 input tokens (~$0.075) and 1,000 output tokens (~$0.3). A typical screening run uses about 5,000–8,000 tokens total, so roughly $0.05–$0.10 per candidate. Apify charges based on actor runs (LinkedIn scraper ~$0.05–$0.15 per run). Google Sheets and Google Drive are included in your Google Workspace account (no additional charge). Telegram Bot is free. Total cost per screening: roughly $0.10–$0.30.

Can I customize the AI agents’ evaluation criteria?

Absolutely. Each agent’s instructions are defined in the LangChain prompt. Edit the prompt in each agent node to emphasize different criteria. For example, if your role prioritizes “leadership and mentoring ability,” adjust Agent 2’s prompt to focus on those traits. Or if you want more detail, ask the agents to return structured JSON with sub-scores instead of prose.

What if the recruiter needs to screen a candidate without a LinkedIn profile?

Create an alternative input path. After the initial Telegram message, add a conditional step: if the message contains a LinkedIn URL, proceed with Apify; if it contains a resume attachment or a Drive link, fetch and parse that instead. Both paths merge at the “AI Analysis” stage, so the agents evaluate the same data regardless of source.

How do I integrate this with my existing ATS (Applicant Tracking System)?

Most modern ATSs expose an API for candidate creation. After screening results are added to Google Sheets, add a conditional node that checks the recommendation. If it’s “Strong Yes,” make an HTTP POST request to your ATS’s API with the candidate details, match score, and recruiter notes. This creates a pre-filled candidate record that the recruiter can review and move forward in your hiring workflow.

Get the AI Candidate Screening Template

Stop screening manually. Import the complete 55-node workflow in under 10 minutes, configure your credentials, and let AI agents handle first-round reviews while you focus on real conversations.

Get the Template →

Instant download · Works on n8n Cloud and self-hosted · Setup guide included

What’s Next?

  • Add a second-stage review: Create a companion workflow that triggers when a recruiter flags a candidate for deeper evaluation. It can compile a detailed dossier from LinkedIn, recent GitHub contributions, and portfolio links.
  • Expand to video interviews: Integrate a video interview scheduling tool (e.g., Calendly, Slack) to automatically send a booking link to “Strong Yes” candidates, streamlining the next step.
  • Multi-language support: Use Google Translate in parallel with Gemini to evaluate candidates from non-English profiles, opening your talent pool globally.
  • Scoring refinement: Once you have 20–30 screening results in Google Sheets, analyze which candidates actually performed well in interviews and phone screens. Use that data to fine-tune the agents’ prompts and weightings for even better predictions.
n8n
AI agents
LinkedIn automation
Google Gemini
Telegram
recruitment automation
workflow template

How to Build an AI Chatbot with Long-Term Memory Using n8n and Google Docs

Ever built a chatbot that forgets everything the moment the conversation ends? You ask your AI assistant to remember your coffee order preference, and five minutes later it has no idea you’re a oat-milk double-shot latte person. It’s frustrating, and it makes the experience feel less intelligent than it should be.

Here’s the good news: you can fix this with n8n. This workflow gives your AI chatbot true persistent memory using Google Docs as a beautifully simple, completely free knowledge store. No database setup. No complex infrastructure. Just your chatbot learning about users, remembering details, and getting smarter with every conversation.

Ready to build this? You can grab the complete ready-to-import workflow with all the setup instructions at EasyWorkflows. Import in seconds and start building immediately.

What You’ll Build

This workflow creates an intelligent chatbot experience where:

  1. Users send messages via chat trigger (or Telegram)
  2. The workflow instantly retrieves all previous memories and notes about that user from Google Docs
  3. An AI agent (GPT-4o-mini) reads the incoming message alongside historical context
  4. The AI thinks about what to remember, what to save, and how to respond
  5. Important facts get saved to the “Long-Term Memories” doc for persistence
  6. Temporary notes get saved to the “Notes” doc for session context
  7. The response goes back to the user via Telegram, chat interface, or both

How It Works — The Big Picture

Let me show you the architecture before we dive into the build:

┌─────────────────────────────────────────────────────────────────┐
│                         USER MESSAGE                             │
│                  (Chat Trigger / Telegram)                       │
└────────────────────────────┬────────────────────────────────────┘
                             │
                ┌────────────┴────────────┐
                │                         │
      ┌─────────▼──────────┐   ┌─────────▼──────────┐
      │   Load Memories    │   │    Load Notes      │
      │  from Google Docs  │   │  from Google Docs  │
      │   (Memory Doc)     │   │   (Notes Doc)      │
      └─────────┬──────────┘   └─────────┬──────────┘
                │                         │
                └────────────┬────────────┘
                             │
                      ┌──────▼──────┐
                      │    Merge    │
                      │ Memories &  │
                      │    Notes    │
                      └──────┬──────┘
                             │
                      ┌──────▼──────┐
                      │  Combine    │
                      │  Context    │
                      └──────┬──────┘
                             │
        ┌────────────────────┼────────────────────┐
        │                    │                    │
   ┌────▼────┐      ┌────────▼────────┐     ┌────▼────┐
   │ Session │      │  AI Memory      │     │  GPT-   │
   │ Memory  │      │  Agent (with    │     │ 4o Mini │
   │ Buffer  │      │  System Prompt) │     │         │
   └────┬────┘      └────────┬────────┘     └────┬────┘
        │                    │                    │
        └────────────────────┼────────────────────┘
                             │
                ┌────────────┴────────────┐
                │                         │
      ┌─────────▼────────┐    ┌──────────▼──────────┐
      │  Save Memory to  │    │  Save Note to      │
      │   Google Docs    │    │  Google Docs       │
      │  (Triggered by   │    │  (Triggered by AI) │
      │   AI decision)   │    │                    │
      └─────────┬────────┘    └──────────┬──────────┘
                │                        │
      ┌─────────▼──────────────────────────▼────────┐
      │              Response Output                │
      │      (Format Chat + Send Telegram)          │
      └──────────────────────────────────────────────┘

What You’ll Need

Before you start, gather these prerequisites:

  • n8n account (cloud.n8n.io or self-hosted) — free tier works fine
  • OpenAI API key with GPT-4o-mini access (~$0.15 per conversation)
  • Google account with Google Docs access (free)
  • Telegram account (optional, but included in this workflow)
  • Telegram Bot Token from BotFather (optional, only if using Telegram output)
  • Basic n8n knowledge — familiarity with nodes, connections, and expressions is helpful but not required

Time estimate: 25–35 minutes for setup and first conversation.

Setting Up Your Google Docs

Google Docs is the memory backbone of this workflow. Think of it like a simple, searchable database that the AI can read and write to. Here’s why it works so well:

  • Free — You don’t pay per request or storage
  • Human-readable — You can open it anytime and read what the AI has learned
  • Searchable — Built-in Find function means you can track memory growth
  • OAuth2-compatible — n8n integrates seamlessly
  • Shareable — If you want to audit or share user data with a team member, it’s just a Google Doc link

Create Two Google Docs

Doc 1: “Long-Term Memories”

This stores facts that persist across conversations. Examples:

[04/08/2026] - Name: Sarah
[04/08/2026] - Preference: Oat milk lattes, no sugar
[04/08/2026] - Job: Product Manager at TechCorp
[04/08/2026] - Timezone: America/Chicago
[04/08/2026] - Goal: Learn n8n automation

Doc 2: “Notes”

This stores temporary reminders, action items, and session notes:

[04/08/2026 14:32:15] - User asked about workflow pricing
[04/08/2026 14:33:42] - Follow up: send template examples
[04/08/2026 14:35:08] - User mentioned bandwidth limits in n8n Cloud

You’ll get the document IDs after you create them. In Google Docs, the URL looks like:

https://docs.google.com/document/d/YOUR_GOOGLE_DOC_ID/edit

Copy that ID—you’ll paste it into the workflow nodes.

Building the Workflow — Step by Step

Now let’s build this. I’ll walk through each node with configurations and tips.

1 Chat Trigger

What it does: Listens for incoming messages from the n8n chat interface or external webhooks. This is your entry point for user input.

How to configure:

  • In n8n, add a “Chat Trigger” node (n8n-nodes-base.chatTrigger)
  • Set chatTriggerType to "webhook"
  • Save and deploy the workflow
  • The node will generate a webhook URL automatically

Data that flows out:

{
  "chatId": "user-session-123",
  "message": "Hey, can you remember I prefer oat milk lattes?",
  "sessionId": "session-456"
}

Tip: The Chat Trigger can receive messages from n8n’s web chat UI, Telegram, Slack, or any HTTP POST request. In this workflow, it fans out to two parallel Google Docs fetch operations.

2 Load Memories from Google Docs

What it does: Retrieves the Long-Term Memories document. This gives the AI context about the user’s past.

How to configure:

  • Add a “Google Docs” node
  • Authenticate with your Google account (OAuth2)
  • Set resource to "document"
  • Set documentId to YOUR_GOOGLE_DOC_ID_MEMORIES
  • Set option to "getText"

Data that flows out:

{
  "data": "[04/08/2026] - Name: Sarah\n[04/08/2026] - Preference: Oat milk lattes, no sugar\n[04/08/2026] - Job: Product Manager at TechCorp"
}

Tip: This node runs in parallel with the Notes fetch, so both operations happen simultaneously. The latency is usually under 500ms per fetch.

3 Load Notes from Google Docs

What it does: Retrieves the Notes document. This provides immediate session context and recent reminders.

How to configure:

  • Add another “Google Docs” node (separate from the Memories node)
  • Authenticate with the same Google account
  • Set resource to "document"
  • Set documentId to YOUR_GOOGLE_DOC_ID_NOTES
  • Set option to "getText"

Data that flows out:

{
  "data": "[04/08/2026 14:32:15] - Asked about workflow pricing\n[04/08/2026 14:33:42] - Follow up: send template examples"
}

Tip: If the Notes doc doesn’t exist yet or is empty, the node will return an empty string. That’s fine—the workflow handles it gracefully.

4 Merge Memories & Notes

What it does: Combines the two separate outputs into a single data structure. This merge prepares the data for aggregation.

How to configure:

  • Add a “Merge” node (@n8n-nodes-base.merge)
  • Set mode to "combine"
  • Set combineBy to "id"
  • Connect Memories output to input 0
  • Connect Notes output to input 1

Data that flows out:

[
  { "json": { "data": "[memories...]", "type": "memories" } },
  { "json": { "data": "[notes...]", "type": "notes" } }
]

Tip: The Merge node in “combine” mode takes multiple inputs and creates an array. This makes it easy for the next node to iterate over both data sources.

5 Combine Context

What it does: Aggregates the memories and notes into a single context object that the AI agent will receive.

How to configure:

  • Add an “Aggregate” node (@n8n-nodes-base.aggregate)
  • Set mode to "combine"
  • Leave other options as default

Data that flows out:

{
  "memory_context": "[all memories]",
  "notes_context": "[all notes]",
  "combined": true
}

Tip: Think of Aggregate as the “summary” step. It pools all items from the previous step so the AI Agent receives one clean input.

6 AI Memory Agent

What it does: This is the brain. The AI Agent reads the user’s message, your system prompt, and all the context from memories and notes. It decides what to respond, what to save, and which tools to call.

How to configure:

  • Add an “AI Tools Agent” node (@n8n/n8n-nodes-langchain.agent)
  • Set agentOptions.systemPrompt to the following:
You are an AI assistant with persistent memory capabilities. Your role is to:

1. MEMORY MANAGEMENT:
   - Extract and save important facts about the user for long-term recall
   - Format memories as: [DATE] - [TOPIC]: [DETAIL]
   - Save to 'Save Memory to Google Docs' when you learn something important

2. NOTE TAKING:
   - Capture actionable items, reminders, or temporary notes
   - Format notes as: [DATE] [TIME] - [NOTE]
   - Save to 'Save Note to Google Docs' when user mentions something to remember

3. CONTEXT AWARENESS:
   - Review loaded memories and notes before responding
   - Reference past conversations naturally
   - Acknowledge when you remember something about the user

4. RESPONSE GUIDELINES:
   - Be helpful, personable, and concise
   - If unsure, ask clarifying questions
   - Never make up information not in your context

Always use the provided tools to save important information.

Tool attachments: Connect the Session Memory Buffer, GPT-4o Mini LLM, and the two Save tools (Save Memory, Save Note). The agent will automatically call these tools based on its logic.

Data that flows out:

{
  "output": "Thanks Sarah! I've noted that you prefer oat milk lattes. I'll remember that for next time we chat. Is there anything else I can help with?",
  "tool_calls": [
    { "tool": "Save Memory to Google Docs", "input": { "topic": "Preference", "detail": "Oat milk lattes, no sugar" } }
  ]
}

Tip: The system prompt is where you define the AI’s personality and its rules for memory management. You can customize this heavily—make it more casual, more formal, more technical, whatever fits your use case.

7 GPT-4o Mini

What it does: The language model that powers the agent. GPT-4o-mini is fast, cheap (~$0.15 per 1K tokens), and smart enough for most chatbot tasks.

How to configure:

  • Add an “OpenAI Chat Model” node (@n8n/n8n-nodes-langchain.lmChatOpenAi)
  • Authenticate with your OpenAI API key
  • Set model to "gpt-4o-mini"
  • Set temperature to 0.7 (keeps responses natural but consistent)

Data flow: The Agent sends prompts to this node, which returns generated text. The node is “read-only” from the Agent’s perspective—it doesn’t make decisions, just generates language.

Tip: If you want more creative responses, increase temperature to 0.9. If you want more deterministic responses, lower it to 0.3. For memory-critical tasks, I’d recommend 0.5–0.7.

8 Session Memory Buffer

What it does: Stores the last 10 messages in the conversation (configurable). This gives the AI short-term context within a single chat session, complementing the long-term Google Docs memory.

How to configure:

  • Add a “Memory Buffer Window” node (@n8n/n8n-nodes-langchain.memoryBufferWindow)
  • Set bufferSize to 10 (keeps the last 10 messages)

Data that flows out:

{
  "history": [
    { "role": "user", "content": "Hey, remember I prefer oat milk?" },
    { "role": "assistant", "content": "I'll remember that!" },
    ...
  ]
}

Tip: The Session Memory Buffer is separate from the long-term Google Docs memory. Use bufferSize 10–20 for natural conversations. If you set it higher (50+), you might hit token limits on OpenAI, increasing costs.

9 Save Memory to Google Docs

What it does: A Google Docs node that appends new long-term memories. When the AI Agent decides to save something important, it calls this tool.

How to configure:

  • Add a “Google Docs” node (different from the retrieval nodes)
  • Authenticate with your Google account
  • Set resource to "document"
  • Set documentId to YOUR_GOOGLE_DOC_ID_MEMORIES
  • Set option to "appendText"
  • Set text to: ={{ "[" + new Date().toLocaleDateString() + "] - " + $json.input.topic + ": " + $json.input.detail }}

Example append:

[04/08/2026] - Preference: Oat milk lattes, no sugar

Tip: The expression creates a timestamp automatically. Each memory is on a new line, making the doc easy to scan.

10 Save Note to Google Docs

What it does: A Google Docs node for temporary notes. When the AI wants to save a reminder or action item, it calls this.

How to configure:

  • Add another “Google Docs” node (separate from Save Memory)
  • Authenticate with your Google account
  • Set resource to "document"
  • Set documentId to YOUR_GOOGLE_DOC_ID_NOTES
  • Set option to "appendText"
  • Set text to: ={{ "[" + new Date().toLocaleDateString() + " " + new Date().toLocaleTimeString() + "] - " + $json.input }}

Example append:

[04/08/2026 14:32:15] - User asked about Telegram integration

Tip: This node includes both date and time, since notes are usually time-sensitive. Notes doc grows fast—you might clean it out monthly or weekly depending on volume.

11 Send Telegram Reply

What it does: Sends the AI’s response to Telegram. Optional, but great for testing or if you want users to chat via Telegram instead of the n8n web UI.

How to configure:

  • Add an “HTTP Request” node (@n8n-nodes-base.httpRequest)
  • Set method to POST
  • Set url to: https://api.telegram.org/bot{{ $env.TELEGRAM_BOT_TOKEN }}/sendMessage
  • Add body parameters:
  • chat_id: YOUR_TELEGRAM_CHAT_ID
  • text: ={{ $json.output }}

Tip: Get your Telegram Bot Token from BotFather on Telegram. Get your Chat ID by messaging the bot and calling /getchatid (if your bot has that command) or using a debug service. If you’re not using Telegram, you can delete this node entirely—the workflow still works.

12 Format Chat Response

What it does: Formats the AI’s output for the n8n chat interface. This is optional if you’re only using Telegram, but it’s useful for testing.

How to configure:

  • Add a “Set” node (@n8n-nodes-base.set)
  • Set mode to "map"
  • Add assignment: response = ={{ $json.output }}

Data that flows out:

{
  "response": "Thanks Sarah! I've noted that you prefer oat milk lattes. I'll remember that for next time."
}

Tip: This node is simple, but it’s important for keeping the chat interface happy. It ensures the response is in the expected format.

The Data Structure

Let’s look at how data flows through the system, using a real example with Sarah:

Initial state (empty memories and notes):

Google Docs - Long-Term Memories:
(empty)

Google Docs - Notes:
(empty)

Sarah sends her first message:

User: "Hi! I'm Sarah from Chicago. I work in product management and I love oat milk lattes."

The workflow retrieves (empty context):

memories_context: ""
notes_context: ""

AI Agent decides to save key facts:

Tool call: Save Memory to Google Docs
Input: { topic: "Name", detail: "Sarah" }
Input: { topic: "Timezone", detail: "America/Chicago" }
Input: { topic: "Job", detail: "Product Manager" }
Input: { topic: "Preference", detail: "Oat milk lattes" }

Google Docs after first conversation:

Google Docs - Long-Term Memories:
[04/08/2026] - Name: Sarah
[04/08/2026] - Timezone: America/Chicago
[04/08/2026] - Job: Product Manager
[04/08/2026] - Preference: Oat milk lattes

Google Docs - Notes:
[04/08/2026 14:35:22] - User wants to learn n8n automation

Sarah’s next message (tomorrow):

User: "Hey, can you help me with n8n workflows?"

The workflow now retrieves:

memories_context: "[04/08/2026] - Name: Sarah\n[04/08/2026] - Timezone: America/Chicago\n[04/08/2026] - Job: Product Manager\n[04/08/2026] - Preference: Oat milk lattes"

notes_context: "[04/08/2026 14:35:22] - User wants to learn n8n automation"

AI response:

Output: "Hey Sarah! Of course—I'd love to help with your n8n workflows. Given that you're a PM at TechCorp in Chicago, I'm guessing you're looking to automate some processes for your team. What kind of workflows are you thinking about?"

Notice how the AI naturally references Sarah by name, acknowledges her role, and connects her earlier interest in n8n to the current question. That’s persistent memory in action.

Full System Flow

Here’s the complete end-to-end journey:

┌─ Start: User sends message via Chat Trigger or Telegram ──┐
│                                                             │
├─ Parallel: Load Memories from Google Docs                 │
│ └─ Retrieve all historical facts about user                │
│                                                             │
├─ Parallel: Load Notes from Google Docs                    │
│ └─ Retrieve session context and recent reminders           │
│                                                             │
├─ Merge: Combine both memory sources                       │
│ └─ Creates array: [memories_obj, notes_obj]               │
│                                                             │
├─ Aggregate: Consolidate into single context               │
│ └─ Pools all items into one data structure                │
│                                                             │
├─ AI Memory Agent (receives):                              │
│ ├─ User message                                            │
│ ├─ All long-term memories                                 │
│ ├─ All notes from this session                            │
│ ├─ Last 10 messages from Session Memory Buffer            │
│ ├─ System prompt (memory management rules)                │
│ └─ Connection to GPT-4o-mini and tools                    │
│                                                             │
├─ AI Decision Making:                                      │
│ ├─ Read context and user message                          │
│ ├─ Generate response                                       │
│ ├─ Decide what facts to save (→ Save Memory tool)         │
│ └─ Decide what notes to capture (→ Save Note tool)        │
│                                                             │
├─ Parallel: Save Memory to Google Docs                     │
│ └─ Append new facts (if AI decided to save)               │
│                                                             │
├─ Parallel: Save Note to Google Docs                       │
│ └─ Append new notes (if AI decided to save)               │
│                                                             │
├─ Output to Chat:                                          │
│ ├─ Format Chat Response → n8n Web UI                     │
│ └─ Send Telegram Reply → User's Telegram                 │
│                                                             │
└─ Complete: User receives response & AI remembers ──────────┘

Testing Your Workflow

Now that your workflow is built, let’s test it thoroughly:

Test Plan

  1. Deploy the workflow and activate it in n8n
  2. Open the Chat Trigger and test with a simple message: "Hi, my name is Sarah and I like coffee."
  3. Check the Google Docs — The Memories doc should now have a new entry with Sarah’s name
  4. Send another message: "What do I like to drink?" The AI should reference the coffee preference from the previous message
  5. Test Telegram output (if enabled) by checking your Telegram chat — the response should arrive there too
  6. Clear the Notes doc and send a message with a reminder: "Remind me to follow up with the marketing team tomorrow." Check that the note appears in the Notes doc
  7. Simulate a delay — Wait 10 minutes, come back, and test that the AI still remembers Sarah. This confirms persistence

Troubleshooting Table

Issue Likely Cause Fix
Chat Trigger shows “Webhook not working” Workflow not saved or deployed Click Save, then Deploy. Check that the webhook URL is active in the node.
Google Docs nodes fail with auth error OAuth2 credential not connected or expired Re-authenticate the Google Docs credential. Grant permission for Docs read/write.
AI response is generic, not remembering user Memories not being retrieved or system prompt unclear Check that Load Memories node is pulling data. Review system prompt in AI Agent node for clarity.
Memory saves fail silently (no error, but doc not updated) Google Doc ID is incorrect or doc doesn’t exist Verify Document ID in Save Memory and Save Note nodes. Double-check the URL in Google Docs.
Telegram message doesn’t send Bot token invalid or chat ID missing Confirm bot token with BotFather. Test chat ID manually using curl or Postman.
Workflow is slow (>5 second response) Large memory doc or network latency Archive old memories to a separate doc. Consider pagination in future versions.

Frequently Asked Questions

How much data can Google Docs store?

Google Docs has a 50MB file size limit, which translates to roughly 10–20 million words. For a personal chatbot, you’d need to chat 100+ times daily for years to hit that limit. For multi-user systems, consider archiving old memories after 6 months.

Why Google Docs instead of a real database?

Simplicity. No backend servers, no authentication headaches, no costs, and you can read/edit memories by hand. For production systems with thousands of users, you’d want PostgreSQL or MongoDB. For personal projects and small teams, Google Docs is perfect.

Can multiple users use the same workflow?

Yes, but you’d want to create separate memory docs per user (or per user-group). Otherwise, all memories get mixed together. A simple fix is to add a User ID prefix in each memory entry: [04/08/2026] [user-sarah] - Preference: Oat milk.

What if I want to use a different LLM instead of GPT-4o-mini?

Easy. Replace the “GPT-4o Mini” node with any other LLM node that n8n supports: Claude (Anthropic), Gemini (Google), Llama (Meta), or even local models. The system prompt stays the same. Just swap the node and re-authenticate.

How do I ensure memory data is private?

The memories are stored in your Google Docs, which means Google has access (per their privacy policy). If you need end-to-end encryption, deploy n8n self-hosted and use your own database with encryption at rest. For most use cases, treating Google Docs like email (encrypted in transit, encrypted at rest on Google’s servers) is sufficient.

What if the AI forgets something it should remember?

This usually means the system prompt isn’t clear enough about what to save. Revisit the “MEMORY MANAGEMENT” section of the system prompt and be more explicit. Example: add “Save names, preferences, job titles, and timezone. Save reminders and follow-ups as notes.” You can also manually add memories to the Google Doc yourself.

Ready to Deploy This Workflow?

Get the complete, ready-to-import JSON file with all the configurations, plus detailed setup guides for OpenAI, Google Docs, and Telegram. Import in seconds and start building.

Get the Workflow & Setup Guide

Includes step-by-step credential setup, testing checklist, and common customizations.

What’s Next?

You’ve built a powerful memory-driven chatbot. Here are four directions you can take it:

  1. Add Slack Integration — Instead of (or in addition to) Telegram, receive and respond to Slack DMs. Users stay in Slack, and memories persist across platforms.
  2. Multi-User Memory Isolation — Spin up separate memory docs per user, or implement a shared “team knowledge base” doc that all users contribute to. Great for support teams.
  3. Export Memory Analytics — Create a separate workflow that reads the memory doc weekly and generates a summary email. “Sarah asked 12 questions about n8n, preferred 5 templates, and wants to learn automation.”
  4. Archive Old Memories — Set up a scheduled n8n workflow that runs monthly, archives memories older than 6 months to a separate “Archive” doc, and clears the active memory doc. Keeps performance snappy.
n8n
AI Agent
Memory Management
Google Docs
GPT-4o
Chatbot
Telegram
LLM Integration
Automation

How to Build a Telegram Crypto Price Alert Bot with n8n

Missing a Bitcoin pump or getting wrecked by a sudden drop you didn’t see coming — that’s the hidden cost of watching charts manually. Most crypto traders either stare at their screen all day or miss the exact moment they needed to act. This tutorial shows you how to build an automated Telegram bot that watches your chosen coins every 15 minutes and pings you the instant prices break your personal alert thresholds — or when any coin moves more than 5% in 24 hours. No coding background required. Just n8n, a free CoinGecko API key, and a Telegram bot.

Prefer to skip the setup? Grab the ready-made template → and be up and running in under 10 minutes.

What You’ll Build

  1. A scheduled n8n workflow that fires every 15 minutes and fetches live prices for Bitcoin, Ethereum, Solana, BNB, and XRP from CoinGecko’s free API.
  2. A smart code node that checks each coin against your custom price thresholds (e.g., “alert me when BTC goes above $75,000 or below $55,000”) and flags any coin with a 24-hour move greater than 5%.
  3. A conditional gate that only fires when something actually matters — no noisy, irrelevant pings.
  4. A clean, formatted Telegram message delivered straight to your phone listing current prices plus a highlighted alert block showing exactly what triggered.

How It Works — The Big Picture

The workflow is a simple five-node pipeline. A schedule wakes it up every 15 minutes, a single HTTP call fetches all prices at once, a JavaScript code node crunches the numbers against your thresholds, and an IF gate decides whether your phone needs to know about it.

┌──────────────────────────────────────────────────────────────────────────┐
│  TELEGRAM CRYPTO PRICE ALERT BOT                                         │
│                                                                          │
│  [Schedule Trigger]  →  [Get Crypto Prices]  →  [Check Alert Thresholds] │
│     every 15 min          CoinGecko API           Code node (JS)         │
│                                                          │               │
│                                              ┌───────────┴───────────┐   │
│                                         hasAlerts?               no alert│
│                                              │                       │   │
│                                    [Send Alert to Telegram]   [Skip]     │
│                                       Telegram bot                       │
└──────────────────────────────────────────────────────────────────────────┘

What You’ll Need

  • n8n — self-hosted or n8n Cloud (free tier works fine for this workflow)
  • CoinGecko account — free plan; no API key required for the public endpoint used here (rate limit: 10–30 calls/min, well within our 15-minute schedule)
  • Telegram account — you’ll create a bot via BotFather (free, takes 2 minutes)
  • Your Telegram chat ID — we’ll show you exactly how to find it below

Estimated build time: 25–35 minutes from scratch, or under 10 minutes with the ready-made template.

Part 1 — Building the Workflow

1 Schedule Trigger (n8n-nodes-base.scheduleTrigger)

This is the heartbeat of the workflow. It wakes up n8n every 15 minutes and kicks off the entire pipeline. Add a Schedule Trigger node and configure it like this:

  • Mode: Interval
  • Every: 15 Minutes

The trigger produces a single output item with a timestamp. That’s all the next node needs — it just needs to know it’s time to fetch prices.

💡

Tip: Prefer a 1-hour interval to reduce noise? Change the minutes value to 60. If you want minute-level granularity (great for active trading sessions), drop it to 5 — CoinGecko’s free tier handles this comfortably.

2 Get Crypto Prices (n8n-nodes-base.httpRequest)

Add an HTTP Request node. This single API call fetches prices and 24-hour change data for all five coins simultaneously — no need for separate calls per coin.

  • Method: GET
  • URL: https://api.coingecko.com/api/v3/simple/price
  • Query Parameters (add each as a separate row):
Parameter Value
ids bitcoin,ethereum,solana,binancecoin,ripple
vs_currencies usd
include_24hr_change true
include_market_cap true

No authentication needed for this endpoint. The API returns a flat JSON object where each key is a coin ID:

{
  "bitcoin":     { "usd": 67543.21, "usd_24h_change": 2.45,  "usd_market_cap": 1330000000000 },
  "ethereum":    { "usd": 3421.56,  "usd_24h_change": -1.23, "usd_market_cap": 411000000000  },
  "solana":      { "usd": 178.92,   "usd_24h_change": 6.11,  "usd_market_cap": 83000000000   },
  "binancecoin": { "usd": 587.44,   "usd_24h_change": 0.87,  "usd_market_cap": 87000000000   },
  "ripple":      { "usd": 0.5821,   "usd_24h_change": -2.34, "usd_market_cap": 32000000000   }
}
💡

Tip: To add more coins, find their CoinGecko ID on the coin’s page (e.g., cardano, polkadot, avalanche-2) and append them comma-separated to the ids parameter. Also add matching entries to the thresholds and coinLabels objects in Step 3.

3 Check Alert Thresholds (n8n-nodes-base.code)

This is where the logic lives. Add a Code node (JavaScript mode) and paste the script below. It loops through every coin, checks prices against your thresholds, flags large 24-hour moves, and assembles a formatted Telegram message ready to send.

Here’s the config block at the top of the script — the only section you need to customize:

// ─── USER CONFIG ─────────────────────────────────────────────
const thresholds = {
  bitcoin:     { low: 55000,  high: 75000 },
  ethereum:    { low: 2800,   high: 4000  },
  solana:      { low: 120,    high: 220   },
  binancecoin: { low: 400,    high: 700   },
  ripple:      { low: 0.40,   high: 0.80  },
};

// Alert if any coin moves more than this % in 24 hours
const CHANGE_ALERT_PCT = 5;
// ─────────────────────────────────────────────────────────────

After running, the node outputs a single item with this shape:

{
  "hasAlerts":   true,
  "alertCount":  1,
  "message":     "📊 *Crypto Price Update — Apr 7, 02:30 PM ET*\n\n🟢 *BTC*: $67,543.21 (+2.45%)\n🔴 *ETH*: $3,421.56 (-1.23%)\n🟢 *SOL*: $178.92 (+6.11%)\n...\n\n🔔 *ALERTS*\n⚡ *Solana (SOL)* surged +6.11% in 24h — now $178.92",
  "timestamp":   "2026-04-07T18:30:00.000Z"
}
📌

Note: The full JavaScript code is included in the downloadable template JSON. When you import the workflow, the code node is pre-filled — you only need to update the threshold values in the USER CONFIG block at the top.

4 Has Alerts? (n8n-nodes-base.if)

Add an IF node to act as the gate. Configure one condition:

  • Value 1: {{ $json.hasAlerts }}
  • Operator: is true

The true branch connects to the Telegram node. The false branch connects to a No-Op (do nothing) node — this prevents n8n from throwing an “unconnected branch” warning while keeping the workflow clean.

💡

Tip: Want a periodic price summary even when no alerts fire? Connect the false branch to a second Telegram node that sends just the priceReport field instead of the full message. Great for a morning digest.

5 Send Alert to Telegram (n8n-nodes-base.telegram)

Add a Telegram node and connect it to the true output of the IF node. Before configuring it, you need a bot token and your chat ID.

Creating your Telegram bot:

  1. Open Telegram and search for @BotFather
  2. Send /newbot, give it a name (e.g., “My Crypto Alerts”) and a username ending in bot
  3. BotFather sends you a token like 7123456789:AAHxxxxxxxxxxxxxxxxxxxxxxxxxxxxxxxx — save it
  4. Start a conversation with your new bot (click “Start” or send any message)
  5. Visit https://api.telegram.org/bot<YOUR_TOKEN>/getUpdates in your browser — find your chat.id in the response (it’s a number like 123456789)

Configuring the Telegram node:

  • Credential: Create a new Telegram API credential → paste your bot token
  • Chat ID: YOUR_TELEGRAM_CHAT_ID (the number you found above)
  • Text: ={{ $json.message }}
  • Additional Fields → Parse Mode: Markdown

When an alert fires, the message delivered to your phone looks like this:

📊 Crypto Price Update — Apr 7, 02:30 PM ET

🟢 BTC: $67,543.21 (+2.45%)
🔴 ETH: $3,421.56 (-1.23%)
🟢 SOL: $178.92 (+6.11%)
🟢 BNB: $587.44 (+0.87%)
🔴 XRP: $0.58 (-2.34%)

🔔 ALERTS
⚡ Solana (SOL) surged +6.11% in 24h — now $178.92
💡

Tip: To send alerts to a Telegram group or channel instead of just yourself, add the bot as an admin to your group, then use the group’s chat ID (starts with a minus sign, e.g., -1001234567890) as the Chat ID value.

Full System Flow

Every 15 minutes
      │
      ▼
[Schedule Trigger]
      │
      ▼
[HTTP Request → CoinGecko API]
  GET /simple/price
  ids=bitcoin,ethereum,solana,bnb,xrp
  include_24hr_change=true
      │
      ▼ (raw price JSON)
[Check Alert Thresholds — Code Node]
  ├── Loop each coin
  ├── Compare price vs. low/high thresholds
  ├── Flag if |24h change| ≥ 5%
  ├── Build formatted Telegram message
  └── Output: { hasAlerts, message, ... }
      │
      ▼
[Has Alerts? — IF Node]
  hasAlerts === true?
      │                     │
     YES                   NO
      │                     │
      ▼                     ▼
[Send Alert to Telegram]  [No-Op — Skip]
  Parse Mode: Markdown
  Delivered to your phone

Testing Your Workflow

Before enabling the schedule, run the workflow manually once to confirm everything is wired up correctly:

  1. Open the workflow in the n8n editor and click Test Workflow (the play button).
  2. Click on the Get Crypto Prices node — you should see live price data in the output panel on the right.
  3. Click on Check Alert Thresholds — verify the message field contains a formatted price string and that hasAlerts shows the expected value.
  4. To force an alert for testing, temporarily set a threshold your current price has already crossed — e.g., set BTC high to 1000 so it always triggers. Run again, and your Telegram should receive a message within seconds. Reset the threshold afterward.
  5. Once confirmed, toggle the workflow Active switch. It will now run automatically every 15 minutes.
Problem Likely Cause Fix
HTTP Request returns 429 CoinGecko rate limit hit Increase the schedule interval to 30 min, or sign up for a CoinGecko Demo API key and add it as a header
Telegram node says “Forbidden” Bot hasn’t been started Open Telegram, find your bot, and send it any message first — bots can’t initiate conversations
Message sends but formatting is broken Parse Mode not set to Markdown In the Telegram node → Additional Fields → set Parse Mode to Markdown
No alerts ever fire Thresholds set outside realistic price ranges Check the thresholds object — make sure low/high values bracket actual current prices
Workflow runs but nothing happens IF node false branch reached (no alerts) Expected behavior — set a temporary low threshold to trigger a test alert as described above

Frequently Asked Questions

Does this cost anything to run?

No — CoinGecko’s public API used in this workflow is completely free with no API key required. The only costs are your n8n hosting (free on self-hosted, or the n8n Cloud free tier covers this comfortably) and your Telegram bot (always free). Total running cost: $0.

Can I track more than 5 coins?

Yes. Add more coin IDs to the ids query parameter in the HTTP Request node (comma-separated, using CoinGecko’s lowercase coin IDs like cardano, chainlink, or avalanche-2). Then add matching entries to the thresholds and coinLabels objects in the Code node. CoinGecko’s free tier supports up to ~250 coin IDs per request.

Can I send alerts to multiple Telegram chats or a group?

Absolutely. Duplicate the Telegram node and set a different Chat ID for each recipient — or add your bot to a Telegram group and use the group’s chat ID (a negative number like -1001234567890). You can find a group’s chat ID the same way as your personal one: visit the getUpdates URL after the bot receives a message in the group.

What happens if CoinGecko is down when the workflow runs?

The HTTP Request node will throw an error, which n8n logs in the execution history. The workflow won’t crash permanently — it simply skips that execution and runs again 15 minutes later. For higher reliability, enable the Retry on Fail option on the HTTP Request node (set to 2 retries, 5 second delay).

Can I get alerts for percentage-based price changes rather than fixed thresholds?

Yes — the Code node already handles this. The CHANGE_ALERT_PCT constant (default: 5) fires an alert whenever any coin moves more than 5% in 24 hours, in either direction. Adjust that number to any value you prefer.

Can I use this with a CoinGecko Pro API key for more features?

Yes. If you upgrade to CoinGecko’s Demo or Pro plan, you get a personal API key that unlocks lower rate limits and additional endpoints (like real-time prices). Add it as an HTTP header named x-cg-demo-api-key in the HTTP Request node’s Headers section. The rest of the workflow stays identical.


🚀 Get the Telegram Crypto Price Alert Bot Template

Skip the build and get the pre-configured n8n workflow JSON, a step-by-step Setup Guide PDF, and a Credentials Guide PDF — everything you need to be live in under 10 minutes.

Get the Template →

Instant download · Works on n8n Cloud and self-hosted

What’s Next?

  • Add a daily digest: Connect the false branch of the IF node to a second Telegram send that fires a clean price summary every morning at 9 AM — regardless of alerts — using a separate Schedule Trigger.
  • Log alerts to Google Sheets: Add a Google Sheets node after the Telegram send to log every triggered alert with a timestamp. Track your alert history over time.
  • Add portfolio tracking: Extend the Code node to calculate the current USD value of your holdings (e.g., “1.5 BTC × $67,543 = $101,315”) and include it in the Telegram message.
  • Connect to a trading signal: Feed alert data into a webhook that triggers a paper trade or signals a human review — building toward a semi-automated trading assistant.
n8n
Telegram
CoinGecko
crypto
price alerts
automation
no-code
trading bots