How to Add LinkedIn Post Commenters to HubSpot CRM with n8n (Auto-Enriched)

New to n8n? Start with our step-by-step setup guide, then come back to build this workflow.

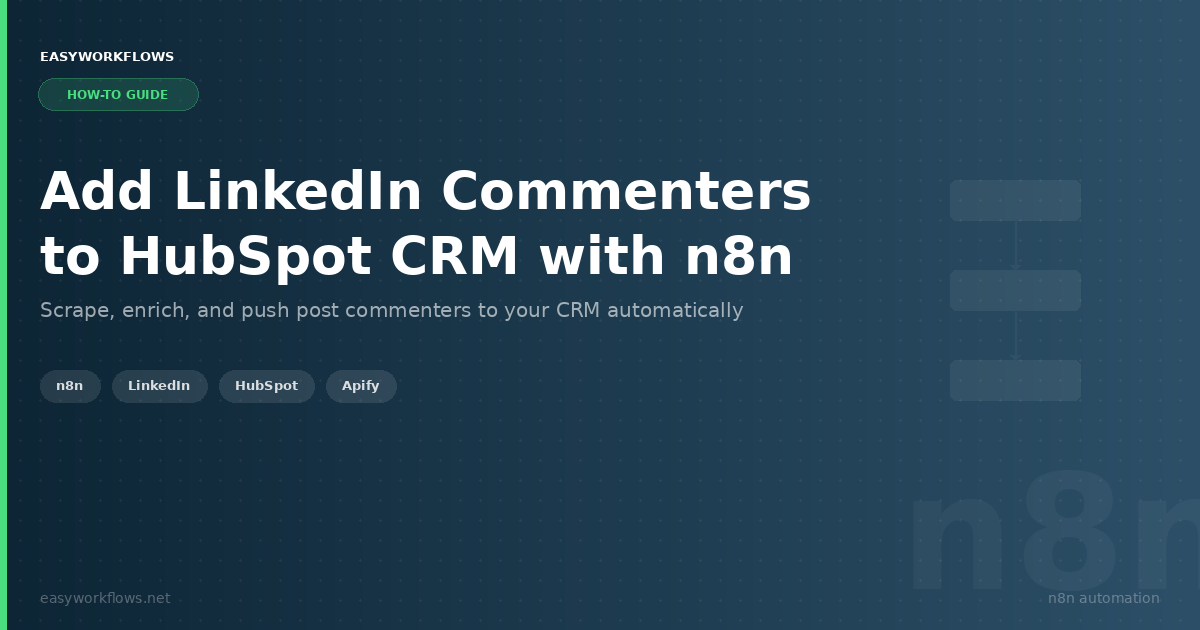
Every person who comments on your LinkedIn post is a warm lead. They’ve already seen your content and engaged with it. But manually copying names, finding emails, and entering contacts into your CRM? That’s an afternoon of soul-crushing data entry for every post you publish. This n8n workflow changes that: paste a LinkedIn post URL into a form, and within minutes every commenter is automatically enriched with professional data and waiting in your HubSpot CRM as a ready-to-contact lead.

Prefer to skip the setup? Grab the ready-made template → and be up and running in under 10 minutes.

What You’ll Build

  1. You paste a LinkedIn post URL into a simple web form and hit submit.
  2. n8n fetches every comment on that post via the ConnectSafely LinkedIn API, with names, profile URLs, and comment text included.
  3. Each commenter’s LinkedIn profile is sent to an Apify actor that returns their full professional details: email address, job title, company name, location, and more.
  4. The workflow filters out any profile where no email was found, so your CRM stays clean.
  5. Verified contacts are automatically created (or updated, if they already exist) in HubSpot with all enriched fields pre-populated, first name, last name, email, title, company, city, and country.

How It Works: The Big Picture

The workflow runs in two logical phases: fetching the comment list, then looping through each commenter to enrich and sync. Here’s the full flow at a glance:

┌──────────────────────────────────────────────────────────────────────┐
│  LINKEDIN → HUBSPOT CRM PIPELINE                                     │
│                                                                      │
│  [Form Trigger]  →  [Fetch Post Comments]  →  [Split Array]          │
│   (Post URL)         (ConnectSafely)           (per commenter)       │
│                                                                      │
│                    ┌─── [Loop Over Items] ────────────────┐          │
│                    │         ↓                            │          │
│                    │  [Enrich with Apify]                 │          │
│                    │         ↓                            │          │
│                    │  [Check Email Exists]                │          │
│                    │    ↓ YES        ↓ NO                 │          │
│                    │  [Create/Update  [Continue Loop] ────┘          │
│                    │   HubSpot]           ↑                          │
│                    │          └────────────┘                         │
│                    └──────────────────────────────────────┘          │
└──────────────────────────────────────────────────────────────────────┘

What You’ll Need

  • n8n (self-hosted, version 1.0+). The ConnectSafely node is a community node that requires self-hosted n8n
  • ConnectSafely LinkedIn API, a paid third-party service that safely retrieves LinkedIn data without violating platform ToS
  • Apify account: free tier works for small volumes; the specific actor used is the LinkedIn Profile Scraper (Actor ID: UMdANQyqx3b2JVuxg)
  • HubSpot account ��� any plan with API access; you’ll need a Private App token
  • A published LinkedIn post with existing comments to test against

Estimated build time: 45 to 60 minutes from scratch, or under 10 minutes with the template.

📌

Self-hosted n8n required: The ConnectSafely community node is not available on n8n Cloud. You’ll need a self-hosted n8n instance to use this workflow. If you’re on Cloud, reach out to us at support@easyworkflows.net and we can discuss an alternative approach using HTTP Request nodes.

Building the Workflow: Step by Step

1 Form Trigger: Enter Post URL (n8n-nodes-base.formTrigger)

This node creates a simple hosted web form that any team member can use to kick off the pipeline. No coding, no API calls, just paste a URL and click submit.

To configure it: open the node and set the Form Title to something descriptive like “LinkedIn Post Engagement Automation.” Add one field with the label LinkedIn Post URL, mark it as required, and add a placeholder showing the expected URL format. n8n will generate a unique public URL for the form, copy it and share it with your sales or marketing team.

When the form is submitted, this data object flows to the next node:

{
  "LinkedIn Post URL": "https://www.linkedin.com/posts/james-carter_ai-sales-automation-activity-7190000000000000000-XXXX"
}
💡

Tip: You can add a second field asking for a “Campaign Tag” or “Lead Source” label. Pass that value to HubSpot as a custom property so you know which LinkedIn post generated each contact.

2 Fetch Post Comments (ConnectSafely LinkedIn)

This community node uses the ConnectSafely API to retrieve all comments on the LinkedIn post. ConnectSafely is a compliant third-party LinkedIn data provider that handles authentication and rate limiting so your account stays safe.

Configuration: set Post URL to ={{ $json['LinkedIn Post URL'] }} and set the operation to Get Post Comments. Attach your ConnectSafely API credential. The node returns an array of comment objects, each containing the commenter’s name, profile URL, comment text, and timestamp.

{
  "comments": [
    {
      "name": "Emily Rodriguez",
      "profileUrl": "https://www.linkedin.com/in/emily-rodriguez-sales",
      "commentText": "This is exactly what our team needs! Great post.",
      "timestamp": "2026-04-10T14:32:00Z"
    },
    {
      "name": "Michael Chen",
      "profileUrl": "https://www.linkedin.com/in/michael-chen-b2b",
      "commentText": "Saved this — we're evaluating tools like this right now.",
      "timestamp": "2026-04-10T15:10:00Z"
    }
  ]
}

3 Split Comments Array (splitOut)

The Split Out node takes the comments array from the previous step and breaks it into individual items, one n8n item per commenter. This is necessary so the loop in the next step can process each person separately.

Set Field To Split Out to comments. After this node, each item looks like a single commenter object.

4 Loop Over Items (splitInBatches)

The Split In Batches node processes commenters one at a time (or in small batches), which prevents you from hammering the Apify API with too many simultaneous requests. Leave the Batch Size at the default (1) for reliability, or increase it to 5 if you have a high Apify plan and want faster processing.

This node has two outputs: output 0 fires when the loop is complete (all items processed), and output 1 fires for batches. Connect output 1 to the Apify enrichment node.

5 Enrich Profile with Apify (Apify)

This is where the magic happens. For each commenter’s LinkedIn profile URL, this node runs an Apify actor that scrapes their public profile and returns rich contact data, including, when available, their work email address.

Configuration: set the Actor ID to https://console.apify.com/actors/UMdANQyqx3b2JVuxg, set the operation to Run actor and get dataset, and in Custom Body enter:

={{ JSON.stringify({ "linkedin": $json.profileUrl }) }}

Attach your Apify API key credential. The actor typically takes 10 to 30 seconds per profile. The output contains detailed professional information mapped to numbered field keys:

{
  "02_First_name": "Emily",
  "03_Last_name": "Rodriguez",
  "04_Email": "emily.rodriguez@techcorp.com",
  "07_Title": "VP of Sales",
  "13C_Current_address": "1428 Elm St, Austin, TX 78701",
  "14_City": "Austin",
  "15_Country": "United States",
  "16_Company_name": "TechCorp Solutions"
}
💡

Tip: Email availability depends on LinkedIn profile privacy settings. Expect 30 to 60% of profiles to return an email. Use the Apify Console to inspect the full schema and add more fields.

6 Check Email Exists (IF)

Not every enriched profile will include an email address; some LinkedIn users keep theirs private. This IF node filters them out before they reach HubSpot, keeping your CRM free of incomplete records.

Configuration: add one condition: Value 1 = ={{ $json['04_Email'] }}, operator = Is not empty. Profiles with a valid email go to TRUE; those without go to FALSE (Continue Loop).

7 Create or Update HubSpot Contact (HubSpot)

The final action node upserts the contact in HubSpot using the email address as the unique identifier. If the contact already exists, their record is updated with the latest data. New contacts are created fresh.

Set Authentication to App Token and attach your HubSpot Private App credential. Map the fields:

HubSpot Field n8n Expression Example Value
Email ={{ $json['04_Email'] }} emily.rodriguez@techcorp.com
First Name ={{ $json['02_First_name'] }} Emily
Last Name ={{ $json['03_Last_name'] }} Rodriguez
Job Title ={{ $json['07_Title'] }} VP of Sales
Company ={{ $json['16_Company_name'] }} TechCorp Solutions
City ={{ $json['14_City'] }} AustinRodriguez
Job Title ={{ $json['07_Title'] }} VP of Sales
Company ={{ $json['16_Company_name'] }} TechCorp Solutions
City ={{ $json['14_City'] }} Austin
Country ={{ $json['15_Country'] }} United States
Street Address ={{ $json['13_Current_address'] }} 1428 Elm St, Austin, TX 78701
💡

Tip: In HubSpot, create a custom contact property called “LinkedIn Source Post” and map it to the original post URL using ={{ $('Form Trigger - Enter Post URL').item.json['LinkedIn Post URL'] }}. This lets you track which post each lead came from directly in your CRM.

8 Continue Loop (No Operation)

This placeholder node serves as the merge point for both branches of the IF node, whether a contact was created in HubSpot (TRUE branch) or skipped due to missing email (FALSE branch), both paths converge here and loop back to Loop Over Items to process the next commenter. No configuration needed.

Full System Flow

Here’s the complete end-to-end picture, from a LinkedIn post URL to a fully enriched HubSpot contact record:

  User submits LinkedIn post URL via Form
             ↓
  [Form Trigger] receives URL
             ↓
  [ConnectSafely] fetches all commenters
  → Returns: [{name, profileUrl, comment}, ...]
             ↓
  [Split Out] → individual commenter items
             ↓
  ┌──────────────── [Loop Over Items] ─────────────────┐
  │  For each commenter:                               │
  │         ↓                                         │
  │  [Apify Actor] enriches LinkedIn profile           │
  │  → Returns: email, name, title, company, city      │
  │         ↓                                         │
  │  [IF: Email Exists?]                               │
  │    ↓ YES                    ↓ NO                  │
  │  [HubSpot: Create/Update]  [Skip]                 │
  │  Contact with enriched data   ↓                   │
  │         ↓                    ↓                    │
  │       [Continue Loop] ←──────┘                    │
  │             ↑                                     │
  └─────────────┘ (next commenter)                    │
             ↓ (all done)                             │
        Workflow complete                             │
        All reachable commenters → HubSpot CRM        │
└─────────────────────────────────────────────────────┘

Testing Your Workflow

  1. Activate the workflow and open the form URL provided by the Form Trigger node.
  2. Paste in a LinkedIn post URL that you own (one with at least 3 to 5 comments for a meaningful test).
  3. Submit the form and watch the execution in the n8n editor. You should see items flowing through each node.
  4. After the run completes, open HubSpot CRM → Contacts and confirm new contacts appear with all fields populated.
  5. For a commenter whose profile you know (yourself or a colleague), verify that the email and company fields are correct.
Problem Likely Cause Fix
ConnectSafely node shows authentication error API credential not configured Re-enter your ConnectSafely API key in the credential modal
Apify returns empty dataset Actor still running; n8n timed out waiting Increase the HTTP timeout in Apify node settings to 120 seconds
HubSpot returns 409 Conflict Contact already exists with same email Normal behavior. HubSpot updates the existing contact; no action needed
0% of profiles return email Testing with private LinkedIn accounts Try with public LinkedIn profiles; email availability varies by privacy settings
Loop never finishes Continue Loop not connected back to Loop Over Items Ensure both IF branches connect to Continue Loop, and Continue Loop connects back to Loop Over Items input 0

Frequently Asked Questions

Does this workflow violate LinkedIn’s Terms of Service?

ConnectSafely is specifically designed to access LinkedIn data within LinkedIn’s permitted boundaries; it doesn’t use scraping bots or credential stuffing. That said, always review the current ToS for your specific use case. The Apify enrichment step retrieves publicly available profile data only. We recommend consulting your legal team for enterprise use.

What percentage of commenters will have an email address?

Typically 30 to 60%, depending on your audience. B2B professionals in sales, marketing, and tech tend to have higher email availability on LinkedIn. The IF node ensures only enriched contacts reach your CRM, so partial data never clutters your records.

Can I run this on n8n Cloud instead of self-hosted?

Not with the ConnectSafely community node, which only installs on self-hosted n8n. If you’re on Cloud, it’s possible to replicate the comment-fetching step using an HTTP Request node pointed at a LinkedIn-compliant API. Reach out to support@easyworkflows.net for guidance on the alternative setup.

How long does the workflow take to run for a post with 100 comments?

About 15 to 30 minutes, depending on Apify’s queue. Each enrichment call takes 10 to 30 seconds per profile, and the loop processes them sequentially. For large volumes, consider running on a schedule or splitting the job into smaller batches using a Filter node to process only the newest commenters since the last run.

Can I add commenters to a HubSpot list or pipeline stage automatically?

Yes. After the “Create or Update HubSpot Contact” node, add a HubSpot node set to “Add contact to list” or “Create deal” and reference the contact’s ID from the previous node’s output. This lets you instantly enroll new LinkedIn-sourced leads into a nurture sequence or sales pipeline.

What if I want to save commenters to Google Sheets instead of HubSpot?

Simply swap the HubSpot node for a Google Sheets “Append Row” node and map the same Apify fields to your sheet columns. The rest of the workflow stays identical. This makes it easy to adapt to any CRM or spreadsheet, just change the final destination node.


🚀 Get the LinkedIn → HubSpot CRM Template

Download the ready-to-import n8n workflow JSON, plus a step-by-step Setup Guide and a Credentials Guide covering ConnectSafely, Apify, and HubSpot: everything you need to go live today.

Get the Template →

Instant download · Works on self-hosted n8n · Includes PDF guides

What’s Next?

  • Auto-enroll in email sequence: After creating the HubSpot contact, trigger a HubSpot workflow to enroll them in a LinkedIn-specific nurture email sequence automatically.
  • Slack notification: Add a Slack node after HubSpot to alert your sales team in real time whenever a high-value contact (e.g., VP or Director title) is added.
  • Run on a schedule: Swap the Form Trigger for a Schedule trigger combined with a stored list of your recent post URLs to process new commenters every morning automatically.
  • Score leads by comment sentiment: Add an OpenAI node before the Apify step to analyze the comment text and assign a lead score, prioritizing contacts who left buying-intent comments.
n8n
LinkedIn
HubSpot
Apify
CRM automation
lead generation
sales automation

How to Build an AI Lead Processing Pipeline with Apify, Gemini & Google Sheets in n8n

New to n8n? Start with our step-by-step setup guide, then come back to build this workflow.

Your sales team is drowning in raw lead data. You’ve scraped thousands of contacts from LinkedIn, Apollo, or custom sources, but half have missing emails, the phone formats are inconsistent, and nobody wants to manually clean 2,000 rows in a spreadsheet before Monday’s call list is ready. There has to be a better way.

There is. This guide walks you through building a fully automated AI lead processing pipeline in n8n that scrapes leads with Apify, validates and deduplicates them using Google Gemini, writes clean records to Google Sheets, and sends your team a Telegram summary, all without touching a single CSV file.

Prefer to skip the build? Grab the ready-made template → and have it running in under 10 minutes.

What You’ll Build

  1. A parent workflow (or manual trigger) fires this sub-workflow, passing along scraping parameters.
  2. n8n sends a POST request to kick off your Apify actor (e.g., Apollo scraper, LinkedIn scraper, or any custom actor).
  3. After a 30-second wait, the workflow polls Apify for results and feeds them into a batching loop.
  4. Google Gemini AI processes up to 1,000 leads per batch, validating required fields, deduplicating by email, generating unique Lead IDs, and formatting phone/location data.
  5. Validated leads are appended to a Google Sheet. Your team receives a Telegram message per batch showing exactly how many leads were added, flagged, or rejected.

How It Works: The Big Picture

+————————————————————————-+
| AI LEAD PROCESSING PIPELINE |
| |
| [Execute Trigger] -> [POST Apify] -> [Loop/Batch] |
| | |
| +——+——+ |
| v (batch out) | (done) |
| [AI Agent] [Wait 30s] -> [GET Apify] |
| | ^ |
| | +– (feeds back to Loop) |
| v |
| [Telegram Batch Report] |
| |
| AI Agent Tools: [Append to Sheets] [Check for Duplicates] |
+————————————————————————-+

The workflow uses n8n’s SplitInBatches node as a loop controller. Output 0 sends the current batch to the AI agent; output 1 routes through a 30-second wait to poll Apify for fresh data, which feeds back into the loop.

What You’ll Need

  • n8n instance (self-hosted or cloud). n8n.io
  • Apify account: apify.com (free tier: 5 compute units/month; paid from $49/mo)
  • Google account with Gemini API access: aistudio.google.com
  • Google Sheets spreadsheet (lead database)
  • Telegram Bot (via @BotFather, free)
  • Build time: ~45 minutes from scratch | Template time: ~8 minutes

Step-by-Step Build

Step 1: When Executed by Another Workflow (Trigger)

This workflow runs as a sub-workflow called by a parent orchestrator. Using executeWorkflowTrigger with passthrough mode means any data the parent sends flows directly into this pipeline.

  1. Add an Execute Workflow Trigger node.
  2. Set Input Source to passthrough.
  3. In your parent workflow, use an Execute Workflow node pointing to this workflow’s ID.
Tip: Test standalone by temporarily replacing the trigger with a Manual Trigger node during development.

Step 2: Trigger Apify Scrape (HTTP POST)

This HTTP Request node fires your Apify actor to start scraping.

  1. Set Method to POST.
  2. Set URL: https://api.apify.com/v2/acts/YOUR_ACTOR_ID/runs
  3. Add Authorization header: Bearer YOUR_APIFY_API_TOKEN
  4. Set Body to JSON with your actor’s input schema.
// Example: Apollo.io scraper input
{
  "searchUrl": "https://app.apollo.io/#/people?sortByField=...",
  "maxResults": 1000
}
Tip: Find your Actor ID in Apify Store → your actor → API tab. Token at apify.com/account/integrations.

Step 3: Loop Over Items (SplitInBatches)

The SplitInBatches node processes data in chunks of 1,000 and routes through two paths.

  1. Set Batch Size to 1000.
  2. Set Options → Reset to false.
  • Output 0 (current batch): routes to the AI Agent.
  • Output 1 (done): routes to Wait → Apify GET → back to loop.

Step 4: Wait 30s for Apify

Pauses 30 seconds for the Apify actor to complete before polling results.

  1. Set Amount to 30, Unit to Seconds.
Tip: For 5,000+ result jobs, increase to 60 to 120s or use Apify’s webhook callback to n8n, more reliable for production.

Step 5: Fetch Apify Results (HTTP GET)

Retrieves all scraped leads from the last Apify actor run.

  1. Set Method to GET.
  2. Set URL: https://api.apify.com/v2/acts/YOUR_ACTOR_ID/runs/last/dataset/items
  3. Same Authorization header as Step 2.
// Example Apify lead record
{
  "name": "Sarah Thompson",
  "email": "sarah.thompson@acmecorp.com",
  "phone": "+1 512 867 5309",
  "company": "Acme Corp",
  "title": "VP of Marketing",
  "location": "Austin, TX"
}

Step 6: AI Lead Processing Agent (Google Gemini)

A Langchain AI Agent powered by Google Gemini validates and deduplicates leads using two Google Sheets tool calls.

Per batch, the agent:

  1. Validates required fields: Name, Email, Company Name.
  2. Deduplicates by checking existing emails in the sheet.
  3. Generates Lead IDs: AP-DDMMYY-xxxx (e.g. AP-110426-0001).
  4. Formats phones (prefers mobile, wraps in quotes) and location (City, Country).
  5. Writes valid leads to Google Sheets one row at a time.
  6. Returns one consolidated Telegram summary for the entire batch.
Tip: Use gemini-1.5-flash for high-volume batches, faster and cheaper than Pro with no quality loss for data validation tasks.

Step 7: Append Lead to Google Sheets (AI Tool)

AI-callable tool that appends a validated lead row. The agent calls this once per valid lead.

  1. Set Operation to Append, connect your Google Sheets OAuth2 credential.
  2. Set Document ID (from sheet URL) and Sheet Name.
  3. Map columns via $fromAI('FieldName') expressions.

Step 8: Check for Duplicate Leads (AI Tool)

AI-callable tool that reads existing emails to detect duplicates before writing.

  1. Set Operation to Read Rows, same document and sheet as Append tool.
  2. Connect as an AI Tool to the agent.
Tip: For sheets with 10,000+ rows, use a Lookup operation on the Email column instead of reading all rows.

Step 9: Send Batch Report via Telegram

Sends the AI agent’s structured summary to your Telegram chat.

  1. Set Chat ID to your chat ID (from @userinfobot).
  2. Set Text to ={{ $json.output }}.
Sample Telegram output:
✅ Batch Complete
Total Processed: 47 | Added: 41 | Flagged: 4 | Skipped: 2

Contacts Added:
- James Carter -- Acme Corp -- james.carter@acmecorp.com
- Emily Rodriguez -- TechVentures -- emily.r@techventures.io
- Michael Chen -- GrowthLabs -- m.chen@growthlabs.com
(+38 more)

⚠️ Flagged: Lead 12 missing LinkedIn; Lead 28 missing Job Title
❌ Skipped: Lead 5 missing Email; Lead 33 missing Company Name

Google Sheets Schema

Column Type Example Notes
Lead ID Text AP-110426-0001 Auto-generated, required
Name Text James Carter Required field
Email Text james.carter@acmecorp.com Required, deduplication key
Phone Number Text “(512) 867-5309” Quoted to preserve format
Company Name Text Acme Corp Required field
Job Title Text VP of Marketing Optional, flagged if missing
Website / LinkedIn URL linkedin.com/in/jamescarter Optional
Address Text Austin, TX City + State/Country only
Company Summary Text B2B SaaS, marketing automation Optional, AI-generated
Relevant Partner Text HubSpot Optional

Customization Ideas

  • Multiple Apify actors: Chain this workflow for Apollo, LinkedIn, or Instagram scrapers all feeding one clean sheet.
  • Apify webhook: Replace the Wait node with an Apify webhook that POSTs results to n8n instantly, more reliable at scale.
  • CRM push: Add a HubSpot or Salesforce node after Google Sheets to sync validated leads directly to your CRM.
  • Lead scoring: Extend the Gemini agent prompt to assign a 1 to 10 score based on title, industry, and company size.
  • Slack alerts: Replace Telegram with a Slack node to post batch reports to your #leads channel.

Skip the Build: Get the Template

Full workflow JSON, Setup Guide PDF, and Credentials Guide PDF, ready to import and activate.

Get the Template — $14.99 →

Troubleshooting

  • Agent returns empty output: Check Gemini API key validity and confirm model name (gemini-1.5-flash or gemini-1.5-pro).
  • Apify GET returns empty array: Actor still running, increase Wait to 60 to 120s or switch to Apify webhooks.
  • Google Sheets “Not found”: Verify Document ID and Sheet GID in both tool nodes match the actual URL.
  • Telegram not sending: Confirm bot token is valid and Chat ID is numeric (check with @userinfobot).
  • Memory key error: Static session key is intentional for sub-workflow isolation, change to dynamic if needed.

How to Build a Lemlist MCP Server with n8n (AI Agent for Cold Email & Lead Enrichment)

New to n8n? Start with our step-by-step setup guide, then come back to build this workflow.

Your AI agent can write the perfect cold email sequence, but then it hits a wall trying to actually push that sequence into Lemlist. Copy-paste, tab-switching, manual API calls: the friction kills the whole point of having an agent. What if your AI agent could just ask n8n to create the lead, enrich the contact, check campaign stats, and manage unsubscribes, all in one conversation?

That’s exactly what this workflow does. It turns your n8n instance into a Lemlist MCP Server: a live endpoint that exposes 15 Lemlist operations as tools any AI agent (Claude, ChatGPT, a custom LangChain agent) can call directly using the Model Context Protocol.

Prefer to skip the setup? Grab the ready-made template → and be up and running in under 10 minutes.

What You’ll Build

  1. An n8n workflow that runs as a persistent MCP server, exposing 15 Lemlist tools via a single webhook endpoint
  2. AI agents connect to the endpoint and can call any tool: create a lead, enrich a contact by LinkedIn URL, pull campaign stats, add emails to the unsubscribe list, and more
  3. Each tool call routes to the correct Lemlist API operation and returns structured data back to the agent in real time
  4. The server handles all five functional areas: Activities, Campaigns, Lead Enrichment, Lead CRUD, Team info, and Unsubscribe list management

How It Works: The Big Picture

The workflow has one entry point, the MCP Trigger node, which acts as an HTTP endpoint your agent connects to. Every tool in the workflow is wired to this trigger via an ai_tool connection. When the agent calls a tool by name, n8n routes the request to the matching Lemlist node, executes it, and streams the result back to the agent.

┌─────────────────────────────────────────────────────────────────────┐
│  LEMLIST MCP SERVER                                                  │
│                                                                      │
│  AI Agent (Claude / ChatGPT / LangChain)                             │
│       │                                                              │
│       ▼  MCP Protocol (HTTP SSE)                                     │
│  [Lemlist Tool MCP Server Trigger]  ◄──── All tools connect here    │
│       │                                                              │
│       ├──(ai_tool)── [Get many activities]                           │
│       ├──(ai_tool)── [Get many campaigns]                            │
│       ├──(ai_tool)── [Get campaign stats]                            │
│       ├──(ai_tool)── [Fetches a previously completed enrichment]     │
│       ├──(ai_tool)── [Enrich a lead using email or LinkedIn URL]     │
│       ├──(ai_tool)── [Enrich a person using email or LinkedIn URL]   │
│       ├──(ai_tool)── [Create a lead]                                 │
│       ├──(ai_tool)── [Delete a lead]                                 │
│       ├──(ai_tool)── [Get a lead]                                    │
│       ├──(ai_tool)── [Unsubscribe a lead]                            │
│       ├──(ai_tool)── [Get a team]                                    │
│       ├──(ai_tool)── [Get team credits]                              │
│       ├──(ai_tool)── [Add an email to an unsubscribe list]           │
│       ├──(ai_tool)── [Delete an email from an unsubscribe list]      │
│       └──(ai_tool)── [Get many unsubscribed emails]                  │
│                                                                      │
│  Result → streamed back to AI agent via MCP protocol                 │
└─────────────────────────────────────────────────────────────────────┘

What You’ll Need

  • n8n: self-hosted (v1.0+) or n8n Cloud. The @n8n/n8n-nodes-langchain.mcpTrigger node is required; it ships with n8n 1.40+.
  • Lemlist account: any paid plan gives you API access. A free trial works for testing.
  • Lemlist API key: found in your Lemlist account settings under Integrations → API
  • An AI agent that supports MCP: Claude Desktop, a LangChain agent, or any framework implementing the Model Context Protocol client

Estimated build time: 20 to 30 minutes from scratch, or under 10 minutes with the template.

Understanding MCP: What It Means for Your Workflow

If you haven’t built an MCP server before, here’s the quick version: MCP (Model Context Protocol) is an open standard that lets AI agents discover and call external tools over HTTP. Think of it as a structured API layer specifically designed for AI agents: the agent asks “what tools do you have?”, the server responds with a list of tool names and descriptions, and the agent calls whichever tools it needs.

In n8n, the mcpTrigger node acts as the server. Every Lemlist Tool node you connect to it becomes a named tool the agent can call. The beauty of this approach is that you don’t need to write any glue code. n8n handles the protocol, the routing, and the response formatting automatically.

💡

Tip: MCP is different from a standard webhook. The trigger keeps a persistent Server-Sent Events (SSE) connection open, which means agents get responses in real time rather than polling. Make sure your n8n instance is accessible from wherever your agent runs.

Building the Workflow, Step by Step

1 Add the MCP Trigger (Lemlist Tool MCP Server)

This is the entry point for every agent request. Search for “MCP Trigger” (listed as @n8n/n8n-nodes-langchain.mcpTrigger) and add it to the canvas. No parameters to configure. The node generates its own endpoint URL automatically when you activate the workflow.

Once active, the node will display an endpoint URL that looks like:

https://your-n8n-instance.com/mcp/YOUR_WEBHOOK_ID/sse

Copy this URL, you’ll paste it into your AI agent’s MCP server configuration.

💡

Tip: On self-hosted n8n, make sure your instance’s webhook URL is set correctly in the N8N_WEBHOOK_URL environment variable. Otherwise the endpoint URL shown in the node won’t be externally reachable by your agent.

2 Configure Your Lemlist Credential

Before adding any Lemlist Tool nodes, create the credential once, every node in the workflow reuses the same credential. Go to Settings → Credentials → New and select Lemlist API. Paste your Lemlist API key (from Lemlist → Settings → Integrations → API) into the field and save.

📌

Note: Lemlist uses a simple API key (not OAuth). Your key looks like lem_api_xxxxxxxxxxxxxxxx. Keep it private, it has full account access.

3 Activities: Get many activities

Add a Lemlist Tool node. Under Resource, select Activity and the operation Get Many. Attach your Lemlist credential. Connect this node to the MCP Trigger via the ai_tool output port (drag from the trigger’s bottom connector to this node).

When an agent calls this tool, it gets a list of recent outreach activities across all campaigns:

{
  "type": "emailSent",
  "leadEmail": "james.carter@outlook.com",
  "campaignId": "cam_abc123",
  "campaignName": "Q2 SaaS Outreach",
  "date": "2026-04-10T14:32:00Z",
  "sequenceStep": 1
}

4 Campaigns: Get many campaigns & Get campaign stats

Add two more Lemlist Tool nodes. The first uses Resource: Campaign, Operation: Get Many, which lists all campaigns with their status and settings. The second uses Resource: Campaign, Operation: Get Stats, which returns performance metrics for a specific campaign ID.

A typical campaign stats response looks like:

{
  "campaignId": "cam_abc123",
  "campaignName": "Q2 SaaS Outreach",
  "emailsSent": 142,
  "opened": 89,
  "openRate": 0.627,
  "clicked": 31,
  "clickRate": 0.218,
  "replied": 18,
  "replyRate": 0.127,
  "bounced": 3
}

Connect both nodes to the MCP Trigger via ai_tool connections.

💡

Tip: An AI agent with access to campaign stats can do things like “find my worst-performing campaign this month and draft a subject line improvement”: the kind of analysis that previously required manual dashboard diving.

5 Enrichment: Three enrichment tools

Add three Lemlist Tool nodes for the enrichment operations:

  • Enrich a lead using an email or LinkedIn URL: takes an email or LinkedIn profile URL and returns company, job title, and social data for an existing Lemlist lead
  • Enrich a person using an email or LinkedIn URL: same enrichment but for a person not yet in Lemlist (no lead record needed)
  • Fetches a previously completed enrichment: retrieves a cached enrichment result by ID without consuming a new credit

A typical enrichment response contains:

{
  "email": "emily.rodriguez@techcorp.com",
  "firstName": "Emily",
  "lastName": "Rodriguez",
  "linkedinUrl": "https://linkedin.com/in/emilyrodriguez",
  "companyName": "TechCorp Solutions",
  "jobTitle": "VP of Engineering",
  "city": "Austin",
  "state": "TX",
  "country": "US",
  "companySize": "51-200",
  "industry": "Software"
}

Connect all three to the MCP Trigger.

6 Lead Management: Four lead operations

Add four Lemlist Tool nodes for full CRUD on leads:

  • Create a lead: adds a new lead to a specified campaign
  • Get a lead: fetches full lead data including custom variables and campaign membership
  • Delete a lead: permanently removes a lead from a campaign
  • Unsubscribe a lead: marks a lead as unsubscribed across all campaigns

When an agent creates a lead, the minimum required fields are the lead’s email address and a campaign ID. Optional fields include first name, last name, company, phone, and any Lemlist custom variables you’ve defined.

{
  "email": "michael.chen@startupco.io",
  "firstName": "Michael",
  "lastName": "Chen",
  "companyName": "StartupCo",
  "phone": "+1 512 555 0193",
  "customVariable": "CEO"
}

7 Team Info: Get team & Get team credits

Add two Lemlist Tool nodes for team-level information. Get a team returns your Lemlist workspace details. Get team credits is the more useful one: it tells the agent how many enrichment credits remain on your plan. An agent can call this before running a bulk enrichment to check whether you have enough credits, preventing unexpected quota errors mid-run.

{
  "teamId": "team_xxxxxxx",
  "teamName": "Carter & Associates Sales",
  "enrichmentCreditsUsed": 847,
  "enrichmentCreditsTotal": 2000,
  "enrichmentCreditsRemaining": 1153
}

8 Unsubscribe List: Three blocklist operations

Add the final three Lemlist Tool nodes:

  • Add an email to an unsubscribe list: permanently blocks an email from future Lemlist outreach
  • Delete an email from an unsubscribe list: removes a mistakenly blocked address
  • Get many unsubscribed emails: retrieves the full blocklist for auditing

This is especially useful in agentic workflows where the agent monitors replies and automatically adds opt-out responses to the unsubscribe list in real time, no manual cleanup required.

Connecting to Your AI Agent

Once you’ve activated the workflow, you need to point your AI agent at the MCP endpoint. The exact steps depend on your agent framework:

Claude Desktop

Open ~/.claude/claude_desktop_config.json (macOS/Linux) or %APPDATA%\Claude\claude_desktop_config.json (Windows) and add a server entry:

{
  "mcpServers": {
    "lemlist": {
      "url": "https://your-n8n-instance.com/mcp/YOUR_WEBHOOK_ID/sse"
    }
  }
}

Restart Claude Desktop. The Lemlist tools will now appear in Claude’s tool panel and it can call them during any conversation.

LangChain / Custom Agent

Use the langchain-mcp-adapters package (Python) or any MCP-compatible client library. Point it at the same SSE URL:

from langchain_mcp_adapters.client import MultiServerMCPClient

client = MultiServerMCPClient({
    "lemlist": {
        "url": "https://your-n8n-instance.com/mcp/YOUR_WEBHOOK_ID/sse",
        "transport": "sse"
    }
})

tools = await client.get_tools()
# tools now includes all 15 Lemlist operations

The 15 Exposed Tools: Reference Table

Tool Name Category What It Does
Get many activities Activities List recent outreach activity events
Get many campaigns Campaigns List all Lemlist campaigns
Get campaign stats Campaigns Open/click/reply rates for a campaign
Fetches a previously completed enrichment Enrichment Retrieve cached enrichment by ID
Enrich a lead using an email or LinkedIn URL Enrichment Enrich an existing Lemlist lead
Enrich a person using an email or LinkedIn URL Enrichment Enrich any email/LinkedIn URL (no lead record needed)
Create a lead Leads Add a new lead to a campaign
Get a lead Leads Fetch full lead record including custom fields
Delete a lead Leads Remove a lead from a campaign
Unsubscribe a lead Leads Mark lead as unsubscribed globally
Get a team Team Fetch workspace/team details
Get team credits Team Check remaining enrichment credits
Add an email to an unsubscribe list Blocklist Block an email from all outreach
Delete an email from an unsubscribe list Blocklist Remove a blocked email
Get many unsubscribed emails Blocklist Audit the full blocklist

Full System Flow

┌──────────────────────────────────────────────────────────────────────────────┐
│  FULL SYSTEM: AI AGENT ↔ LEMLIST MCP SERVER ↔ LEMLIST API                   │
│                                                                              │
│  User ──► AI Agent (Claude / GPT / LangChain)                                │
│               │                                                              │
│               │  "Enrich emily.rodriguez@techcorp.com and create her         │
│               │   as a lead in the Q2 SaaS Outreach campaign"               │
│               │                                                              │
│               ▼                                                              │
│  [MCP Client] ──SSE──► [n8n MCP Trigger]                                     │
│                               │                                              │
│               ┌───────────────┤                                              │
│               │               │                                              │
│               ▼               ▼                                              │
│  Tool call 1:           Tool call 2:                                         │
│  Enrich a person        Create a lead                                        │
│  (LinkedIn URL)         (email + campaign)                                   │
│       │                       │                                              │
│       ▼                       ▼                                              │
│  Lemlist Enrichment API  Lemlist Leads API                                   │
│       │                       │                                              │
│       └───────────┬───────────┘                                              │
│                   ▼                                                          │
│           Results streamed back to agent via MCP                             │
│                   │                                                          │
│                   ▼                                                          │
│  Agent responds to user: "Emily has been enriched (VP of Engineering,        │
│  TechCorp Solutions, Austin TX) and added to Q2 SaaS Outreach."              │
└──────────────────────────────────────────────────────────────────────────────┘

Testing Your Workflow

  1. Activate the workflow in n8n, and the MCP trigger node will display the SSE endpoint URL
  2. Copy the endpoint URL and add it to your AI agent’s MCP server config
  3. In your agent, ask: “List all my Lemlist campaigns”, which calls Get many campaigns and should return your campaign list
  4. Test enrichment: “Enrich the person at emily.rodriguez@outlook.com”, which should return job title, company, and social data
  5. Test lead creation: “Create a lead for michael.chen@startupco.io in campaign [your campaign ID]”
Problem Likely Cause Fix
Agent can’t reach the MCP endpoint n8n webhook URL not set / firewall blocking port Set N8N_WEBHOOK_URL env var; ensure port 443/5678 is open
“401 Unauthorized” from Lemlist tools API key not attached to nodes Open each Lemlist Tool node and select your Lemlist credential
Enrichment returns no data Email not found in Lemlist’s enrichment database Try a LinkedIn URL instead; not all emails have enrichment coverage
Agent only sees some tools, not all 15 Not all nodes connected to MCP Trigger Check each Lemlist Tool node has an ai_tool wire going to the trigger
MCP Trigger node missing from n8n n8n version older than 1.40 Upgrade n8n to 1.40+, since the mcpTrigger node ships with that release

Frequently Asked Questions

Do all 15 tools need separate Lemlist credentials?

No, one Lemlist API key covers all nodes. Create the credential once in n8n’s credential manager, then select it in each Lemlist Tool node. All nodes in this workflow use the same single credential.

Can I use this with n8n Cloud or only self-hosted?

Both work. On n8n Cloud your instance is already public, so the MCP endpoint is immediately reachable by external agents. On self-hosted n8n, you need to make sure your instance’s webhook URL is publicly accessible and that N8N_WEBHOOK_URL is correctly configured.

How many enrichment credits does calling the enrichment tools use?

Each call to Enrich a lead or Enrich a person uses one Lemlist enrichment credit. Fetches a previously completed enrichment retrieves a cached result and does not use a credit. Use Get team credits to monitor your remaining balance before bulk enrichment runs.

Can I add more Lemlist operations to this server later?

Yes. Just add another Lemlist Tool node to the canvas, configure it with the operation you need, and connect it to the MCP Trigger via an ai_tool wire. The server automatically advertises all connected tools to agents, no additional configuration needed.

Is the MCP connection secure? Should I worry about unauthorized access?

The MCP endpoint URL acts as a secret: anyone with the URL can call the tools. Keep it private and don’t share it publicly. For additional security, you can add an API key header check using n8n’s webhook authentication settings on the trigger node, or restrict access to specific IP ranges at the network level.

What happens if the n8n workflow is inactive when the agent tries to call a tool?

The agent will receive a connection error: the MCP SSE endpoint only works when the workflow is active. Make sure the workflow is toggled on in n8n. If you’re on self-hosted n8n, also ensure the n8n process itself is running (consider setting it up as a system service so it restarts automatically).


🚀 Get the Lemlist MCP Server Template

Skip the manual setup and get the ready-to-import n8n workflow JSON, a step-by-step Setup Guide PDF, and a Credentials Guide PDF that walks you through getting your Lemlist API key and connecting your agent.

Get the Template →

Instant download · Works on n8n Cloud and self-hosted · All 15 Lemlist tools included

What’s Next?

  • Build a full sales agent: Combine this MCP server with a web scraping tool and an AI agent that finds prospects on LinkedIn, enriches them, and adds them to Lemlist campaigns, completely autonomously
  • Auto-manage unsubscribes: Connect a Gmail or Outlook trigger that monitors for “unsubscribe” or “opt out” keywords in replies, then calls this server to add the sender to your global blocklist
  • Campaign reporting bot: Build a Telegram or Slack bot that lets your team query campaign stats in plain English, and the agent calls Get campaign stats and formats a readable report
  • Credit monitoring alert: Set up a daily n8n schedule that calls Get team credits and sends a Slack notification when enrichment credits drop below a threshold
  • Extend with other MCP servers: Combine this server with a HubSpot MCP server or a Slack MCP server so your agent can enrich a lead in Lemlist AND create a CRM contact AND notify your sales team, all in one conversation
n8n
Lemlist
MCP Server
AI Agents
Cold Email
Lead Enrichment
Sales Automation
Model Context Protocol

How to Build an AI Website Chatbot with CRM Lead Capture Using n8n

AI Website Chatbot n8n workflow template thumbnail

New to n8n? Start with our step-by-step setup guide, then come back to build this workflow.

Every visitor who leaves your website without talking to someone is a missed opportunity. Maybe they had a question about your services but didn’t feel like filling out a contact form. Maybe they were ready to buy but got distracted. A live chat widget helps, but you can’t sit at your desk 24/7 waiting for messages. What if an AI chatbot could greet visitors, answer their questions about your business, and quietly collect their name and email, all while you sleep? That’s exactly what you’ll build in this guide using n8n and OpenAI.

Prefer to skip the setup? Grab the ready-made template → and be up and running in under 10 minutes.

What You’ll Build

  1. A visitor lands on your website and sees a chat widget in the corner of the screen.
  2. They type a question. The AI chatbot responds naturally, explains your services, and asks what they need help with.
  3. Once the visitor shares their email and describes their project, the chatbot automatically saves the lead to a Google Sheet acting as your lightweight CRM.
  4. The visitor gets a friendly confirmation message, and you wake up to a spreadsheet full of qualified leads ready for follow-up.

How It Works: The Big Picture

This template uses two connected workflows inside n8n. The main workflow runs the chatbot itself, receiving messages, thinking through responses with GPT-4o mini, and maintaining conversation context. When the visitor shares their contact info, the chatbot calls a sub-workflow tool that extracts the email and description, formats it into clean JSON, and appends a new row to your Google Sheet.

┌──────────────────────────────────────────────────────────────────────────────┐
│  MAIN WORKFLOW — Website Chatbot                                            │
│                                                                              │
│  [Chat Trigger] → [Website Chatbot Agent] ←── [OpenAI GPT-4o mini]         │
│                           ↑                                                  │
│                    [Conversation Memory]                                     │
│                           ↓ (tool call when lead info collected)             │
│                    [Save Lead to CRM]                                        │
└──────────────────────────────────────────────────────────────────────────────┘
                            │
                            ▼
┌──────────────────────────────────────────────────────────────────────────────┐
│  SUB-WORKFLOW — CRM Lead Processing                                         │
│                                                                              │
│  [Receive Lead Data] → [Extract Lead Info] → [Append to Sheet] → [Confirm] │
│                              ↑                                               │
│                     [GPT-4o mini + Output Parser]                            │
└──────────────────────────────────────────────────────────────────────────────┘
                            │
                            ▼
                   ┌─────────────────┐
                   │  Google Sheets   │
                   │  (Leads CRM)     │
                   └─────────────────┘
  

What You’ll Need

  • A self-hosted or cloud n8n instance (version 1.0 or later)
  • An OpenAI API key with access to GPT-4o mini (or any other chat model)
  • A Google account with Google Sheets access (free tier works fine)
  • A website where you can embed the n8n chat widget (any site that supports JavaScript snippets)

Estimated build time: 30 to 45 minutes from scratch, or under 10 minutes with the template.

Part 1: The Main Chatbot Workflow

This workflow handles every incoming message from your website visitors. It powers the AI conversation, remembers what the visitor said earlier in the chat, and calls the CRM sub-workflow when it detects lead information.

1 Chat Trigger (n8n Chat Trigger)

The Chat Trigger node is n8n’s built-in way to receive messages from a chat widget you embed on your website. When a visitor types something and hits send, this node fires and passes the message into the workflow.

  1. Add a Chat Trigger node to your canvas (search for “When chat message received”).
  2. Leave the default options as-is. No extra configuration needed.
  3. After saving and activating the workflow, n8n gives you a webhook URL and a small JavaScript snippet you can paste into your site’s HTML to display the chat widget.
{
  "action": "sendMessage",
  "body": {
    "message": "Hi, I'm interested in automating my invoice process."
  },
  "sessionId": "visitor-session-abc123"
}
💡

Tip: The n8n chat widget works on any website: WordPress, Shopify, static HTML, React apps. Just paste the embed snippet before the closing </body> tag.

2 Website Chatbot Agent (AI Agent)

This is the brain of the operation. The AI Agent node receives the visitor’s message, processes it through the OpenAI model, checks conversation history, and generates a helpful response. It’s configured with a system message that tells the AI who it is, what services your company offers, and what information to collect.

  1. Add an AI Agent node and connect it to the Chat Trigger.
  2. In the System Message field under Options, paste your company description and instructions. Here’s the template version (customize for your business):
You are the first point of contact for visitors on our website.
Your company helps businesses automate their internal processes
using n8n, an open-source workflow automation platform.

Keep answers brief and helpful.

Our services include:
- Designing and implementing automations using n8n
- Replacing manual work with fully automated workflows
- Training teams to manage and scale automations in-house

Your primary goals are:
1. Briefly explain what we do in a helpful, conversational tone.
2. Ask the visitor what processes they want to automate.
3. Collect their name and email address for follow-up.

After you have the email and what the user needs, send all the
info together to the CRM tool.
💡

Tip: The last line is critical: it tells the AI agent when to trigger the CRM tool. Without it, the agent won’t know to save the lead. Adjust the wording, but keep the instruction to call the tool once email and description are collected.

3 OpenAI Chat Model (Language Model)

This node provides the actual language model that powers the agent’s responses. It connects to the Agent node via the ai_languageModel connector, not the regular data flow.

  1. Add an OpenAI Chat Model node.
  2. Select gpt-4o-mini as the model (fast, cheap, and accurate enough for customer conversations).
  3. Connect your OpenAI API credential.
  4. Drag a connection from this node’s output to the Agent node’s AI Language Model input (the connector on the bottom-left of the Agent node).
📌

You can swap gpt-4o-mini for gpt-4o if you want more nuanced responses, but it costs roughly 10x more per token. For a lead-capture chatbot, gpt-4o-mini is the sweet spot.

4 Conversation Memory (Buffer Window Memory)

Without memory, the chatbot forgets everything after each message. The Buffer Window Memory node stores the last several exchanges so the AI can reference what the visitor said earlier in the conversation, like when they mentioned their name two messages ago.

  1. Add a Window Buffer Memory node.
  2. Leave defaults as-is (it stores the last 5 message pairs by default).
  3. Connect it to the Agent node’s AI Memory input.

Part 2: The CRM Sub-Workflow (Lead Processing)

When the chatbot collects enough information (email + project description), the Agent calls the CRM tool. This tool is actually a full sub-workflow embedded inside a Tool Workflow node. It takes the raw conversation data, extracts the structured lead info, and saves it to Google Sheets.

5 Save Lead to CRM (Tool Workflow)

The Tool Workflow node lets you give the AI agent access to a multi-step process as if it were a single tool. When the agent decides it’s time to save the lead, it calls this tool and passes the conversation data in.

  1. Add a Tool Workflow node and connect it to the Agent node’s AI Tool input.
  2. Set the source to Parameter (this embeds the sub-workflow JSON directly inside the node, so you don’t need a separate workflow file).
  3. In the Description field, write: CRM tool to store lead information, call this once you have the visitor's email address and a description of what they need
  4. Paste the sub-workflow JSON into the Workflow JSON field. The template includes this pre-configured.
💡

Tip: The tool description matters more than you’d think. The AI agent reads this description to decide when to call the tool. A vague description like “save data” may cause the agent to trigger it at the wrong time.

6 Extract Lead Info (AI Agent with Output Parser)

Inside the sub-workflow, this agent node takes the raw conversation input (which could be messy, “Sure, my email is sarah.thompson@gmail.com and I need help with onboarding automation”) and extracts it into a clean JSON object with exactly two fields: email and description.

  1. The node receives input from the Receive Lead Data trigger.
  2. It uses GPT-4o mini with a strict system prompt that says: “You are a formatting assistant. Your only job is to extract and convert the input into clean, valid JSON.”
  3. A Structured Output Parser is connected to enforce the JSON schema, making sure the output always has the right shape.

After this node runs, the data looks like this:

{
  "output": {
    "email": "sarah.thompson@gmail.com",
    "description": "Wants help automating client onboarding and sending welcome emails."
  }
}

7 Append Lead to Sheet (Google Sheets)

This node takes the structured lead data and appends it as a new row in your Google Sheet. Each lead gets its own row with the email and project description.

  1. Connect your Google Sheets OAuth2 credential.
  2. Select your spreadsheet (or create a new one called “Leads CRM”).
  3. Choose Sheet1 as the sheet name.
  4. Map the columns: set email to ={{ $json.output.email }} and description to ={{ $json.output.description }}.

8 Send Confirmation (Code Node)

A simple Code node that returns a thank-you message back to the chatbot. This text gets sent back through the tool chain to the agent, which uses it to confirm the lead was saved.

return [
  {
    json: {
      text: "Thanks for the info, we will be in touch soon"
    }
  }
];

The Data Structure

Your Google Sheet acts as a lightweight CRM. It only needs two columns to start, but you can add more later (timestamp, source page, lead score).

Column Type Example Description
email Text sarah.thompson@gmail.com The visitor’s email address, collected during the chat conversation
description Text Wants help automating client onboarding and sending welcome emails A summary of what the visitor needs, extracted by the AI from the conversation

Here’s what a few rows might look like after a week of running the chatbot:

email description
sarah.thompson@gmail.com Wants help automating client onboarding and sending welcome emails
james.carter@outlook.com Looking to sync Shopify orders with their warehouse spreadsheet automatically
emily.rodriguez@acmecorp.com Needs a workflow to route support tickets from email to Slack channels
📌

Column names must match exactly: email and description, all lowercase. The Google Sheets node maps data by column header, so a mismatch like “Email” or “Description” will cause empty cells.

Full System Flow

  Visitor types message in chat widget
                │
                ▼
  ┌─────────────────────────────┐
  │  Chat Trigger               │ ← Receives message via webhook
  └─────────────┬───────────────┘
                │
                ▼
  ┌─────────────────────────────┐     ┌──────────────────────┐
  │  Website Chatbot Agent      │ ←── │ OpenAI GPT-4o mini   │
  │  (System prompt defines     │     └──────────────────────┘
  │   company info + goals)     │     ┌──────────────────────┐
  │                             │ ←── │ Conversation Memory   │
  └─────────────┬───────────────┘     └──────────────────────┘
                │
          Has email + description?
          ┌─────┴─────┐
          No          Yes
          │           │
          ▼           ▼
     Reply with    ┌──────────────────────┐
     follow-up     │ Save Lead to CRM     │ (Tool Workflow call)
     question      └───────────┬───────────┘
                              │
                              ▼
                   ┌──────────────────────┐
                   │ Extract Lead Info     │ ← GPT-4o mini + Output Parser
                   └──────────┬───────────┘
                              │
                              ▼
                   ┌──────────────────────┐
                   │ Append Lead to Sheet  │ → Google Sheets
                   └──────────┬───────────┘
                              │
                              ▼
                   ┌──────────────────────┐
                   │ Send Confirmation     │ → "Thanks, we'll be in touch"
                   └──────────────────────┘
  

Testing Your Workflow

  1. Save and activate the workflow in n8n.
  2. Open the chat widget (you can test it directly in n8n by clicking “Chat” in the top-right corner of the editor, or embed the snippet on a test page).
  3. Send a greeting like: “Hi, I run a small e-commerce store and I’m interested in automating my order fulfillment process.”
  4. Wait for the chatbot to respond and ask for your email. Provide a test email: “Sure, it’s test.user@example.com”
  5. Check your Google Sheet. You should see a new row with the email and a description of the request.
  6. Verify the chatbot sent back a confirmation message like “Thanks for the info, we will be in touch soon.”
Problem Likely Cause Fix
Chatbot responds but never saves the lead The tool description is too vague, or the system prompt doesn’t tell the agent to call the CRM tool Make sure the system message ends with “After you have the email and what the user needs, send all the info together to the CRM tool.”
Google Sheet stays empty Column headers don’t match or OAuth credential expired Check that your sheet has email and description as column headers (lowercase). Re-authorize Google Sheets in n8n if needed.
Chat widget doesn’t appear on site Embed snippet is missing or blocked by CSP Paste the n8n chat embed code before </body>. Check your browser console for Content Security Policy errors.
Agent gives generic or off-topic answers System message doesn’t describe your specific business Rewrite the system message to include your actual services, company name, and the tone you want.
“Could not parse output” error in sub-workflow The Structured Output Parser schema doesn’t match GPT’s output format Ensure the parser’s example JSON has exactly email and description fields. Check the Extract Lead Info node’s execution log for the raw output.

Frequently Asked Questions

Can I use a different AI model instead of GPT-4o mini?

Yes. You can swap in any model that n8n supports: GPT-4o, Claude, Gemini, or even a local model via Ollama. Just replace the OpenAI Chat Model nodes with the appropriate model node. Keep in mind that the system prompts may need slight adjustments for non-OpenAI models.

How do I add the chat widget to my WordPress site?

After activating the workflow, n8n provides an embed snippet (a small block of HTML and JavaScript). In WordPress, go to Appearance → Theme Editor → footer.php and paste the snippet just before the closing </body> tag. Alternatively, use a plugin like “Insert Headers and Footers” to add it without editing theme files.

Will the chatbot work on multiple pages at once?

Yes. The chat widget runs on every page where the embed snippet is loaded. Each visitor gets their own session ID, so conversations stay separate even when dozens of people are chatting at the same time. The Buffer Window Memory keeps each session’s context isolated.

Can I collect more fields like phone number or company name?

Absolutely. Update the system message to ask for those fields, then update the Structured Output Parser schema in the sub-workflow to include the new fields. Finally, add matching columns to your Google Sheet. The AI will extract whatever you tell it to look for.

How much does it cost to run this per month?

The main cost is OpenAI API usage. GPT-4o mini is priced at about $0.15 per million input tokens and $0.60 per million output tokens. A typical chat conversation of 10 messages costs roughly $0.002 to $0.005. Even with 500 conversations per month, you’d spend under $3 on AI. n8n self-hosted is free; n8n Cloud starts at $24/month.

What happens if OpenAI’s API goes down while someone is chatting?

The chatbot will fail to respond to that specific message. n8n will log the error in the execution history. The visitor’s message isn’t lost. They can try again once the API recovers. For production use, consider adding an error branch in the Agent node that sends a fallback message like “Sorry, I’m having trouble right now. Please email us at support@yourcompany.com.”

🚀 Get the AI Website Chatbot Template

Skip the 45-minute build. Get the complete workflow JSON, a setup guide with step-by-step screenshots, and a credentials guide that walks you through every API key, ready to import and go live in under 10 minutes.

Get the Template →

Instant download · Works on n8n Cloud and self-hosted

What’s Next?

  • Add email notifications: Connect a Gmail or SendGrid node to email yourself whenever a new lead is captured, so you can follow up faster.
  • Qualify leads with AI scoring: Add a second AI step that rates each lead (hot, warm, cold) based on their description and writes the score to a third column in your sheet.
  • Connect to a real CRM: Replace the Google Sheets node with HubSpot, Salesforce, or Pipedrive to send leads directly into your sales pipeline.
  • Add a knowledge base: Attach a RAG (Retrieval-Augmented Generation) tool so the chatbot can answer detailed questions about your products or services using your own documentation.
n8n
OpenAI
Google Sheets
chatbot
lead capture
CRM
automation
AI agent

How to Build an AI Candidate Screening Pipeline with n8n (LinkedIn + Gemini)

New to n8n? Start with our step-by-step setup guide, then come back to build this workflow.

Recruiting teams spend hours on first-round screening: parsing LinkedIn profiles, cross-referencing job requirements, and writing candidate summaries. It’s critical work, but it’s repetitive and error-prone. What if you could automate the entire initial review, freeing your team to focus on real conversations with the best candidates?

This n8n workflow does exactly that: a recruiter sends a LinkedIn profile URL via Telegram, three AI agents powered by Google Gemini analyze the candidate against the job requirements, and a formatted assessment comes back within seconds. Everything is logged to Google Sheets for your records. Let’s build it.

Prefer to skip the setup? Grab the ready-made template → and be up and running in under 10 minutes.

What You’ll Build

  1. A Telegram bot receives a LinkedIn profile URL from a recruiter
  2. The workflow scrapes the candidate’s profile data using Apify
  3. It retrieves the job description from your Google Drive folder
  4. Three specialized AI agents evaluate the candidate: one scores JD match, one delivers a detailed analysis, and one synthesizes a recruiter-ready recommendation
  5. Results are stored as a row in Google Sheets for future reference
  6. A formatted summary is sent back to Telegram with the screening verdict

How It Works: The Big Picture

The workflow orchestrates a multi-stage evaluation: it gathers data from three sources (LinkedIn, Google Drive, Apify), processes it through three independent LLM agents, consolidates the results, and delivers them both to a persistent data store and back to the recruiter in real time.

┌──────────────────────────────────────────────────────────────────────────┐
│  AI CANDIDATE SCREENING PIPELINE                                        │
│                                                                          │
│  1. Telegram Trigger                                                     │
│         ↓                                                                │
│  2. Extract LinkedIn URL → 3. Apify Scraper (LinkedIn Profile)         │
│         ↓                                                                │
│  4. Poll Apify Status → 5. Get Apify Results                            │
│         ↓                                                                │
│  6. Google Drive: Fetch Job Description                                 │
│  7. Extract PDF Text                                                    │
│         ↓                                                                │
│  8–10. Three Parallel LLM Agents (Gemini 2.5 Pro)                       │
│        • Agent 1: JD Matching Score                                     │
│        • Agent 2: Detailed Candidate Analysis                           │
│        • Agent 3: Recruiter Recommendation                              │
│         ↓                                                                │
│  11. Merge Agent Results                                                │
│  12. Add to Google Sheets                                               │
│  13. Format & Send Telegram Summary                                     │
│         ↓                                                                │
│  14. Telegram Send (Final Message)                                      │
└──────────────────────────────────────────────────────────────────────────┘
  

What You’ll Need

  • n8n account (Cloud or self-hosted, version 1.0+)
  • Telegram Bot API: a bot token created via BotFather
  • Google Account with access to Google Drive, Google Sheets, and the Gemini API
  • Apify Account with API access and a LinkedIn Scraper actor already configured
  • Google Drive Folder containing job description PDFs (one per role)
  • Google Sheets Document where candidate results will be stored
  • LinkedIn URL(s) to test with, public profiles work best

Estimated build time: 45 to 60 minutes from scratch, or under 10 minutes with the template.

Part 1: The Trigger and Data Collection

Step 1: Telegram Trigger and URL Extraction

The workflow starts when your recruiter sends a message with a LinkedIn profile link. The Telegram trigger node listens for incoming messages, and a Set node extracts the LinkedIn URL for processing.

Configuration: Set the Telegram Bot token in the credential field. The trigger fires every time a message arrives. A downstream Set node extracts the URL string from the message text using a simple expression.


{
  "message": "Please screen this candidate: https://www.linkedin.com/in/james-carter-52a1b3c/",
  "linkedinUrl": "https://www.linkedin.com/in/james-carter-52a1b3c/",
  "timestamp": "2026-04-08T10:15:00Z"
}
  
💡

Tip: Make sure your recruiter includes the full LinkedIn profile URL in their message. Private or incomplete URLs will cause the Apify scraper to fail silently. Train users to send the full URL like https://www.linkedin.com/in/username/.

Step 2: Apify LinkedIn Scraper Trigger and Polling

Once you have the URL, send it to Apify’s LinkedIn Profile Scraper actor. Apify will queue the job asynchronously, so you need to poll for results. The workflow launches the actor, then checks its status repeatedly until it’s done.

Configuration: In the Apify node, set the Actor ID to your LinkedIn Scraper actor, pass the LinkedIn URL as input, and call the actor. Store the Run ID for polling. Use a Wait node to space out polling calls (2 to 3 seconds apart, 30 to 40 attempts). Once the status shows “Succeeded,” fetch the results from the Apify output dataset.


{
  "runId": "YOUR_RUN_ID_FROM_APIFY",
  "status": "Succeeded",
  "profile": {
    "name": "James Carter",
    "headline": "Senior Software Engineer at TechCorp",
    "location": "Austin, TX, USA",
    "about": "10+ years building scalable systems. Expertise in cloud architecture and team leadership.",
    "experience": [
      {
        "title": "Senior Software Engineer",
        "company": "TechCorp Inc.",
        "duration": "2022–Present",
        "description": "Led platform modernization, reducing infrastructure costs by 35%."
      }
    ],
    "skills": ["Python", "AWS", "System Design", "Leadership", "Docker", "Kubernetes"],
    "endorsements": 247
  }
}
  
📌

Important: Apify’s LinkedIn scraper may hit rate limits if called too frequently. Keep polling intervals at 2 to 3 seconds and fail gracefully if a profile can’t be scraped (use an IF node to check the status).

Step 3: Fetch Job Description from Google Drive

Your Google Drive folder holds job descriptions as PDFs. In parallel with the Apify scrape, the workflow fetches the correct job description. A Set node stores the job title or folder ID for lookup, and a Google Drive node finds and downloads the PDF.

Configuration: Use Google Drive credentials (OAuth2). Set the operation to “Download File” and specify your folder structure. You may hard-code the folder ID or pass it dynamically based on recruiter input. Extract the PDF file ID and download the binary content.


{
  "jobDescriptionFile": {
    "id": "1a2b3c4d5e6f7g8h9i0j_JOB_DESC",
    "name": "Senior_Software_Engineer_2026.pdf",
    "mimeType": "application/pdf",
    "size": 45230,
    "downloadUrl": "https://drive.google.com/file/d/1a2b3c4d5e6f7g8h9i0j_JOB_DESC/view"
  }
}
  

Part 2: Document Processing and AI Analysis

Step 4: Extract Text from PDF Job Description

PDF files need to be converted to plain text before the AI agents can analyze them. An n8n PDF Extractor node (or a Code node using a library like pdfkit) parses the PDF and outputs clean text.

Configuration: Feed the downloaded PDF binary into a PDF Extract node. Set it to extract all text. The output is clean, line-broken text suitable for LLM processing.


{
  "jobDescriptionText": "Senior Software Engineer - Full-Time, Austin, TX\n\nAbout the Role:\nWe're seeking a Senior Software Engineer to lead our platform modernization initiative...\n\nKey Responsibilities:\n- Design and implement scalable microservices\n- Mentor junior engineers\n- Collaborate with product and design teams\n\nRequired Skills:\n- 8+ years software engineering experience\n- Proficiency in Python, Go, or Rust\n- AWS or GCP certification preferred\n- Strong system design fundamentals\n\nCompensation:\n$180,000–$220,000 + equity"
}
  

Step 5 to 7: Three Parallel AI Agents (Gemini 2.5 Pro with LangChain)

This is where the intelligence happens. Three specialized LangChain agents, each powered by Google Gemini 2.5 Pro, evaluate the candidate from different angles. They run in parallel for speed, each receiving the same candidate profile and job description but with a different prompt.

Agent 1: JD Matching Agent
Purpose: Assign a match score (0 to 100%) and list which job requirements the candidate meets and which they lack.
Prompt: “You are a recruitment analyst. Compare this candidate’s profile to the job description. Score the match from 0 to 100%. List which required skills are present, which are missing, and which desired skills the candidate has. Be precise and numerical.”


{
  "matchScore": 78,
  "requiredSkillsMet": ["Python", "AWS", "System Design", "Leadership"],
  "requiredSkillsMissing": [],
  "desiredSkillsPresent": ["Docker", "Kubernetes"],
  "reasoning": "Strong match on core backend skills and architecture. Leadership experience aligns with mentoring expectations."
}
  

Agent 2: Detailed Analysis Agent
Purpose: Provide a deep-dive evaluation of the candidate’s background, strengths, gaps, and how they’d perform in the role.
Prompt: “You are a senior recruiter reviewing this candidate. Write a comprehensive 2 to 3 paragraph evaluation of their fit for the role. Consider their experience trajectory, demonstrated technical depth, leadership maturity, and any red flags or concerns. Be constructive but honest.”


{
  "analysis": "James Carter presents a strong profile for this role. His 10 years in software engineering, with the last 4 focused on platform modernization at TechCorp, directly mirror the responsibilities outlined. His experience leading infrastructure cost optimization demonstrates both technical depth and business acumen. However, his background is predominantly in established, large-scale systems; this role will require exposure to startup-pace decision-making. His skill set is very current—Docker, Kubernetes, and AWS are all heavily weighted in the job description. No significant gaps identified beyond the typical onboarding curve."
}
  

Agent 3: Recruiter Recommendation Agent
Purpose: Synthesize the other two analyses and produce a hiring recommendation for the recruiter (e.g., “Strong Yes,” “Yes with caveats,” “No”).
Prompt: “Based on the candidate profile, job description, and the above analyses, provide a short hiring recommendation. Choose from: ‘Strong Yes, move to phone screen,’ ‘Yes, with caveats,’ ‘Maybe, needs clarification on specific skills,’ ‘No, not a fit.’ Explain your recommendation in 1 to 2 sentences.”


{
  "recommendation": "Strong Yes—move to phone screen",
  "rationale": "Carter's technical skills and leadership experience are a strong fit. His platform modernization background directly aligns with the role's core responsibility. Recommend phone screen to assess cultural fit and career motivation."
}
  
💡

Tip: Parallel execution is critical for speed. All three agents should start at the same time (use a Merge node to combine their outputs). If one agent times out, the workflow won’t block the others, use error handlers to catch and log failures gracefully.

Part 3: Results Storage and Final Output

Step 8: Merge Agent Results and Add to Google Sheets

Once all three agents finish, a Merge node combines their outputs into a single structured result. This consolidated data is then added as a new row to your Google Sheets document, creating a searchable archive of all screening decisions.

Configuration: Set up the Merge node to combine all agent outputs under a single object. In the Google Sheets node, configure the operation to “Append Row” into your spreadsheet. Map each agent result to a column: matchScore, analysis, recommendation, linkedinUrl, timestamp, and candidateName.


{
  "linkedinUrl": "https://www.linkedin.com/in/james-carter-52a1b3c/",
  "candidateName": "James Carter",
  "timestamp": "2026-04-08T10:15:00Z",
  "matchScore": 78,
  "requiredSkillsMet": "Python, AWS, System Design, Leadership",
  "requiredSkillsMissing": "None",
  "analysis": "James Carter presents a strong profile...",
  "recommendation": "Strong Yes—move to phone screen"
}
  

Step 9: Format and Send Telegram Summary

The final step sends a formatted message back to the recruiter via Telegram. The message includes the match score, the recommendation, and a brief summary for quick review.

Configuration: Use a Set node to format the output as a readable Telegram message (emoji, line breaks, bold text). Then use a Telegram Send node to deliver it to the recruiter’s chat ID (or the original chat where they sent the URL).


{
  "telegramMessage": "✅ SCREENING COMPLETE\\n\\nCandidate: James Carter\\nMatch Score: 78%\\nRecommendation: Strong Yes—move to phone screen\\n\\nProfile: Senior Software Engineer at TechCorp (10 yrs exp)\\nKey Fit: Python, AWS, System Design, Leadership all present.\\n\\nFull analysis saved to screening sheet.",
  "chatId": "YOUR_RECRUITER_CHAT_ID"
}
  
💡

Tip: Add a conditional branch here. If the recommendation is “No,” prefix the Telegram message with a ⛔ emoji. If it’s “Strong Yes,” use a 🚀 emoji. This gives the recruiter instant visual feedback before they even read the details.

The Data Structure

All screening results are logged to a Google Sheets document. This becomes your searchable candidate database. Each row captures one screening event, with columns for the LinkedIn URL, candidate name, all three agent outputs, and the timestamp.

Column Type Example Description
Date Date 2026-04-08 Screening date (auto-populate with workflow timestamp)
Candidate Name Text James Carter Full name from LinkedIn profile
LinkedIn URL URL https://www.linkedin.com/in/james-carter-52a1b3c/ Link to original profile
Job Title Screened For Text Senior Software Engineer Which job description was used
Match Score Number 78 0 to 100 from Agent 1
Required Skills Met Text Python, AWS, System Design, Leadership Comma-separated list from Agent 1
Required Skills Missing Text (none) Gaps the candidate should address
Detailed Analysis Long Text James Carter presents a strong profile… Full paragraph from Agent 2
Recommendation Text Strong Yes, move to phone screen Decision from Agent 3
📌

Important: Set up the Google Sheets document with these column headers before importing the workflow. The column names must match exactly. The workflow expects Candidate Name, Match Score, etc. If you rename columns, update the field mappings in the Google Sheets node.

Full System Flow

Here’s the complete end-to-end journey, from recruiter message to final Telegram response:

┌─────────────────────────────────────────────────────────────────────────┐
│                    FULL AI SCREENING PIPELINE                          │
│                                                                         │
│  TRIGGER                                                                │
│  ┌──────────────────┐                                                   │
│  │ Telegram Message │ (Recruiter sends LinkedIn URL)                   │
│  └────────┬─────────┘                                                   │
│           │                                                             │
│  DATA GATHERING (Parallel)                                             │
│           ├──→ Apify LinkedIn Scraper ────→ Poll for Results           │
│           │                                                             │
│           └──→ Google Drive ────→ Download Job Description PDF         │
│                                           │                            │
│                                   Extract PDF Text                     │
│           │                                                             │
│           ↓ (Wait for both)                                            │
│           │                                                             │
│  AI ANALYSIS (3 Parallel Agents)                                       │
│           ├──→ Agent 1: JD Match Score & Skills Gap                    │
│           ├──→ Agent 2: Detailed Candidate Analysis                    │
│           └──→ Agent 3: Recruiter Recommendation                       │
│           │                                                             │
│           ↓ (Merge all agent outputs)                                  │
│           │                                                             │
│  PERSISTENCE & OUTPUT                                                  │
│           ├──→ Add Row to Google Sheets                                │
│           │                                                             │
│           └──→ Format & Send Telegram Summary                          │
│                                                                         │
│  ┌──────────────────────────────────────┐                              │
│  │ Recruiter Receives Summary in Telegram│ (with score + recommendation)
│  └──────────────────────────────────────┘                              │
│                                                                         │
│  ✅ Full screening complete in 30–60 seconds                           │
│                                                                         │
└─────────────────────────────────────────────────────────────────────────┘
  

Testing Your Workflow

Before letting your team loose on the workflow, run through this test plan to confirm everything is wired correctly.

  1. Send a test LinkedIn URL via Telegram: Use a public profile (e.g., your own LinkedIn or a known public figure). Send a message to your bot like: “Please screen: https://www.linkedin.com/in/sarah-thompson-engineering/”
  2. Monitor the n8n execution: Open the workflow’s execution history in n8n and watch for successful node completion. Check that Apify returns profile data, Google Drive successfully downloads the PDF, and all three agents produce output.
  3. Check Telegram for the response: Within 30 to 60 seconds, you should receive a formatted message with a match score and recommendation.
  4. Verify the Google Sheets row: Open your screening spreadsheet and confirm that a new row was added with all the candidate details and agent analysis.
Problem Likely Cause Fix
Telegram message not triggering workflow Bot token incorrect or Telegram node not listening on the right chat Re-check bot token in Telegram credential. Confirm you’re messaging the correct bot.
Apify scraper returns empty profile LinkedIn profile is private or URL is malformed Test with a public profile. Ensure recruiter sends full URL (https://www.linkedin.com/in/username/).
Google Drive node returns “File not found” Job description PDF is not in the specified folder, or folder ID is wrong Double-check folder ID in Google Drive config. Confirm PDF file exists and is accessible.
Gemini agents time out or return empty responses API quota exceeded, malformed prompt, or credential not authenticated Check Google Cloud console for quota limits. Re-authenticate Gemini credential. Simplify the prompt if needed.
Google Sheets append fails Column names don’t match, sheet is read-only, or credentials lack write access Verify column headers match exactly. Check sheet permissions. Re-authenticate Google Sheets credential.
Telegram response is delayed (>2 minutes) Apify polling is slow, or Gemini API is slow Reduce polling interval slightly (1 to 2 sec). Check n8n logs for slow node execution.

Frequently Asked Questions

Can I screen candidates for multiple jobs at once?

Yes. Instead of hard-coding a single job description, modify the workflow to accept a job title as an input parameter. Add a conditional step that looks up the corresponding PDF from Google Drive based on the title sent in the Telegram message. For example, if the recruiter sends “Screen for Senior Software Engineer,” the workflow finds and uses that specific job description.

What if Apify can’t scrape a LinkedIn profile?

Apify may fail on private profiles, suspended profiles, or if LinkedIn rate-limits the scraper. Add an error handler branch after the Apify polling step. If the status is “Failed,” send a message back to the recruiter explaining the issue and ask them to provide a public-facing profile link or a resume PDF instead. You can then use a PDF extractor node to parse the resume and proceed with the same AI agents.

How much does this cost to run?

Costs depend on your service usage. Gemini API charges per 1,000 input tokens (~$0.075) and 1,000 output tokens (~$0.3). A typical screening run uses about 5,000 to 8,000 tokens total, so roughly $0.05 to $0.10 per candidate. Apify charges based on actor runs (LinkedIn scraper ~$0.05 to $0.15 per run). Google Sheets and Google Drive are included in your Google Workspace account (no additional charge). Telegram Bot is free. Total cost per screening: roughly $0.10 to $0.30.

Can I customize the AI agents’ evaluation criteria?

Absolutely. Each agent’s instructions are defined in the LangChain prompt. Edit the prompt in each agent node to emphasize different criteria. For example, if your role prioritizes “leadership and mentoring ability,” adjust Agent 2’s prompt to focus on those traits. Or if you want more detail, ask the agents to return structured JSON with sub-scores instead of prose.

What if the recruiter needs to screen a candidate without a LinkedIn profile?

Create an alternative input path. After the initial Telegram message, add a conditional step: if the message contains a LinkedIn URL, proceed with Apify; if it contains a resume attachment or a Drive link, fetch and parse that instead. Both paths merge at the “AI Analysis” stage, so the agents evaluate the same data regardless of source.

How do I integrate this with my existing ATS (Applicant Tracking System)?

Most modern ATSs expose an API for candidate creation. After screening results are added to Google Sheets, add a conditional node that checks the recommendation. If it’s “Strong Yes,” make an HTTP POST request to your ATS’s API with the candidate details, match score, and recruiter notes. This creates a pre-filled candidate record that the recruiter can review and move forward in your hiring workflow.

Get the AI Candidate Screening Template

Stop screening manually. Import the complete 55-node workflow in under 10 minutes, configure your credentials, and let AI agents handle first-round reviews while you focus on real conversations.

Get the Template →

Instant download · Works on n8n Cloud and self-hosted · Setup guide included

What’s Next?

  • Add a second-stage review: Create a companion workflow that triggers when a recruiter flags a candidate for deeper evaluation. It can compile a detailed dossier from LinkedIn, recent GitHub contributions, and portfolio links.
  • Expand to video interviews: Integrate a video interview scheduling tool (e.g., Calendly, Slack) to automatically send a booking link to “Strong Yes” candidates, streamlining the next step.
  • Multi-language support: Use Google Translate in parallel with Gemini to evaluate candidates from non-English profiles, opening your talent pool globally.
  • Scoring refinement: Once you have 20 to 30 screening results in Google Sheets, analyze which candidates actually performed well in interviews and phone screens. Use that data to fine-tune the agents’ prompts and weightings for even better predictions.
n8n
AI agents
LinkedIn automation
Google Gemini
Telegram
recruitment automation
workflow template

How to Build AI Lead Scoring with Salesforce, GPT-4o, and Slack in n8n

New to n8n? Start with our step-by-step setup guide, then come back to build this workflow.

Your sales team is drowning in leads. Last week you got 247. Yesterday alone, 58. But here’s the real problem: they’re spending three hours manually qualifying each batch, leaving scores written in messy spreadsheets, and the best leads get worked last because nobody marked them as priority. By then, they’ve already gone cold.

What if your AI could instantly score every lead the moment it enters Salesforce? Not just a random 1-100 number, but a real assessment: Is this a hot prospect ready to buy? A warm lead worth nurturing? Or cold?

That’s exactly what we’re building today. In this guide, you’ll create a complete AI-powered lead-scoring workflow in n8n that connects Salesforce, GPT-4o, and Slack. You’ll master data masking, a privacy-first technique that keeps PII out of the AI’s hands. And you’ll have a system that runs automatically, scoring leads while your team sleeps.

Ready to skip the manual building and import a production-ready template? We’ve pre-built this entire workflow. Grab the template and get started in under 5 minutes.

What You’ll Build

By the end of this guide, you’ll have a fully automated lead-scoring system that:

  1. Triggers instantly when a new lead lands in Salesforce, no manual intervention needed
  2. Masks sensitive data (names, emails, phone numbers) before it ever leaves your system, keeping PII private
  3. Scores each lead with GPT-4o, assigning a score (1-100), tier (Hot/Warm/Cold), and actionable next steps
  4. Restores original data after scoring, so your Slack message has the real contact info intact
  5. Posts to Slack with a clean, formatted notification that your sales team acts on immediately

How It Works: The Big Picture

Before we dig into the code, let’s see how the pieces fit together:

┌──────────────┐         ┌──────────────┐         ┌──────────────┐
│ 1. SALESFORCE│         │ 2. LOOP/      │         │ 3. FETCH     │
│ TRIGGER      │────────▶│    SPLIT      │────────▶│ LEAD DETAILS │
│              │         │  (splitIn5s)  │         │ (HTTP Request)
└──────────────┘         └──────────────┘         └──────────────┘
        │                        │                        │
        │                        │                        │
        │                        └────────────────────────┘
        │                                  │
        │                    ┌─────────────▼──────────────┐
        │                    │ 4. MASK SENSITIVE DATA     │
        │                    │ (Code node)                │
        │                    │ Strip email, phone, name   │
        │                    │ Store mapping: real→masked │
        │                    └─────────────┬──────────────┘
        │                                  │
        │                    ┌─────────────▼──────────────┐
        │                    │ 5. AI LEAD SCORING         │
        │                    │ (OpenAI GPT-4o)            │
        │                    │ Analyze masked lead        │
        │                    │ Score, tier, reasoning     │
        │                    └─────────────┬──────────────┘
        │                                  │
        │                    ┌─────────────▼──────────────┐
        │                    │ 6. UNMASK LEAD DATA        │
        │                    │ (Code node)                │
        │                    │ Restore email, phone, name │
        │                    │ From mapping: masked→real  │
        │                    └─────────────┬──────────────┘
        │                                  │
        │                    ┌─────────────▼──────────────┐
        │                    │ 7. POST TO SLACK           │
        │                    │ Format and send            │
        │                    │ scored lead notification   │
        │                    │ to sales channel           │
        │                    └────────────────────────────┘

The key innovation here is Steps 4 and 6: data masking and unmasking. Your lead’s real email and phone number never get sent to OpenAI. Instead, GPT-4o analyzes a sanitized version, then we restore the original data before Slack posts it. Privacy by design.

How to Build an AI-Powered Zoho CRM Lead Assistant with n8n and OpenAI

New to n8n? Start with our step-by-step setup guide, then come back to build this workflow.

Stop clicking through Zoho CRM forms every time a new lead comes in. What if you could just type “Add Sarah Thompson from Vertex Solutions, email sarah@vertexsolutions.com” and have it done instantly? This n8n workflow builds exactly that: an AI-powered CRM assistant that understands plain English, connects to your Zoho CRM through the Model Context Protocol (MCP), and handles lead creation, updates, lookups, and deletions on command. You talk to it like a teammate, and it handles the CRM busywork.

Prefer to skip the setup? Grab the ready-made template → and be up and running in under 10 minutes.

What You’ll Build

  1. You type a message into n8n’s built-in chat panel, something like “Create a lead for James Carter at NovaTech, email james.carter@novatech.io, source is web form.”
  2. An AI Agent powered by OpenAI reads your message, figures out which CRM action you need, and calls the right Zoho tool automatically.
  3. The lead is created (or updated, retrieved, or deleted) in your Zoho CRM, and the AI confirms what it did in plain English.
  4. The conversation has memory, so you can follow up naturally: “Now update his status to Contacted” without repeating details.

How It Works: The Big Picture

This workflow uses n8n’s Model Context Protocol (MCP) architecture to bridge an AI chatbot with your Zoho CRM. It has two connected sections running inside a single workflow: an MCP Server that exposes CRM operations as callable tools, and an AI Agent that interprets your messages and calls those tools.

┌──────────────────────────────────────────────────────────────────────────────┐
│  AI-POWERED ZOHO CRM LEAD MANAGER                                          │
│                                                                              │
│  SECTION A: MCP SERVER                                                       │
│  ┌─────────────────────┐                                                     │
│  │  MCP Server Trigger  │◄── Create Lead ── Delete Lead ── Get Lead          │
│  │  (exposes tools)     │◄── Get All Leads ── Update Lead                    │
│  └─────────┬───────────┘                                                     │
│            │ MCP endpoint                                                    │
│            ▼                                                                 │
│  SECTION B: AI AGENT                                                         │
│  ┌──────────────┐    ┌──────────────┐    ┌─────────────────┐                │
│  │ Chat Trigger  │───▶│  AI Agent     │◄───│ OpenAI GPT-4o   │                │
│  │ (user input)  │    │ (orchestrator)│◄───│ mini            │                │
│  └──────────────┘    │              │◄───│ Conversation    │                │
│                      │              │◄───│ Memory          │                │
│                      │              │◄───│ MCP Client      │───▶ Section A  │
│                      └──────────────┘    └─────────────────┘                │
└──────────────────────────────────────────────────────────────────────────────┘
  

What You’ll Need

  • n8n instance: Cloud or self-hosted, version 1.60 or later (MCP nodes require a recent version)
  • Zoho CRM account: Free tier works. You need API access via a Zoho Developer Console app.
  • OpenAI API key: A funded account with access to gpt-4o-mini (or any model you prefer)

Estimated build time: 30 to 40 minutes from scratch, or under 10 minutes with the template.

Part 1: The MCP Server (Zoho CRM Tools)

The first section of this workflow creates a private API endpoint that exposes five Zoho CRM operations as tools. Any MCP-compatible client, including the AI Agent in Section B, can discover and call these tools automatically.

1 MCP Server Trigger

This node is the backbone of the MCP architecture. It creates a webhook endpoint that advertises all connected Zoho CRM tool nodes as callable functions. When an MCP client connects, it receives a manifest listing every available tool with its parameters, and the client (your AI Agent) then knows exactly what it can do.

  1. Add an MCP Server Trigger node to your canvas (found under Langchain → Triggers).
  2. Leave the default path or set a custom one, and n8n will generate the full Production URL for you.
  3. After saving the workflow, copy the Production URL from this node, you will need it for the MCP Client in Section B.
💡

Tip: The MCP Server Trigger only advertises tools that are connected to it. If you add a new Zoho operation later, make sure to wire it into this trigger node or the AI Agent won’t see it.

2 Create Lead in Zoho CRM (Zoho CRM Tool)

This tool node lets the AI create new leads. It uses n8n’s $fromAI() expression for every field, which means the AI Agent decides what values to fill based on the user’s message, so you don’t hardcode anything.

  1. Add a Zoho CRM Tool node and set Resource to Lead, Operation to Create.
  2. In the Last Name field, enter: ={{ $fromAI('Last_Name', '', 'string') }}
  3. In the Company field, enter: ={{ $fromAI('Company', '', 'string') }}
  4. Expand Additional Fields and add: Email, Mobile, Website, First_Name, Lead_Source, Lead_Status, each using the same $fromAI() pattern.
  5. Select your Zoho OAuth2 API credential.
  6. Connect this node’s AI Tool output to the MCP Server Trigger’s AI Tool input.

When the AI Agent receives “Create a lead for Emily Rodriguez at BrightPath Marketing, email emily.rodriguez@brightpath.com,” it will fill in:

{
  "First_Name": "Emily",
  "Last_Name": "Rodriguez",
  "Company": "BrightPath Marketing",
  "Email": "emily.rodriguez@brightpath.com",
  "Lead_Source": "Chat",
  "Lead_Status": "Not Contacted"
}

3 Get Lead from Zoho CRM (Zoho CRM Tool)

Retrieves a single lead by its Zoho record ID. The AI uses this when you ask something like “Show me the details for lead 5765430000012345.”

  1. Add another Zoho CRM Tool node. Set Resource to Lead, Operation to Get.
  2. Set Lead ID to: ={{ $fromAI('Lead_ID', '', 'string') }}
  3. Connect to the MCP Server Trigger.

4 Get All Leads from Zoho CRM (Zoho CRM Tool)

Lists every lead in your CRM. Useful when you type “Show me all my leads” or “How many leads do we have?”

  1. Add a Zoho CRM Tool node. Set Resource to Lead, Operation to Get All.
  2. Toggle Return All to true so the AI gets the complete list.
  3. Connect to the MCP Server Trigger.
📌

If you have thousands of leads, returning all of them at once can be slow and expensive (OpenAI tokens). Consider toggling Return All off and setting a limit of 50 to 100 for large CRM databases.

5 Update Lead in Zoho CRM (Zoho CRM Tool)

Modifies an existing lead. The AI extracts the Lead ID and whichever fields need changing from your message.

  1. Add a Zoho CRM Tool node. Set Resource to Lead, Operation to Update.
  2. Set Lead ID to ={{ $fromAI('Lead_ID', '', 'string') }}
  3. Under Update Fields, add: Company, Last_Name, First_Name, Description, Lead_Source, Lead_Status, each with $fromAI() expressions.
  4. Connect to the MCP Server Trigger.

Example: “Update lead 5765430000012345, change status to Qualified and add a note: Scheduled demo for April 15.”

{
  "Lead_ID": "5765430000012345",
  "Lead_Status": "Qualified",
  "Description": "Scheduled demo for April 15"
}

6 Delete Lead in Zoho CRM (Zoho CRM Tool)

Removes a lead permanently. The AI only calls this when you explicitly request deletion and provide an ID.

  1. Add a Zoho CRM Tool node. Set Resource to Lead, Operation to Delete.
  2. Set Lead ID to ={{ $fromAI('Lead_ID', '', 'string') }}
  3. Connect to the MCP Server Trigger.
💡

Tip: The AI Agent’s system prompt instructs it to confirm before destructive actions. If you want extra safety, you can add an IF node before the Delete tool that requires a confirmation flag.


Part 2: The AI Agent (Chat Interface)

This section is the front door. It receives your messages, processes them through an AI model, and decides which Zoho CRM tool to call via the MCP connection.

7 When Chat Message Received (Chat Trigger)

This trigger opens n8n’s built-in chat panel, giving you a familiar messaging interface to interact with the AI Agent.

  1. Add a Chat Trigger node (Langchain → Triggers).
  2. Leave defaults, no special configuration needed.
  3. This node’s output connects to the AI Agent node.

8 AI Agent (Agent)

The orchestrator. It receives the user’s message, uses OpenAI to understand intent, selects the right Zoho tool via MCP, executes the action, and returns a natural-language summary.

  1. Add an AI Agent node (Langchain → Agents).
  2. In Options → System Message, enter:
You are an AI assistant that helps manage leads in Zoho CRM.
When the user asks to create, update, retrieve, or delete a lead,
use the appropriate Zoho CRM tool via the MCP connection.
Always confirm the action taken and summarize the result in natural language.
If the user asks to list leads, present them in a clean, readable format.
If a request is ambiguous, ask for clarification before proceeding.
  1. Connect the Chat Trigger’s output to this node’s input.
  2. This node has three sub-inputs: Language Model, Memory, and Tools. You will connect the next three nodes to these.

9 OpenAI Chat Model

The brain powering the AI Agent. We use gpt-4o-mini for a good balance of intelligence and cost, and it handles tool selection and natural language reliably without running up a large bill.

  1. Add an OpenAI Chat Model node (Langchain → Language Models).
  2. Select gpt-4o-mini from the model dropdown (or use gpt-4o if you want stronger reasoning).
  3. Select your OpenAI API credential.
  4. Connect this node’s AI Language Model output to the AI Agent’s Language Model input.

10 Conversation Memory (Buffer Window)

Keeps the last few exchanges in context so you can have multi-turn conversations. Without this, the AI would forget everything after each message.

  1. Add a Memory Buffer Window node (Langchain → Memory).
  2. Leave defaults. The default window size of 5 messages works well for CRM tasks.
  3. Connect its AI Memory output to the AI Agent’s Memory input.

This is what makes exchanges like this possible:

You: "Create a lead for Michael Chen at Pinnacle Labs, email michael.chen@pinnaclelabs.com"
AI:  "Done! Lead created for Michael Chen at Pinnacle Labs."
You: "Great, now change his status to Qualified"
AI:  "Updated Michael Chen's lead status to Qualified."

11 MCP Client (Tool)

This is the bridge between the AI Agent and the MCP Server from Section A. It connects to the MCP Server Trigger’s endpoint and pulls in all available Zoho tools, and the Agent can then call any of them.

  1. Add an MCP Client Tool node (Langchain → Tools).
  2. In the Endpoint URL field, paste the Production URL you copied from the MCP Server Trigger in Step 1.
  3. Connect its AI Tool output to the AI Agent’s Tools input.
💡

Tip: If your n8n instance is behind a firewall, make sure the MCP Server Trigger’s URL is reachable from the same instance. For self-hosted setups, http://localhost:5678/mcp/YOUR_PATH works. For n8n Cloud, use the full production URL.


The MCP Architecture: Why It Matters

You might wonder: why not connect the Zoho CRM nodes directly to the AI Agent as tools? You absolutely can, and for simpler setups that works fine. The MCP architecture adds a layer of separation that pays off in three ways:

  • Reusability: Once your Zoho MCP Server is running, any MCP-compatible client can use it. You could connect a second AI Agent from a different workflow, a Claude Desktop integration, or any tool that speaks MCP.
  • Modularity: You can add new Zoho operations (deals, contacts, tasks) to the MCP Server without touching the AI Agent. It discovers new tools automatically.
  • Scalability: In a team setting, one person maintains the CRM tools while another builds AI interfaces on top. Clean separation of concerns.

Full System Flow

┌─────────────────────────────────────────────────────────────────────────────┐
│                                                                             │
│   USER: "Create a lead for Sarah Thompson at Vertex Solutions"              │
│     │                                                                       │
│     ▼                                                                       │
│   [Chat Trigger] ──▶ [AI Agent] ──▶ interprets intent                      │
│                         │    ▲                                               │
│                         │    │ context from [Conversation Memory]            │
│                         │    │ reasoning from [OpenAI GPT-4o-mini]          │
│                         ▼                                                    │
│                    [MCP Client] ──▶ calls MCP Server endpoint               │
│                         │                                                    │
│                         ▼                                                    │
│                  [MCP Server Trigger] ──▶ selects tool                      │
│                         │                                                    │
│                         ▼                                                    │
│               [Create Lead in Zoho CRM]                                     │
│                         │                                                    │
│                         ▼                                                    │
│               ZOHO CRM: Lead created                                        │
│                         │                                                    │
│                         ▼                                                    │
│   AI: "Done! Created lead for Sarah Thompson at Vertex Solutions."          │
│                                                                             │
└─────────────────────────────────────────────────────────────────────────────┘
  

Testing Your Workflow

Before toggling Active, run through these checks:

  1. Open the chat panel: click the Chat icon in n8n’s sidebar (or execute the workflow manually).
  2. Create a test lead: type “Create a lead for Test User at Test Corp, email test@testcorp.com”
  3. Verify in Zoho CRM: log in to your Zoho CRM and confirm the lead appeared with the correct details.
  4. Test retrieval: copy the Lead ID from Zoho and type “Get details for lead [ID]”
  5. Test update: type “Update lead [ID], set status to Contacted”
  6. Test listing: type “Show me all leads”
  7. Test memory: create a lead, then immediately ask “Now change their company to Acme Corp”, and the AI should remember the lead from the previous message.
Problem Likely Cause Fix
AI says “I don’t have tools to do that” MCP Client isn’t connected or URL is wrong Re-copy the Production URL from the MCP Server Trigger and paste it into the MCP Client’s Endpoint URL field
Zoho returns “INVALID_TOKEN” OAuth2 token expired Go to Credentials → Zoho OAuth2 API → click Reconnect to refresh the token
Lead created with missing fields AI couldn’t extract all values from your message Be more explicit: include first name, last name, company, and email in your message
“Could not connect to MCP endpoint” Workflow not activated or wrong URL Make sure the workflow is saved and Active. For self-hosted, verify the URL starts with your instance domain
AI forgets previous context Memory node not connected Check that the Conversation Memory node is wired into the AI Agent’s Memory input

Frequently Asked Questions

Can I use a different AI model instead of OpenAI?

Yes. Swap the OpenAI Chat Model node for any Langchain-compatible model node in n8n: Anthropic Claude, Google Gemini, or a local model via Ollama. The MCP architecture is model-agnostic, so the Zoho CRM tools work the same regardless of which AI powers the agent.

Does this work with Zoho CRM’s free plan?

Zoho CRM’s free plan supports API access for up to three users, which is enough for this workflow. You’ll need to create a Server-based Client in the Zoho Developer Console to get your OAuth credentials. The only limitation is that some advanced CRM fields may not be available on the free tier.

Can I add more CRM operations like managing deals or contacts?

Absolutely. Add new Zoho CRM Tool nodes for Deals, Contacts, Tasks, or any other Zoho CRM resource. Wire them into the MCP Server Trigger, and the AI Agent will discover them automatically on its next connection. No changes needed on the Agent side.

How much does it cost to run per message?

Using gpt-4o-mini, each CRM interaction costs roughly $0.001 to $0.003 depending on the conversation length and the size of data returned from Zoho. Even heavy daily use (100+ messages) would stay well under $1/day. Switching to gpt-4o increases cost by about 10x but gives stronger reasoning.

Is my CRM data secure? Does OpenAI see my lead information?

When using the OpenAI API (not ChatGPT), OpenAI does not train on your data. However, lead details are sent to OpenAI’s servers for processing. If this is a concern, you can swap in a self-hosted model via Ollama, and the MCP setup works identically, and your data never leaves your infrastructure.

Can multiple team members use this at the same time?

The chat interface is per-session in n8n, so each user gets their own conversation thread and memory. Multiple people can use it concurrently, and each session’s Conversation Memory buffer is independent. For team-wide access, consider triggering the AI Agent via a Telegram or Slack bot instead of the built-in chat.

Get the Zoho CRM AI Lead Assistant Template

Skip the 30-minute build and get the complete workflow JSON, a step-by-step setup guide, and a credentials walkthrough for every API key you need.

Get the Template →

Instant download · Works on n8n Cloud and self-hosted

What’s Next?

  • Add a Telegram or Slack trigger: manage your CRM leads from your phone without opening n8n at all.
  • Expand to Deals and Contacts: add more Zoho CRM Tool nodes to the MCP Server and manage your entire pipeline.
  • Integrate lead scoring: add a Code node that scores leads based on custom rules before the AI creates them.
  • Build a daily summary: add a Schedule Trigger that asks the AI Agent “Summarize all leads created today” and sends the result via email.
n8n
Zoho CRM
OpenAI
MCP
AI Agent
lead management
CRM automation
automation

How to Add LinkedIn Post Commenters to HubSpot CRM with n8n

New to n8n? Start with our step-by-step setup guide, then come back to build this workflow.

You publish a LinkedIn post, it takes off, and suddenly forty people you’ve never met are commenting on it. Each one of them is a warm lead, someone who already cares about what you have to say. But by the time you’ve finished scrolling through the comments, copying names, and looking people up one by one, the momentum is gone. What if every single one of those commenters appeared in your CRM automatically, complete with their email, job title, and company, ready for your sales team to follow up?

That’s exactly what you’ll build in this guide. Using n8n, Apify, and HubSpot, you’ll create a workflow that scrapes commenters from any LinkedIn post, enriches their profiles with professional data, and pushes qualified contacts straight into your CRM. No manual data entry, no copy-pasting, no missed opportunities.

Prefer to skip the setup? Grab the ready-made template → and be up and running in under 10 minutes.

What You’ll Build

  1. You paste a LinkedIn post URL into a simple web form hosted by n8n.
  2. The workflow scrapes every comment on that post and extracts the commenter’s LinkedIn profile URL.
  3. Each commenter’s profile is enriched through Apify, pulling their email address, job title, company name, city, and country.
  4. If a valid email is found, the workflow creates or updates a contact in HubSpot CRM with all the enriched data.
  5. Commenters without a discoverable email are silently skipped, keeping your CRM clean.

How It Works: The Big Picture

The entire process runs through a single n8n workflow with seven core nodes. Here’s the high-level flow:

┌──────────────────────────────────────────────────────────────────────────────────────┐
│  LINKEDIN COMMENTERS → HUBSPOT CRM                                                  │
│                                                                                      │
│  [Form Trigger]                                                                      │
│       │                                                                              │
│       ▼                                                                              │
│  [Scrape Post Comments]  ──▶  [Loop Over Commenters]                                 │
│                                     │                                                │
│                                     ▼                                                │
│                              [Wait 3 sec]                                            │
│                                     │                                                │
│                                     ▼                                                │
│                              [Enrich Profile]                                        │
│                                     │                                                │
│                                     ▼                                                │
│                              [Extract Fields]                                        │
│                                     │                                                │
│                                     ▼                                                │
│                              [Has Valid Email?]                                      │
│                               ╱            ╲                                         │
│                           YES ╱              ╲ NO                                    │
│                             ╱                  ╲                                     │
│                [Create/Update           [Skip — No Email]                            │
│                 HubSpot Contact]              │                                      │
│                        │                      │                                      │
│                        └───── ◀── Loop ──◀────┘                                      │
└──────────────────────────────────────────────────────────────────────────────────────┘
  

What You’ll Need

  • n8n instance: self-hosted or n8n Cloud (all nodes are built-in, no community nodes required)
  • Apify account: the free tier gives you $5/month of compute, enough to process around 50 to 100 profiles per run. Sign up here.
  • HubSpot account: free CRM tier works perfectly. You’ll need a Private App Token with crm.objects.contacts.write scope.

Estimated build time: 30 to 40 minutes from scratch, or under 10 minutes with the template.

Building the Workflow Step by Step

1 Submit LinkedIn Post URL (Form Trigger)

The workflow starts with n8n’s built-in Form Trigger node. This creates a simple web form where you paste the LinkedIn post URL. When you submit the form, the workflow fires.

  1. Add a Form Trigger node to your canvas.
  2. Set the Form Title to LinkedIn Post Engagement Capture.
  3. Add one form field: label it LinkedIn Post URL, set it as required, and add a placeholder like https://www.linkedin.com/posts/username_topic-activity-123...
  4. Save the node. n8n will generate a unique form URL you can bookmark.

After submission, the data flowing out of this node looks like:

{
  "LinkedIn Post URL": "https://www.linkedin.com/posts/james-carter_ai-automation-activity-7291234567890-AbCd",
  "submittedAt": "2026-04-08T14:22:00.000Z"
}
💡

Tip: You can find the URL of any LinkedIn post by clicking the three dots on the post and selecting “Copy link to post.” Make sure you’re copying the full URL, not a shortened one.

2 Scrape Post Comments (HTTP Request → Apify)

This node sends the LinkedIn post URL to Apify’s LinkedIn Post Comments Scraper actor, which returns an array of all commenters with their profile URLs and comment text.

  1. Add an HTTP Request node and connect it to the Form Trigger.
  2. Set the Method to POST.
  3. Set the URL to: https://api.apify.com/v2/acts/curious_coder~linkedin-post-comments-scraper/run-sync-get-dataset-items?token={{ $credentials.httpHeaderAuth.value }}
  4. Under Body, select JSON and enter:
    {
      "postUrl": "{{ $json['LinkedIn Post URL'] }}",
      "maxComments": 100
    }
  5. Set the Timeout to 120000 ms (2 minutes), scraping takes time.
  6. Under Credentials, add your Apify API token as an HTTP Header Auth credential (header name: Authorization, value: Bearer YOUR_TOKEN). Alternatively, the token in the URL query parameter handles auth directly.

The response is an array of comment objects. Each item looks like:

{
  "profileUrl": "https://www.linkedin.com/in/emily-rodriguez-marketing",
  "commenterName": "Emily Rodriguez",
  "commentText": "This is such a great breakdown! We've been looking at something similar.",
  "timestamp": "2026-04-07T09:15:00.000Z"
}
💡

Tip: The maxComments parameter caps how many comments are scraped. For posts with hundreds of comments, start with 50 to test, then increase once you’ve confirmed the workflow runs smoothly.

3 Loop Over Commenters (Split In Batches)

The comment scraper returns all comments as an array. The Loop node processes them one at a time, which is important because the enrichment step hits an external API that has rate limits.

  1. Add a Split In Batches node and connect it to the HTTP Request node.
  2. Set Batch Size to 1, we process one commenter per iteration.

The loop feeds each individual commenter object to the next node in sequence.

4 Wait Between Requests (Wait Node)

Adding a 3-second pause between enrichment requests prevents you from hitting Apify’s rate limits and keeps the workflow running reliably even with large comment batches.

  1. Add a Wait node after the loop’s “process” output.
  2. Set Amount to 3 and Unit to seconds.
📌

If you’re on Apify’s paid plan with higher rate limits, you can reduce this to 1 second or remove it entirely.

5 Enrich Profile (HTTP Request → Apify)

This is where the magic happens. For each commenter, we call Apify’s LinkedIn Profile Scraper to pull their full professional details: email, headline, company, location, and more.

  1. Add another HTTP Request node.
  2. Set the Method to POST.
  3. Set the URL to: https://api.apify.com/v2/acts/curious_coder~linkedin-profile-scraper/run-sync-get-dataset-items?token={{ $credentials.httpHeaderAuth.value }}
  4. Under Body, set JSON to:
    {
      "profileUrls": ["{{ $json.profileUrl }}"]
    }
  5. Set the Timeout to 120000 ms.
  6. Use the same Apify credential as Step 2.

The enriched profile data comes back looking something like this:

{
  "firstName": "Emily",
  "lastName": "Rodriguez",
  "email": "emily.rodriguez@techcorp.com",
  "headline": "VP of Marketing at TechCorp",
  "company": "TechCorp Inc.",
  "city": "Austin",
  "country": "US",
  "url": "https://www.linkedin.com/in/emily-rodriguez-marketing",
  "connections": 2847
}

6 Extract Profile Fields (Set Node)

The enrichment response contains dozens of fields. This Set node extracts only the ones you actually need for your CRM, creating a clean, standardized data object.

  1. Add a Set node and connect it to the Enrich Profile node.
  2. Switch to Manual mode.
  3. Map these fields:
    Output Field Expression
    email ={{ $json.email }}
    firstName ={{ $json.firstName }}
    lastName ={{ $json.lastName }}
    jobTitle ={{ $json.headline }}
    company ={{ $json.company }}
    city ={{ $json.city }}
    country ={{ $json.country }}
    linkedinUrl ={{ $json.url }}

After this node, each item has a clean, flat structure:

{
  "email": "emily.rodriguez@techcorp.com",
  "firstName": "Emily",
  "lastName": "Rodriguez",
  "jobTitle": "VP of Marketing at TechCorp",
  "company": "TechCorp Inc.",
  "city": "Austin",
  "country": "US",
  "linkedinUrl": "https://www.linkedin.com/in/emily-rodriguez-marketing"
}

7 Has Valid Email? (IF Node)

Not every LinkedIn profile has a publicly discoverable email address. This IF node checks whether the enrichment found a valid email before attempting to create a CRM contact.

  1. Add an IF node.
  2. Add two conditions (AND):
    • {{ $json.email }} exists
    • {{ $json.email }} is not empty

The true branch goes to HubSpot. The false branch goes to a No-Op node that loops back, silently skipping the commenter.

💡

Tip: Apify typically finds emails for 40 to 60% of LinkedIn profiles. If you need higher hit rates, consider adding a secondary enrichment service like Hunter.io or Apollo as a fallback before the IF node.

8 Create or Update HubSpot Contact (HubSpot Node)

The final action node. It takes the enriched profile data and creates a new contact in HubSpot, or updates an existing one if a contact with the same email already exists.

  1. Add a HubSpot node.
  2. Set Authentication to App Token.
  3. Set the Email field to ={{ $json.email }}.
  4. Under Additional Fields, map:
    HubSpot Field Expression
    First Name ={{ $json.firstName }}
    Last Name ={{ $json.lastName }}
    Job Title ={{ $json.jobTitle }}
    Company Name ={{ $json.company }}
    City ={{ $json.city }}
    Country ={{ $json.country }}
    Website ={{ $json.linkedinUrl }}

Connect both the HubSpot node’s output and the “Skip, No Email” node back to the Loop node to continue processing the next commenter.

📌

The HubSpot node uses upsert behavior by default: if a contact with the same email already exists, it updates their fields instead of creating a duplicate. This keeps your CRM clean even if you run the workflow on multiple posts where the same people comment.

The Data Flow

Here’s what a contact record looks like as it moves through the system, from raw LinkedIn comment to polished CRM entry:

Stage Data Available Example
After Comment Scrape Profile URL, Name, Comment Text emily-rodriguez-marketing
After Enrichment + Email, Headline, Company, City, Country emily.rodriguez@techcorp.com, VP of Marketing
After Field Extraction Clean 8-field object ready for CRM Flat JSON with all mapped fields
In HubSpot Full contact record with source tracking Contact card with LinkedIn URL as website

Full System Flow

┌──────────────────────────────────────────────────────────────────────────────┐
│                                                                              │
│   USER                     n8n WORKFLOW                      HUBSPOT CRM     │
│                                                                              │
│   Pastes URL ──▶ [Form Trigger]                                              │
│                       │                                                      │
│                       ▼                                                      │
│                  [HTTP Request] ──▶ Apify Comments API                       │
│                       │                                                      │
│                       ▼                                                      │
│                  [Loop: 1 at a time]                                          │
│                       │                                                      │
│                       ▼                                                      │
│                  [Wait 3 sec]                                                │
│                       │                                                      │
│                       ▼                                                      │
│                  [HTTP Request] ──▶ Apify Profile API                        │
│                       │                                                      │
│                       ▼                                                      │
│                  [Set: Extract Fields]                                        │
│                       │                                                      │
│                       ▼                                                      │
│                  [IF: Email exists?]                                          │
│                    ╱        ╲                                                 │
│                YES            NO                                             │
│                 ╱                ╲                                            │
│   [HubSpot: Upsert]     [Skip: No-Op]                                       │
│         │                      │           ──▶  Contact created/updated      │
│         └──── Loop back ◀──────┘                                             │
│                                                                              │
└──────────────────────────────────────────────────────────────────────────────┘
  

Testing Your Workflow

  1. Find a test post. Use one of your own LinkedIn posts that has at least 5 to 10 comments. Avoid posts with hundreds of comments for your first test, keep it small.
  2. Open the form. Click “Test workflow” in n8n, then open the form URL in your browser. Paste the LinkedIn post URL and submit.
  3. Watch the execution. In n8n, you’ll see the workflow run node by node. The comment scraping takes 30 to 60 seconds. Each profile enrichment takes another 10 to 30 seconds.
  4. Check HubSpot. Open your HubSpot contacts list and look for the newly created records. Verify that the name, email, job title, and company are populated correctly.
  5. Review skipped contacts. Check the workflow execution log, any commenters without emails will show as passing through the “Skip, No Email” branch.
Problem Likely Cause Fix
No comments returned Post URL is incorrect or post has no comments Copy the URL directly from the post’s share menu; make sure the post is public
Enrichment returns empty data Apify token is invalid or has run out of credits Check your Apify dashboard for remaining credits and regenerate the token
HubSpot returns 401 error App Token doesn’t have the right scopes In HubSpot, edit your Private App and ensure crm.objects.contacts.write is enabled
Workflow times out Too many comments + enrichment is slow Reduce maxComments to 50, or increase the HTTP Request timeout to 180000 ms
Duplicate contacts in CRM Email field is mapped incorrectly Make sure the HubSpot node’s Email field uses the exact expression ={{ $json.email }}

Frequently Asked Questions

Does this work with n8n Cloud or only self-hosted?

It works with both. Every node in this workflow is a standard n8n built-in node, no community nodes required. The Apify calls are made through regular HTTP Request nodes, so there’s nothing extra to install.

How many comments can it handle per run?

The template is set to scrape up to 100 comments per post. You can increase this by changing the maxComments parameter, but keep in mind that each profile enrichment uses Apify compute credits. A batch of 100 profiles typically costs around $1 to $2 on the free tier.

What if a commenter is already in my HubSpot CRM?

The HubSpot node uses upsert logic, it matches on email address. If a contact with that email already exists, their record gets updated with the latest data instead of creating a duplicate. Your CRM stays clean no matter how many times you run it.

Can I use a different CRM instead of HubSpot?

Yes. Swap the HubSpot node for any CRM node that n8n supports: Salesforce, Pipedrive, Zoho CRM, or even a Google Sheets node if you want a lightweight approach. The enrichment pipeline stays the same; you just change the final destination.

Is scraping LinkedIn comments against their terms of service?

Apify handles the data collection through their compliant infrastructure. The data accessed is publicly visible comment information. That said, always review LinkedIn’s current terms and your local data protection regulations before using any automation at scale.

What percentage of profiles actually have an email?

Apify’s LinkedIn Profile Scraper typically discovers email addresses for 40 to 60% of profiles, depending on the industry and how complete people’s profiles are. B2B professionals in tech and marketing tend to have higher hit rates.

Get the LinkedIn Commenters to HubSpot CRM Template

Skip the 40-minute build. Get the pre-built workflow JSON, step-by-step setup guide, and credentials walkthrough, import it into n8n and start capturing leads in under 10 minutes.

Get the Template →

Instant download · Works on n8n Cloud and self-hosted

What’s Next?

  • Add a Slack notification: get a message in your team channel every time a new contact is added to HubSpot, with their name, company, and the post they commented on.
  • Tag contacts by post topic: use a Set node to add a custom HubSpot property that records which post the contact engaged with, so your sales team knows what they’re interested in.
  • Chain with an email sequence: connect HubSpot to your email tool (Mailchimp, SendGrid, or HubSpot’s own sequences) to automatically send a welcome email to new contacts.
  • Schedule it to run on multiple posts: replace the Form Trigger with a Schedule Trigger and a list of post URLs in a Google Sheet to process several posts on autopilot.
n8n
LinkedIn
HubSpot
Apify
CRM
Lead Generation
Contact Enrichment
automation

How to Auto-Create HubSpot Contacts from Typeform Submissions with n8n

New to n8n? Start with our step-by-step setup guide, then come back to build this workflow.

Every Typeform submission sitting in a spreadsheet instead of your CRM is a lead going cold. Someone just told you their name, email, company, and job title, and that data is gathering dust in a tab you’ll check “later.” Meanwhile, your sales team has no idea the lead exists. This workflow fixes that permanently. You’ll build an n8n automation that catches every Typeform submission the moment it arrives, maps the fields to HubSpot contact properties, checks whether the person already exists in your CRM, and either creates a new contact or updates the existing one, all without you lifting a finger.

Prefer to skip the setup? Grab the ready-made template → and be up and running in under 10 minutes.

What You’ll Build

  1. A visitor fills out your Typeform (contact form, demo request, lead magnet, whatever you use).
  2. n8n instantly receives the submission via webhook and extracts the relevant fields: email, first name, last name, company, phone, and job title.
  3. The workflow searches HubSpot to check if a contact with that email already exists.
  4. If the contact exists, their record gets updated with the latest information. If they’re new, a fresh contact is created in HubSpot with all the form data.
  5. Your sales team sees the new or updated contact in HubSpot immediately: no manual entry, no lag, no missed leads.

How It Works: The Big Picture

The entire workflow runs as a single chain with one decision branch. Here’s the full flow at a glance:

┌──────────────────────────────────────────────────────────────────────────────┐
│  AUTO-CREATE HUBSPOT CONTACTS FROM TYPEFORM                                 │
│                                                                              │
│  [Typeform Trigger] → [Map Fields] → [Check If Email Exists] → [Contact?]  │
│                                                          ↓ Yes      ↓ No    │
│                                              [Update Contact]  [Create New] │
└──────────────────────────────────────────────────────────────────────────────┘

What You’ll Need

  • n8n instance: self-hosted or n8n Cloud (any plan)
  • Typeform account: free tier works, but you need at least one published form
  • HubSpot account: free CRM tier is enough; you’ll need an OAuth2 app or private app token
  • 5 minutes if you use the template, or about 25 to 30 minutes building from scratch

Estimated build time: 25 to 30 minutes from scratch, or under 10 minutes with the template.

Building the Workflow: Step by Step

1 Typeform Trigger (Typeform Trigger Node)

This node listens for new Typeform submissions in real time. Every time someone hits “Submit” on your form, n8n receives the full response payload instantly.

  1. In n8n, add a new node and search for Typeform Trigger.
  2. Connect your Typeform credential (API token, see the Credentials Guide for how to get one).
  3. In the Form dropdown, select the form you want to connect.
  4. Click Listen for Test Event, then go to your Typeform and submit a test response.

After the test submission, you’ll see the raw data from Typeform:

{"What is your email address?":"james.carter@gmail.com","What is your first name?":"James","What is your last name?":"Carter","What company do you work for?":"Ridgeline Analytics","What is your phone number?":"(555) 867-5309","What is your job title?":"VP of Marketing","submittedAt":"2026-04-07T14:23:00.000Z"}
💡

Tip: Typeform uses the full question text as the field key. If you rename a question later, update the field references in the Map Fields node too.

2 Map Fields (Set Node)

Typeform’s field names are long question strings. This Set node transforms them into clean field names that match HubSpot’s default properties.

Output Field Expression Purpose
email {{ $json['What is your email address?'] }} Primary identifier for HubSpot
firstname {{ $json['What is your first name?'] }} Contact first name
lastname {{ $json['What is your last name?'] }} Contact last name
company {{ $json['What company do you work for?'] }} Company association
phone {{ $json['What is your phone number?'] }} Phone number
jobtitle {{ $json['What is your job title?'] }} Job title property
lead_source Typeform (static) Tracks lead origin
💡

Tip: If your Typeform uses different question text, update the expressions to match. The output field names should stay the same, they match HubSpot’s defaults.

3 Check If Email Exists (HubSpot Node, Search)

Before creating a contact, this node searches HubSpot by email address to check for duplicates.

  1. Add a HubSpot node. Set Resource to Contact, Operation to Search.
  2. Add a filter: Property = email, Operator = Equal, Value = {{ $json.email }}

4 Contact Exists? (IF Node)

Routes the flow: if {{ $json.total }} is greater than 0 → update the existing contact. Otherwise → create a new one.

📌

The IF node’s output 0 (true) goes to Update, output 1 (false) goes to Create. Don’t mix them up.

5 Update Existing Contact (HubSpot Node, Update)

Connected to the true branch. Uses {{ $('Check If Email Exists').item.json.results[0].id }} as the Contact ID, and pulls field values from the Map Fields node.

6 Create New Contact (HubSpot Node, Create)

Connected to the false branch. Sets the email and all additional fields from the Map Fields node to create a fresh HubSpot contact.

Full System Flow

┌────────────────────────────────────────────────────────────────────────────────────────┐
│  VISITOR SUBMITS TYPEFORM                                                              │
│       ↓                                                                                │
│  [Typeform Trigger] ─── receives webhook payload ──→ [Map Fields]                     │
│                                                          ↓                             │
│                                               [Check If Email Exists]                  │
│                                                          ↓                             │
│                                                  [Contact Exists?]                     │
│                                                    ↓ YES    ↓ NO                       │
│                                           [Update Contact] [Create Contact]            │
└────────────────────────────────────────────────────────────────────────────────────────┘

Testing Your Workflow

  1. Activate the workflow in n8n by toggling the Active switch.
  2. Submit a test form response in Typeform using a test email not in HubSpot yet.
  3. Check HubSpot: you should see a new contact with all fields populated.
  4. Submit again with the same email but different company name.
  5. Check HubSpot again: the contact should show the updated company.
Problem Likely Cause Fix
Workflow never triggers Webhook not registered Deactivate and reactivate the workflow. Verify webhook in Typeform settings.
HubSpot 401 error Expired OAuth token Re-authorize your HubSpot credential. Check scopes include contacts read+write.
Empty fields in HubSpot Question text mismatch Compare Typeform question keys with Map Fields expressions exactly.
Duplicate contacts IF node misconfigured Verify condition checks $json.total > 0. True → Update, False → Create.

Frequently Asked Questions

Can I use this with HubSpot’s free CRM?

Yes. The free CRM includes full contact management and API access. Default fields like email, name, company, and phone are all available on the free plan.

What if the submission is missing some fields?

The workflow still runs and HubSpot leaves empty fields blank. It won’t overwrite existing data with empty values on updates.

Can I auto-add contacts to a HubSpot list or deal?

Yes, add a HubSpot node after Create New Contact set to “Add Contact to List” or “Create Deal”. The template covers core contact creation; lists and deals are easy extensions.

Does this work with Typeform’s free plan?

Yes, with the 10 responses/month limit. Webhooks work on all Typeform plans including free.

What if I use Google Forms or Tally instead?

Swap the Typeform Trigger for a Google Forms Trigger or Webhook node. Update the Map Fields expressions for the new payload. The HubSpot side stays identical.

Will this slow down my Typeform?

No. Typeform sends the webhook after submission is complete. The respondent sees the Thank You screen immediately. n8n processes asynchronously.

Get the HubSpot + Typeform Template

Skip the 30-minute build. Get the complete workflow JSON, setup guide, and credentials walkthrough: import into n8n and be live in under 10 minutes.

Get the Template →

Instant download · Works on n8n Cloud and self-hosted

What’s Next?

  • Auto-assign leads to sales reps: round-robin assignment based on territory or workload.
  • Send a Slack notification: ping #new-leads when a contact is created.
  • Enroll in a HubSpot sequence: automated welcome email within minutes.
  • Score leads with AI: use OpenAI to evaluate company and job title before CRM entry.
n8n
HubSpot
Typeform
CRM
lead capture
automation
no-code