How to Build a WhatsApp AI Customer Support Bot with n8n

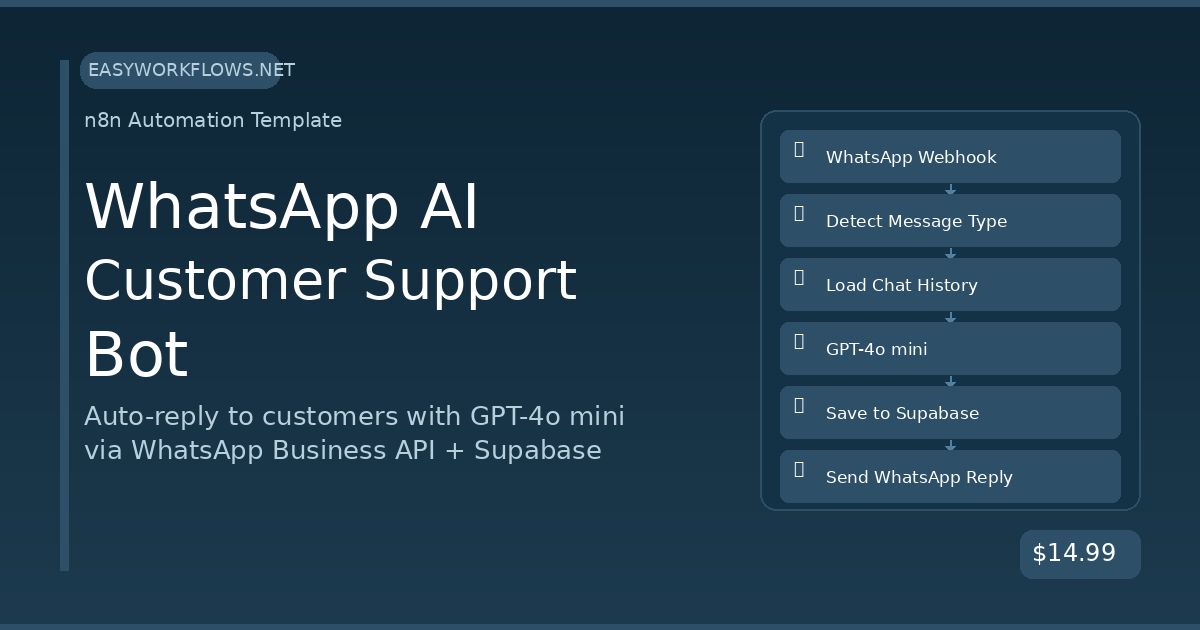
Running customer support 24/7 without burning out your team is one of the hardest operational problems a growing business faces. Customers expect instant replies on WhatsApp — but hiring a support agent for every timezone is expensive and unsustainable. This n8n workflow connects WhatsApp Business API, OpenAI’s GPT-4o mini, and Supabase to build a support bot that reads conversation history, generates intelligent replies, and responds in under 3 seconds — around the clock, automatically.

Prefer to skip the setup? Grab the ready-made template → and be up and running in under 10 minutes.

What You’ll Build

  1. A customer sends a WhatsApp message to your business number at any hour.
  2. n8n receives the message via webhook and filters out non-text events like delivery receipts.
  3. The workflow fetches the customer’s last 10 messages from Supabase so the AI has full context.
  4. OpenAI GPT-4o mini reads the conversation history and generates a helpful, on-brand reply.
  5. The exchange is saved to Supabase and the reply is sent back to the customer — typically within 2–3 seconds.

How It Works — The Big Picture

The workflow is a single pipeline triggered by Meta’s WhatsApp Business webhook. Every incoming message flows through a filter, a context-retrieval step, an AI generation step, and two write operations — one to store the conversation and one to deliver the reply.

┌──────────────────────────────────────────────────────────┐
│  WHATSAPP AI CUSTOMER SUPPORT BOT                        │
│                                                          │
│  [WhatsApp Webhook]                                      │
│         |                                                │
│         v                                                │
│  [Is Text Message?] --(No)--> [Return 200 OK]            │
│         | (Yes)                                          │
│         v                                                │
│  [Extract Message Data]                                  │
│         |                                                │
│         v                                                │
│  [Get History · Supabase]                                │
│         |                                                │
│         v                                                │
│  [Build AI Messages]                                     │
│         |                                                │
│         v                                                │
│  [OpenAI Chat Completion]                                │
│         |                                                │
│         v                                                │
│  [Store Conversation · Supabase]                         │
│         |                                                │
│         v                                                │
│  [Send WhatsApp Reply]                                   │
│         |                                                │
│         v                                                │
│  [Return 200 OK]                                         │
└──────────────────────────────────────────────────────────┘
  

What You’ll Need

  • n8n instance — Cloud or self-hosted (v1.0 or higher)
  • Meta Developer Account — with a WhatsApp Business App and a phone number configured (test numbers are free)
  • OpenAI API key — GPT-4o mini costs roughly $0.0002 per typical support message
  • Supabase account — the free tier handles thousands of daily conversations
  • One conversations table in Supabase (SQL provided below)

Estimated build time: 45–60 minutes from scratch, or under 10 minutes with the template.

Part 1 — Building the Workflow Step by Step

1 WhatsApp Webhook (Webhook node)

Meta’s WhatsApp Business API delivers every incoming message to a URL you specify — this node is that URL. When a customer texts your business, Meta makes a POST request here with the full message payload.

Configure the node:

  1. Set HTTP Method to POST
  2. Set Path to whatsapp-support
  3. Set Response Mode to “Using ‘Respond to Webhook’ Node” — this lets the pipeline finish before sending the 200 OK
  4. Copy the production webhook URL (e.g., https://your-n8n.com/webhook/whatsapp-support) and paste it into your Meta App’s WhatsApp → Configuration → Webhook URL field

Here’s what a typical incoming payload looks like:

{
  "entry": [{
    "changes": [{
      "value": {
        "metadata": { "phone_number_id": "123456789012345" },
        "messages": [{
          "id": "wamid.HBgNMTU1NTEyMzQ1Njc4",
          "from": "15551234567",
          "type": "text",
          "text": { "body": "Hi, where is my order #1042?" }
        }]
      }
    }]
  }]
}
💡

Tip: Meta also sends webhook events for status updates (delivered, read). These won’t have a messages array — which is exactly why the next step filters them out.

2 Is Text Message? (IF node)

Not every webhook event is a customer message. Delivery confirmations and read receipts arrive through the same endpoint without a messages[0] object. This IF node gates those out to avoid errors downstream.

Configure the condition:

  1. Left Value: {{ $json.entry[0].changes[0].value.messages[0].type }}
  2. Operation: equals
  3. Right Value: text

The True branch continues to message processing. The False branch connects to a simple Respond to Webhook node that returns 200 OK immediately — keeping Meta happy without doing unnecessary work.

💡

Tip: Want to handle voice notes or images too? Add additional OR conditions for audio or image message types and route them to separate processing branches.

3 Extract Message Data (Set node)

Meta’s webhook payload is deeply nested. This Set node flattens the fields we need into a clean, easy-to-reference object so every downstream node can access data without long expression chains.

Configure these field assignments:

Field Name n8n Expression
phone ={{ $json.entry[0].changes[0].value.messages[0].from }}
message ={{ $json.entry[0].changes[0].value.messages[0].text.body }}
messageId ={{ $json.entry[0].changes[0].value.messages[0].id }}
timestamp ={{ $now.toISO() }}
businessPhoneId ={{ $json.entry[0].changes[0].value.metadata.phone_number_id }}

After this node, the data looks like:

{
  "phone": "15551234567",
  "message": "Hi, where is my order #1042?",
  "messageId": "wamid.HBgNMTU1NTEyMzQ1Njc4",
  "timestamp": "2026-04-05T14:32:17.000Z",
  "businessPhoneId": "123456789012345"
}

4 Get Conversation History (HTTP Request → Supabase)

Before calling OpenAI, we need the customer’s conversation history so the AI can understand context — was this their first message? Did they already explain their issue? This node queries Supabase’s REST API for the last 10 messages from this phone number.

Configure the HTTP Request node:

  1. Method: GET
  2. URL: https://YOUR_SUPABASE_PROJECT_REF.supabase.co/rest/v1/conversations
  3. Add header apikey: your Supabase anon/public key
  4. Add header Authorization: Bearer YOUR_SUPABASE_ANON_KEY
  5. Add query param phone: eq.{{ $('Extract Message Data').item.json.phone }}
  6. Add query param order: created_at.desc
  7. Add query param limit: 10

Returns an array of up to 10 rows — or an empty array for a brand-new customer, which is handled gracefully in the next step.

💡

Tip: The limit=10 means the AI sees the last 5 exchanges (10 messages: 5 user, 5 assistant). Increase this for more context — but be aware that a larger history window increases your OpenAI token cost slightly.

5 Build AI Messages (Code node)

This is the brain of the operation. The Code node takes the Supabase history array, reverses it to chronological order, prepends a system prompt, and appends the current customer message — producing the exact messages array the OpenAI Chat Completions API expects.

const history = $input.all();
const currentMessage = $('Extract Message Data').item.json.message;
const phone = $('Extract Message Data').item.json.phone;
const businessPhoneId = $('Extract Message Data').item.json.businessPhoneId;

// System prompt defines the bot's personality and knowledge
const messages = [
  {
    role: 'system',
    content: `You are a friendly and professional customer support assistant
for our online store. Be concise, empathetic, and helpful.
Answer questions about orders, shipping, returns, and products.
If you cannot resolve an issue, ask the customer to email
support@yourstore.com with their order number.
Keep replies under 150 words.`
  }
];

// Add history in chronological order (we fetched desc, so reverse)
const sorted = history.map(i => i.json)
  .filter(m => m.role && m.content)
  .reverse();
for (const msg of sorted) {
  messages.push({ role: msg.role, content: msg.content });
}

// Add the current incoming message
messages.push({ role: 'user', content: currentMessage });

return [{ json: { messages, currentMessage, phone, businessPhoneId } }];
💡

Tip: The system prompt is where you make this bot yours. Add specific product return policies, shipping timeframes, or even a list of FAQ answers. The more specific the prompt, the more accurate the responses — and the fewer handoffs to human agents.

6 OpenAI Chat Completion (HTTP Request → OpenAI)

Sends the complete conversation context to GPT-4o mini and receives a natural, contextual reply. Using an HTTP Request node (rather than the OpenAI node) gives you full control over the messages array format.

Configure the node:

  1. Method: POST
  2. URL: https://api.openai.com/v1/chat/completions
  3. Header Authorization: Bearer YOUR_OPENAI_API_KEY
  4. Header Content-Type: application/json
  5. Body (JSON expression): ={{ { "model": "gpt-4o-mini", "messages": $json.messages, "max_tokens": 500, "temperature": 0.7 } }}

The response object looks like this:

{
  "choices": [{
    "message": {
      "role": "assistant",
      "content": "Hi! I'd be happy to look into order #1042 for you. Could you confirm the email address on the order so I can pull it up?"
    },
    "finish_reason": "stop"
  }],
  "usage": { "total_tokens": 312 }
}

Access the reply downstream with $json.choices[0].message.content.

💡

Tip: GPT-4o mini costs roughly $0.15 per million input tokens. A typical 10-message support conversation uses around 800 tokens total — under $0.0002. Even at 10,000 conversations per month, your OpenAI bill stays under $2.

7 Store Conversation (HTTP Request → Supabase)

Saves both the customer’s message and the AI’s reply to Supabase in a single bulk insert. This is what makes the bot remember past conversations — every message is persisted for future context retrieval.

Configure the node:

  1. Method: POST
  2. URL: https://YOUR_SUPABASE_PROJECT_REF.supabase.co/rest/v1/conversations
  3. Headers: same apikey and Authorization as Step 4, plus Content-Type: application/json and Prefer: return=minimal
  4. Body: a JSON array with two objects — the user message and the assistant reply
=[
  {
    "phone": "={{ $('Build AI Messages').item.json.phone }}",
    "role": "user",
    "content": "={{ $('Build AI Messages').item.json.currentMessage }}"
  },
  {
    "phone": "={{ $('Build AI Messages').item.json.phone }}",
    "role": "assistant",
    "content": "={{ $json.choices[0].message.content }}"
  }
]
💡

Tip: Supabase supports array inserts in a single POST — both rows land in one API call, keeping your workflow fast.

8 Send WhatsApp Reply (HTTP Request → Meta Graph API)

Delivers the AI-generated response to the customer’s WhatsApp number using Meta’s Cloud API. The businessPhoneId you extracted in Step 3 identifies which business phone number to send from.

Configure the node:

  1. Method: POST
  2. URL: =https://graph.facebook.com/v19.0/{{ $('Build AI Messages').item.json.businessPhoneId }}/messages
  3. Header Authorization: Bearer YOUR_WHATSAPP_ACCESS_TOKEN
  4. Body (JSON expression):
={
  "messaging_product": "whatsapp",
  "to": "={{ $('Build AI Messages').item.json.phone }}",
  "type": "text",
  "text": {
    "body": "={{ $('OpenAI Chat Completion').item.json.choices[0].message.content }}"
  }
}
💡

Tip: Phone numbers must be in international format without the + prefix — e.g., 15551234567 not +1-555-123-4567. The value you extracted from the webhook payload is already in the correct format.

9 Return 200 OK (Respond to Webhook node)

Meta requires your webhook endpoint to respond with HTTP 200 within 20 seconds. This final node sends that acknowledgment after the full pipeline completes successfully.

Configure: Respond With = JSON, Response Body = {"status": "ok"}. Also wire the False branch from Step 2 (“Ignore Non-Text”) to a separate instance of this node so non-text webhook events also get their 200 OK immediately.

The Data Structure

The entire conversation memory lives in a single Supabase table. Create it by running this SQL in the Supabase dashboard under SQL Editor:

CREATE TABLE conversations (
  id          bigint primary key generated always as identity,
  phone       text        not null,
  role        text        not null check (role in ('user', 'assistant')),
  content     text        not null,
  created_at  timestamptz not null default now()
);

CREATE INDEX idx_conversations_phone      ON conversations(phone);
CREATE INDEX idx_conversations_created_at ON conversations(created_at);
Column Type Example Description
id bigint 42 Auto-incrementing primary key
phone text 15551234567 Customer WhatsApp number (no + prefix)
role text user Either user or assistant
content text Hi, where is my order #1042? Full message text
created_at timestamptz 2026-04-05T14:32:17Z Auto-set on insert

Sample rows showing a two-turn conversation:

id phone role content created_at
1 15551234567 user Hi, where is my order #1042? 2026-04-05T14:32:17Z
2 15551234567 assistant Hi! I’d be happy to help. Could you confirm the email on the order? 2026-04-05T14:32:19Z
3 15551234567 user Sure, it’s james.carter@gmail.com 2026-04-05T14:35:01Z
📌

Important: The table name must be exactly conversations and column names must match the workflow expressions exactly. Column names are case-sensitive in Supabase’s REST API.

Full System Flow

Customer's WhatsApp
       | sends "Hi, where is order #1042?"
       v
[Meta WhatsApp Business API]
       | POST /webhook/whatsapp-support
       v
[n8n: WhatsApp Webhook]
       |
       v
[Is Text Message?] --(No: status update)--> [Return 200 OK]
       | (Yes)
       v
[Extract Message Data]
  phone=15551234567 | message="Hi, where is order #1042?" | businessPhoneId=12345
       |
       v
[Supabase: GET /conversations?phone=eq.15551234567&order=created_at.desc&limit=10]
  Returns: [] (first-time customer)
       |
       v
[Build AI Messages]
  [ {role:system, content:"You are a helpful support agent..."} ,
    {role:user, content:"Hi, where is order #1042?"} ]
       |
       v
[OpenAI GPT-4o mini: /v1/chat/completions]
  Returns: "Hi! I'd be happy to look into order #1042 for you..."
       |
       v
[Supabase: POST /conversations (bulk insert 2 rows)]
  Stores user msg + assistant reply
       |
       v
[Meta Graph API: POST /messages]
  Sends reply to +15551234567 via WhatsApp
       |
       v
Customer receives reply in <3 seconds
       |
       v
[Return 200 OK to Meta]
  

Testing Your Workflow

  1. In your Meta Developer portal, go to WhatsApp → API Setup and use the test “From” number to send a message to your personal WhatsApp number (which you’ve added as a test recipient).
  2. Open n8n and watch the Executions panel — a new execution should appear within a second.
  3. Verify the IF node routed to the True branch and all nodes show green checkmarks.
  4. Check your Supabase conversations table — two new rows should appear (role=user and role=assistant).
  5. Check your WhatsApp — the AI reply should have arrived.
Problem Likely Cause Fix
Webhook never triggers URL not saved in Meta portal Go to Meta App → WhatsApp → Configuration → paste the n8n production webhook URL and click Verify & Save
403 from Supabase Wrong API key or missing RLS policy Use the anon/public key (not service role), and in Supabase enable Row Level Security but add a policy allowing insert/select
400 from WhatsApp API Phone number format wrong Numbers must be international digits only, no + or dashes — e.g., 15551234567
OpenAI 401 Unauthorized Expired or mistyped API key Regenerate your key at platform.openai.com and update the Authorization header value
Bot has no memory between sessions Supabase table name or column name mismatch Check that the table is named conversations and columns are phone, role, content, created_at — exact case

Frequently Asked Questions

Do I need a paid WhatsApp Business account to use this?

You need a Meta Business Account, but not a paid subscription. WhatsApp’s Cloud API (the free tier) includes 1,000 free service conversations per month. After that, pricing is per-conversation — typically $0.01–$0.05 depending on your country. You can start testing for free using Meta’s developer test credentials before connecting a real business number.

How many messages back does the bot remember?

By default, the workflow fetches the last 10 messages (5 exchanges). Change the limit=10 query parameter in Step 4 to any number you prefer. Higher limits give the AI more context but slightly increase your OpenAI token usage — still very inexpensive at GPT-4o mini rates.

Can I customize the AI’s tone and knowledge?

Absolutely — that’s the whole point of the system prompt in Step 5. Edit the system message content in the Build AI Messages Code node to reflect your brand voice, product catalog details, return policies, or even specific FAQ answers. The more specific the prompt, the fewer cases the bot will escalate to a human.

What happens if OpenAI is temporarily unavailable?

n8n will mark the execution as an error and the customer won’t receive a reply. To handle this gracefully, add an n8n Error Trigger workflow that catches failures and sends a fallback WhatsApp message: “We’re experiencing a brief technical issue — a team member will respond within 1 hour.” You can also enable n8n’s built-in retry logic on the OpenAI HTTP Request node.

Can I hand off to a human agent when needed?

Yes. In the Build AI Messages Code node, add logic to check whether the incoming message contains phrases like “speak to a human” or “escalate.” If detected, replace the OpenAI step with a Slack message or email notification to your support team, who then reply manually. The conversation history in Supabase gives them full context immediately.

Does this work with multiple WhatsApp phone numbers?

Yes — because the businessPhoneId is pulled from the incoming webhook payload, the workflow dynamically uses the correct sending number for each incoming message. Link multiple WhatsApp numbers to your Meta app and a single n8n workflow handles all of them without any changes.

🚀 Get the WhatsApp AI Customer Support Bot Template

You now have everything you need to deploy a 24/7 WhatsApp AI support bot with full conversation memory. The template includes the ready-to-import workflow JSON, a step-by-step Setup Guide, and a Credentials Guide for WhatsApp Business API, OpenAI, and Supabase — so you skip the hours of API docs and go straight to testing.

Get the Template →

Instant download · Works on n8n Cloud and self-hosted

What’s Next?

  • Add order lookup: Connect to your Shopify or WooCommerce store so the bot can query real-time order statuses by order number.
  • Detect frustrated customers: Add a sentiment analysis step — if the AI detects frustration or repeated complaints, automatically route to a Slack alert for a human to jump in.
  • Go multilingual: Add a language detection step before the OpenAI call and include the detected language in the system prompt so the bot replies in the customer’s language automatically.
  • Build a weekly digest: Use an n8n Schedule trigger to query Supabase for weekly conversation summaries and email them to your team every Monday morning.
n8n
WhatsApp
OpenAI
Supabase
customer support
chatbot
automation
GPT-4o

How to Auto-Process Stripe Payments and Log to Google Sheets with n8n

Every Stripe payment you receive can be automatically logged to Google Sheets in real time — no manual exports, no missed transactions, no more downloading CSVs at the end of the month. With this n8n workflow, the moment a payment succeeds in Stripe, a new row appears in your spreadsheet with the customer name, email, amount, description, and payment method already filled in. If the payment is above a threshold you set, you’ll get an email alert too.

Prefer to skip the setup? Grab the ready-made template → and be up and running in under 10 minutes.

What You’ll Build

  1. A Stripe webhook listener that fires the moment a payment succeeds — no polling, no delays.
  2. A data formatting step that converts Stripe’s raw event data (amounts in cents, Unix timestamps) into clean, human-readable fields.
  3. An automatic Google Sheets append that logs every payment as a new row in a structured ledger.
  4. A conditional check that sends you an email notification for any payment over $500 so you never miss a big order.

How It Works — The Big Picture

n8n listens for Stripe’s payment_intent.succeeded webhook event. Each time a payment completes, the workflow wakes up, reformats the data into tidy fields, writes a row to your Google Sheet, then checks whether the amount qualifies as high-value — sending an alert email if so.

+----------------------------------------------------------------+
|  AUTO-PROCESS STRIPE PAYMENTS to GOOGLE SHEETS                 |
|                                                                |
|  [Stripe Trigger]                                              |
|        |  payment_intent.succeeded fires                       |
|        v                                                       |
|  [Format Payment Data]                                         |
|        |  cents-to-dollars, Unix-to-date, map fields           |
|        v                                                       |
|  [Log to Google Sheets]                                        |
|        |  append row: ID, date, name, email, amount            |
|        v                                                       |
|  [Check High Value Payment]                                    |
|        | amount >= $500?                                       |
|       YES -------------------------------------------+         |
|        |                                             v         |
|       NO (end)                        [Send High Value Alert]  |
|                                          email notification    |
+----------------------------------------------------------------+
  

What You’ll Need

  • An n8n instance — cloud or self-hosted (n8n.io; free tier works)
  • A Stripe account with at least one product or payment link set up
  • A Google account with Google Sheets access (free)
  • An SMTP account for alert emails — Gmail App Password, SendGrid, or any SMTP provider (optional but recommended)
  • A Google Sheet with the correct column headers (details in the Data Structure section below)

Estimated build time: 35–50 minutes from scratch, or under 10 minutes with the template.

Building the Workflow — Step by Step

1 Stripe Trigger (stripeTrigger)

This node creates a webhook endpoint in n8n that Stripe calls whenever a payment event fires. It’s the entry point for the entire workflow — everything else is downstream of this single trigger.

To configure it:

  1. In n8n, add a new node and search for Stripe Trigger.
  2. Connect your Stripe credential. If you don’t have one yet, click Create new, paste your Stripe Restricted API key (with webhook read permissions), and save.
  3. Under Events, select payment_intent.succeeded. This fires every time a payment is fully authorized and captured.
  4. Save the workflow. n8n will display a webhook URL — copy it.
  5. In your Stripe dashboard, go to Developers → Webhooks → Add endpoint, paste the n8n URL, and select the payment_intent.succeeded event.
💡

Tip: Use Stripe’s Send test webhook button right after adding the endpoint to confirm n8n receives it. You’ll see the raw payload in n8n’s execution log — this is what the next node will process.

A typical Stripe payment_intent.succeeded payload looks like this:

{
  "id": "pi_3QxT4kABCDEFGHIJ12345678",
  "object": "payment_intent",
  "amount": 4999,
  "currency": "usd",
  "status": "succeeded",
  "description": "Order #1042 — Premium Plan",
  "receipt_email": "emily.rodriguez@gmail.com",
  "billing_details": {
    "name": "Emily Rodriguez",
    "email": "emily.rodriguez@gmail.com"
  },
  "created": 1743865200,
  "payment_method_types": ["card"]
}

Notice that amount is in cents (4999 = $49.99) and created is a Unix timestamp. The next node handles the conversion.

2 Format Payment Data (Set)

The raw Stripe payload is useful, but messy. This Set node maps the data into clean, consistently named fields that Google Sheets can receive directly — no JavaScript required inside the sheet.

Add a Set node connected to the Stripe Trigger, then add these fields in Manual mapping mode:

Field Name n8n Expression Result Example
payment_id ={{ $json.id }} pi_3QxT4kABC…
customer_name ={{ $json.billing_details?.name || 'Unknown' }} Emily Rodriguez
customer_email ={{ $json.receipt_email || 'N/A' }} emily.rodriguez@gmail.com
amount_usd ={{ ($json.amount / 100).toFixed(2) }} 49.99
currency ={{ $json.currency.toUpperCase() }} USD
description ={{ $json.description || 'Payment' }} Order #1042 — Premium Plan
status ={{ $json.status }} succeeded
payment_date ={{ new Date($json.created * 1000).toLocaleDateString('en-US') }} 4/5/2026
payment_method ={{ $json.payment_method_types?.[0] || 'card' }} card
💡

Tip: The ?.name optional chaining prevents the workflow from erroring when billing_details is null — which happens with some payment types like bank transfers. The || 'Unknown' fallback ensures your sheet always gets a value.

After this node, data looks like this:

{
  "payment_id": "pi_3QxT4kABCDEFGHIJ12345678",
  "customer_name": "Emily Rodriguez",
  "customer_email": "emily.rodriguez@gmail.com",
  "amount_usd": "49.99",
  "currency": "USD",
  "description": "Order #1042 — Premium Plan",
  "status": "succeeded",
  "payment_date": "4/5/2026",
  "payment_method": "card"
}

3 Log to Google Sheets (googleSheets)

This node appends a new row to your Payments sheet every time a payment is processed. It uses the Append or Update operation — if a payment ID already exists (e.g., a duplicate webhook retry), it updates the existing row instead of creating a duplicate.

  1. Add a Google Sheets node and connect your Google OAuth2 credential.
  2. Set Operation to Append or Update.
  3. Paste your Spreadsheet ID (the long string in your Google Sheet’s URL).
  4. Set Sheet Name to Payments.
  5. Under Columns, switch to Define below and map each column header to its expression from the previous Set node (e.g., Payment ID={{ $json.payment_id }}).
  6. Set Matching Columns to Payment ID so duplicate events update instead of duplicate.
📌

Note: The column headers in your Google Sheet must match exactly — including capitalization and spacing. If you name the column “payment id” (lowercase) but the node sends “Payment ID”, the data will land in the wrong column or create a new one.

4 Check High Value Payment (IF)

After logging, the workflow checks whether the payment amount is $500 or more. Payments that clear this threshold go down the true branch to trigger an email alert; all others exit quietly.

  1. Add an IF node connected to the Google Sheets node.
  2. Set the Value 1 expression to ={{ parseFloat($('Format Payment Data').item.json.amount_usd) }}.
  3. Set Operation to Greater than or equal to.
  4. Set Value 2 to 500.
💡

Tip: You can change the threshold to any amount that makes sense for your business. A SaaS charging $29/month might alert at $200; an agency billing clients might only care about payments above $2,000.

5 Send High Value Alert (emailSend)

When a payment exceeds the threshold, this node fires off an email with all the relevant details so you can follow up personally, flag the account, or just celebrate a big win.

  1. Add a Send Email node to the true output of the IF node.
  2. Connect your SMTP credential (Gmail App Password works great; see the Credentials Guide).
  3. Set From to your sender address and To to your notification email.
  4. Set Subject to: =High-Value Payment: ${{ $('Format Payment Data').item.json.amount_usd }} from {{ $('Format Payment Data').item.json.customer_name }}
  5. Add a plain-text or HTML body with all the payment fields from the Format node.

A sample alert email body:

High-Value Payment Received

Customer: James Carter
Email: james.carter@gmail.com
Amount: $1,250.00
Description: Order #2089 — Enterprise Annual License
Date: 4/5/2026
Payment ID: pi_3QxT4kABCDEFGHIJ12345678

The Data Structure

Your Google Sheet needs a tab named Payments with these column headers in row 1 (exact capitalization matters):

Column Header Type Example Description
Payment ID Text pi_3QxT4kABC… Stripe’s unique payment intent ID — used to deduplicate retried webhooks
Date Text 4/5/2026 US-formatted payment date derived from Stripe’s Unix timestamp
Customer Name Text Emily Rodriguez Billing name from Stripe; falls back to “Unknown” if not provided
Customer Email Text emily.rodriguez@gmail.com Receipt email address; falls back to “N/A” if absent
Amount (USD) Number 49.99 Payment amount in dollars (converted from cents)
Currency Text USD ISO currency code, uppercased
Description Text Order #1042 — Premium Plan Stripe payment description or product name
Status Text succeeded Payment status from Stripe (always “succeeded” for this trigger)
Payment Method Text card Payment method type (card, bank_transfer, etc.)

Here’s what a few rows look like once data starts flowing:

Payment ID Date Customer Name Amount (USD) Status
pi_3QxT4k… 4/5/2026 Emily Rodriguez 49.99 succeeded
pi_3QxT7m… 4/5/2026 James Carter 1250.00 succeeded
pi_3QxV2n… 4/5/2026 Sarah Thompson 29.00 succeeded
📌

Create the sheet and add the column headers before activating the workflow. n8n’s Google Sheets node expects the headers to already exist in row 1 — it doesn’t create them automatically.

Full System Flow

  Customer Pays via Stripe
          |
          v
  Stripe fires payment_intent.succeeded
          |
          v
  +----------------------------+
  |   n8n Stripe Trigger       |  <-- webhook endpoint registered in Stripe dashboard
  +------------+---------------+
               | raw Stripe payload (cents, Unix timestamps)
               v
  +----------------------------+
  |  Format Payment Data       |  <-- Set node: converts & maps fields
  +------------+---------------+
               | clean fields: name, email, $amount, date
               v
  +----------------------------+
  |  Log to Google Sheets      |  <-- appends or updates row by Payment ID
  +------------+---------------+
               | row written OK
               v
  +----------------------------+
  | Check High Value Payment   |  <-- IF: amount_usd >= 500?
  +------+-------------+-------+
        YES            NO
         |              |
         v             end
  +-----------------+
  | Send Alert Email|  <-- SMTP: notify you of big payment
  +-----------------+
  

Testing Your Workflow

Before going live, test with Stripe’s built-in test mode:

  1. In Stripe dashboard, switch to Test mode (toggle in the top-left).
  2. Go to Developers → Webhooks → select your endpoint → click Send test webhook → choose payment_intent.succeeded.
  3. Open n8n’s execution log — you should see the workflow trigger and all 5 nodes complete successfully.
  4. Check your Google Sheet — a new row should appear with the test payment data.
  5. To test the high-value alert, temporarily lower the threshold to $1 in the IF node, trigger another test, and check your inbox.
Problem Likely Cause Fix
Workflow doesn’t trigger at all Webhook URL not registered in Stripe, or n8n not publicly reachable Check Stripe → Webhooks; for self-hosted n8n, ensure your instance has a public URL (not localhost)
Google Sheets shows data in wrong columns Column header mismatch Check that headers in row 1 of your sheet exactly match the field names in the Set node (case-sensitive)
Amount appears as “NaN” or empty $json.amount is undefined for some event types Confirm the trigger is set to payment_intent.succeeded not charge.succeeded
Duplicate rows in Google Sheets Stripe retries the webhook if n8n doesn’t return 200 fast enough Ensure your Matching Columns is set to “Payment ID” in the Google Sheets node
High-value alert email not arriving SMTP credential invalid, or spam filter Test SMTP connection in n8n; check spam folder; use an App Password for Gmail

Frequently Asked Questions

Does this work with Stripe Checkout, Payment Links, and direct API charges?

Yes — the payment_intent.succeeded event fires for all of them. Whether the payment comes from a Stripe Checkout session, a Payment Link, a subscription renewal, or a manual API charge, a PaymentIntent is always created under the hood and this workflow will catch it.

What happens if Stripe sends the same webhook twice (retry)?

Stripe retries failed webhooks up to 3 days. Because the Google Sheets node is configured with Append or Update and Payment ID as the matching column, a duplicate event will update the existing row instead of creating a second one. Your ledger stays clean.

Can I log refunds or failed payments too?

Absolutely. In the Stripe Trigger node, add additional events: charge.refunded for refunds and payment_intent.payment_failed for failures. You can add an IF or Switch node after the trigger to route each event type to a different sheet tab.

Can I use this with n8n Cloud, or does it need to be self-hosted?

Either works. n8n Cloud instances have a public URL by default, so webhook registration in Stripe is straightforward. Self-hosted instances need a public URL too — if yours is behind a router, use a service like Cloudflare Tunnel or ngrok to expose it. Once the URL is registered, behavior is identical.

Can I send the alert to Slack instead of email?

Yes — just swap the Send Email node for a Slack node set to Post Message. Connect your Slack OAuth credential, pick your alert channel, and use the same expressions to build the message text. You can even have both: add both a Send Email and a Slack node to the true branch of the IF node.

What if a customer’s name or email is missing from the Stripe event?

The Set node uses JavaScript optional chaining (?.name) and fallback values (|| 'Unknown' and || 'N/A'). This means even if Stripe sends an event with no billing details, the workflow will still complete and log the row — just with placeholder values instead of blank cells.

🚀 Get the Stripe to Google Sheets Template

Skip the setup and get the complete n8n workflow JSON, a pre-configured Google Sheet template, a step-by-step Setup Guide PDF, and a Credentials Guide PDF — everything you need to go live in minutes.

Get the Template →

Instant download · Works on n8n Cloud and self-hosted

What’s Next?

  • Add a Slack notification for every payment (not just high-value) — great for small teams who want a #payments channel in real time.
  • Create a monthly revenue summary by adding a scheduled workflow that queries your Google Sheet, calculates MRR, and emails you a report on the 1st of each month.
  • Sync to a CRM — add a HubSpot or Airtable node after the Google Sheets step to create or update a deal every time a payment lands.
  • Handle subscriptions separately — listen for invoice.payment_succeeded to capture recurring Stripe subscription payments on their own sheet tab with subscriber lifetime value tracking.
n8n
Stripe
Google Sheets
payment automation
no-code
webhooks
automation

How to Build a Slack Knowledge Base Bot with AI and n8n

Every team has that one Slack channel — the one where the same five questions get asked every single week. “Where’s the onboarding doc?” “What’s the refund policy?” “How do I reset my API key?” Your senior engineers are answering these instead of shipping. Your support lead is copy-pasting the same response for the third time today. With this n8n workflow, you’ll build an AI-powered Slack bot that reads incoming questions, searches your company knowledge base using semantic vector search, and posts precise answers back in the thread — automatically, in about 2 seconds.

Prefer to skip the setup? Grab the ready-made template → and be running in under 10 minutes.

What You’ll Build

  1. A Slack bot that listens for messages in any channel it’s invited to
  2. An OpenAI step that converts each incoming question into a 1,536-dimensional vector embedding
  3. A Pinecone semantic search that retrieves the most relevant chunks from your knowledge base
  4. A GPT-4o-mini step that reads the retrieved context and writes a clear, grounded answer
  5. An automatic thread reply in Slack so teammates get instant answers without leaving the channel

How It Works — The Big Picture

This workflow uses the RAG pattern — Retrieval-Augmented Generation. Instead of asking an AI to recall facts from its training data (which goes stale), you store your up-to-date company knowledge in Pinecone as vector embeddings. When a question arrives, the bot finds the semantically closest knowledge chunks and hands them to GPT-4o-mini as context. The result: factual, grounded answers drawn only from your approved content.

┌─────────────────────────────────────────────────────────────────────┐
│  SLACK KNOWLEDGE BASE BOT                                           │
│                                                                     │
│  [Slack Trigger]                                                    │
│        ↓                                                            │
│  [Filter Bot Messages] ──(bot message)──→ (stop — no loop)         │
│        ↓ (user message)                                             │
│  [Generate Question Embedding]  (OpenAI text-embedding-3-small)    │
│        ↓ 1,536-dim vector                                           │
│  [Query Pinecone]  (top-5 semantic matches from knowledge base)     │
│        ↓ matched chunks + scores                                    │
│  [Extract Context]  (filter score > 0.7, join top 3 chunks)        │
│        ↓ formatted context string                                   │
│  [Generate AI Answer]  (GPT-4o-mini + RAG prompt)                  │
│        ↓ natural language answer                                    │
│  [Post Answer to Slack]  (reply in the original thread)            │
└─────────────────────────────────────────────────────────────────────┘

What You’ll Need

  • n8n — self-hosted (v1.0+) or n8n Cloud
  • Slack app with Events API enabled and a Bot User Token (starts with xoxb-)
  • OpenAI account — API key with access to text-embedding-3-small and gpt-4o-mini
  • Pinecone account — free Starter plan is plenty; create an index with dimension 1536 and metric cosine
  • A pre-populated Pinecone namespace called knowledge-base (the Credentials Guide includes a Python ingestion script)

Estimated build time: 45–60 minutes from scratch, or under 10 minutes with the template.

Building the Bot — Step by Step

1 Slack Trigger

This node opens a webhook endpoint that Slack’s Events API calls every time a message is posted in a channel your bot belongs to. It’s the entry point for everything.

  1. Add a Slack Trigger node to your canvas.
  2. Select your Slack Bot Token credential (or create one — see the Credentials Guide).
  3. Set the Trigger to Message.
  4. Copy the Webhook URL n8n displays. Paste it into your Slack app’s Event Subscriptions → Request URL field.
  5. In Slack app settings, enable the message.channels and message.groups event scopes, then reinstall the app to your workspace.

A message event payload looks like this:

{
  "type": "message",
  "text": "What is our refund policy for annual subscriptions?",
  "user": "U04ABCDEF12",
  "channel": "C06XYZABC99",
  "ts": "1743784201.000100",
  "subtype": null
}
💡

Tip: Slack sends events for bot messages too — including the bot’s own replies. Without the next filter node, every answer the bot posts would re-trigger the workflow and create an infinite loop.

2 Filter Bot Messages (IF)

This IF node stops the workflow from processing bot messages. It’s a one-condition check that routes user messages forward and drops everything else.

  1. Add an IF node connected to the Slack Trigger output.
  2. Set Value 1 to ={{ $json.subtype }}.
  3. Condition: Is Not Equal Tobot_message.
  4. Connect the True output to Step 3. Leave False unconnected.
💡

Tip: You can add a second condition here to limit the bot to a specific channel — filter $json.channel equals C06XYZABC99. This is useful if you want the bot active only in #ask-the-bot and not everywhere.

3 Generate Question Embedding (HTTP Request → OpenAI)

This node calls the OpenAI Embeddings API and converts the user’s question into a 1,536-dimensional vector — a list of numbers that captures the semantic meaning of the sentence. Pinecone will use this to find similar content.

  1. Add an HTTP Request node.
  2. Method: POST | URL: https://api.openai.com/v1/embeddings
  3. Authentication: Generic Credential Type → HTTP Header Auth. Create a credential with Name = Authorization and Value = Bearer YOUR_OPENAI_API_KEY.
  4. Body Content Type: JSON. Paste this body:
{
  "input": "={{ $('Slack Trigger').item.json.text }}",
  "model": "text-embedding-3-small"
}

The response contains the embedding inside data[0].embedding:

{
  "object": "list",
  "data": [
    {
      "object": "embedding",
      "index": 0,
      "embedding": [0.0023, -0.0189, 0.0341, "...1,533 more values..."]
    }
  ],
  "model": "text-embedding-3-small",
  "usage": { "prompt_tokens": 11, "total_tokens": 11 }
}
💡

Tip: text-embedding-3-small costs $0.02 per million tokens. A team of 50 people asking 200 questions a day will spend about half a cent on embeddings. If you need higher search accuracy, switch to text-embedding-3-large (3,072 dimensions) — but update your Pinecone index dimension to match before doing so.

4 Query Pinecone (HTTP Request)

This node sends the question vector to Pinecone and gets back the five most semantically similar knowledge chunks, each scored between 0 (irrelevant) and 1 (identical).

  1. Add another HTTP Request node.
  2. Method: POST | URL: https://YOUR_PINECONE_INDEX_HOST/query (replace with your index host from the Pinecone console — it looks like my-index-abc123.svc.us-east-1.pinecone.io)
  3. Add a header: Name = Api-Key, Value = YOUR_PINECONE_API_KEY.
  4. Body Content Type: JSON. Use this expression as the body:
{
  "vector": "={{ $json.data[0].embedding }}",
  "topK": 5,
  "includeMetadata": true,
  "namespace": "knowledge-base"
}

Pinecone responds with the top matches and their stored metadata:

{
  "matches": [
    {
      "id": "doc-refund-annual-001",
      "score": 0.921,
      "metadata": {
        "text": "Annual subscriptions may be refunded within 30 days of purchase for a full refund. After 30 days, refunds are prorated based on remaining months.",
        "source": "help-center/billing",
        "last_updated": "2026-03-01"
      }
    },
    {
      "id": "doc-refund-annual-002",
      "score": 0.874,
      "metadata": {
        "text": "To request a refund, email billing@acme-corp.com with your order number and reason for cancellation. Refunds are processed within 5 business days.",
        "source": "help-center/billing",
        "last_updated": "2026-03-01"
      }
    }
  ],
  "namespace": "knowledge-base"
}
📌

Your Pinecone index must be pre-populated before the bot can answer anything. Each vector record needs a text field in its metadata. The Credentials Guide PDF bundled with the template includes a ready-to-run Python ingestion script that embeds and uploads your documents in minutes.

5 Extract Context (Code)

This JavaScript node processes the Pinecone results: filters low-confidence matches, takes the top 3 chunks, formats them into a numbered context string, and bundles the data for the next node.

const matches = $input.item.json.matches || [];
const slackData = $('Slack Trigger').item.json;

if (matches.length === 0) {
  return [{
    json: {
      context: 'No relevant information found in the knowledge base.',
      question: slackData.text,
      channel: slackData.channel,
      thread_ts: slackData.ts
    }
  }];
}

const context = matches
  .filter(m => m.score > 0.7)
  .slice(0, 3)
  .map((m, i) => `[${i + 1}] ${m.metadata.text}`)
  .join('\n\n');

return [{
  json: {
    context: context || 'No highly relevant information found.',
    question: slackData.text,
    channel: slackData.channel,
    thread_ts: slackData.ts
  }
}];

After this node, the data is clean and ready for the AI:

{
  "context": "[1] Annual subscriptions may be refunded within 30 days...\n\n[2] To request a refund, email billing@acme-corp.com...",
  "question": "What is our refund policy for annual subscriptions?",
  "channel": "C06XYZABC99",
  "thread_ts": "1743784201.000100"
}
💡

Tip: The 0.7 score threshold is a good starting point. If the bot returns off-topic answers, raise it to 0.8. If it says “no information found” for questions you know are in the knowledge base, lower it to 0.65 or check that your Pinecone namespace name matches exactly.

6 Generate AI Answer (HTTP Request → OpenAI Chat)

This node sends the retrieved context and the original question to GPT-4o-mini. The system prompt instructs the model to answer strictly from the provided context — no hallucinating facts that aren’t in your knowledge base.

  1. Method: POST | URL: https://api.openai.com/v1/chat/completions
  2. Reuse your OpenAI HTTP Header Auth credential.
  3. Body (JSON):
{
  "model": "gpt-4o-mini",
  "messages": [
    {
      "role": "system",
      "content": "You are a helpful company knowledge base assistant. Answer questions using ONLY the provided context. If the context does not contain the answer, say so clearly and suggest the user contact the team directly. Keep answers concise and actionable."
    },
    {
      "role": "user",
      "content": "Context:\n={{ $json.context }}\n\nQuestion: ={{ $json.question }}"
    }
  ],
  "max_tokens": 500,
  "temperature": 0.2
}
💡

Tip: temperature: 0.2 keeps answers factual and consistent. For a knowledge base bot you want determinism, not creativity. max_tokens: 500 keeps responses Slack-readable — roughly 3–5 paragraphs maximum.

7 Post Answer to Slack

The final node takes GPT-4o-mini’s answer and posts it as a thread reply — so the answer lives directly under the original question rather than flooding the main channel.

  1. Add a Slack node. Resource: Message, Operation: Post.
  2. Channel: ={{ $('Extract Context').item.json.channel }}
  3. Text: ={{ $json.choices[0].message.content }}
  4. Under Other Options, set Thread Timestamp to ={{ $('Extract Context').item.json.thread_ts }}
  5. Use the same Slack credential as the Slack Trigger.
💡

Tip: Want to brand the reply? Change the text field to: 🤖 *Knowledge Base Bot:* {{ $json.choices[0].message.content }}. The asterisks render as bold in Slack, making it clear this is an automated response.

The Data Flow

Here’s how a single question moves through all seven nodes, from Slack message to bot reply:

Stage Data Present Key Field
After Slack Trigger Raw Slack event payload text, channel, ts
After Filter Same payload, confirmed user message subtype is null
After OpenAI Embeddings 1,536-number float array data[0].embedding
After Pinecone Query Top 5 knowledge chunks + similarity scores matches[].score, matches[].metadata.text
After Extract Context Formatted context + original question context, question, thread_ts
After OpenAI Chat Full ChatGPT response object choices[0].message.content
Posted to Slack Plain text answer in thread Visible to all channel members instantly

Pinecone Knowledge Base Schema

Every vector record you upsert into Pinecone must follow this structure. The text metadata field is required — the Extract Context node reads it directly.

Field Type Example Description
id String doc-refund-001 Unique identifier for this knowledge chunk
values Float[1536] [0.023, -0.019, …] Embedding from text-embedding-3-small
metadata.text String "Annual subscriptions are refunded within 30 days…" The raw knowledge chunk — required
metadata.source String help-center/billing Where this content came from (optional)
metadata.last_updated String 2026-03-01 Last update date for freshness tracking (optional)
📌

Keep each knowledge chunk between 100 and 500 words. Too short and the chunk loses context; too long and the embedding gets diluted. One concept per chunk is a good rule of thumb — for example, one chunk for the refund policy, a separate chunk for the cancellation process.

Full System Flow

User posts question in Slack
          │
          ▼
┌─────────────────────┐
│    Slack Trigger    │  Receives message.channels event via webhook
└─────────────────────┘
          │
          ▼
┌─────────────────────┐
│ Filter Bot Messages │──── subtype = "bot_message"? ──→ STOP
└─────────────────────┘
          │ user message passes
          ▼
┌──────────────────────────┐
│ Generate Question        │  POST https://api.openai.com/v1/embeddings
│ Embedding (OpenAI)       │  model: text-embedding-3-small → 1,536-dim vector
└──────────────────────────┘
          │
          ▼
┌──────────────────────────┐
│ Query Pinecone           │  POST {index-host}/query
│ (vector search)          │  topK=5 · namespace: knowledge-base
└──────────────────────────┘
          │ top matches with metadata + scores
          ▼
┌──────────────────────────┐
│ Extract Context          │  Filter: score > 0.7
│ (Code node)              │  Join top 3 chunks into context string
└──────────────────────────┘
          │
          ▼
┌──────────────────────────┐
│ Generate AI Answer       │  POST https://api.openai.com/v1/chat/completions
│ (GPT-4o-mini)            │  RAG prompt · temperature: 0.2 · max_tokens: 500
└──────────────────────────┘
          │ grounded answer text
          ▼
┌──────────────────────────┐
│ Post Answer to Slack     │  Thread reply on original message
└──────────────────────────┘
          │
          ▼
Team member sees the answer in 2–3 seconds ✓

Testing Your Workflow

  1. Make sure the workflow is toggled to Active in n8n.
  2. Invite your bot to a test channel: type /invite @YourBotName.
  3. Post a question you know is covered in your knowledge base — for example: “What’s the refund policy for annual plans?”
  4. Within 2–3 seconds, a thread reply should appear with a grounded answer drawn from your Pinecone content.
  5. Post a question that’s definitely not in your knowledge base. The bot should say it doesn’t have that information and suggest contacting the team.
  6. Check the n8n Execution log to confirm all 7 nodes completed with green checkmarks and no errors.
Problem Likely Cause Fix
Bot doesn’t respond at all Workflow not Active, or Slack webhook URL mismatch Toggle workflow to Active; verify webhook URL in Slack app settings matches n8n exactly
Bot replies to its own messages Filter Bot Messages node misconfigured Check the True output of the IF node connects to Step 3; False output should be unconnected
“No relevant information found” for everything Pinecone index empty or wrong namespace Run the ingestion script from the Credentials Guide; confirm namespace is exactly knowledge-base
Off-topic or wrong answers Score threshold too low or chunks too large Raise score threshold to 0.8 in the Extract Context node; re-chunk content into shorter segments
OpenAI 401 Unauthorized API key missing or expired Regenerate key at platform.openai.com and update the HTTP Header Auth credential in n8n
Slack “not_in_channel” error Bot not invited to the channel Run /invite @YourBotName in the channel before testing

Frequently Asked Questions

Do I need to load content into Pinecone before the bot will work?

Yes — without content in Pinecone, every query returns empty results and the bot will say “no information found.” The template package includes a Python ingestion script (in the Credentials Guide PDF) that takes any plain text or Markdown file, splits it into chunks, generates embeddings, and uploads them to Pinecone. You can have a basic knowledge base loaded in 10–15 minutes.

How do I prevent the bot from answering questions it shouldn’t?

The system prompt in Step 6 instructs GPT-4o-mini to answer only from the provided context. If a question doesn’t match anything in Pinecone above the 0.7 threshold, the Extract Context node sends a “no information found” message as the context — and the AI is instructed to honestly say so and redirect to the team. You control what goes into Pinecone, so you control what the bot can answer.

How much does this cost to run per month?

For a team of 50 people asking roughly 200 questions a day: OpenAI embedding calls cost about $0.005/day, and GPT-4o-mini answers cost about $0.10/day. Pinecone’s free Starter plan handles up to 100,000 vectors — more than enough for a thorough company knowledge base. Total cost: roughly $3–4/month in API fees.

Can I restrict the bot to specific Slack channels?

Yes. In the Filter Bot Messages IF node (Step 2), add a second condition: $json.channel equals your target channel ID. The bot will only respond in that specific channel. You can find a channel’s ID by right-clicking it in Slack and selecting “Copy link” — the ID is the string starting with C at the end of the URL.

How do I keep the knowledge base current as our docs change?

Build a second n8n workflow that watches for document updates — a Google Drive trigger that fires when a doc is modified, re-embeds the content, and upserts it to Pinecone by the same id. Since Pinecone’s upsert operation overwrites by ID, you won’t accumulate duplicates. You can also just re-run the ingestion script manually after major documentation updates.

Does this work on n8n Cloud, or only self-hosted?

It works on both. The workflow uses only HTTP Request nodes, a Code node, the Slack Trigger, and the Slack node — all available in n8n Cloud and every self-hosted version from 1.0 onwards. No custom nodes or community packages are required.

🚀 Get the Slack Knowledge Base Bot Template

You now know exactly how this workflow is built. The template gets you there in under 10 minutes: it includes the ready-to-import workflow JSON, a Setup Guide PDF with step-by-step activation instructions, and a Credentials Guide PDF with a working Python ingestion script to load your knowledge base into Pinecone.

Get the Template →

Instant download · Works on n8n Cloud and self-hosted

What’s Next?

  • Add answer feedback: Let users react 👍 or 👎 on bot replies, log reactions to Airtable, and use quality scores to identify gaps in your knowledge base.
  • Auto-ingest from Notion or Confluence: Build a companion n8n workflow that watches for document updates and automatically re-embeds modified pages into Pinecone.
  • Add a Slack slash command: Create a /ask command so users can query the bot privately in DMs without cluttering a shared channel.
  • Multi-namespace routing: Create separate Pinecone namespaces for HR, Engineering, and Sales — and route questions to the right namespace based on which Slack channel they came from.
n8n
Slack
OpenAI
Pinecone
RAG
AI automation
knowledge base
vector search

How to Auto-Sync Notion Databases to Airtable with n8n

Every edit you make in Notion can land in Airtable automatically — no copy-paste, no manual exports, no data drift. If your team lives in Notion but your operations dashboard runs in Airtable, you already know the pain: the two fall out of sync within hours, someone gets the wrong status, and suddenly half your workday disappears into reconciliation. This guide shows you how to build an n8n workflow that polls your Notion database every 15 minutes and upserts each record straight into Airtable — new items get created, updated items get refreshed, and nothing gets duplicated.

Prefer to skip the setup? Grab the ready-made template → and be up and running in under 10 minutes.

What You’ll Build

  1. A schedule-triggered n8n workflow fires every 15 minutes — no manual intervention needed.
  2. The workflow fetches every page from your chosen Notion database and filters it down to only those edited in the last 15 minutes, so you’re never re-processing stale data.
  3. A Code node extracts the Notion page properties (title, status, priority, email, due date, notes, and tags) into a clean, flat object.
  4. The Airtable node upserts each record using the Notion page ID as the unique key — if the row already exists it updates it; if not it creates a new one.
  5. Your Airtable base stays in near-real-time sync with Notion, with a direct link back to each Notion page for quick reference.

How It Works — The Big Picture

The workflow is a single linear pipeline: schedule → fetch → filter → transform → upsert. The magic is in the upsert step, which uses the Notion page ID as a match key so it can tell the difference between a record it’s seen before and a brand-new one.

┌──────────────────────────────────────────────────────────────────────┐
│  AUTO-SYNC NOTION DATABASE → AIRTABLE                                │
│                                                                      │
│  [Every 15 Min]                                                      │
│       │                                                              │
│       ▼                                                              │
│  [Fetch All Notion Pages]  ← polls your Notion database             │
│       │                                                              │
│       ▼                                                              │
│  [Filter: Modified in Last 15 Min]  ← skips unchanged records       │
│       │                                                              │
│       ▼                                                              │
│  [Extract & Map Fields]  ← Code node: flattens Notion properties    │
│       │                                                              │
│       ▼                                                              │
│  [Upsert in Airtable]  ← creates new rows OR updates existing ones  │
│                            matched by notion_page_id                 │
└──────────────────────────────────────────────────────────────────────┘

What You’ll Need

  • n8n — self-hosted (v1.0+) or an n8n Cloud account
  • Notion account — with a database you want to sync; free tier works
  • Notion Integration — a connected integration with read access to your database (takes about 2 minutes to set up at notion.so/my-integrations)
  • Airtable account — free tier works; you’ll need a base with a table that mirrors your Notion schema
  • Airtable Personal Access Token — generated from your Airtable account settings with data.records:write scope

Estimated build time: 30–45 minutes from scratch, or under 10 minutes with the ready-made template.

Building the Workflow — Step by Step

1 Every 15 Minutes (Schedule Trigger)

This node kicks off the entire workflow on a recurring schedule. It doesn’t pass any data downstream — it’s just the heartbeat.

In n8n, add a Schedule Trigger node and configure it like this:

  1. Set Trigger Interval to Minutes
  2. Set Minutes Between Triggers to 15
  3. Click Save
💡

Tip: If your Notion database is high-volume (hundreds of edits per day), consider shortening the interval to 5 minutes. For low-activity databases, 30 or 60 minutes is perfectly fine and reduces API calls.

2 Fetch All Notion Pages (Notion node)

This node connects to your Notion database and retrieves all pages inside it. We’ll filter them down in the next step — here we just get everything so nothing slips through the cracks.

  1. Add a Notion node and connect your Notion credential (or create one using your integration’s Internal Integration Secret)
  2. Set Resource to Database Page
  3. Set Operation to Get Many
  4. In the Database ID field, paste the ID of your Notion database. You can find it in the database URL: notion.so/workspace/THIS-LONG-ID?v=...
  5. Enable Return All so n8n fetches every page, not just the first 100

After this node runs, each output item represents one Notion page. The raw data looks something like this:

{
  "id": "a1b2c3d4-e5f6-7890-abcd-ef1234567890",
  "last_edited_time": "2026-04-04T09:47:00.000Z",
  "url": "https://www.notion.so/a1b2c3d4e5f67890abcdef1234567890",
  "properties": {
    "Name": { "title": [{ "plain_text": "Q2 Marketing Campaign" }] },
    "Status": { "select": { "name": "In Progress" } },
    "Priority": { "select": { "name": "High" } },
    "Email": { "email": "james.carter@gmail.com" },
    "Due Date": { "date": { "start": "2026-04-15" } },
    "Notes": { "rich_text": [{ "plain_text": "Coordinate with Emily on copy approval." }] },
    "Tags": { "multi_select": [{ "name": "Marketing" }, { "name": "Q2" }] }
  }
}
📌

The Notion node returns properties in a deeply nested format. Your property names (Name, Status, etc.) must match exactly what they’re called in your Notion database. If you’re using different column names, you’ll update the Code node in Step 4 to match.

3 Filter: Modified in Last 15 Min (Filter node)

Without this filter, the workflow would re-upsert every record in your Notion database on every run — wasteful and slow. This node passes only the pages that were edited since the last trigger fired.

  1. Add a Filter node
  2. Add a condition with Left Value set to the expression:
    ={{ new Date($json.last_edited_time).getTime() }}
  3. Set Operator to Greater Than or Equal
  4. Set Right Value to:
    ={{ Date.now() - 15 * 60 * 1000 }}
  5. Make sure Value Type is set to Number for both sides
💡

Tip: The expression Date.now() - 15 * 60 * 1000 computes the Unix timestamp for exactly 15 minutes ago. If your schedule trigger interval is different, replace 15 with your interval in minutes. Adding a small buffer (say, 16 minutes for a 15-minute schedule) ensures you never miss a record due to tiny timing drift.

4 Extract & Map Fields (Code node)

Notion’s property format is deeply nested — a simple title field is buried inside properties.Name.title[0].plain_text. This Code node flattens everything into a clean, Airtable-ready object with one pass.

  1. Add a Code node
  2. Set Mode to Run Once for Each Item
  3. Paste in the following JavaScript:
// Extract Notion page properties into flat, Airtable-friendly fields
const page = $input.item.json;
const props = page.properties ?? {};

// Helper: safely read any Notion property type
const get = (key, type) => {
  const p = props[key];
  if (!p) return '';
  switch (type) {
    case 'title':        return p.title?.[0]?.plain_text ?? '';
    case 'rich_text':   return p.rich_text?.[0]?.plain_text ?? '';
    case 'select':      return p.select?.name ?? '';
    case 'multi_select': return p.multi_select?.map(s => s.name).join(', ') ?? '';
    case 'date':        return p.date?.start ?? '';
    case 'email':       return p.email ?? '';
    case 'number':      return p.number ?? 0;
    case 'checkbox':    return String(p.checkbox ?? false);
    case 'url':         return p.url ?? '';
    default:            return '';
  }
};

return {
  json: {
    notion_page_id: page.id,
    Name:           get('Name', 'title'),
    Status:         get('Status', 'select'),
    Priority:       get('Priority', 'select'),
    Email:          get('Email', 'email'),
    Due_Date:       get('Due Date', 'date'),
    Notes:          get('Notes', 'rich_text'),
    Tags:           get('Tags', 'multi_select'),
    Last_Edited:    page.last_edited_time,
    Notion_URL:     page.url,
  }
};

After this node runs, each item is a clean, flat object ready to be written to Airtable:

{
  "notion_page_id": "a1b2c3d4-e5f6-7890-abcd-ef1234567890",
  "Name": "Q2 Marketing Campaign",
  "Status": "In Progress",
  "Priority": "High",
  "Email": "james.carter@gmail.com",
  "Due_Date": "2026-04-15",
  "Notes": "Coordinate with Emily on copy approval.",
  "Tags": "Marketing, Q2",
  "Last_Edited": "2026-04-04T09:47:00.000Z",
  "Notion_URL": "https://www.notion.so/a1b2c3d4..."
}
💡

Tip: If your Notion database has different property names or types, update the get('PropertyName', 'type') calls to match. The helper function supports all common Notion property types — just change the key and type string. Add or remove fields as needed for your own schema.

5 Upsert in Airtable (Airtable node)

This is where the sync actually happens. The Airtable Upsert operation is the key: it checks whether a record matching your specified field already exists, updates it if so, and creates a new one if not — all in a single API call.

  1. Add an Airtable node and connect your Airtable credential (Personal Access Token)
  2. Set Operation to Upsert
  3. Set Base to your Airtable base (select from the dropdown or paste the Base ID)
  4. Set Table to your sync table
  5. Under Fields to Match On, enter notion_page_id — this is the unique key that tells Airtable whether to create or update
  6. In the field mapping section, map each field from the Code node output to the corresponding Airtable column
{
  "notion_page_id": "={{ $json.notion_page_id }}",
  "Name":           "={{ $json.Name }}",
  "Status":         "={{ $json.Status }}",
  "Priority":       "={{ $json.Priority }}",
  "Email":          "={{ $json.Email }}",
  "Due_Date":       "={{ $json.Due_Date }}",
  "Notes":          "={{ $json.Notes }}",
  "Tags":           "={{ $json.Tags }}",
  "Last_Edited":    "={{ $json.Last_Edited }}",
  "Notion_URL":     "={{ $json.Notion_URL }}"
}
📌

The Airtable upsert operation requires your Airtable table to have a text field named notion_page_id. If this field doesn’t exist, Airtable won’t know what to match on and will create duplicates. Create the field in Airtable before activating the workflow.

The Airtable Table Schema

Your Airtable sync table needs to match the fields your Code node outputs. Here’s the recommended schema — create these columns in Airtable before running the workflow for the first time:

Column Name Airtable Field Type Example Value Purpose
notion_page_id Single line text a1b2c3d4-e5f6-... Unique match key — never changes for a given Notion page
Name Single line text Q2 Marketing Campaign The page title from Notion
Status Single line text (or Single select) In Progress Current workflow status
Priority Single line text (or Single select) High Task priority level
Email Email james.carter@gmail.com Contact email from Notion
Due_Date Date 2026-04-15 ISO date string from Notion’s date property
Notes Long text Coordinate with Emily… Rich text notes (plain text only — no formatting)
Tags Single line text Marketing, Q2 Comma-separated list of Notion multi-select values
Last_Edited Single line text 2026-04-04T09:47:00Z ISO timestamp of last Notion edit — useful for debugging
Notion_URL URL https://notion.so/… Direct link back to the source Notion page

Here’s what a couple of synced rows look like in practice:

Name Status Priority Email Due_Date
Q2 Marketing Campaign In Progress High james.carter@gmail.com 2026-04-15
Vendor Contract Review Done Medium emily.rodriguez@outlook.com 2026-03-31
Onboarding Flow Redesign Not Started Low michael.chen@gmail.com 2026-05-01
📌

Column names in Airtable are case-sensitive and must match exactly what the Code node outputs (e.g., Due_Date with a capital D and underscore). If you rename any column, update the Code node’s output keys to match.

Full System Flow

Here’s the complete data journey from Notion edit to Airtable row, end to end:

┌─────────────────────────────────────────────────────────────────────────┐
│  NOTION (source of truth)                                               │
│  User edits a page → last_edited_time updates                           │
└──────────────────────────────┬──────────────────────────────────────────┘
                               │  (every 15 minutes)
                               ▼
┌─────────────────────────────────────────────────────────────────────────┐
│  n8n WORKFLOW                                                           │
│                                                                         │
│  Schedule Trigger (every 15 min)                                        │
│       │                                                                 │
│       ▼                                                                 │
│  Notion node: GET all pages from database                               │
│       │  returns N page objects with nested properties                  │
│       ▼                                                                 │
│  Filter node: keep only pages where                                     │
│               last_edited_time >= now - 15 min                          │
│       │  passes M ≤ N recently changed pages                            │
│       ▼                                                                 │
│  Code node: flatten Notion props → clean JSON object                    │
│       │  { notion_page_id, Name, Status, Priority, … }                  │
│       ▼                                                                 │
│  Airtable Upsert: match on notion_page_id                               │
│       ├─ Record found?  → UPDATE existing row                           │
│       └─ Record missing? → CREATE new row                               │
│                                                                         │
└──────────────────────────────┬──────────────────────────────────────────┘
                               │
                               ▼
┌─────────────────────────────────────────────────────────────────────────┐
│  AIRTABLE (reporting / ops layer)                                       │
│  Rows stay in sync with Notion — max 15 minutes behind                 │
└─────────────────────────────────────────────────────────────────────────┘

Testing Your Workflow

  1. Make a test edit in Notion: Open your Notion database, pick any page, and change a field (e.g., update the Status to “In Review”). Save it — Notion updates last_edited_time automatically.
  2. Run the workflow manually: In n8n, click Test Workflow (the play button) on the Schedule Trigger node to fire it immediately without waiting 15 minutes.
  3. Check the Filter node output: The edited page should pass through. If the Filter passes 0 items, check that your system clock is correct and that the edited page’s last_edited_time is recent.
  4. Check Airtable: Within a few seconds, the corresponding row should appear or update in your Airtable table. Verify the field values match what you changed in Notion.
  5. Test the upsert (no-duplicate check): Run the workflow a second time immediately. The Airtable row should update in place — no duplicate rows should appear.
Problem Likely Cause Fix
Filter passes 0 items even after editing Notion Edit was made more than 15 minutes ago Edit the page again and immediately run the test, or temporarily widen the filter window to 60 minutes
Airtable creates duplicate rows notion_page_id column missing in Airtable table, or the “Fields to Match On” setting is blank Create the notion_page_id column in Airtable and confirm it’s set as the upsert match key
Code node fails with “Cannot read properties of undefined” Your Notion database has a different property name or type than expected Open the Notion node output in n8n and check the exact property names in properties, then update the Code node’s get() calls to match
Notion node returns 0 items Integration not connected to the database In Notion, open the database → click ⋯ → Connections → add your integration
Airtable “Invalid permissions” error Personal Access Token missing data.records:write scope Regenerate the token at airtable.com/account with the correct scopes checked

Frequently Asked Questions

Does this sync work in both directions — Airtable to Notion as well?

The workflow described here is one-directional: Notion is the source of truth and Airtable is the destination. Building a reverse sync (Airtable → Notion) is possible but requires a second workflow that watches Airtable for changes via polling or a webhook. Combining both directions into a bidirectional sync also requires a “last-write-wins” or conflict resolution strategy to avoid infinite loops.

What happens if my Notion database has hundreds of pages?

The Notion node with Return All enabled will fetch every page regardless of count, which can be slow for very large databases (500+ pages). In that case, consider using Notion’s built-in filter inside the Notion node to retrieve only pages modified after a certain date — this offloads the filtering to Notion’s API and reduces the volume of data n8n has to process.

Can I sync multiple Notion databases to multiple Airtable tables?

Yes — you can either duplicate this workflow (one copy per database-table pair) or extend it with a Switch node to route different database IDs to different Airtable table IDs. The duplicate approach is simpler to maintain; the Switch approach reduces the number of active workflows in your n8n instance.

My Notion database has properties that aren’t in the Code node — how do I add them?

Add a new line to the return { json: { ... } } block using the get('YourPropertyName', 'type') helper. The supported types are: title, rich_text, select, multi_select, date, email, number, checkbox, and url. Then create a matching column in your Airtable table and add it to the Airtable node’s field mapping.

Will this workflow work on n8n Cloud or only on self-hosted?

It works on both. The Schedule Trigger, Notion node, Filter node, Code node, and Airtable node are all built into n8n — no extra packages or server access required. On n8n Cloud, just import the JSON template and connect your credentials.

How do I handle Notion relation or formula properties?

Relation properties return an array of page references (not plain text), and formula properties return a computed value in a nested formula object. Neither is handled by the default Code node in this template. You can extend the get() helper with a case 'relation' branch that maps the array to a comma-separated list of page IDs, or use a case 'formula' branch that reads p.formula.string (or .number, .boolean) depending on your formula’s return type.

🚀 Get the Notion → Airtable Sync Template

You now know exactly how this workflow operates. Skip the setup time and grab the ready-to-import template — it includes the workflow JSON, a step-by-step Setup Guide PDF, and a Credentials Guide that walks you through every API key you’ll need.

Get the Template →

Instant download · Works on n8n Cloud and self-hosted · $14.99

What’s Next?

  • Add a Slack notification: After the Airtable upsert, add a Slack node that posts a message to a channel whenever a high-priority record is synced — good for keeping the team aware of urgent changes without checking Airtable manually.
  • Filter by status: Add an IF node after the Code step to only sync records that are “In Progress” or “Done” — useful if you want Airtable to act as a completed-work log rather than a full mirror.
  • Reverse sync: Build a companion workflow that polls Airtable for changes and writes them back to Notion, creating a true bidirectional sync between both tools.
  • Add error alerting: Wrap the Airtable upsert in a try/catch (or use n8n’s Error Workflow feature) to send yourself an email or Slack DM if the sync fails — so you’re never left with stale data and no idea why.
n8n
Notion
Airtable
automation
database sync
no-code
productivity

How to Auto-Triage Support Emails to Slack with AI Using n8n

Every support inbox gets noisy fast. A billing question sits next to a frantic “our entire account is locked” message, and both look the same in a Gmail preview. By the time someone reads the urgent one, an hour has slipped by. This tutorial walks you through building an n8n workflow that reads every inbound support email, asks GPT-4o mini to classify it by priority and category, routes the result to the right Slack channel — and logs everything to a Google Sheet so nothing ever disappears.

Prefer to skip the setup? Grab the ready-made template → and be up and running in under 10 minutes.

What You’ll Build

  1. A Gmail trigger polls your inbox every minute for new unread emails.
  2. An OpenAI call analyzes the email and returns a priority level (High / Medium / Low), a category (Bug Report, Billing, Feature Request, etc.), a one-sentence summary, and the sender’s detected sentiment.
  3. A conditional branch routes High-priority tickets to a #support-urgent Slack channel with a bold alert, and everything else to #support as a standard notification.
  4. Every ticket — regardless of priority — is appended to a Google Sheet so you have a permanent, searchable log of all incoming requests.

How It Works — The Big Picture

The workflow runs as a polling loop. Think of it as a tireless assistant who checks email every sixty seconds, reads it with an AI brain, and instantly posts into the right Slack channel — then files the paperwork in a spreadsheet.

┌─────────────────────────────────────────────────────────────────────┐
│  GMAIL → SLACK AI SUPPORT TRIAGE                                    │
│                                                                     │
│  [Gmail Trigger]                                                    │
│       │  (new unread email)                                         │
│       ▼                                                             │
│  [Extract Email Fields]                                             │
│       │  (sender, subject, body snippet, timestamp)                 │
│       ▼                                                             │
│  [AI Classify & Summarize]  ←── OpenAI gpt-4o-mini                 │
│       │  (priority, category, summary, sentiment)                   │
│       ▼                                                             │
│  [Parse AI Response]                                                │
│       │                                                             │
│       ▼                                                             │
│  [Check Priority]                                                   │
│       │                        │                                    │
│    priority=High           priority≠High                            │
│       │                        │                                    │
│       ▼                        ▼                                    │
│  [Slack Urgent]          [Slack Standard]                           │
│  #support-urgent          #support                                  │
│       │                        │                                    │
│       └──────────┬─────────────┘                                    │
│                  ▼                                                  │
│         [Log to Google Sheets]                                      │
└─────────────────────────────────────────────────────────────────────┘

What You’ll Need

  • n8n — self-hosted or n8n Cloud (any version 1.0+)
  • Gmail account — connected via Google OAuth2 in n8n
  • OpenAI account — API key with access to gpt-4o-mini
  • Slack workspace — with two channels: #support-urgent and #support
  • Google Sheets — a spreadsheet with the columns described below

Estimated build time: 40–60 minutes from scratch, or under 10 minutes with the template.


Building the Workflow — Step by Step

1 Gmail Trigger — Watch for New Emails

The Gmail Trigger node polls your inbox every minute and fires once for each new unread email it finds. Connect your Gmail credential via Google OAuth2, set Poll Times to Every Minute, and set Read Status to Unread under Filters.

After a test run, the raw payload looks like this:

{
  "id": "18f4a3b2c1d0e9f8",
  "from": { "value": [{ "name": "Sarah Thompson", "address": "sarah.thompson@outlook.com" }] },
  "subject": "Can't log into my account — urgent!",
  "text": "Hi, I've been trying to log in for the past hour and keep getting an 'Invalid credentials' error...",
  "date": "2026-04-03T14:22:00.000Z"
}
💡

Tip: If you only want to monitor a specific support address, route emails to a Gmail label first, then filter by that label in the trigger node.

2 Extract Email Fields — Set Node

The Set node flattens the nested Gmail payload into a clean, flat object for the AI prompt. Configure these assignments:

Field Name Expression Purpose
sender ={{ $json.from?.value?.[0]?.address ?? $json.from }} Sender’s email address
senderName ={{ $json.from?.value?.[0]?.name ?? 'Unknown' }} Sender’s display name
subject ={{ $json.subject ?? '(No Subject)' }} Email subject line
bodySnippet ={{ ($json.text ?? $json.snippet ?? '').substring(0, 1200) }} First 1,200 chars of body
receivedAt ={{ $now.format('yyyy-MM-dd HH:mm') }} Human-readable timestamp
messageId ={{ $json.id }} Gmail message ID
📌

We cap the body at 1,200 characters to keep OpenAI token costs low. Increase this limit if your customers tend to write detailed reports.

3 AI Classify & Summarize — HTTP Request to OpenAI

An HTTP Request node sends the email to OpenAI’s Chat Completions API. Set Method to POST, URL to https://api.openai.com/v1/chat/completions, and Authentication to HTTP Header Auth with Authorization: Bearer YOUR_KEY. Use this JSON body:

{
  "model": "gpt-4o-mini",
  "temperature": 0,
  "response_format": { "type": "json_object" },
  "messages": [
    { "role": "system", "content": "You are a support triage assistant. Return JSON with: priority (High/Medium/Low), category (Bug Report/Billing/Feature Request/General Question/Account Issue), summary (max 120 chars), sentiment (Frustrated/Neutral/Positive). High priority = outage, data loss, billing error, account locked, urgent/ASAP." },
    { "role": "user", "content": "From: {{ $json.senderName }} <{{ $json.sender }}>\nSubject: {{ $json.subject }}\n\n{{ $json.bodySnippet }}" }
  ]
}
💡

Tip: Setting temperature: 0 makes classification deterministic. The response_format: json_object parameter guarantees the response is always valid JSON, preventing parse errors downstream.

4 Parse AI Response — Code Node

This Code node extracts the nested JSON, parses it, and merges AI classifications with the original email fields:

const aiRaw = items[0].json.choices?.[0]?.message?.content ?? '{}';
let ai;
try { ai = JSON.parse(aiRaw); }
catch (e) { ai = { priority: 'Low', category: 'General Question', summary: 'Parse error', sentiment: 'Neutral' }; }

const emailData = $('Extract Email Fields').item.json;
return [{ json: {
  sender: emailData.sender, senderName: emailData.senderName,
  subject: emailData.subject, bodySnippet: emailData.bodySnippet,
  receivedAt: emailData.receivedAt, messageId: emailData.messageId,
  priority: ai.priority ?? 'Low', category: ai.category ?? 'General Question',
  summary: ai.summary ?? emailData.subject, sentiment: ai.sentiment ?? 'Neutral'
}}];

The merged output object looks like this:

{
  "sender": "sarah.thompson@outlook.com",
  "senderName": "Sarah Thompson",
  "subject": "Can't log into my account — urgent!",
  "priority": "High",
  "category": "Account Issue",
  "summary": "User cannot log in due to 'Invalid credentials' error persisting for over an hour.",
  "sentiment": "Frustrated",
  "receivedAt": "2026-04-03 14:22",
  "messageId": "18f4a3b2c1d0e9f8"
}
💡

Tip: The try/catch block ensures the workflow never crashes if OpenAI is rate-limited or returns an unexpected response — it falls back to Low priority instead.

5 Check Priority — IF Node

The IF node checks whether priority equals "High" (case-insensitive). True branch → urgent Slack alert. False branch → standard notification. Left value: ={{ $json.priority }}, Operation: String equals, Right value: High.

📌

To add a Medium-priority route, swap the IF node for a Switch node with three outputs: High, Medium, and Low.

6 Slack Urgent Alert

Posts to #support-urgent with Block Kit formatting. Set Resource to Message, Operation to Post, Message Type to Blocks. The card shows sender name, category, received timestamp, sentiment, subject, and AI summary — everything your on-call team needs at a glance.

💡

Tip: Add an Action block with a button linking directly to the email: https://mail.google.com/mail/u/0/#inbox/{{ $json.messageId }}

7 Slack Standard Alert

Identical configuration to Step 6, but posts to #support with a gentler 📬 New Support Ticket header and includes the priority level in the fields.

8 Log to Google Sheets

Both Slack branches converge here. The Google Sheets node appends one row per email. Set Operation to Append Row and map all nine columns. This creates a permanent, searchable history of every inbound request.


The Data Structure

Create a Google Sheet named Support Ticket Log with these columns in row 1. Names are case-sensitive and must match exactly.

Column Type Example Description
Received At Text 2026-04-03 14:22 Timestamp when the email arrived
Sender Text sarah.thompson@outlook.com Sender’s email address
Sender Name Text Sarah Thompson Sender’s display name from Gmail
Subject Text Can’t log into my account — urgent! Original email subject line
Priority Text High AI-assigned priority: High / Medium / Low
Category Text Account Issue AI-assigned ticket category
Sentiment Text Frustrated Detected sender emotion
AI Summary Text User cannot log in due to… One-sentence AI summary
Message ID Text 18f4a3b2c1d0e9f8 Gmail message ID for deduplication
📌

Column names are case-sensitive. Leaving out columns won’t break the workflow — n8n simply won’t write to unmapped columns.


Full System Flow

  INCOMING EMAIL
       │
       ▼
  ┌────────────────┐
  │  Gmail Trigger │  (polls every minute)
  └────────┬───────┘
           │ raw email payload
           ▼
  ┌──────────────────────┐
  │  Extract Email Fields │  (Set node)
  └──────────┬───────────┘
             │ {sender, subject, bodySnippet, receivedAt, messageId}
             ▼
  ┌──────────────────────────────┐
  │  AI Classify & Summarize     │  (HTTP → OpenAI gpt-4o-mini)
  └──────────┬───────────────────┘
             │ OpenAI JSON response
             ▼
  ┌──────────────────────┐
  │  Parse AI Response   │  (Code node)
  └──────────┬───────────┘
             │ {priority, category, summary, sentiment, + email fields}
             ▼
  ┌──────────────────────┐
  │    Check Priority    │  (IF node)
  └────┬─────────────────┘
       │                     │
  priority=High         priority≠High
       │                     │
       ▼                     ▼
  ┌────────────┐     ┌────────────────┐
  │ Slack      │     │ Slack          │
  │ #support-  │     │ #support       │
  │  urgent    │     │ (standard)     │
  └─────┬──────┘     └──────┬─────────┘
        │                   │
        └──────────┬────────┘
                   ▼
       ┌────────────────────┐
       │  Log to Google     │
       │  Sheets (append)   │
       └────────────────────┘

Testing Your Workflow

  1. Activate the workflow (toggle the Active switch in the top-right).
  2. Send a test email with subject “URGENT: payment failed — please help!” to the monitored inbox.
  3. Wait up to 60 seconds, then check #support-urgent in Slack — you should see a card with a bold header.
  4. Check your Google Sheet — a new row should appear with all nine columns filled.
  5. Send a second email with subject “Feature request: dark mode”. It should appear in #support as Low priority.
Problem Likely Cause Fix
No Slack message received Slack credential scope missing Re-authorize Slack and ensure chat:write scope is granted
Google Sheets row not appended Column name mismatch Check that sheet column headers match exactly (case-sensitive)
OpenAI node returns 401 API key format wrong Verify the Authorization header value is Bearer sk-…
All emails classified as Low AI parse error falling back Inspect Code node output — check choices[0].message.content
Gmail trigger fires duplicates Emails re-marked as unread Enable the Mark as Read option on the Gmail Trigger node

Frequently Asked Questions

Does this workflow automatically reply to the sender?

No — this workflow focuses purely on triage and notification. You can add a Gmail send node at the end to fire an auto-acknowledgment, wired in parallel with the Slack nodes so both happen simultaneously.

How much does the OpenAI API cost to run this?

GPT-4o mini is very inexpensive — roughly $0.15 per million input tokens. For a typical support email (~200 tokens), you’re looking at fractions of a cent per email. Processing 1,000 emails per month costs less than $0.50 in API fees.

Can I add more priority levels or categories?

Absolutely. Edit the system prompt in the HTTP Request node to include any levels or categories you need. Just make sure your IF or Switch node branches match whatever the AI returns.

What happens if OpenAI is down or rate-limited?

The Code node has a try/catch block that falls back to Low priority if parsing fails. The email still gets logged to Google Sheets and posted to Slack — just without an AI classification.

Can I monitor multiple Gmail inboxes?

Yes. Add a second Gmail Trigger node connected to a different Gmail credential and wire it into the same Extract Email Fields node. Both triggers independently poll their inboxes and feed into the same triage pipeline.

Is my email content sent to OpenAI’s servers?

Yes — the subject and first 1,200 characters of the body are sent to OpenAI’s API. OpenAI’s standard API does not use submitted data to train models. If your emails contain sensitive data, consider a self-hosted local model like Ollama with Llama 3 via the HTTP Request node.


🚀 Get the Gmail → Slack AI Support Triage Template

Skip the build and get a ready-to-import n8n workflow JSON, a step-by-step Setup Guide PDF, and a Credentials Guide PDF — everything you need to be running in under 10 minutes.

Get the Template →

Instant download · Works on n8n Cloud and self-hosted

What’s Next?

  • Auto-reply on High priority: Add a Gmail send node that fires an immediate acknowledgment to the customer when their ticket lands as High priority.
  • Create tickets in a helpdesk: Replace or augment the Google Sheets node with a Zendesk, Freshdesk, or Linear node to create a real ticket with the AI-assigned priority already set.
  • Daily digest report: Add a second workflow that runs at 8 AM every morning, reads yesterday’s rows from the Google Sheet, and posts a summary to Slack.
  • Sentiment escalation: DM the support manager directly when sentiment is Frustrated AND priority is High.
n8n
Gmail
Slack
OpenAI
Google Sheets
Support Automation
AI Triage
automation

How to Auto-Log Gmail Emails to Google Sheets with n8n (AI Categorization)

Every day, important emails land in your inbox — and most of them vanish into the void with no record of who sent them, what they were about, or how you responded. If you manage a business inbox, you already know the pain: support requests get buried, sales leads go cold, and billing questions get missed entirely. What if every single email was automatically logged, categorized, and timestamped the moment it arrived? That’s exactly what this n8n workflow does — it watches your Gmail inbox, asks OpenAI to categorize each new message, and appends a clean row to a Google Sheets log in real time.

Prefer to skip the setup? Grab the ready-made template → and be up and running in under 10 minutes.

What You’ll Build

  1. A Gmail trigger that polls your inbox every minute for new unread messages.
  2. An OpenAI call that reads each email’s subject line and preview text, then returns one of six categories: Support, Sales, Billing, Newsletter, Spam, or Other.
  3. A formatting step that packages the sender info, subject, snippet, category, and timestamp into a clean row structure.
  4. A Google Sheets append that adds the row to your Email Log sheet — instantly and automatically.

How It Works — The Big Picture

The workflow is a simple four-node pipeline. Gmail fires whenever a new unread email arrives, OpenAI classifies it in under a second, a Set node formats the fields, and Google Sheets stores the result. Nothing is deleted, moved, or marked read — this is a pure logging workflow that runs silently in the background.

+------------------------------------------------------------------+
|  AUTO-LOG GMAIL TO GOOGLE SHEETS WITH AI CATEGORIZATION          |
|                                                                  |
|  [Gmail Trigger]  -->  [Classify Email with AI]                  |
|   New unread email     POST to OpenAI GPT-4o-mini                |
|   (polls every min)    Returns: Support / Sales / Billing /      |
|                        Newsletter / Spam / Other                 |
|                                 |                                |
|                                 v                                |
|                        [Format Row Data]                         |
|                         Set node -- maps fields                  |
|                                 |                                |
|                                 v                                |
|                        [Log to Google Sheets]                    |
|                         Appends row to "Email Log" sheet         |
+------------------------------------------------------------------+

What You’ll Need

  • An n8n instance (Cloud or self-hosted — version 1.0 or later)
  • A Gmail account with OAuth2 connected in n8n
  • An OpenAI account with an API key (GPT-4o-mini is very cheap — under $0.01 per 1,000 emails)
  • A Google Sheets account with OAuth2 connected in n8n
  • A Google Sheet set up with the correct column headers (details below)

Estimated build time: 30-45 minutes from scratch, or under 10 minutes with the template.

Building the Workflow — Step by Step

1 New Email Trigger (Gmail Trigger)

This node is the entry point — it polls your Gmail inbox every minute looking for new unread messages. When it finds one, it sends all of that email’s metadata downstream.

To configure it:

  1. Add a Gmail Trigger node to your canvas.
  2. Under Credential, connect your Gmail OAuth2 account (click “Create new” if you haven’t set one up yet — n8n will walk you through the Google authorization flow).
  3. Set Poll Times to Every Minute. You can slow this down to every 5 or 15 minutes if your inbox is high-volume.
  4. Under Filters → Read Status, select Unread so you only process new messages, not your entire archive.

When this node fires, it outputs a JSON object for each new unread email. Here’s what a typical message looks like at this stage:

{
  "id": "18f3a1c9b4d2e7a5",
  "threadId": "18f3a1c9b4d2e7a5",
  "subject": "Re: Invoice #4821 - Payment Confirmation",
  "snippet": "Hi Sarah, just confirming that we processed payment this morning...",
  "date": "Fri, 03 Apr 2026 09:14:22 -0500",
  "from": {
    "value": [
      {
        "address": "james.carter@outlook.com",
        "name": "James Carter"
      }
    ]
  }
}
💡

Tip: If you want to monitor a specific label rather than your whole inbox (e.g., a shared support@ alias forwarded to a label), use the Label Names filter to narrow the scope. This prevents the workflow from logging every newsletter and promotional email if you have those auto-labeled.

2 Classify Email with AI (HTTP Request to OpenAI)

This node sends the email’s subject and preview text to OpenAI’s Chat Completions API. A tightly-worded system prompt instructs GPT-4o-mini to reply with a single category word — nothing else.

To configure it:

  1. Add an HTTP Request node.
  2. Set Method to POST and URL to https://api.openai.com/v1/chat/completions.
  3. Under Authentication, choose Predefined Credential Type then OpenAI, and connect your OpenAI API credential.
  4. Enable Send Body and set Content Type to JSON.
  5. In the Body field, paste the expression from the template (it builds a messages array with the system prompt and the email content dynamically).

The system prompt used is:

You are an email classifier. Classify the email into exactly one of these
categories: Support, Sales, Billing, Newsletter, Spam, Other. Reply with
only the category name, nothing else.

OpenAI returns a standard completion response. The category lives at choices[0].message.content:

{
  "choices": [
    {
      "message": {
        "role": "assistant",
        "content": "Billing"
      }
    }
  ],
  "model": "gpt-4o-mini",
  "usage": {
    "prompt_tokens": 82,
    "completion_tokens": 1,
    "total_tokens": 83
  }
}
💡

Tip: GPT-4o-mini is extremely cheap for single-word completions — roughly $0.00015 per email. Even if you receive 500 emails a day, this classification step costs less than $3 a month. You can swap in gpt-4o if you want higher accuracy on ambiguous messages, but in practice mini handles email classification very well.

3 Format Row Data (Set Node)

This node pulls fields from both the Gmail Trigger (step 1) and the OpenAI response (step 2) and assembles them into a single, clean object that matches the Google Sheets column headers exactly.

To configure it:

  1. Add a Set node.
  2. Switch to Manual Mapping mode.
  3. Create nine fields with these exact names (they must match your sheet headers): Date Received, From Email, From Name, Subject, Snippet, Category, Message ID, Thread ID, Logged At.
  4. Map each field to the corresponding expression from the template.

After this node, the data looks like this — a flat object ready to insert into Sheets:

{
  "Date Received": "Fri, 03 Apr 2026 09:14:22 -0500",
  "From Email": "james.carter@outlook.com",
  "From Name": "James Carter",
  "Subject": "Re: Invoice #4821 - Payment Confirmation",
  "Snippet": "Hi Sarah, just confirming that we processed payment this morning...",
  "Category": "Billing",
  "Message ID": "18f3a1c9b4d2e7a5",
  "Thread ID": "18f3a1c9b4d2e7a5",
  "Logged At": "2026-04-03 09:14:31"
}
📌

The Logged At field uses $now.format('yyyy-MM-dd HH:mm:ss') — this records when n8n processed the email, which may be up to a minute after the email arrived. If you need the exact arrival time, use Date Received for sorting instead.

4 Log to Google Sheets (Append Row)

The final node appends the formatted row to your Email Log sheet. This is a one-way write — it never reads from or overwrites existing rows.

To configure it:

  1. Add a Google Sheets node.
  2. Set Operation to Append Row.
  3. Connect your Google Sheets OAuth2 credential.
  4. In the Document field, paste your spreadsheet ID (found in the URL: docs.google.com/spreadsheets/d/YOUR_ID/edit).
  5. Set Sheet Name to Email Log.
  6. Under Columns, switch to Define Below and map each column name to its corresponding expression.
💡

Tip: Make sure your Google Sheet already has a header row with the exact column names listed above before activating the workflow. If the sheet is empty when the first row comes in, Google Sheets may treat the data row as headers.

The Data Structure — Your Email Log Sheet

Create a new Google Sheet named Email Log and add these column headers in row 1 before activating the workflow. The column names must match exactly — including capitalization and spaces.

Column Type Example Description
Date Received Text Fri, 03 Apr 2026 09:14:22 -0500 Raw date header from the email (RFC 2822 format)
From Email Text james.carter@outlook.com Sender’s email address
From Name Text James Carter Sender’s display name (may be blank if not set)
Subject Text Re: Invoice #4821 – Payment Confirmation Full email subject line
Snippet Text Hi Sarah, just confirming payment… First ~100 characters of the email body (Gmail preview)
Category Text Billing AI-assigned category from OpenAI
Message ID Text 18f3a1c9b4d2e7a5 Unique Gmail message ID — useful for deduplication
Thread ID Text 18f3a1c9b4d2e7a5 Gmail thread ID — group related messages together
Logged At Text 2026-04-03 09:14:31 Timestamp when n8n processed this email (UTC)

Here’s what a few rows look like in practice:

Date Received From Email From Name Subject Category
Fri, 03 Apr 2026 09:14:22 james.carter@outlook.com James Carter Re: Invoice #4821 Billing
Fri, 03 Apr 2026 10:02:45 emily.rodriguez@gmail.com Emily Rodriguez Question about Pro plan Sales
Fri, 03 Apr 2026 11:33:08 noreply@weeklydigest.com Weekly Digest Your top stories this week Newsletter
Fri, 03 Apr 2026 14:17:52 michael.chen@techco.com Michael Chen App is throwing 500 errors Support
📌

Column names are case-sensitive. If your header says from email (lowercase) but n8n maps to From Email, the append will create a new column instead of filling the existing one. Double-check your headers before your first test run.

Full System Flow

Here’s the end-to-end picture showing every data hop from Gmail inbox to spreadsheet row:

  GMAIL INBOX
       |
       |  New unread email arrives
       v
  +-----------------------------------+
  |  Gmail Trigger                    |
  |  Polls every 1 minute             |
  |  Filter: unread only              |
  |  Output: id, threadId, subject,   |
  |  snippet, date, from{}            |
  +----------------+------------------+
                   |
                   |  subject + from + snippet
                   v
  +-----------------------------------+
  |  Classify Email with AI           |
  |  POST to OpenAI GPT-4o-mini       |
  |  System: "Classify into:          |
  |  Support / Sales / Billing /      |
  |  Newsletter / Spam / Other"       |
  |  Output: choices[0].message       |
  |          .content = "Billing"     |
  +----------------+------------------+
                   |
                   |  category string + original fields
                   v
  +-----------------------------------+
  |  Format Row Data (Set Node)       |
  |  Maps 9 fields into flat object   |
  |  Adds "Logged At" timestamp       |
  +----------------+------------------+
                   |
                   |  clean row object
                   v
  +-----------------------------------+
  |  Log to Google Sheets             |
  |  Operation: Append Row            |
  |  Sheet: "Email Log"               |
  |  9 columns mapped                 |
  +-----------------------------------+
                   |
                   v
  GOOGLE SHEETS -- NEW ROW ADDED

Testing Your Workflow

Before activating, run a manual test to confirm every node is working correctly:

  1. Make sure you have at least one unread email in your Gmail inbox (send yourself a test message if needed).
  2. Click Test Workflow in n8n. The Gmail Trigger will fetch the most recent unread message.
  3. Verify the Classify Email with AI node output — you should see a choices[0].message.content field with one of the six category names.
  4. Check the Format Row Data node output — confirm all nine fields are populated correctly.
  5. Open your Google Sheet and confirm a new row appeared at the bottom of Email Log.
  6. Activate the workflow using the toggle in the top-right corner of the editor.
Problem Likely Cause Fix
Gmail Trigger fires but returns no items No unread emails in inbox at test time Send yourself a test email, mark it unread, then re-run
OpenAI returns a 401 error API key not set or expired Check your OpenAI credential in n8n Settings → Credentials
Google Sheets creates a new column instead of filling existing one Column name mismatch (case or spacing) Compare your sheet header row to the field names in the Set node exactly
Category field shows the full OpenAI response object, not just the word Wrong expression path Use $json.choices[0].message.content.trim() in the Set node
Workflow runs on already-processed emails Trigger not filtering by unread Enable the Read Status: Unread filter in the Gmail Trigger

Frequently Asked Questions

Will this workflow mark my emails as read?

No — this workflow is read-only from Gmail’s perspective. It fetches email metadata but doesn’t modify, move, label, or mark any messages. Your inbox stays exactly as it is; the workflow just mirrors information into your spreadsheet.

Can I monitor multiple Gmail accounts?

Yes. Duplicate the workflow and connect a different Gmail credential in the trigger node of each copy. Each workflow operates independently and can log to the same sheet or separate sheets depending on your preference.

How accurate is the AI categorization?

GPT-4o-mini is very accurate for email classification — in testing it correctly categorizes over 95% of emails on the first try. The trickiest cases are emails that straddle categories (e.g., a sales email that’s also a billing question). You can improve accuracy by customizing the system prompt to add examples or additional categories specific to your business.

What happens if OpenAI is down or returns an error?

By default, n8n will mark that execution as failed and stop processing that email. The email won’t be logged to the sheet. To handle this gracefully, you can add an error branch after the HTTP Request node that falls back to writing “Uncategorized” — or enable n8n’s built-in Error Workflow setting to get notified when runs fail.

Can I add more categories beyond the default six?

Absolutely. Edit the system prompt in the HTTP Request node to include your custom categories (e.g., “Partnership”, “Press”, “Internal”). Keep the instruction to reply with only the category name, and update your Google Sheets dropdown validation to match if you’re using data validation on that column.

Does this work with Google Workspace accounts?

Yes. The Gmail OAuth2 connection in n8n supports both personal Gmail accounts and Google Workspace accounts. If you’re on a Workspace account, you may need your admin to approve the n8n OAuth app in the Google Admin Console — check with your IT team if you see a permissions error during setup.


🚀 Get the Gmail to Google Sheets AI Tagging Template

Skip the configuration work — get the ready-to-import n8n workflow JSON, a step-by-step Setup Guide PDF, and a Credentials Guide PDF that walks you through every API key you’ll need. Be up and running in under 10 minutes.

Get the Template →

Instant download · Works on n8n Cloud and self-hosted

What’s Next?

  • Auto-reply by category: Add a Gmail “Send Email” node after the Sheets append that fires a canned reply for Support emails, acknowledging receipt within seconds.
  • Slack alerts for high-priority categories: Route Sales and Support emails to a dedicated Slack channel so your team sees them instantly without checking their inbox.
  • Weekly summary report: Add a second n8n workflow on a schedule that reads the Email Log sheet, groups by Category, and emails you a Monday-morning breakdown.
  • CRM sync: For emails categorized as Sales, push the sender’s name and email to HubSpot or Pipedrive as a new contact or deal automatically.
n8n
Gmail
Google Sheets
OpenAI
email automation
AI categorization
workflow automation

How to Auto-Send Weekly Google Sheets Reports via Email with n8n

Every Monday morning, someone on your team is opening a spreadsheet, copying numbers into an email, formatting a table by hand, and hitting send — only to do it all over again next week. It’s tedious, error-prone, and completely unnecessary. With n8n, you can build a workflow that reads your Google Sheet, aggregates the data, builds a polished HTML email, and sends it automatically — without touching a single cell yourself.

In this guide you’ll build a five-node n8n workflow that fires every Monday at 9 AM, pulls rows from a Google Sheets sales tracker, calculates totals and averages, identifies the top performer, and emails a beautiful formatted report to your team. No code experience required — just follow the steps.

Prefer to skip the setup? Grab the ready-made template and be up and running in under 10 minutes.

What You’ll Build

  1. A Google Sheet acts as your data source — your team logs deals, tasks, or KPIs there throughout the week as usual.
  2. Every Monday at 9 AM, n8n automatically reads every row in the sheet.
  3. A Code node crunches the numbers: total sales, deal count, average deal size, and top performer.
  4. A Set node assembles a clean, branded HTML email with a summary card and a full data table.
  5. Gmail delivers the finished report to every recipient on your list — no human involved.

How It Works — The Big Picture

The workflow is a straight linear pipeline: trigger → read → process → format → send. There are no branches or conditionals, which makes it easy to understand and extend later.

+----------------------------------------------------------------------+
|  WEEKLY GOOGLE SHEETS REPORT -- n8n WORKFLOW                        |
|                                                                      |
|  [Schedule Trigger]  ->  [Read Google Sheet]  ->  [Aggregate Data]  |
|   Every Mon 9 AM          All rows read           Totals, avg,      |
|                            from "Weekly Sales"     top performer    |
|                                                         |           |
|                                              [Build Email Content]  |
|                                               HTML email assembled  |
|                                                         |           |
|                                              [Send Email Report]    |
|                                               Delivered via Gmail   |
+----------------------------------------------------------------------+

What You’ll Need

  • n8n — self-hosted or n8n Cloud (free trial available at n8n.io)
  • Google account — for Google Sheets and Gmail (both use OAuth2)
  • A Google Sheet — with columns: Date, Sales Rep, Client, Amount, Status

Estimated build time: 25–40 minutes from scratch, or under 10 minutes with the ready-made template.

Building the Workflow — Step by Step

1 Schedule Trigger

This is the starting gun. The Schedule Trigger fires the workflow on a cron schedule — no manual intervention needed. You’ll configure it to run every Monday at 9 AM.

  1. In your n8n canvas, click Add first step and search for Schedule Trigger.
  2. Under Trigger Rules, click Add Rule and set mode to Custom (Cron Expression).
  3. Enter the expression: 0 9 * * 1 — this means “9:00 AM every Monday”.
  4. Set the Timezone to your local timezone (e.g., America/New_York).
💡

Tip: Want a daily report instead of weekly? Change the cron to 0 9 * * *. For weekdays only, use 0 9 * * 1-5.

2 Read Google Sheet

This node connects to your Google account and reads every data row from the specified sheet. It outputs one n8n item per row.

  1. Add a Google Sheets node after the trigger.
  2. Under Credential, click Create new and complete the Google OAuth2 sign-in flow.
  3. Set Operation to Read Rows.
  4. Paste your Spreadsheet ID (found in the Google Sheets URL between /d/ and /edit).
  5. Set Sheet Name to Weekly Sales (or your actual tab name).
  6. Under Options, ensure First Row Contains Column Names is enabled.
{
  "Date": "03/31/2026",
  "Sales Rep": "James Carter",
  "Client": "Apex Digital LLC",
  "Amount": "4250.00",
  "Status": "Closed Won"
}
💡

Tip: Column names must match exactly — including capitalization — because the Code node references them by name.

3 Aggregate Data (Code node)

This Code node runs once across all items from the sheet. It calculates totals, finds the top performer, and builds the HTML table rows for the email body.

  1. Add a Code node and set Mode to Run Once for All Items.
  2. Paste the following JavaScript:
const rows = $input.all();
const data = rows.map(r => r.json);

if (data.length === 0) {
  return [{ json: { error: 'No data found', dealCount: 0 } }];
}

const totalSales = data.reduce((sum, r) => sum + parseFloat(r['Amount'] || 0), 0);
const count = data.length;
const avg = count > 0 ? (totalSales / count).toFixed(2) : '0.00';

const topRep = data.reduce((best, r) => {
  return parseFloat(r['Amount'] || 0) > parseFloat(best['Amount'] || 0) ? r : best;
}, data[0]);

const tableRows = data.map(r => `
  <tr>
    <td style="padding:8px 12px;border-bottom:1px solid #e2e8f0;">${r['Date'] || ''}</td>
    <td style="padding:8px 12px;border-bottom:1px solid #e2e8f0;">${r['Sales Rep'] || ''}</td>
    <td style="padding:8px 12px;border-bottom:1px solid #e2e8f0;">${r['Client'] || ''}</td>
    <td style="padding:8px 12px;border-bottom:1px solid #e2e8f0;font-weight:600;">$${parseFloat(r['Amount'] || 0).toFixed(2)}</td>
    <td style="padding:8px 12px;border-bottom:1px solid #e2e8f0;">${r['Status'] || ''}</td>
  </tr>
`).join('');

const reportDate = new Date().toLocaleDateString('en-US', {
  weekday: 'long', year: 'numeric', month: 'long', day: 'numeric'
});

return [{
  json: { totalSales: totalSales.toFixed(2), dealCount: count, avgDeal: avg,
    topRep: topRep['Sales Rep'] || 'N/A',
    topRepAmount: parseFloat(topRep['Amount'] || 0).toFixed(2),
    tableRows, reportDate }
}];
💡

Tip: To filter only “Closed Won” deals, add const closedWon = data.filter(r => r['Status'] === 'Closed Won'); and use closedWon instead of data in the reduce calls.

4 Build Email Content (Set node)

The Set node assembles two fields: the email subject line and the full HTML email body, using n8n expressions to inject the aggregated values.

  1. Add a Set node and switch mode to Manual Mapping.
  2. Add a field named emailSubject: Weekly Sales Report – {{ $now.format('MMMM d, yyyy') }}
  3. Add a field named emailBody and paste in your HTML email template using {{ $json.totalSales }} expressions.

5 Send Email Report (Gmail node)

The final node picks up the subject and body and delivers the email via your connected Gmail account.

  1. Add a Gmail node and connect your Gmail account via OAuth2.
  2. Set Operation to Send.
  3. In To, enter your recipient email(s), comma-separated.
  4. Set Subject to ={{ $json.emailSubject }} and Email Type to HTML.
  5. Set Message to ={{ $json.emailBody }}.

The Data Structure

Your Google Sheet needs a tab named Weekly Sales with these exact column headers:

Column Type Example Description
Date Text / Date 03/31/2026 When the deal was logged
Sales Rep Text James Carter Team member who owns this deal
Client Text Apex Digital LLC Company or contact name
Amount Number (no $ symbol) 4250.00 Dollar value of the deal
Status Text Closed Won Current deal status
📌

Important: Store the Amount column as plain numbers without currency symbols or commas. parseFloat() will return NaN for values like $4,250.00, breaking your totals.

Testing Your Workflow

  1. Make sure your Google Sheet has at least 2–3 rows of test data with all five columns filled in.
  2. Open the workflow in n8n and click Test workflow. This manually triggers the workflow regardless of the schedule.
  3. Watch each node light up green as it executes. Click nodes to inspect their output.
  4. Check your Gmail inbox — a formatted report email should arrive within a few seconds.
  5. Once confirmed working, click Save and toggle the workflow Active.
Problem Likely Cause Fix
Google Sheets node returns no rows Wrong sheet name or spreadsheet ID Copy the ID from the URL; ensure the tab name matches exactly (case-sensitive)
Totals show as 0 or NaN Amount column contains $ symbols or commas Remove formatting from the Amount column
Email not received Gmail OAuth token expired or wrong recipient Re-authorize the Gmail credential; double-check the To field
Workflow doesn’t fire on Monday Timezone mismatch Set timezone in the Schedule Trigger to match your local time
HTML renders as plain text Gmail node Email Type set to Plain Text Change Email Type to HTML in the Gmail node settings

Frequently Asked Questions

Can I send the report to multiple people?

Yes. In the Gmail node’s To field, enter comma-separated email addresses. You can also use the CC and BCC fields under Options.

What if my sheet has hundreds of rows?

The Google Sheets node reads all rows in a single API call, and the Code node processes them all at once. For very large sheets (5,000+ rows), add a date filter node after the Google Sheets node to limit processing to the current week’s data.

Can I use this for something other than sales data?

Absolutely. The workflow is a general-purpose “read sheet → aggregate → email” pipeline. Just rename the columns in your sheet and update the field references in the Code node. A project hours report might use Employee, Project, Hours, and Week columns instead.

Does the workflow clear the sheet data after sending?

No — by default it’s read-only and keeps all rows. If you want the report to cover only the previous week’s entries, add a date filter in the Code node: const thisWeek = data.filter(r => new Date(r['Date']) >= sevenDaysAgo);

Is it safe to connect my Gmail account to n8n?

Yes — n8n uses Google’s official OAuth2 flow. Your credentials are stored encrypted in n8n’s database and never exposed to third parties. If you’re self-hosting n8n, they stay entirely on your own server. You can revoke access at any time from your Google Account security settings.


Get the Weekly Report Template

Skip the build — get the complete n8n workflow JSON, a Setup Guide PDF, and a Credentials Guide PDF. Everything you need to go from zero to automated reports in under 10 minutes.

Get the Template

Instant download · Works on n8n Cloud and self-hosted

What’s Next?

  • Add a Slack notification: Drop a Slack node after the Gmail node to post a summary card to your #sales channel at the same time the email goes out.
  • Store historical summaries: After the Aggregate Data node, add a Google Sheets node to write weekly totals to a separate “History” tab.
  • Conditional alerts: Add an IF node that sends a different email when total sales miss the week’s target.
  • Multi-team reports: Use a Switch node to route rows by region and send tailored reports to each team lead.
n8n
Google Sheets
Gmail
automation
weekly report
email automation
scheduled workflow

How to Auto-Summarize Gmail Emails with AI Using n8n

Your inbox is full — important emails are buried, and you’re spending hours skimming threads just to find the ones that actually need your attention. What if every new email was automatically summarized by AI, pinged to your Slack, and logged to a spreadsheet — without you lifting a finger? In this tutorial, you’ll build exactly that using n8n, OpenAI, Slack, and Google Sheets. No code required, and it runs 24/7 in the background while you focus on work that matters.

Prefer to skip the setup? Grab the ready-made template → and be up and running in under 10 minutes.

What You’ll Build

  1. A Gmail trigger polls your inbox every minute for new unread emails.
  2. The email content is sent to OpenAI’s GPT-4o-mini model, which generates a crisp 2–3 sentence summary.
  3. The summary is posted to a Slack channel (e.g., #email-digest) so you see it the moment it lands.
  4. The email metadata and AI summary are simultaneously appended to a Google Sheets log — your permanent, searchable email archive.
  5. You stay on top of every important email without ever opening your inbox to triage.

How It Works — The Big Picture

The workflow is a linear pipeline with one fan-out at the end. Gmail fires the trigger, two Set nodes shape the data, one HTTP Request calls OpenAI, and then both Slack and Google Sheets receive the result in parallel.

┌──────────────────────────────────────────────────────────────────────────┐
│  AUTO-SUMMARIZE GMAIL EMAILS WITH AI                                     │
│                                                                          │
│  [Gmail Trigger]                                                         │
│       │  new unread email detected                                       │
│       ▼                                                                  │
│  [Extract Email Fields]  ← pulls sender, subject, body text             │
│       │                                                                  │
│       ▼                                                                  │
│  [Summarize with OpenAI]  ← POST to GPT-4o-mini API                     │
│       │                                                                  │
│       ▼                                                                  │
│  [Prepare Notification Data]  ← merges summary + email metadata          │
│       │                                                                  │
│       ├──────────────────────────┐                                       │
│       ▼                          ▼                                       │
│  [Send Slack Notification]  [Log to Google Sheets]                       │
│   posts to #email-digest     appends row to "Email Log" sheet            │
└──────────────────────────────────────────────────────────────────────────┘

What You’ll Need

  • n8n — self-hosted or n8n Cloud (free tier works)
  • Gmail account — connected via Google OAuth2 in n8n
  • OpenAI account — API key from platform.openai.com (GPT-4o-mini costs fractions of a cent per email)
  • Slack workspace — with a channel like #email-digest and a Slack app connected in n8n
  • Google Sheets — a new spreadsheet with a tab named Email Log

Estimated build time: 35–50 minutes from scratch, or under 10 minutes with the ready-made template.

Building the Workflow — Step by Step

1 Gmail Trigger (gmailTrigger)

This is the entry point. The Gmail Trigger node polls your inbox on a schedule and fires whenever it finds a new unread email. Think of it as a quiet watchdog that checks your mailbox every 60 seconds.

How to configure it:

  1. In your n8n canvas, click + Add node and search for Gmail Trigger.
  2. Connect your Google account when prompted (you’ll be redirected to Google’s OAuth screen).
  3. Under Poll Times, set the interval to Every Minute — or adjust to every 5 minutes if you prefer less frequent checks.
  4. Under Filters → Read Status, choose Unread so already-read emails don’t get processed again.
  5. Leave Include Spam & Trash unchecked.

When this node fires, the output is a rich object containing the full email. Here’s what a sample output looks like:

{
  "id": "18e5a3b2c7d4e901",
  "subject": "Q2 Budget Review — Action Needed",
  "from": {
    "value": [{ "address": "sarah.thompson@acmecorp.com", "name": "Sarah Thompson" }]
  },
  "date": "2026-04-02T14:23:11.000Z",
  "text": "Hi James,\n\nI've attached the updated Q2 budget spreadsheet for your review..."
}
💡

Tip: If you only want to process emails from specific senders or with certain subjects, add a Label filter. Create a Gmail filter that auto-labels those emails, then reference that label ID here. This keeps your workflow laser-focused and avoids processing newsletters or automated notifications.

2 Extract Email Fields (Set)

The raw Gmail output has a lot of nested data. This Set node flattens it into clean, named fields that the rest of the workflow can reference easily.

How to configure it:

  1. Add a Set node after Gmail Trigger and set mode to Manual Mapping.
  2. Add the following fields using the expression editor:
Field Name Expression What It Captures
sender ={{ $json.from.value[0].address }} Sender’s email address
senderName ={{ $json.from.value[0].name || $json.from.value[0].address }} Display name (falls back to email)
subject ={{ $json.subject }} Email subject line
bodyText ={{ ($json.text || '').substring(0, 4000) }} Plain text body, capped at 4,000 chars
receivedAt ={{ $json.date }} Timestamp the email was received
messageId ={{ $json.id }} Gmail’s unique message ID
💡

Tip: The substring(0, 4000) cap on bodyText is intentional. Capping at 4,000 characters keeps your API costs minimal while still capturing the meaningful content of any real email.

3 Summarize with OpenAI (HTTP Request)

This is where the magic happens. You’ll make a direct API call to OpenAI’s Chat Completions endpoint using an HTTP Request node — transparent, flexible, and easy to customize.

How to configure it:

  1. Add an HTTP Request node. Set Method to POST and URL to https://api.openai.com/v1/chat/completions.
  2. Under Authentication, choose Generic Credential Type → HTTP Header Auth. Create a credential with Name: Authorization and Value: Bearer sk-YOUR_OPENAI_API_KEY.
  3. Set Body Content Type to JSON and use this body:
{
  "model": "gpt-4o-mini",
  "messages": [
    {
      "role": "system",
      "content": "You are a concise email assistant. Summarize the following email in exactly 2-3 sentences."
    },
    {
      "role": "user",
      "content": "From: {{ $json.senderName }} <{{ $json.sender }}>\nSubject: {{ $json.subject }}\n\n{{ $json.bodyText }}"
    }
  ],
  "max_tokens": 200,
  "temperature": 0.2
}
📌

Cost note: GPT-4o-mini costs roughly $0.15 per million input tokens. A typical email summary costs about $0.00009 — less than a tenth of a cent. Processing 1,000 emails a month costs under $0.10 total.

4 Prepare Notification Data (Set)

After the OpenAI call, the email fields from Step 2 are no longer in scope. This second Set node reassembles everything — it grabs the AI summary and re-references the email metadata using n8n’s node-reference syntax.

Field Expression
summary ={{ $json.choices[0].message.content }}
sender ={{ $('Extract Email Fields').item.json.sender }}
senderName ={{ $('Extract Email Fields').item.json.senderName }}
subject ={{ $('Extract Email Fields').item.json.subject }}
receivedAt ={{ $('Extract Email Fields').item.json.receivedAt }}
messageId ={{ $('Extract Email Fields').item.json.messageId }}

5 Send Slack Notification (Slack)

This node posts the email summary to a Slack channel so your team sees it in real time. Connect your Slack workspace via OAuth, set the channel to #email-digest, and use this message text:

📧 *New Email Summary*
*From:* {{ $json.senderName }} <{{ $json.sender }}>
*Subject:* {{ $json.subject }}
*Received:* {{ $json.receivedAt }}

*AI Summary:*
{{ $json.summary }}

6 Log to Google Sheets (Google Sheets)

The final node appends a new row to your Email Log spreadsheet every time an email is processed — your permanent, searchable archive.

Set Operation to Append or Update Row, select your spreadsheet, set the sheet name to Email Log, and map these columns:

Sheet Column n8n Expression
Received At ={{ $json.receivedAt }}
Sender Name ={{ $json.senderName }}
Sender Email ={{ $json.sender }}
Subject ={{ $json.subject }}
AI Summary ={{ $json.summary }}
Message ID ={{ $json.messageId }}

The Data Structure (Google Sheets)

Your Email Log sheet must have these exact column headers in row 1. Column names are case-sensitive.

Column Type Example Value Description
Received At DateTime 2026-04-02T14:23:11.000Z ISO timestamp when email arrived
Sender Name Text Sarah Thompson Display name from the From header
Sender Email Text sarah.thompson@acmecorp.com Sender’s email address
Subject Text Q2 Budget Review — Action Needed Email subject line
AI Summary Long Text Sarah Thompson from Acme Corp sent… 2–3 sentence AI-generated summary
Message ID Text 18e5a3b2c7d4e901 Gmail’s unique internal message ID
📌

Column header names in Google Sheets are case-sensitive. If there’s a mismatch, data will go into a new column instead of the right one. Double-check spelling before your first test run.

Full System Flow

┌─────────────────────────────────────────────────────────────────────────────────┐
│  FULL SYSTEM FLOW — Gmail AI Summarizer                                         │
│                                                                                 │
│  Gmail Inbox                                                                    │
│     │  (new unread email arrives)                                               │
│     ▼                                                                           │
│  [Gmail Trigger]  ──polls every 60s──►  raw email object (id, from, subject,   │
│                                          date, text)                            │
│     │                                                                           │
│     ▼                                                                           │
│  [Extract Email Fields]  ─────────────► { sender, senderName, subject,         │
│                                           bodyText (≤4000 chars), receivedAt,  │
│                                           messageId }                           │
│     │                                                                           │
│     ▼                                                                           │
│  [Summarize with OpenAI]                                                        │
│     POST https://api.openai.com/v1/chat/completions                             │
│     model: gpt-4o-mini  ──────────────► { choices[0].message.content: "..." }  │
│     │                                                                           │
│     ▼                                                                           │
│  [Prepare Notification Data]  ────────► { summary, sender, senderName,         │
│                                           subject, receivedAt, messageId }      │
│     │                                                                           │
│     ├───────────────────────────────────────────────┐                          │
│     ▼                                               ▼                           │
│  [Send Slack Notification]               [Log to Google Sheets]                 │
│   POST to #email-digest                   APPEND row to "Email Log" tab         │
│                                                                                 │
│  ✅ Done — email summarized, team notified, and permanently archived            │
└─────────────────────────────────────────────────────────────────────────────────┘

Testing Your Workflow

  1. Send a test email to yourself from another account. Use a realistic subject and write 3–4 sentences of body text.
  2. In the n8n canvas, click the Gmail Trigger node and press Fetch Test Event. Your test email should appear as the sample data.
  3. Click Execute from here to run the rest of the workflow with that email.
  4. Check your #email-digest Slack channel — the summary should appear within seconds.
  5. Open your Google Sheets Email Log — a new row should be appended with all six columns filled.
  6. Once confirmed, click Save then toggle the Active switch to start the live workflow.
Problem Likely Cause Fix
Gmail Trigger finds no emails No unread emails, or wrong label filter Send a fresh test email, then click “Fetch Test Event” again
OpenAI returns 401 error API key incorrect or missing “Bearer ” prefix Regenerate the key and ensure the value starts with “Bearer sk-…”
Slack message not appearing Bot not added to the channel Type /invite @YourBotName in the #email-digest channel
Google Sheets row goes to wrong column Column header name mismatch Compare sheet headers letter-for-letter with n8n field names
Same email processed multiple times Email stays unread after processing Add a Gmail node at the end to mark the email as read

Frequently Asked Questions

Will this workflow read emails I’ve already seen?

Only if they’re still marked as unread. The Gmail Trigger is filtered to unread emails, so anything you’ve already opened and read won’t be reprocessed. If you want to back-process a batch of old emails, temporarily change the filter to “All Mail” for a one-time run, then switch back.

What if an email has no plain text body — only HTML?

The workflow uses $json.text (plain text) by default. If your email client sends HTML-only, update the bodyText expression to ={{ $json.text || $json.textHtml?.replace(/<[^>]+>/g, '') || '' }} — this strips HTML tags as a fallback.

Can I filter which emails get summarized — for example, only from my boss?

Yes. Create a Gmail filter that auto-labels emails from specific senders, then restrict the Gmail Trigger to only watch that label. Alternatively, add an IF node after “Extract Email Fields” and check if $json.sender matches a list of allowed addresses.

Is my email content sent to OpenAI? Is that safe?

Yes — the email body text is sent to OpenAI’s API. OpenAI’s API does not use your data to train models by default, per their API data usage policy. If your emails contain highly sensitive content, consider running an open-source LLM locally via n8n’s Ollama integration instead.

Can I use a different AI model instead of GPT-4o-mini?

Absolutely. To use GPT-4o, just change "model": "gpt-4o-mini" to "model": "gpt-4o" in the HTTP Request body — expect roughly 10× the cost. For a free option, replace the HTTP Request node with an Ollama node pointed at a local Llama 3 instance.

What happens if the workflow runs while n8n is offline?

n8n stores the last-polled email timestamp internally. When it comes back online, it will catch up on any emails that arrived while it was down. For production use on self-hosted n8n, consider setting up PM2 to auto-restart n8n if it crashes.

🚀 Get the Gmail AI Summarizer Template

Skip the setup and get the pre-built workflow JSON, a step-by-step Setup Guide PDF, and a Credentials Guide that walks you through connecting Gmail, OpenAI, Slack, and Google Sheets — all for less than the cost of a cup of coffee.

Get the Template →

Instant download · Works on n8n Cloud and self-hosted · $14.99

What’s Next?

  • Auto-reply to routine emails: Add a second AI call that drafts a reply, then use Gmail’s “Create Draft” action so you can review and send with one click.
  • Priority scoring: Add a second OpenAI call that rates each email 1–5 for urgency. Route high-priority emails to a dedicated #urgent-emails Slack channel.
  • Weekly digest email: Pair this workflow with a scheduled trigger that reads your Google Sheets log every Friday and emails a formatted weekly summary to your team.
  • Notion integration: Replace or supplement the Google Sheets node with a Notion node to create a card in your “Inbox” database for each processed email.
n8n
Gmail
OpenAI
Slack
Google Sheets
AI automation
email automation